![]() Логотип Dyson AirWrap
Логотип Dyson AirWrap
Руководство пользователя
В поле

Некоторые вложения могут быть не включены.
Вы можете купить дополнительные насадки на www.dyson.com/mynewairwrap

Начинаем!

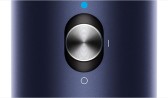
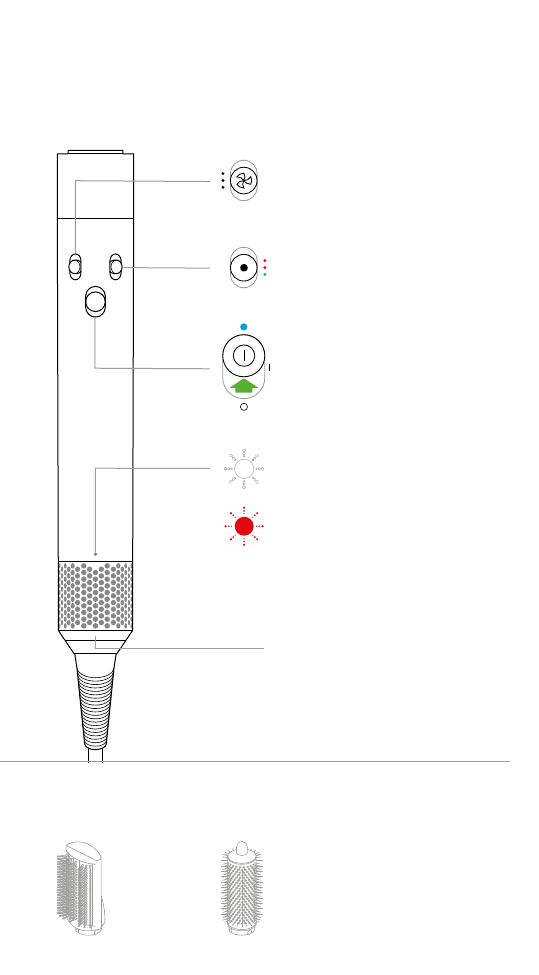
![]() LED
LED
Очистите фильтр.
Подробнее см. в разделе «Регулярное техническое обслуживание фильтра».
Если горит красный светодиод, а фильтр уже очищен, обратитесь в службу поддержки Dyson.
Светодиодные индикаторы расположены в нижней части ручки над клеткой фильтра.
Использование ваших вложений
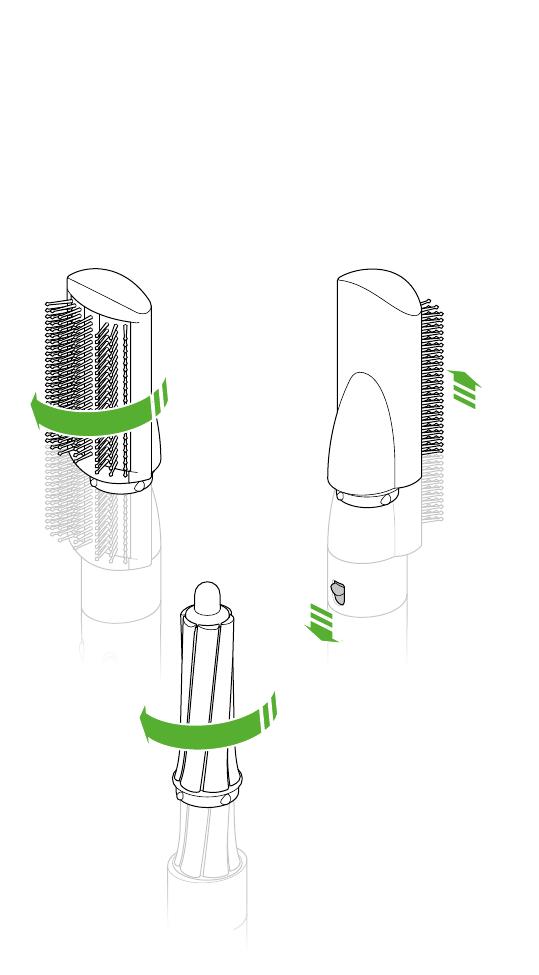
Подключение насадки
Поверните насадку в основной корпус до надежной фиксации.

Изменение вложений
Чтобы сменить насадку, потяните переключатель вниз, чтобы отпустить.

Крутой сенсорный наконечник
Во время использования насадки Airwrap™, круглая щетка для придания объема и сушилка для разглаживания волос Coanda нагреваются. Чтобы перейти на другую насадку, удерживайте наконечник.
Будьте осторожны при обращении с горячими насадками. Держите насадку только в указанном месте.
Некоторым насадкам может потребоваться периодическая чистка.
Для получения дополнительной информации перейдите к www.dyson.com/mynewairwrap
Предварительный стайлинг
Выглаживающая сушилка Coanda
До сurling, предварительно высушите волосы почти до сухости.
Поставляется с двумя режимами (i) сушка (ii) разглаживание.
Используйте крутой наконечник для переключения между двумя режимами.
CurlИНГ
баррели
Шаг 1
Возьмите прядь волос и подведите ствол к кончикам. Волосы начнут оборачиваться вокруг бочки.
Шаг 2
Переместите стайлер к голове, не нужно крутить. Держите 15 секунд или пока не высохнет.
Шаг 3
Нажмите и удерживайте холодный выстрел в течение 5-10 секунд, чтобы установить c.url. Выключите, чтобы освободить.
Чтобы изменить сurl направлении, поверните холодный наконечник.
Шейпинг
Сглаживающие кисти
Шаг 1
Грубо высушите волосы разглаживающим феном Coanda.
Шаг 2
Используйте сглаживающую кисть, чтобы растушевать от корней до кончиков.
Советы:
Для объема расчешите лицо щетиной наружу.
Поверните кисть внутрь на концах, чтобы создать форму.
Сглаживание
Выглаживающая сушилка Coanda
Поверните холодный наконечник, чтобы выбрать режим сглаживания.
Нажмите на волосы, чтобы изменить направление воздушного потока.
Шаг 3
Используйте на сухих волосах, чтобы скрыть непослушные волосы.
Нанесите на волосы, пока они не притянутся, затем медленно нанесите на кончики.
Для использования на сухих и прямых волосах.
Как пользоваться панелью контактов
Приложите контактную планку к голове, пока не услышите щелчок и волосы не притянутся.
Пробегитесь от корня к кончику, чтобы скрыть разлетающиеся части.
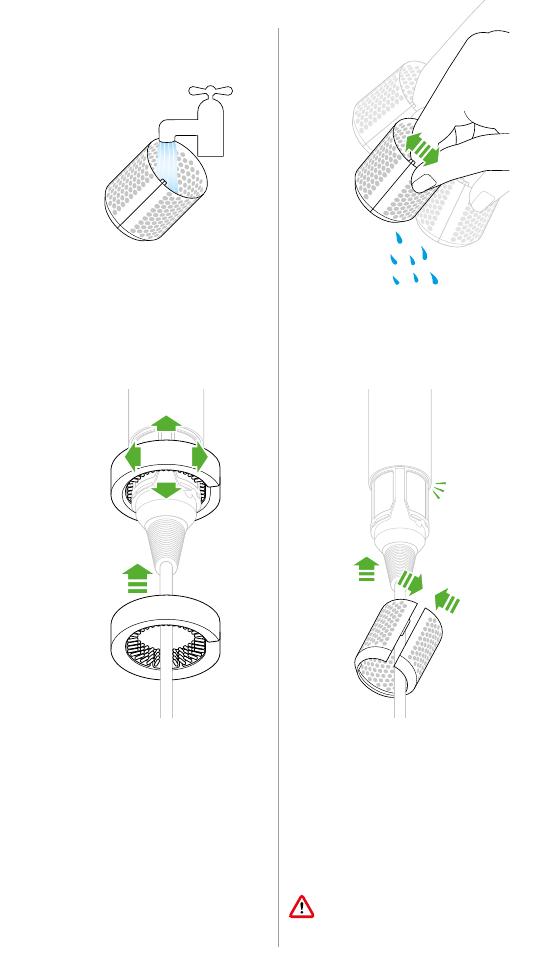
Регулярное обслуживание фильтра
Фильтр необходимо очистить, когда белый светодиод начнет мигать.
Убедитесь, что вы отключили прибор от электросети и дали ему остыть, прежде чем чистить фильтр.
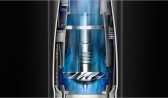
Мультистайлер Dyson Airwrap™ создан на основе передовых технологий, обеспечивающих непревзойденную производительность.
Эта технология должна быть защищена от пыли и остатков средств для волос.
Для поддержания производительности требуется техническое обслуживание.
Шаг 1
Наденьте щетку для очистки фильтра на кабель и на решетку фильтра.
Тщательно очистите корпус фильтра вращательным движением.
Снимите щетку для очистки фильтра.
Наденьте щетку фильтра на клетку фильтра и поверните ее, чтобы очистить клетку фильтра.
Шаг 2
Возьмитесь за ручку прибора и потяните корзину фильтра вниз на кабель.
Осторожно откройте корзину фильтра и снимите ее с кабеля.
Аккуратно потяните клетку фильтра вниз по направлению к кабелю.
Шаг 3
Промойте решетку фильтра под струей теплой воды.
Промойте корпус фильтра под краном.
Шаг 4
Встряхните клетку фильтра, чтобы удалить большую часть лишней воды, затем дайте высохнуть естественным путем.
Шаг 5
Вращая, поднимая и опуская, очищайте сетку фильтра щеткой для очистки фильтра до тех пор, пока не будет удален весь мусор.
Не используйте воду или химические вещества для очистки сетки фильтра.
Вращайте фильтрующую щетку вокруг фильтрующей сетки для очистки.
Шаг 6
Осторожно потяните за решетку фильтра и наденьте ее на кабель.
Сдвиньте решетку фильтра к ручке и поверните, пока она не встанет на место.
Аккуратно откройте клетку фильтра и сдвиньте клетку к ручке, поверните, пока она не встанет на место со щелчком.
SV12 JN.00000 PN.000000-00-00
00.00.00 ВЕРСИЯ № 01
Документы / Ресурсы
Рекомендации

Поддержка | Начало работы с мультистайлером Dyson Airwrap™ | Дайсон
- Manuals
- Brands
- Dyson Manuals
- Hair Styler
- Airwrap
- Operating manual
-
Contents
-
Table of Contents
-
Bookmarks
Quick Links
Operating manual
Manual de funcionamiento
HS01
26.09.2018 14:29 — C99475_HS01_OPMAN_US_X308-OPERATING-MANUAL
Related Manuals for Dyson Airwrap
Summary of Contents for Dyson Airwrap
-
Page 1
Operating manual Manual de funcionamiento HS01 26.09.2018 14:29 — C99475_HS01_OPMAN_US_X308-OPERATING-MANUAL… -
Page 2
26.09.2018 14:29 — C99475_HS01_OPMAN_US_X308-OPERATING-MANUAL… -
Page 3
Thank you for buying the Dyson Airwrap™ styler. To read your manual in English go to page 4. Gracias por comprar un estilizador Dyson Airwrap™. Para leer el manual en español, vaya a la página 24. 26.09.2018 14:29 — C99475_HS01_OPMAN_US_X308-OPERATING-MANUAL… -
Page 4
Contents Important safety instructions Getting started In the box Functions Using your attachments Regular filter maintenance Additional information 26.09.2018 14:29 — C99475_HS01_OPMAN_US_X308-OPERATING-MANUAL… -
Page 5
Thank you for buying the Dyson Airwrap™ styler. By combining our small, powerful digital motor with applied aerodynamics, the Dyson Airwrap™ styler is able to harness the Coanda effect. This allows it to style and dry simultaneously, using air – without extreme heat. -
Page 6
Most questions can be solved over the phone by one of our trained Dyson Helpline staff. Visit www.dyson.com/support for online help, support videos, general tips and useful information about Dyson. -
Page 7
This illustration is for example purposes only. 26.09.2018 14:29 — C99475_HS01_OPMAN_US_X308-OPERATING-MANUAL… -
Page 8
IMPORTANT SAFETY INSTRUCTIONS When using an electrical machine, especially when children are present, basic safety precautions should always be followed, including the following: READ ALL INSTRUCTIONS BEFORE USE KEEP AWAY FROM WATER. DANGER AS WITH MOST ELECTRICAL MACHINES, ELECTRICAL PARTS ARE ELECTRICALLY LIVE EVEN WHEN THE SWITCH IS OFF. -
Page 9
TO PERSONS: 6. The machine should never be left unattended when plugged in. 7. This Dyson machine is not intended for use by, on, or near young children, invalids or infirm persons with reduced physical, sensory or reasoning capabilities, or lack of… -
Page 10
Children should be supervised to ensure that they do not play with the machine. READ AND SAVE THESE INSTRUCTIONS THIS DYSON MACHINE IS INTENDED FOR HOUSEHOLD USE ONLY. OPERATING INSTRUCTIONS 23. To reduce the risk of electric shock, this machine has a polarized plug (one blade is wider than the other) as a safety feature. -
Page 11
If the ALCI immediately trips for a second time, unplug the machine and contact the Dyson Helpline. 27. If the machine does not operate in the proper functioning condition, it should be discarded or returned to a service center for examination and repair. -
Page 12
USER MAINTENANCE INSTRUCTIONS 28. Any other servicing should be performed by an authorized service representative. 29. Storage – important. When not in use, the machine should be unplugged, allowed to cool and stored in a safe and dry location, out of reach of children. Do not pull the cord or wrap it around the machine. -
Page 13
ALCI plug Ensure you check the ALCI safety feature every time you use your machine. The purpose of this test is to make sure the safety device is working. Reset clik Test clik clik clik To test: Plug in the machine The reset button will ‘click’… -
Page 14
In the box Dyson Airwrap™ Pre-styling dryer styler main body Non-slip mat Filter cleaning brush Connecting the attachment Turn attachment into the main body until it fits securely. 1.2″ Airwrap™ barrels 1.6″ Airwrap™ barrels Firm smoothing brush 26.09.2018 14:29 — C99475_HS01_OPMAN_US_X308-OPERATING-MANUAL… -
Page 15
Clean the filter. See the ‘Regular filter maintenance’ section for details. If the red LED lights, and the filter has already been cleaned, contact the Dyson Helpline. Removable filter cage Easy to remove for cleaning (see the «Regular filter main- tenance» section for details). -
Page 16
Using your attachments Connecting Changing the attachment attachments Turn attachment into the To change attachment, main body until it fits securely. pull down on the switch to release. 26.09.2018 14:29 — C99475_HS01_OPMAN_US_X308-OPERATING-MANUAL… -
Page 17
Take care when handling hot attachments Hold the attachment only in the area indicated. Some attachments may need occasional cleaning. For more information, go to www.dyson.com/myairwrap. Pre-styling Airwrap™ Firm Soft smooth- Round dryer barrels smoothing ing brush volumizing brush brush… -
Page 18
Ensure that you unplug your machine from the main electricity supply and allow to cool down before cleaning your filter. The Dyson Airwrap™ styler has highly tuned technology to give outstanding performance. This technology needs to be kept free from dust and hair product residue and maintenance is required to maintain performance. -
Page 19
Slide the filter cleaning brush Hold the handle of your over the cable and onto the machine and pull the filter cage filter cage. downwards, onto the cable. Using a rotating action clean Gently pull open the filter cage the filter cage thoroughly. and slide it off the cable. -
Page 20
Wash the filter cage under Shake the filter cage to remove a warm, running tap. the majority of the excess water, then leave to dry well naturally. 26.09.2018 14:29 — C99475_HS01_OPMAN_US_X308-OPERATING-MANUAL… -
Page 21
Do not use your machine without the filter cage attached. clik clik Using a rotating and up and Gently pull the filter cage open down action, clean the filter and slide it onto the cable. mesh with the filter cleaning brush until all the debris has Slide the filter cage towards the been removed. -
Page 22
This limited warranty is subject to the following terms: WHAT IS NOT COVERED Dyson shall not be liable for costs, damages or repairs incurred as a result of, due to, or from: • Damage caused by not carrying out the recommended machine maintenance. -
Page 23
IMPORTANT DATA PROTECTION INFORMATION • Your details will be held by Dyson or others on behalf of Dyson so that we can assist you more quickly in our Customer Service department. • If your personal details change, if you change your mind about any of your marketing preferences or if you have any queries about how we use your information, please contact the Dyson Helpline. -
Page 24
USES Contenido Instrucciones importantes de seguridad Inicio En la caja Funciones Uso de los accesorios Mantenimiento regular del filtro Información adicional 26.09.2018 14:29 — C99475_HS01_OPMAN_US_X308-OPERATING-MANUAL… -
Page 25
Gracias por comprar un estilizador Dyson Airwrap™. Combinando nuestro motor digital pequeño y poderoso con la aerodinámica aplicada, el estilizador Dyson Airwrap™ es capaz de aprovechar el efecto Coanda. Esto le permite peinar y secar de forma simultánea, usando aire, sin calor extremo. -
Page 26
Si tiene alguna duda acerca de su máquina Dyson, llame al teléfono de Atención al Cliente de Dyson con el número de serie e información de cuándo y dónde compró. La mayoría de las dudas pueden resolverse por teléfono con la ayuda de un miembro… -
Page 27
Esta figura es únicamente para mostrar un ejemplo. 26.09.2018 14:29 — C99475_HS01_OPMAN_US_X308-OPERATING-MANUAL… -
Page 28
INSTRUCCIONES IMPORTANTES DE SEGURIDAD Cuando utilice una máquina eléctrica, especialmente cuando haya niños presentes, siempre debe seguir ciertas precauciones básicas de seguridad, incluso las siguientes: LEA TODAS LAS INSTRUCCIONES ANTES DE UTILIZAR EL APARATO MANTENER ALEJADO DEL AGUA. PELIGRO AL IGUAL QUE CON LA MAYORÍA DE LAS MÁQUINAS ELÉCTRICAS, LAS PARTES ELÉCTRICAS CONDUCEN LA TENSIÓN INCLUSO CUANDO EL INTERRUPTOR… -
Page 29
PRESTE ATENCIÓN A LO SIGUIENTE: 6. Nunca debe dejarse una máquina sin supervisión cuando está enchufada. 7. Esta máquina Dyson no está destinada para el uso por parte de, cerca o en niños pequeños o personas inválidas o inestables con capacidades físicas,… -
Page 30
Es necesaria la atención de un adulto cuando es utilizada por o cerca de un niño. Los niños deben ser supervisados para asegurarse de que no jueguen con la máquina. LEA Y GUARDE ESTAS INSTRUCCIONES ESTA MÁQUINA DYSON ES PARA USO DOMÉSTICO SOLAMENTE. 26.09.2018 14:29 — C99475_HS01_OPMAN_US_X308-OPERATING-MANUAL… -
Page 31
INSTRUCCIONES DE FUNCIONAMIENTO 23. Para reducir el riesgo de choque eléctrico, esta máquina tiene un enchufe polarizado (una clavija es más ancha que la otra) como característica de seguridad. Este enchufe encajará en un tomacorriente polarizado de una sola manera. Si el enchufe no entra completamente en el tomacorriente, invierta su posición. -
Page 32
Si el ALCI se dispara inmediatamente por segunda vez, desenchufe la máquina y comuníquese con el servicio de Atención al Cliente de Dyson. 27. Si la máquina no funciona en las condiciones de funcionamiento adecuadas debe ser desechado o llevado a un centro de servicio para su inspección y reparación. -
Page 33
Enchufe ALCI Asegúrese de verificar la función de seguridad ALCI cada vez que utilice el aparato. La finalidad de esta prueba es asegurarse de que el dispositivo de seguridad funcione correctamente. Reiniciar clik Probar clik clik clik Para realizar la prueba, El botón de reinicio hará… -
Page 34
Dyson Airwrap™ Secador pre-peinado Alfombrilla antideslizante Cepillo limpiador de filtro Algunos accesorios podrían no estar incluidos. Los accesorios se pueden comprar de forma independiente en www.dyson.com/myairwrap. Cilindros Airwrap™ Cilindros Airwrap™ Cepillo para alisado firme de 1.2 pulgadas de 1.6 pulgadas… -
Page 35
“Mantenimiento regular del filtro“ para obtener más detalles. Si se enciende la luz LED roja, y ya se ha limpiado el filtro, comuníquese con la línea de ayuda de Dyson. Compartimento de filtro desmontable Fácil de quitar para limpieza (consulte la sección Mantenimiento regular del filtro para obtener más detalles). -
Page 36
Uso de los accesorios Conexión Cambio de del accesorio accesorios Coloque y gire el accesorio en el Para cambiar los accesorios, aparato hasta que se encastre presione el botón hacia abajo seguro en su posición. para soltarlo. 26.09.2018 14:29 — C99475_HS01_OPMAN_US_X308-OPERATING-MANUAL… -
Page 37
Sostenga el accesorio solo en el área indicada. Algunos accesorios podrían necesitar limpieza adicional. Para obtener más información, visite el sitio www.dyson.com/myairwrap. Secador Cilindros Cepillo para Cepillo para Cepillo pre-peinado Airwrap™ alisado firme alisado suave circular para dar volumen 26.09.2018 14:29 — C99475_HS01_OPMAN_US_X308-OPERATING-MANUAL… -
Page 38
Asegúrese de desenchufar el aparato de la fuente de energía y permitir que se enfríe antes de limpiar el filtro. El estilizador Dyson Airwrap™ tiene una tecnología altamente calibrada para brindar un rendimiento excepcional. Esta tecnología se debe mantener… -
Page 39
Deslice el cepillo limpiador Sostenga el mango del aparato de filtro sobre el cable y por y jale el compartimento del encima del compartimento filtro hacia abajo, por encima del filtro. del cable. Usando un movimiento Jale suavemente para abrir rotativo limpie el el compartimento del filtro compartimento del filtro… -
Page 40
Lave el compartimento del Agite el compartimento del filtro con agua corriente tibia filtro para eliminar la mayor del grifo. parte del exceso de agua, luego deje secar completamente de forma natural. 26.09.2018 14:29 — C99475_HS01_OPMAN_US_X308-OPERATING-MANUAL… -
Page 41
No use el aparato sin el compartimento del filtro colocado. clik clik Con un movimiento rotativo Jale suavemente el y de arriba hacia abajo, limpie compartimento del filtro para el filtro con el cepillo abrirlo y deslícelo sobre el cable. de limpieza de filtro hasta quitar los residuos. -
Page 42
90 días posteriores a la fecha de fabricación, según los registros de Dyson. Esta garantía proporciona, sin costo para usted, toda la mano de obra y piezas para poner su máquina en perfectas condiciones de funcionamiento durante el… -
Page 43
• Antes de llevar a cabo el servicio, los términos de la garantía limitada requieren que usted se ponga en contacto con el servicio de Atención al Cliente Dyson con el nombre o número de su modelo, el número de serie, así como el lugar y la fecha de compra. -
Page 44
INFORMACIÓN DE ELIMINACIÓN DE RESIDUOS • Los productos Dyson están hechos a partir de materiales reciclables de alta calidad. Recíclelos siempre que sea posible. 26.09.2018 14:29 — C99475_HS01_OPMAN_US_X308-OPERATING-MANUAL… -
Page 45
26.09.2018 14:29 — C99475_HS01_OPMAN_US_X308-OPERATING-MANUAL… -
Page 46
26.09.2018 14:29 — C99475_HS01_OPMAN_US_X308-OPERATING-MANUAL… -
Page 47
26.09.2018 14:29 — C99475_HS01_OPMAN_US_X308-OPERATING-MANUAL… -
Page 48
Dyson contact details Website: www.dyson.com/support Dyson Helpline: (866) 693-9766 Mon-Fri: 8:00am — 8:00pm (CST) Sat: 9:00am — 6:00pm (CST) Address: Distributed by Dyson, Inc. 1330 West Fulton Street, 5th Floor, Chicago, IL 60607 US Detalles de contacto de Dyson USES Website: www.dyson.com/support…
This manual is also suitable for:
Hs01
![]() Логотип Dyson AirWrap
Логотип Dyson AirWrap
Руководство пользователя
В поле
Некоторые вложения могут быть не включены.
Вы можете купить дополнительные насадки на www.dyson.com/mynewairwrap
Начиная
![]() LED
LED
Очистите фильтр.
Подробнее см. в разделе «Регулярное техническое обслуживание фильтра».
Если горит красный светодиод, а фильтр уже очищен, обратитесь в службу поддержки Dyson.
Светодиодные индикаторы расположены в нижней части ручки над клеткой фильтра.
Использование ваших вложений
Подключение насадки
Поверните насадку в основной корпус до надежной фиксации.
Изменение вложений
Чтобы сменить насадку, потяните переключатель вниз, чтобы отпустить.
Крутой сенсорный наконечник
Во время использования насадки Airwrap™, круглая щетка для придания объема и сушилка для разглаживания волос Coanda нагреваются. Чтобы перейти на другую насадку, удерживайте наконечник.
Будьте осторожны при обращении с горячими насадками. Держите насадку только в указанном месте.
Некоторым насадкам может потребоваться периодическая чистка.
Для получения дополнительной информации перейдите к www.dyson.com/mynewairwrap
Предварительный стайлинг
Выглаживающая сушилка Coanda
До сurling, предварительно высушите волосы почти до сухости.
Поставляется с двумя режимами (i) сушка (ii) разглаживание.
Используйте крутой наконечник для переключения между двумя режимами.
CurlИНГ
баррели
Шаг 1
Возьмите прядь волос и подведите ствол к кончикам. Волосы начнут оборачиваться вокруг бочки.
Шаг 2
Переместите стайлер к голове, не нужно крутить. Держите 15 секунд или пока не высохнет.
Шаг 3
Нажмите и удерживайте холодный выстрел в течение 5-10 секунд, чтобы установить c.url. Выключите, чтобы освободить.
Чтобы изменить сurl направлении, поверните холодный наконечник.
Шейпинг
Сглаживающие кисти
Шаг 1
Грубо высушите волосы разглаживающим феном Coanda.
Шаг 2
Используйте сглаживающую кисть, чтобы растушевать от корней до кончиков.
Советы:
Для объема расчешите лицо щетиной наружу.
Поверните кисть внутрь на концах, чтобы создать форму.
Сглаживание
Выглаживающая сушилка Coanda
Поверните холодный наконечник, чтобы выбрать режим сглаживания.
Нажмите на волосы, чтобы изменить направление воздушного потока.
Шаг 3
Используйте на сухих волосах, чтобы скрыть непослушные волосы.
Нанесите на волосы, пока они не притянутся, затем медленно нанесите на кончики.
Для использования на сухих и прямых волосах.
Как пользоваться панелью контактов
Приложите контактную планку к голове, пока не услышите щелчок и волосы не притянутся.
Пробегитесь от корня к кончику, чтобы скрыть разлетающиеся части.
Регулярное обслуживание фильтра
Фильтр необходимо очистить, когда белый светодиод начнет мигать.
Убедитесь, что вы отключили прибор от электросети и дали ему остыть, прежде чем чистить фильтр.
Мультистайлер Dyson Airwrap™ создан на основе передовых технологий, обеспечивающих непревзойденную производительность.
Эта технология должна быть защищена от пыли и остатков средств для волос.
Для поддержания производительности требуется техническое обслуживание.
Шаг 1
Наденьте щетку для очистки фильтра на кабель и на решетку фильтра.
Тщательно очистите корпус фильтра вращательным движением.
Снимите щетку для очистки фильтра.
Наденьте щетку фильтра на клетку фильтра и поверните ее, чтобы очистить клетку фильтра.
Шаг 2
Возьмитесь за ручку прибора и потяните корзину фильтра вниз на кабель.
Осторожно откройте корзину фильтра и снимите ее с кабеля.
Аккуратно потяните клетку фильтра вниз по направлению к кабелю.
Шаг 3
Промойте решетку фильтра под струей теплой воды.
Промойте корпус фильтра под краном.
Шаг 4
Встряхните клетку фильтра, чтобы удалить большую часть лишней воды, затем дайте высохнуть естественным путем.
Шаг 5
Вращая, поднимая и опуская, очищайте сетку фильтра щеткой для очистки фильтра до тех пор, пока не будет удален весь мусор.
Не используйте воду или химические вещества для очистки сетки фильтра.
Вращайте фильтрующую щетку вокруг фильтрующей сетки для очистки.
Шаг 6
Осторожно потяните за решетку фильтра и наденьте ее на кабель.
Сдвиньте решетку фильтра к ручке и поверните, пока она не встанет на место.
Аккуратно откройте клетку фильтра и сдвиньте клетку к ручке, поверните, пока она не встанет на место со щелчком.
SV12 JN.00000 PN.000000-00-00
00.00.00 ВЕРСИЯ № 01
Документы / Ресурсы
Рекомендации
Поддержка | Начало работы с мультистайлером Dyson Airwrap™ | Дайсон
![]()
Download Article
![]()
Download Article
The Dyson Airwrap is a new all-in-one hairstyling product that makes curling, brushing, shaping, and drying your hair easier than ever. Unlike traditional curlers, it uses hot air instead of hot metal, so there’s much less risk of damaging your hair. It also has dryer and brush attachments that can add volume and shape to your hair while drying it at the same time. Using this machine is simple, so don’t hesitate to try it out. Just remember to wet and towel dry your hair so it’s damp when you start, then style your hair however you want!
-

1
Attach the 1.2 in barrel for small curls. The Airwrap comes with 2 curling barrels. The 1.2 in barrel is for smaller curls, so choose this barrel if this is the look you’re going for.[1]
- The curling barrels, along with all the other attachments, click simply onto the Airwrap. Press all attachments into the top of the handle and turn it clockwise to lock it in place.
-
2
Use the 1.6 in barrel for larger curls. If you’re going for large, flowing curls, then the 1.6 in barrel is a better choice. Click it onto the Airwrap and turn it counterclockwise to lock it into place.[2]
Advertisement
-
3
Apply any styling products that you use. If you usually use any prodcuts before styling your hair, then apply it now, before curling. This helps your hair retain its curls.[3]
- Mousse is a common choice for prepping your hair before curling. Squeeze out a handful, then rub it all over your hair to protect it and lock in your curls.
- Setting spray is another good pre-curling choice. If you want to set your curls in more firmly, then spritz your hair with some setting spray before curling.
- You could also curl without any products. Your curls may not last as long or stay in place as well, though.
-
4
Pull a section of hair 1–3 in (2.5–7.6 cm) thick in front of your head. Separate your hair into sections roughly as large as you want the curls to be. If you have thick hair, aim for roughly 1 in (2.5 cm) sections. With thinner hair, you can use a section closer to 3 in (7.6 cm) if you want to. Grab a section and pull it in front of you.[4]
- In general for smaller curls, pull a thinner section of hair. If you’d like larger curls, then grab a larger section.
- Since curling is so easy with the Airwrap, you can experiment with differently-sized hair sections to see what you like best.
-
5
Set the Airwrap to the high heat and high power positions. On the Airflow handle there are 2 knobs, one for heat setting and the other for power. Set both of these to high before you start curling.[5]
- You don’t have to wait for the Airwrap to warm up like a regular curling iron, so don’t turn it on until you’re ready to use it.
- The Airwrap doesn’t damage or burn your hair like other curling irons can because it only uses air.
-
6
Wrap the curling barrel around your hair and hold it for 15 seconds. Touch the barrel to the tips of your hair. The air automatically wraps your hair around the barrel, so you don’t have to twist it. Slowly bring the curler towards your scalp and let it wrap up your hair. Leave it in place for 15 seconds to dry your hair.[6]
- If you want a looser curl, then wrap your hair around the barrel by hand instead of letting the air wrap it up. This gives you a more subtle style.[7]
- If you don’t know which way to hold the curler, look for the arrows on the barrel. Make sure they’re pointing away from you.[8]
- If you want a looser curl, then wrap your hair around the barrel by hand instead of letting the air wrap it up. This gives you a more subtle style.[7]
-
7
Switch to the cold shot setting to set the curl in place. The cold shot button is on the Airflow handle, underneath the power and heat settings. Press and hold it down for 5-10 seconds to set the curl.[9]
-
8
Turn the power off and pull the Airflow down to release the curls. Hit the power button to turn the power off, releasing your hair. Then pull the curler straight down so it slides out. Repeat this wrapping, drying, and removing process to curl all your hair.[10]
- Don’t pull the Airflow out while the power is still on. This could damage your hair.


Advertisement
-
1
Attach the soft brush if you have thin hair. These smoothing brushes are great for straightening your hair. For thin, straight hair, the soft brush is the best choice. Clip the brush into the Airflow by inserting it into the handle and turning it clockwise.[11]
-
2
Use the firm brush for thicker and wavier hair. The other brush type, firm, is best for thicker hair types. Use this attachment if you need to control your hair a bit more.[12]
-
3
Set the Airflow to medium power and heat for simple smoothing. If you just want to brush out your hair, then medium is the perfect setting. This will flatten your hair for a simple, stylish look.[13]
- For a sleeker look, set the heat to high.
- You can also experiment with different settings when you learn how to use the Airflow.
-
4
Brush from your scalp to your hairline first. Turn the power on and start brushing. If you have a part in your hair, start there and brush outward until you reach your hairline. Don’t brush all the way down to the hair tips yet. Repeat this for your whole scalp.[14]
- This might be easier if you separate your hair with clips, but you don’t have to.
-
5
Finish by brushing the Airflow from your hairline to your hair ends. Bring the Airflow below the level you just brushed. Brush in a slow motion from your hairline all the way down to the tips of your hair. Work all the way around your head to finish up.[15]
- The brushing should dry your hair as well. If your hair isn’t drying, try brushing a little slower.
-
6
Set the airflow to low heat and brush through your hair again. This is a final touch-up to finish drying your hair and brush out any more tangles. Keep brushing until your hair is completely dry.[16]
-
7
Shape your ends with the curling barrel to if you want to. You can add a bit more style to your hair with a light curl. Clip the curling barrel onto the Airflow and set it to high heat and power. Wrap the ends of your hair for 10 seconds for a quick shaping.[17]


Advertisement
-
1
Clip the volume brush onto the Airflow. If you want more volume, bounce, or curl in your hair, then the volume brush is a perfect attachment. Take the brush attachment and press it into the Airflow handle, then twist it clockwise to lock it in place.[18]
- The volume brush can curl your hair slightly, but not as much as the curling barrels. Use those instead if you want full curls.
-
2
Set the Airflow to medium heat and power. These 2 settings are on the Airflow handle. Slide both switches to the medium setting before you start brushing.[19]
- You could also use high power if you want to curl your hair a bit more.
-
3
Brush through each section of your hair. Turn the power on and start brushing from your scalp down to your hair tips. Brush slowly so the Airflow dries your hair as well. Work around your hair until it’s completely dry.[20]
- If you just brush your hair without any other styling, your hair will have a wavy look. You can also do some more styling with the volume brush.
-
4
Point the brush outward to add more volume. Brushing from below gives your hair a fuller look. Instead of brushing towards your scalp, tuck the brush underneath your hair and point the bristles away from your scalp. Then brush away from your scalp all the way to your hair tips and let the hair fall.[21]
- You could also brush up to give your hair more volume.
- You could brush all your hair this way, or just the sections that you want to have more volume.
- This is an especially good trick to add volume to thinner or straighter hair types.
-
5
Wrap the tips around the brush to create more shape. The volume brush can also curl your hair a bit. Wrap a section of hair up and hold it in place for 10 seconds. Then press the cold snap button to lock the curl in place and straighten your hair back out.[22]
- You could also use the curling barrel on the tips for more shaping.


Advertisement
Ask a Question
200 characters left
Include your email address to get a message when this question is answered.
Submit
Advertisement
-
Your curls won’t set if you don’t use the cold blast to finish up, so don’t forget that step.
-
Rather than towel-drying your hair, you could use the dryer attachment first. Remember to stop drying while your hair is still damp.
-
If you want more suggestions on how to use the Airwrap, there are video tutorials on the Dyson website.
Thanks for submitting a tip for review!
Advertisement
References
About This Article
Article SummaryX
To use your Dyson Airwrap to curl your hair, start with damp, towel-dried hair. Insert the 1.2 inch barrel into your Airwrap, then set your device to high heat and high airflow. Curl a small section of your hair and hold for 15 seconds, or until your hair feels dry to the touch. Then, push the cold shot button on your Airwrap for 5-10 seconds, which will set the curl. Turn off the Airwrap, then release the curl. Continue curling small sections of your hair. To use your Airwrap to straighten your hair, start with damp, towel-dried hair. Tie the top section of your hair up so it’s out of the way. Then, attach the soft smoothing brush to your Airwrap. Turn on the device and run the brush through the bottom section of your hair from root to tip, repeating until dry. Use the cold shot for 5-10 seconds to set your style. Untie the top of your hair and repeat the process.
Did this summary help you?
Thanks to all authors for creating a page that has been read 50,590 times.
Did this article help you?
-
Главная
-
Каталог
-
Избранное
-
Корзина
- Главная
- Каталог
- Стайлеры Dyson Airwrap
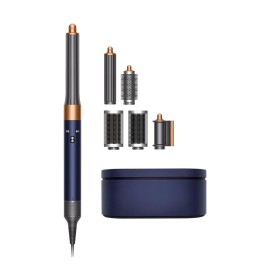
- Стайлер Dyson Airwrap HS05 (берлинская лазурь/медь) Complete Long с чехлом
333252-01
Технические характеристики
![]()
Отрицательные ионы
Помогает уменьшить статику
Воздушный поток (л/с)
13.5
Габариты устройства
272мм*41мм*48мм
Мощность прибора (Вт)
1300
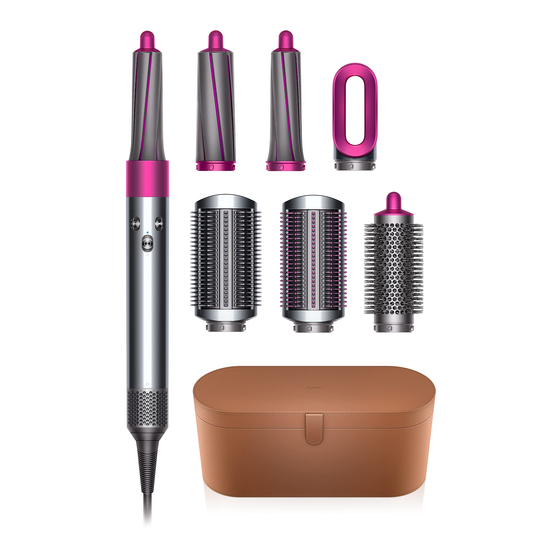
Комплектация
![]()
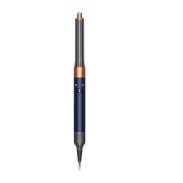
Профессиональный стайлер
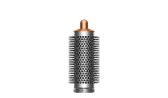
Цилиндрическая насадка Airwrap 40 мм

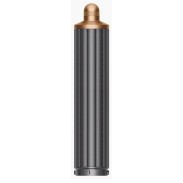
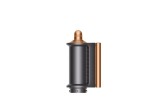
Цилиндрическая насадка Airwrap 30 мм
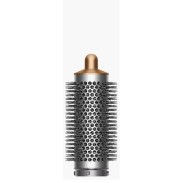
Круглая щетка
Расчёска с жесткими щетинками
Расческа с мягкими щетинками

Насадка для деликатной сушки
Щетка для чистки

Бокс для хранения
Отзывы
![]()
Инга
Хоть я еще и не научилась пользоваться стайлером полностью, ставлю ему самую высокую отметку. Новая модель вообще классная — есть насадка для сушки и укладки. Делаю локоны, первые разы не получалось, сейчас приноровилась и прическа практически аккуратная.
Илона В
Фен-стайлер конечно крутой, но он был бы еще круче если бы работал без провода как и выпрямитель.
Айгуль
Заказала стайлер на сайте с максимальной скидкой и полным комплектом насадок. Товар и правда классный, как о нем пишут другие девушки. Делаю укладки каждый день, а волосы не портятся и выглядят стильно.
Алиса
Это самый классный продукт, не имеющий аналогов на рынке. Я по качеству его сравниваю с Айфоном, ни одного недостатка не выявила.
Лиля
Очень нравится стайлер Airwrap, меня подкупило то что много насадок. Они все функциональные, пользуюсь всеми насадками и делаю разные прически.
Артем
Заказывал стайлер в подарок, все понравилось, магазин рекомендую.
Алина
Я почти никогда не пишу отзывы, но тут я в диком восторге от продукта. Стайлер настолько крутой, что я напишу об этом. Он имеет много насадок. все они находятся в красивом чехле. Это настоящее спасение для меня, теперь прически делаю сама и не трачусь на салон красоты. Укладку делаю сама дома, а поэтому экономлю на походе в салон красоты.
Полезные ссылки
![]()
Описание
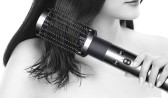
Современный стайлер Dyson Airwrap HS05 разработан для ежедневного ухода за волосами. В нем сочетаются сразу несколько функций. Он способен подсушивать, добавлять прикорневой объем, завивать прямые или выпрямлять вьющиеся волосы. Стайлер имеет встроенный датчик контроля нагрева, который не позволяет ему разогреться выше 150 градусов и навредить волосам. Комплектация состоит стайлера 6 насадок и синего бокса для компактного хранения и перевозки устройства.
-
Встроенный датчик контроля температуры
В стайлере предусмотрено три уровня нагрева воздуха, включая режим холодного воздуха. Не допускается повышение температуры выше установленных значений, поэтому волосы остаются здоровыми
-
Возможность управления воздушным потоком
Три точные скорости воздушного потока, соответствующие вашему стилю
-
Холодный воздух
Немедленно отключает нагревательный элемент, чтобы более прохладный воздух зафиксировал укладку
-
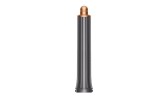
Цилиндрическая насадка 3 см
В отличие от стандартной комплектации насадка одна, она отличается большей длиной и предназначена для укладки длинных волос. Для создания причесок по и против часовой стрелки достаточно переключить режим. Локоны получаются аккуратными и красивыми
-
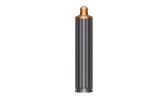
Цилиндрическая насадка 4 см
Для укладки волос в разных направлениях теперь достаточно одной насадки длиной 18 см. Она предназначена для создания небрежных локонов на длинных волосах и имеет диаметр 4 см
-
Жесткая щетка
Насадка предназначена для распутывания волос и придания им привлекательного вида. Зубчики деликатно воздействуют на кожу головы
-
Мягкая щетка
Волосы разглаживаются под мощным потоком воздуха. За счет мягких шариков на конце щетинок отсутствует негативное влияние на кожу головы и волосы
-
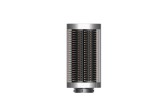
Щетка брашинг
Основное предназначение насадки — придание объема волосам. Мощный поток направляется на пряди, волосы постепенно вытягиваются и приобретают объем
-
Насадка для деликатной сушки
Насадка необходима для легкого подсушивания волос перед укладкой. Она отличается небольшой мощностью, поэтому для основной сушки не подходит
-
Одновременно сушит и укладывает волосы
Благодаря подаче мощного потока воздуха и контроля температуры стайлер Dyson Airwrap позволяет высушивать и укладывать волосы без экстремальных температур
-
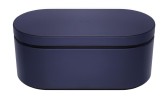
Бокс-чехол синего цвета
Вместительный и стильный бокс имеет сверху магнитную кнопку, которая прочно фиксирует крышку, чтобы она случайно не открывалась. Внутри мягкая обивка, которая защищает устройство и насадки от потертостей
-
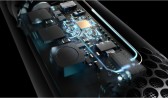
Оснащен двигателем с цифровым управлением Dyson V9
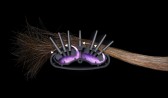
Стайлер Dyson Airwrap оснащен 13-лопастной импеллер, который вращается со скоростью до 110 000 об/мин. При этом он нагнетает воздух под давлением в 3,2 кПа, что позволяет достичь эффекта Коанда при создании локонов
-
Эффект Коанда для выпрямления волос
Благодаря эффекту Коанда, волосы притягиваются к поверхности щетки. После этого воздух проходит вдоль этих прядей, имитируя технологию укладки, которую используют стилисты
-
Притягивает и накручивает волосы с помощью воздуха
Эффект Коанда основан на притяжении ваших волос к цилиндрической насадке. После чего плавно накручивает их. Без использования зажимов или других неудобных приспособлений для завивки. Но создавая роскошные объемные локоны или волны
-
Без экстремальных температур
В стайлере интеллектуальная система контроля измеряет температуру воздуха более 40 раз в секунду и регулирует нагрев. В результате чего температура всегда остается ниже 150°C и не повреждает волосы


Комплектация
-
Профессиональный стайлер
-
Цилиндрическая насадка Airwrap 40 мм
-
Цилиндрическая насадка Airwrap 30 мм
-
Круглая щетка
-
Расчёска с жесткими щетинками
-
Расческа с мягкими щетинками
-
Насадка для деликатной сушки
-
Щетка для чистки
-
Бокс для хранения
FAQs
Можно ли посмотреть продукт до оплаты и убедиться в его целостности?
![]()
Да, до оплаты можно распаковать продукт, осмотреть содержимое всех коробок, убедиться в том, что комплектация полная, проверить подлинность и потом оплатить курьеру заказ удобным способом.
Сколько времени ждать доставку?
![]()
По Москве курьеры доставляют товар в течение 2-3 часов. Если расстояние больше 10 километров, то потребуется немного больше времени. По России доставка идет 3-6 дня и зависит от удаленности города.
Сколько стоит доставка?
![]()
Стоимость доставки рассчитывается индивидуально. По Москве и за пределами МКАД 300-500 рублей. По России доставка до 1000 рублей, но на дальние расстояния стоимость может составить около 1200 рублей.
Есть ли возможность самовывоза?
![]()
Да, вы можете сами забрать товар в удобном пункте выдачи. Но для этого нужно связаться с менеджерами и подобрать удобное отделение для получения товара.
Как получить гарантию на продукцию?
![]()
Гарантия действует с момента покупки 2-5 лет (в зависимости от типа техники). После совершения покупки необходимо зарегистрировать свою технику на официальном сайте Dyson, чтобы гарантия вступила в силу. При наступлении гарантийного случая необходимо обратиться в сервисный центр Dyson.
Отзывы
Инга
Хоть я еще и не научилась пользоваться стайлером полностью, ставлю ему самую высокую отметку. Новая модель вообще классная — есть насадка для сушки и укладки. Делаю локоны, первые разы не получалось, сейчас приноровилась и прическа практически аккуратная.
Илона В
Фен-стайлер конечно крутой, но он был бы еще круче если бы работал без провода как и выпрямитель.
Айгуль
Заказала стайлер на сайте с максимальной скидкой и полным комплектом насадок. Товар и правда классный, как о нем пишут другие девушки. Делаю укладки каждый день, а волосы не портятся и выглядят стильно.
Алиса
Это самый классный продукт, не имеющий аналогов на рынке. Я по качеству его сравниваю с Айфоном, ни одного недостатка не выявила.
Лиля
Очень нравится стайлер Airwrap, меня подкупило то что много насадок. Они все функциональные, пользуюсь всеми насадками и делаю разные прически.
Артем
Заказывал стайлер в подарок, все понравилось, магазин рекомендую.
Алина
Я почти никогда не пишу отзывы, но тут я в диком восторге от продукта. Стайлер настолько крутой, что я напишу об этом. Он имеет много насадок. все они находятся в красивом чехле. Это настоящее спасение для меня, теперь прически делаю сама и не трачусь на салон красоты. Укладку делаю сама дома, а поэтому экономлю на походе в салон красоты.
Вы недавно смотрели
Задать вопрос
![]()
![]()
Ваша корзина
![]()
Условия доставки
Наш интернет-магазин Dyson-rus.com осуществляет доставку по всей России.
Доставка осуществляется бесплатно при заказе на сумму свыше 7 000 руб.*
Для Москвы и Московской области действуют особые условия доставки:
Москва и Московская область на расстояние до 10 км. от МКАД
Интервалы доставки:
- 09:00 — 15:00
- 15:00 — 19:00
- 19:00 — 23:00
Есть возможность оформить экспресс доставку за 2-3 часа.
Москва и Московская область на расстояние от 10 до 50 км. от МКАД (кроме пятницы)
10:00 — 22:00
Другие города России
Доставка в другие города России осуществляется с помощью транспортной компании «DPD» и другими: зависит от города доставки.
При отправке товара транспортной компанией возможна доставка:
- до пункта самовывоза в вашем городе
- по указанному вами адресу до двери в пределах города.
Возможные формы оплаты: оплата пластиковой картой на сайте, наличными при получении товара.
* Для товаров по Акции условия доставки могут быть изменены. Уточняйте подробности у оператора.
![]()
Ваш заказ оформлен

Спасибо, что воспользовались нашими услугами, мы свяжемся с вами в ближайшее время
ВЕРНУТЬСЯ НА САЙТ
Посмотреть инструкция для Dyson Airwrap Complete бесплатно. Руководство относится к категории приборы для укладки, 10 человек(а) дали ему среднюю оценку 8.6. Руководство доступно на следующих языках: английский. У вас есть вопрос о Dyson Airwrap Complete или вам нужна помощь? Задайте свой вопрос здесь
Стилер Dyson Airwrap Complete — это многофункциональный инструмент для подсушивания и укладки волос с функцией ионизации. Он оснащен 4 уровнями нагрева и 3 скоростями, что позволяет выбирать оптимальный режим в зависимости от типа волос и желаемого результата. Минимальная температура инструмента составляет 28 °C, а максимальная — 90 °C. Стилер имеет возможность выпрямления волос и создания кудрей, что позволяет создавать разнообразные укладки на разной длине и структуре волос. Вес стилера составляет 581 грамм, что делает его легким для использования.
Оснащенный технологией нагрева, стилер Dyson Airwrap Complete предлагает быстрое и комфортное укладывание волос. Он также оснащен функцией ионизации для уменьшения статического электричества на волосах, обеспечивая мягкость и блеск. Регулируемый термостат делает устройство более удобным при использовании и позволяет более тонко настроить режим нагрева.
Характеристика веса и оптимального температурного режима делает этот стилер идеальным для использования дома или в путешествии. Этот многофункциональный стилер легкий, но очень надежный, что обеспечивает долговечность использования и качественный результат, равномерно и быстро создавая прекрасные укладки для всех видов волос.
Производительность
| Тип | Мультистайлер |
| Технология | Теплый |
| Выпрямление волос | — |
| Завивка волос | Да |
| Текстурирование волос | — |
| Сушка волос | Да |
| Ионная функция | Да |
| Керамическая система нагрева | — |
| Регулируемый термостат | Да |
| Количество уровней нагрева | 4 |
| Число скоростей | 3 |
| Температура (мин) | 28 °C |
| Температура (макс) | 90 °C |
| Поток воздуха | 13 l/s |
| Скорость двигателя | 110000 RPM |
| Скорость сушки | 3.74 г/мин |
Вес и размеры
Дизайн
| Цвет товара | Fuchsia, Nickel |
Эргономика
| Беспроводной | Нет |
| Длина шнура | 2.62 m |
| Светодиодные индикаторы | Да |
| Встроенный экран | Нет |
| Вкл/Выкл переключатель | Да |
| Автовыключение | — |
| Поворотный шнур | Да |
Энергопитание
| Мощность | 1300 W |
| Входящее напряжение сети | 220-240 V |
| Источник питания | Кабель переменного тока |
Данные об упаковке
| Ширина упаковки | 181.5 mm |
| Глубина упаковки | 384 mm |
| Высота упаковки | 167.5 mm |
| Масса брутто | 2120 g |
Содержимое упаковки
| Количество щеток | 3 |
| Футляр для транспортировки | Да |
| Противоскользящий коврик | Да |
| Аксессуары в комплекте | 30mm Airwrap barrels, 40mm Airwrap barrels, Pre-styling dryer, Filter cleaning brush |
показать больше
Не можете найти ответ на свой вопрос в руководстве? Вы можете найти ответ на свой вопрос ниже, в разделе часто задаваемых вопросов о Dyson Airwrap Complete.
Какой вес Dyson Airwrap Complete?
Dyson Airwrap Complete имеет вес 581 g.
Инструкция Dyson Airwrap Complete доступно в русский?
К сожалению, у нас нет руководства для Dyson Airwrap Complete, доступного в русский. Это руководство доступно в английский.
Не нашли свой вопрос? Задайте свой вопрос здесь
![]() Логотип Dyson AirWrap
Логотип Dyson AirWrap
Руководство пользователя
В поле
Некоторые вложения могут быть не включены.
Вы можете купить дополнительные насадки на www.dyson.com/mynewairwrap
Начиная
![]() LED
LED
Очистите фильтр.
Подробнее см. в разделе «Регулярное техническое обслуживание фильтра».
Если горит красный светодиод, а фильтр уже очищен, обратитесь в службу поддержки Dyson.
Светодиодные индикаторы расположены в нижней части ручки над клеткой фильтра.
Использование ваших вложений
Подключение насадки
Поверните насадку в основной корпус до надежной фиксации.
Изменение вложений
Чтобы сменить насадку, потяните переключатель вниз, чтобы отпустить.
Крутой сенсорный наконечник
Во время использования насадки Airwrap™, круглая щетка для придания объема и сушилка для разглаживания волос Coanda нагреваются. Чтобы перейти на другую насадку, удерживайте наконечник.
Будьте осторожны при обращении с горячими насадками. Держите насадку только в указанном месте.
Некоторым насадкам может потребоваться периодическая чистка.
Для получения дополнительной информации перейдите к www.dyson.com/mynewairwrap
Предварительный стайлинг
Выглаживающая сушилка Coanda
До сurling, предварительно высушите волосы почти до сухости.
Поставляется с двумя режимами (i) сушка (ii) разглаживание.
Используйте крутой наконечник для переключения между двумя режимами.
CurlИНГ
баррели
Шаг 1
Возьмите прядь волос и подведите ствол к кончикам. Волосы начнут оборачиваться вокруг бочки.
Шаг 2
Переместите стайлер к голове, не нужно крутить. Держите 15 секунд или пока не высохнет.
Шаг 3
Нажмите и удерживайте холодный выстрел в течение 5-10 секунд, чтобы установить c.url. Выключите, чтобы освободить.
Чтобы изменить сurl направлении, поверните холодный наконечник.
Шейпинг
Сглаживающие кисти
Шаг 1
Грубо высушите волосы разглаживающим феном Coanda.
Шаг 2
Используйте сглаживающую кисть, чтобы растушевать от корней до кончиков.
Советы:
Для объема расчешите лицо щетиной наружу.
Поверните кисть внутрь на концах, чтобы создать форму.
Сглаживание
Выглаживающая сушилка Coanda
Поверните холодный наконечник, чтобы выбрать режим сглаживания.
Нажмите на волосы, чтобы изменить направление воздушного потока.
Шаг 3
Используйте на сухих волосах, чтобы скрыть непослушные волосы.
Нанесите на волосы, пока они не притянутся, затем медленно нанесите на кончики.
Для использования на сухих и прямых волосах.
Как пользоваться панелью контактов
Приложите контактную планку к голове, пока не услышите щелчок и волосы не притянутся.
Пробегитесь от корня к кончику, чтобы скрыть разлетающиеся части.
Регулярное обслуживание фильтра
Фильтр необходимо очистить, когда белый светодиод начнет мигать.
Убедитесь, что вы отключили прибор от электросети и дали ему остыть, прежде чем чистить фильтр.
Мультистайлер Dyson Airwrap™ создан на основе передовых технологий, обеспечивающих непревзойденную производительность.
Эта технология должна быть защищена от пыли и остатков средств для волос.
Для поддержания производительности требуется техническое обслуживание.
Шаг 1
Наденьте щетку для очистки фильтра на кабель и на решетку фильтра.
Тщательно очистите корпус фильтра вращательным движением.
Снимите щетку для очистки фильтра.
Наденьте щетку фильтра на клетку фильтра и поверните ее, чтобы очистить клетку фильтра.
Шаг 2
Возьмитесь за ручку прибора и потяните корзину фильтра вниз на кабель.
Осторожно откройте корзину фильтра и снимите ее с кабеля.
Аккуратно потяните клетку фильтра вниз по направлению к кабелю.
Шаг 3
Промойте решетку фильтра под струей теплой воды.
Промойте корпус фильтра под краном.
Шаг 4
Встряхните клетку фильтра, чтобы удалить большую часть лишней воды, затем дайте высохнуть естественным путем.
Шаг 5
Вращая, поднимая и опуская, очищайте сетку фильтра щеткой для очистки фильтра до тех пор, пока не будет удален весь мусор.
Не используйте воду или химические вещества для очистки сетки фильтра.
Вращайте фильтрующую щетку вокруг фильтрующей сетки для очистки.
Шаг 6
Осторожно потяните за решетку фильтра и наденьте ее на кабель.
Сдвиньте решетку фильтра к ручке и поверните, пока она не встанет на место.
Аккуратно откройте клетку фильтра и сдвиньте клетку к ручке, поверните, пока она не встанет на место со щелчком.
SV12 JN.00000 PN.000000-00-00
00.00.00 ВЕРСИЯ № 01
Документы / Ресурсы
Рекомендации
Поддержка | Начало работы с мультистайлером Dyson Airwrap™ | Дайсон
![]() Download Article
Download Article
![]() Download Article
Download Article
The Dyson Airwrap is a new all-in-one hairstyling product that makes curling, brushing, shaping, and drying your hair easier than ever. Unlike traditional curlers, it uses hot air instead of hot metal, so there’s much less risk of damaging your hair. It also has dryer and brush attachments that can add volume and shape to your hair while drying it at the same time. Using this machine is simple, so don’t hesitate to try it out. Just remember to wet and towel dry your hair so it’s damp when you start, then style your hair however you want!
-
1
Attach the 1.2 in barrel for small curls. The Airwrap comes with 2 curling barrels. The 1.2 in barrel is for smaller curls, so choose this barrel if this is the look you’re going for.[1]
- The curling barrels, along with all the other attachments, click simply onto the Airwrap. Press all attachments into the top of the handle and turn it clockwise to lock it in place.
-
2
Use the 1.6 in barrel for larger curls. If you’re going for large, flowing curls, then the 1.6 in barrel is a better choice. Click it onto the Airwrap and turn it counterclockwise to lock it into place.[2]
Advertisement
-
3
Apply any styling products that you use. If you usually use any prodcuts before styling your hair, then apply it now, before curling. This helps your hair retain its curls.[3]
- Mousse is a common choice for prepping your hair before curling. Squeeze out a handful, then rub it all over your hair to protect it and lock in your curls.
- Setting spray is another good pre-curling choice. If you want to set your curls in more firmly, then spritz your hair with some setting spray before curling.
- You could also curl without any products. Your curls may not last as long or stay in place as well, though.
-
4
Pull a section of hair 1–3 in (2.5–7.6 cm) thick in front of your head. Separate your hair into sections roughly as large as you want the curls to be. If you have thick hair, aim for roughly 1 in (2.5 cm) sections. With thinner hair, you can use a section closer to 3 in (7.6 cm) if you want to. Grab a section and pull it in front of you.[4]
- In general for smaller curls, pull a thinner section of hair. If you’d like larger curls, then grab a larger section.
- Since curling is so easy with the Airwrap, you can experiment with differently-sized hair sections to see what you like best.
-
5
Set the Airwrap to the high heat and high power positions. On the Airflow handle there are 2 knobs, one for heat setting and the other for power. Set both of these to high before you start curling.[5]
- You don’t have to wait for the Airwrap to warm up like a regular curling iron, so don’t turn it on until you’re ready to use it.
- The Airwrap doesn’t damage or burn your hair like other curling irons can because it only uses air.
-
6
Wrap the curling barrel around your hair and hold it for 15 seconds. Touch the barrel to the tips of your hair. The air automatically wraps your hair around the barrel, so you don’t have to twist it. Slowly bring the curler towards your scalp and let it wrap up your hair. Leave it in place for 15 seconds to dry your hair.[6]
- If you want a looser curl, then wrap your hair around the barrel by hand instead of letting the air wrap it up. This gives you a more subtle style.[7]
- If you don’t know which way to hold the curler, look for the arrows on the barrel. Make sure they’re pointing away from you.[8]
- If you want a looser curl, then wrap your hair around the barrel by hand instead of letting the air wrap it up. This gives you a more subtle style.[7]
-
7
Switch to the cold shot setting to set the curl in place. The cold shot button is on the Airflow handle, underneath the power and heat settings. Press and hold it down for 5-10 seconds to set the curl.[9]
-
8
Turn the power off and pull the Airflow down to release the curls. Hit the power button to turn the power off, releasing your hair. Then pull the curler straight down so it slides out. Repeat this wrapping, drying, and removing process to curl all your hair.[10]
- Don’t pull the Airflow out while the power is still on. This could damage your hair.
Advertisement
-
1
Attach the soft brush if you have thin hair. These smoothing brushes are great for straightening your hair. For thin, straight hair, the soft brush is the best choice. Clip the brush into the Airflow by inserting it into the handle and turning it clockwise.[11]
-
2
Use the firm brush for thicker and wavier hair. The other brush type, firm, is best for thicker hair types. Use this attachment if you need to control your hair a bit more.[12]
-
3
Set the Airflow to medium power and heat for simple smoothing. If you just want to brush out your hair, then medium is the perfect setting. This will flatten your hair for a simple, stylish look.[13]
- For a sleeker look, set the heat to high.
- You can also experiment with different settings when you learn how to use the Airflow.
-
4
Brush from your scalp to your hairline first. Turn the power on and start brushing. If you have a part in your hair, start there and brush outward until you reach your hairline. Don’t brush all the way down to the hair tips yet. Repeat this for your whole scalp.[14]
- This might be easier if you separate your hair with clips, but you don’t have to.
-
5
Finish by brushing the Airflow from your hairline to your hair ends. Bring the Airflow below the level you just brushed. Brush in a slow motion from your hairline all the way down to the tips of your hair. Work all the way around your head to finish up.[15]
- The brushing should dry your hair as well. If your hair isn’t drying, try brushing a little slower.
-
6
Set the airflow to low heat and brush through your hair again. This is a final touch-up to finish drying your hair and brush out any more tangles. Keep brushing until your hair is completely dry.[16]
-
7
Shape your ends with the curling barrel to if you want to. You can add a bit more style to your hair with a light curl. Clip the curling barrel onto the Airflow and set it to high heat and power. Wrap the ends of your hair for 10 seconds for a quick shaping.[17]
Advertisement
-
1
Clip the volume brush onto the Airflow. If you want more volume, bounce, or curl in your hair, then the volume brush is a perfect attachment. Take the brush attachment and press it into the Airflow handle, then twist it clockwise to lock it in place.[18]
- The volume brush can curl your hair slightly, but not as much as the curling barrels. Use those instead if you want full curls.
-
2
Set the Airflow to medium heat and power. These 2 settings are on the Airflow handle. Slide both switches to the medium setting before you start brushing.[19]
- You could also use high power if you want to curl your hair a bit more.
-
3
Brush through each section of your hair. Turn the power on and start brushing from your scalp down to your hair tips. Brush slowly so the Airflow dries your hair as well. Work around your hair until it’s completely dry.[20]
- If you just brush your hair without any other styling, your hair will have a wavy look. You can also do some more styling with the volume brush.
-
4
Point the brush outward to add more volume. Brushing from below gives your hair a fuller look. Instead of brushing towards your scalp, tuck the brush underneath your hair and point the bristles away from your scalp. Then brush away from your scalp all the way to your hair tips and let the hair fall.[21]
- You could also brush up to give your hair more volume.
- You could brush all your hair this way, or just the sections that you want to have more volume.
- This is an especially good trick to add volume to thinner or straighter hair types.
-
5
Wrap the tips around the brush to create more shape. The volume brush can also curl your hair a bit. Wrap a section of hair up and hold it in place for 10 seconds. Then press the cold snap button to lock the curl in place and straighten your hair back out.[22]
- You could also use the curling barrel on the tips for more shaping.
Advertisement
Ask a Question
200 characters left
Include your email address to get a message when this question is answered.
Submit
Advertisement
-
Your curls won’t set if you don’t use the cold blast to finish up, so don’t forget that step.
-
Rather than towel-drying your hair, you could use the dryer attachment first. Remember to stop drying while your hair is still damp.
-
If you want more suggestions on how to use the Airwrap, there are video tutorials on the Dyson website.
Thanks for submitting a tip for review!
Advertisement
References
About This Article
Article SummaryX
To use your Dyson Airwrap to curl your hair, start with damp, towel-dried hair. Insert the 1.2 inch barrel into your Airwrap, then set your device to high heat and high airflow. Curl a small section of your hair and hold for 15 seconds, or until your hair feels dry to the touch. Then, push the cold shot button on your Airwrap for 5-10 seconds, which will set the curl. Turn off the Airwrap, then release the curl. Continue curling small sections of your hair. To use your Airwrap to straighten your hair, start with damp, towel-dried hair. Tie the top section of your hair up so it’s out of the way. Then, attach the soft smoothing brush to your Airwrap. Turn on the device and run the brush through the bottom section of your hair from root to tip, repeating until dry. Use the cold shot for 5-10 seconds to set your style. Untie the top of your hair and repeat the process.
Did this summary help you?
Thanks to all authors for creating a page that has been read 54,032 times.
Did this article help you?
HS01

2
Thank you for buying the
Dyson Airwrap™ styler.
To read your manual in English
go to page 4.
Vielen Dank, dass Sie sich für
den Dyson Airwrap™ Styler
entschieden haben.
Um das Handbuch auf Deutsch
zu lesen, gehen Sie auf Seite 18.
Gracias por comprar el modelador
Dyson Airwrap™.
Para leer el manual en español,
vaya a la página 34.
Merci d’avoir acheté l’outil de coiffage
Dyson Air wrap™.
Pour lire votre manuel en français
rendez-vous à la page 50.
Grazie per aver acquistato
Dyson Airwrap™ styler.
Per leggere il manuale in italiano,
andare a pagina 64.

3
Hartelijk dank voor uw aankoop
van de Dyson Airwrap™ styler.
Ga naar pagina 78 om uw gebruikers
handleiding in het Nederlands te
lezen.
Dziękujemy za zakup urządzenia
do stylizacji Dyson Airwrap™.
Instrukcja obsługi w języku angielskim
jest dostępna na stronie 92.
Zahvaljujemo se vam za
nakup oblikovalnika pričeske
Dyson Airwrap™ styler.
Priročnik v slovenščini je na strani 106.
Благодарим вас за приобретение
стайлера для укладки волос
Dyson Air wrap™.
Инструкция на русском языке
находится на странице 120.

7
10
11
12
14
16
4
EN
Contents
Important safety instructions
Getting started
In the box
Functions
Using your attachments
Regular filter maintenance
Additional information

C 12/ M 100 / Y 0 / K 0
Dyson Fuchsia
N308 3-Step Guide QR Code
C 85/ M100 / Y 0 / K 0
Dyson Purple
5
How to curl your hair with Coanda air.
Watch the 30sec film
Scan with phone camera or app, or
visit www.dyson.com/myairwrap
Thank you for buying the
Dyson Airwrap™ styler.
By combining our small, powerful
digital motor with applied
aerodynamics, the Dyson Airwrap™
styler is able to harness the Coanda
effect. This allows it to style and dry
simultaneously, using air – without
extreme heat.
6
After registering your 2 year guarantee, your Dyson
appliance will be covered for parts and labour for 2 years
from the date of purchase, subject to the terms of the
guarantee.
If you have any questions about your Dyson appliance, call
the Dyson Helpline with your serial number and details of
where and when you bought the appliance.
Most questions can be solved over the phone by one of our
trained Dyson Helpline staff.
Visit www.dyson.com/support for online help,
support videos, general tips and useful information about
Dyson.
Your 2 year guarantee is based on ‘normal use’. It does not
apply to use in salons or by stylists.
Your serial number can be found on the rating plate located
on the cable label, towards the plug.
Note your serial number for future reference on the back
page of this manual.
Registration
This illustration is for
example purposes only.

7
EN
IMPORTANT SAFETY
INSTRUCTIONS
READ ALL INSTRUCTIONS
BEFORE USE
When using an electrical appliance, basic
precautions should always be followed,
including the following:
WARNING
THESE WARNINGS APPLY TO THE
APPLIANCE, AND ALSO WHERE
APPLICABLE, TO ALL TOOLS,
ACCESSORIES, CHARGERS OR
MAINS ADAPTORS.
TO REDUCE THE RISK OF FIRE,
ELECTRIC SHOCK, OR INJURY:
1. This Dyson appliance can be used by
children aged from 8 years and above
and persons with reduced physical,
sensory or reasoning capabilities, or lack
of experience and knowledge, only if they
have been given supervision or instruction
by a responsible person concerning
use of the appliance in a safe way
and understand the hazards involved.
Cleaning and user maintenance shall not
be made by children without supervision.
2. Do not allow to be used as a toy. Close
attention is necessary when used by
or near children. Children should be

8
supervised to ensure that they do not play
with the appliance.
3. If the appliance is used in a bathroom,
unplug after use. The proximity of
water presents a hazard even when the
appliance is switched off.
4. WARNING: Do not use this appliance
near bathtubs, showers, basins or other
vessels containing water.
5. If the supply cord is damaged, it must be
replaced or repaired by the manufacturer,
its service agent or similarly qualified
persons in order to avoid a hazard.
6. This appliance has a non-self resetting
thermal cut-out safety device to prevent
overheating. If your appliance cuts out,
unplug it from the mains supply socket
and leave to cool.
7. CAUTION: In order to avoid a hazard
due to inadvertent resetting of the thermal
cut-out, this appliance must not be
supplied through an external switching
device, such as a timer, or connected to
a circuit that is regularly switched on and
off by the utility company, or plugged into
any socket where the electrical supply is
unstable or likely to be turned off.
8. For additional protection, the installation
of a residual current device (RCD) having
a rated residual operating current not
9
exceeding 30mA is advisable. Ask your
installer for advice.
9. Do not use the appliance for any other
purpose than styling hair.
10. Do not handle any part of the plug or
appliance with wet hands.
11. Do not unplug by pulling on the cable
or stretch or pull the cable when in use.
Do not use an extension lead and do not
wrap the cable around the appliance.
12. Do not use any lubricants, cleaning
agents, polishes or air fresheners on any
part of the appliance.
13. Contact the Dyson Helpline when a
service or repair is required. Do not
disassemble the appliance as incorrect
reassembly may result in an electric shock
or fire.
14. If the appliance is not working as it should,
if it has received a sharp blow, if it has
been dropped, damaged, left outdoors,
or dropped into water, do not use and
contact the Dyson Helpline.
The attachments may
become hot during use.
10
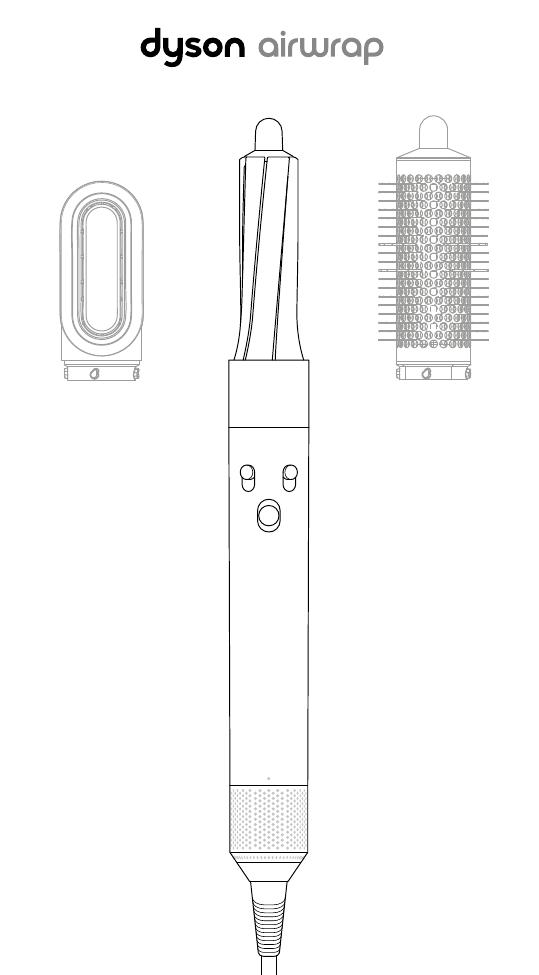
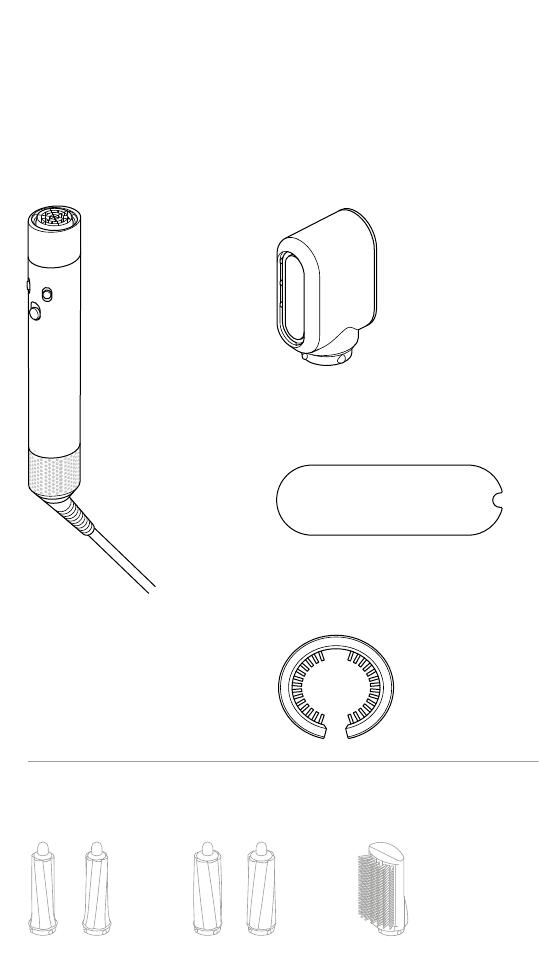
In the box
Dyson Airwrap™
styler main body
30mm Airwrap™ barrels 40mm Airwrap™ barrels Firm smoothing brush
Some attachments may not be included.
Filter cleaning brush
Non-slip mat
Pre-styling dryer
11
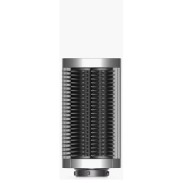
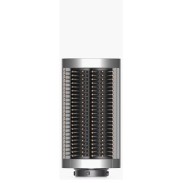
Removable filter cage
Easy to remove for cleaning (see
the ‘Regular filter maintenance’
section for details).
Power on/off with cold shot
Sliding switch with cold shot
to set your style.
Temperature control
2 heat settings plus a cold
setting to finish your style.
Airflow control
3 airflow speeds.
LED
Clean the filter. See the ‘Regular
filter maintenance’ section for
details.
If the red LED lights, and the
filter has already been cleaned,
contact the Dyson Helpline.
Soft smoothing brush Round volumising brush
Functions
Attachments can be purchased separately at
www.dyson.com/myairwrap.
12
Connecting
the attachment
Turn attachment into the
main body until it fits securely.
Changing
attachments
To change attachment,
pull down on the switch to
release.
Using your attachments

13
Cool touch tip
During use, the curlers
and round volumising
brush will get hot.
To change to another
attachment, hold the tip.
Firm
smoothing
brush
Soft
smoothing
brush
Pre-styling
dryer
Round
volumising
brush
Airwrap™
barrels
Take care when
handling hot
attachments
Hold the attachment only
in the area indicated.
Some attachments may
need occasional cleaning.
For more information, go
www.dyson.com/myairwrap.

1 2
14
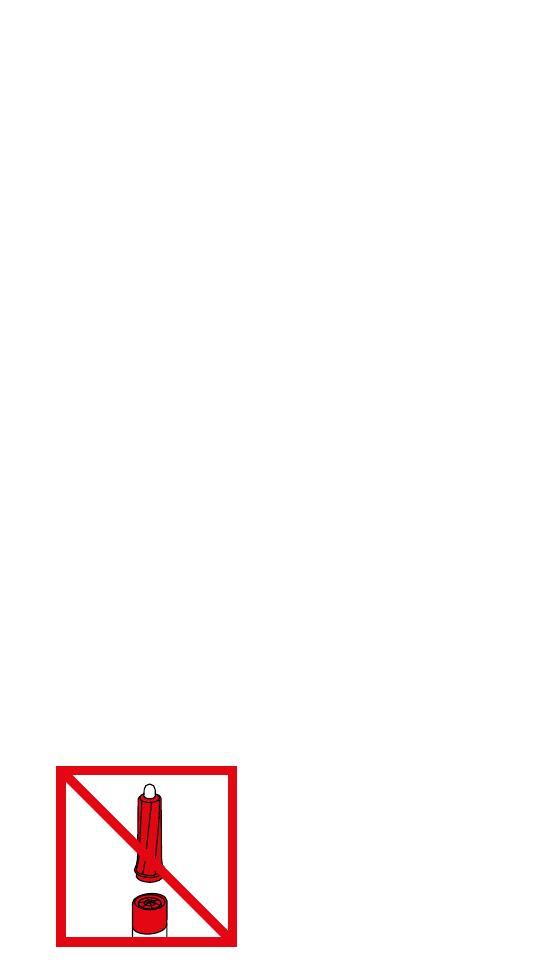
Ensure that you unplug your
appliance from the mains
electricity supply and allow
to cool down before cleaning
your filter.
The Dyson Airwrap™ styler has
highly tuned technology to give
outstanding performance.
This technology needs to
be kept free from dust and
hair product residue and
maintenance is required to
maintain performance.
Slide the filter cleaning brush
over the cable and onto the
filter cage.
Using a rotating action clean
the filter cage thoroughly.
Remove the filter cleaning
brush.
Hold the handle of your
appliance and pull the filter
cage downwards, onto the
cable.
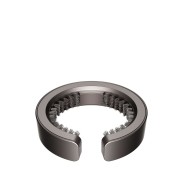
Gently pull open the filter cage
and slide it off the cable.
Filter mesh Filter cageFilter cleaning brush
Regular filter
maintenance
The filter must be cleaned when the white LED starts flashing.
3 4
5 6
clik
15
Using a rotating and up and
down action, clean the filter
mesh with the filter cleaning
brush until all the debris has
been removed.
Do not use water or
chemicals to clean the filter
mesh.
Gently pull the filter cage
open and slide it onto the
cable.
Slide the filter cage towards
the handle and twist until it
snaps into place.
Do not use your appliance
without the filter cage attached.
Wash the filter cage under
a warm, running tap.
Shake the filter cage to remove
the majority of the excess water,
then leave to dry well naturally.

16
EN
LIMITED 2 YEAR GUARANTEE
TERMS AND CONDITIONS OF THE DYSON 2 YEAR
LIMITED GUARANTEE
WHAT IS COVERED
• The repair or replacement of your Dyson appliance (at Dyson’s discretion)
if it is found to be defective due to faulty materials, workmanship or
function within 2 years of purchase or delivery (if any part is no longer
available or out of manufacture Dyson will replace it with a functional
replacement part).
• Where this appliance is sold outside of the EU, this guarantee will only be
valid if the appliance is used in the country in which it was sold.
• Where this appliance is sold within the EU, this guarantee will only be
valid (i) if the appliance is used in the country in which it was sold or (ii) if
the appliance is used in Austria, Belgium, France, Germany, Ireland, Italy,
Netherlands, Spain or the United Kingdom and the same model as this
appliance is sold at the same voltage rating in the relevant country.
WHAT IS NOT COVERED
Dyson does not guarantee the repair or replacement of a product
where a defect is the result of:
• Damage caused by not carrying out the recommended
appliance maintenance.
• Accidental damage, faults caused by negligent use or care, misuse,
neglect, carelessness or operation or handling of the appliance which
is not in accordance with the Dyson Operating Manual.
• Use of the appliance for anything other than the use it is designed for.
• Use of the appliance outside of ‘normal use’ which is defined as more
than 2 hours per day.
• Use of the appliance in salons or by stylists.
• Use of parts not assembled or installed in accordance with the
instructions of Dyson.
• Use of parts and accessories which are not genuine Dyson components.
• Faulty installation (except where installed by Dyson).
• Repairs or alterations carried out by parties other than Dyson
or its authorised agents.
• Normal wear and tear (e.g. fuse etc.).
If you are in any doubt as to what is covered by your guarantee,
please contact the Dyson Helpline.
SUMMARY OF COVER
• The guarantee becomes effective from the date of purchase (or the date
topof delivery if this is later).
• You must provide proof of (both the original and any subsequent) delivery/
purchase before any work can be carried out on your Dyson appliance.
Without this proof, any work carried out will be chargeable. Keep your
receipt or delivery note.
Additional information

17
• All work will be carried out by Dyson or its authorised agents.
• Any parts which are replaced by Dyson will become the property
of Dyson.
• The repair or replacement of your Dyson appliance under guarantee
will not extend the period of guarantee.
• The guarantee provides benefits which are additional to and do not
affect your statutory rights as a consumer.
IMPORTANT DATA
PROTECTION INFORMATION
• Your information will be held by Dyson and its agents for promotional,
marketing and servicing purposes.
• If your personal details change, if you change your mind about any
of your marketing preferences or if you have any queries about how
we use your information, please contact the Dyson Helpline.
• For more information on how we protect your privacy, please see
our privacy policy on the Dyson website.
DISPOSAL INFORMATION
• Dyson products are made from high grade recyclable materials.
Recycle where possible.
• This marking indicates that this product should not be disposed with
other household wastes throughout the EU. To prevent possible harm
to the environment or human health from uncontrolled waste disposal,
recycle it responsibly to promote the sustainable reuse of material
resources. To return your used device, please use the return and collection
systems or contact the retailer where the product was purchased. They can
take this product for environmentally safe recycling.

21
26
27
28
30
32
18
DE
Inhalt
Wichtige Sicherheitshinweise
Erste Schritte
Lieferumfang
Funktionen
Verwendung der Aufsätze
Regelmäßige Filterwartung
Zusätzliche Informationen

C 12/ M 100 / Y 0 / K 0
Dyson Fuchsia
N308 3-Step Guide QR Code
C 85/ M100 / Y 0 / K 0
Dyson Purple
19
Vielen Dank, dass Sie sich
für den Dyson Airwrap™
Styler entschieden haben.
Durch Kombination unseres kleinen
und leistungsstarken digitalen Motors
mit angewandter Aerodynamik kann
mit dem Dyson Airwrap™ Styler
der Coandă-Effekt erzielt werden.
Dadurch wird simultanes Stylen
und Trocknen unter Einsatz von Luft
ermöglicht — ohne extreme Hitze.
Locken kreieren mit dem
Coandă-Effekt.
30-Sekunden-Film ansehen
20
Nur für Illustrationszwecke.
Für Ihr Dyson Gerät gewähren wir Ihnen ab Kaufdatum
für einen Zeitraum von 2 Jahren gemäß unseren
Garantiebestimmungen Garantie auf alle Teile und
Reparaturarbeiten.
Wenden Sie sich bei Fragen zu Ihrem Dyson Gerät
telefonisch an den Kundendienst von Dyson und geben
Sie Ihre Seriennummer sowie das Datum und den Ort des
Kaufs Ihres Geräts an.
Die meisten Fragen können telefonisch von einem unserer
Kundendienstmitarbeiter beantwortet werden.
Auf der Dyson Webseite (www.dyson.de/support (DE)
www.dyson.at/support (AT) oder www.dyson.ch/support
(CH)) finden Sie im Service-Bereich die Online-Hilfe,
nützliche Anleitungsvideos sowie allgemeine Tipps und
hilfreiche Informationen zu Dyson.
Ihre 2-jährige Garantie basiert auf „normaler Nutzung“.
Sie gilt nicht bei Nutzung in Friseursalons oder durch
Stylisten.
Die Seriennummer befindet sich auf dem Typenschild am
Kabeletikett in der Nähe des Steckers.
Notieren Sie die Seriennummer für spätere Verwendung
auf der Rückseite dieser Anleitung.
Registrierung

Многие девушки хотят иметь стильную и красивую прическу и готовы тратить на это много времени утром. Благодаря использованию техники от Dyson, можно сэкономить время и не просыпаться в 6 утра, чтобы перед работой сделать укладку или завить волосы. Для создания стильной прически вам потребуется стайлер Dyson и свободное время. Он безопасно воздействует на каждый волосок, за счет датчика контроля температур.
Стайлер Dyson Airwrap — это универсальное средство для ухода за волосами, заменяющее несколько девайсов. С его помощью можно выпрямлять, завивать волосы, делать разные прически, сушить локоны.
Как подготовить волосы к укладке
Перед созданием прически необходимо хорошо вымыть волосы с шампунем и кондиционером. Если вы хотите сделать объемные локоны, обязательно используйте средства с эффектом объема. Хорошо расчешите волосы, чтобы они не путались и были прямыми. Используйте проверенные шампуни, которые очищают волосы от загрязнений пыли. От правильно выбранного средства для мытья головы зависит стойкость будущей прически. Волосы нужно мыть два раза: первое мытье смывает всю грязь с них, второе очищает кожу.

Прежде чем приступить к завивке волос стайлером Dyson Airwrap, их необходимо подсушить с помощью овальной насадки для предварительной сушки. Не нужно полностью высушивать волосы, они должны быть слегка влажными, чтобы пряди приняли нужную форму. Затем на волосы нужно нанести спрей для объема или термозащитное средство, чтобы эффект от завивки был лучше. Средство наносится по всей длине волос, особое внимание уделяется кончикам.
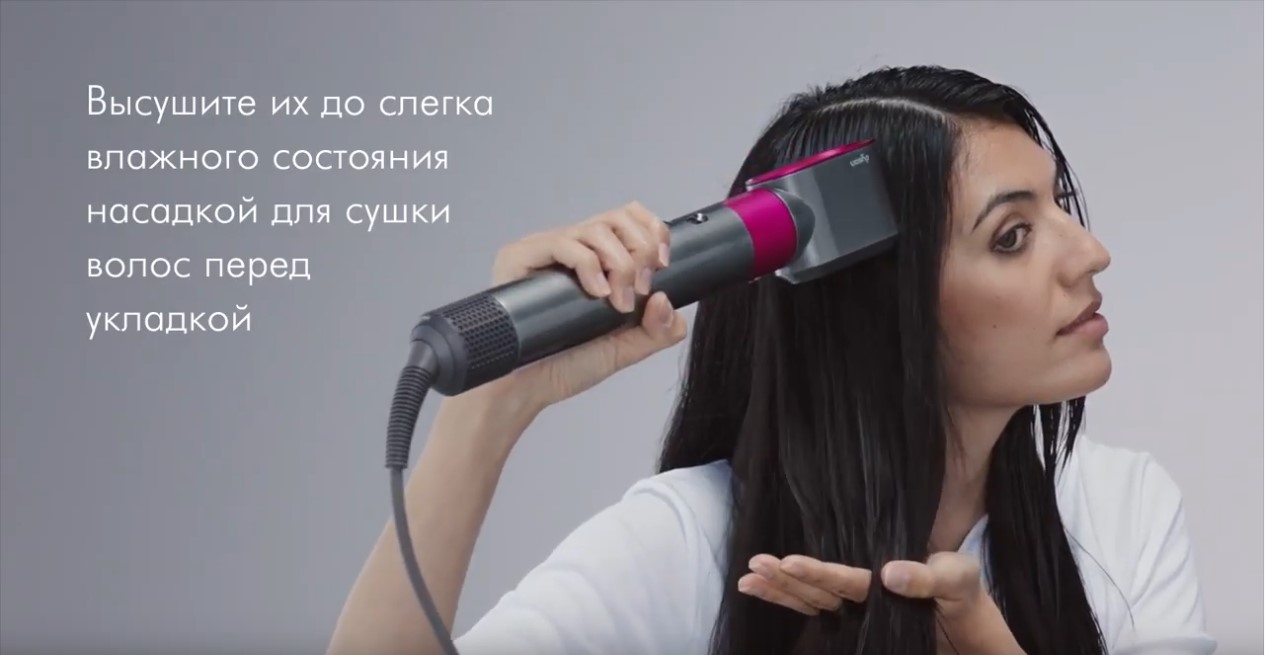 Опишем несколько косметических средств, которые оказывают защищающий эффект для волос:
- Сыворотка. Ее используют для придания блеска волосам. Чтобы готовая прическа смотрелась натурально, выбирайте сыворотку с легкой консистенцией. Ее нужно наносить на влажные волосы, отступая от корней. На корни средство не стоит наносить, чтобы они не смотрелись жирными. Обязательно распределите сыворотку по всей длине волос.
- Текстурирующий спрей. Его нужно наносить на сухие волосы. Средство необходимо для эластичности волос, что упрощает укладку. Спрей нужно аккуратно распределять по всей длине волос.
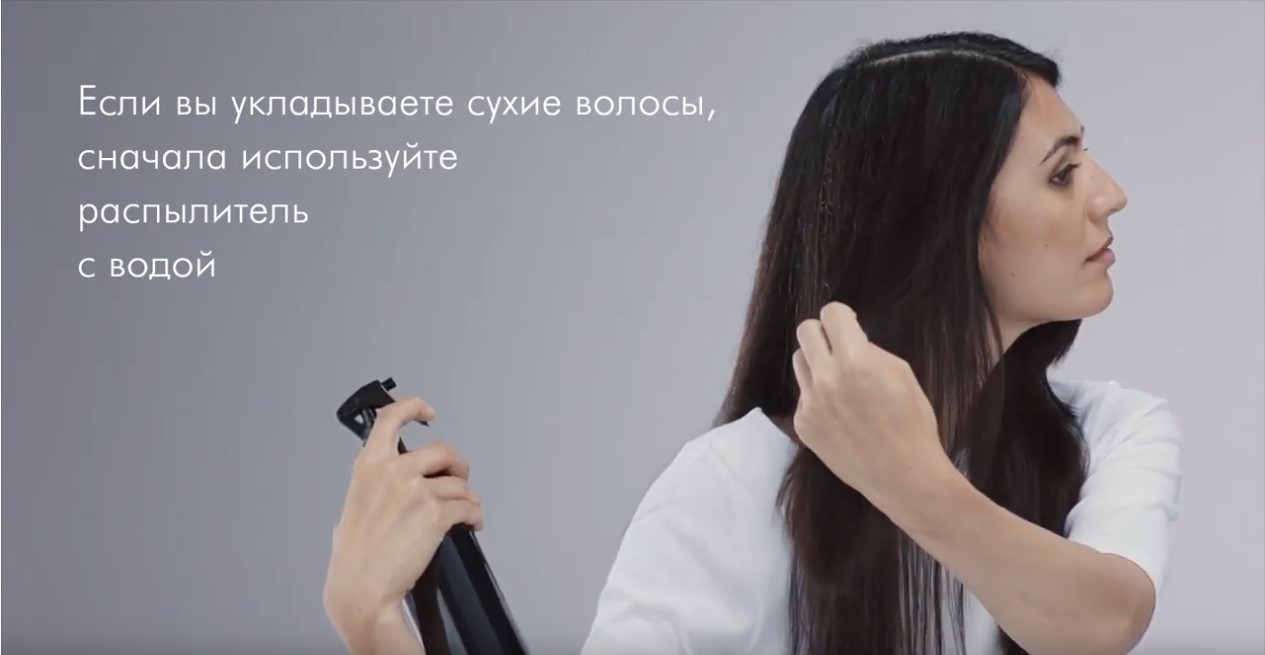
Делаем упругие локоны с помощью насадки 30 мм
Чтобы создать упругие и красивые локоны понадобится насадка диаметром 30 мм. Разделите волосы на несколько прядей, если хотите накрутить локоны компактного размера, то захватывайте небольшие прядки волос. Начинайте аккуратно накручивать волосы на насадку у кончиков в направлении от лица. Когда кончики волос окажутся на насадке, можно дальше не накручивать их, волосы сами притянутся благодаря эффекту Коанда. Когда вся прядь от кончиков до корней окажется на насадке, подержите стайлер в таком положении несколько секунд. Прибор не нужно отключать, дождитесь его остывания и опускайте стайлер вниз, чтобы сформировался локон.
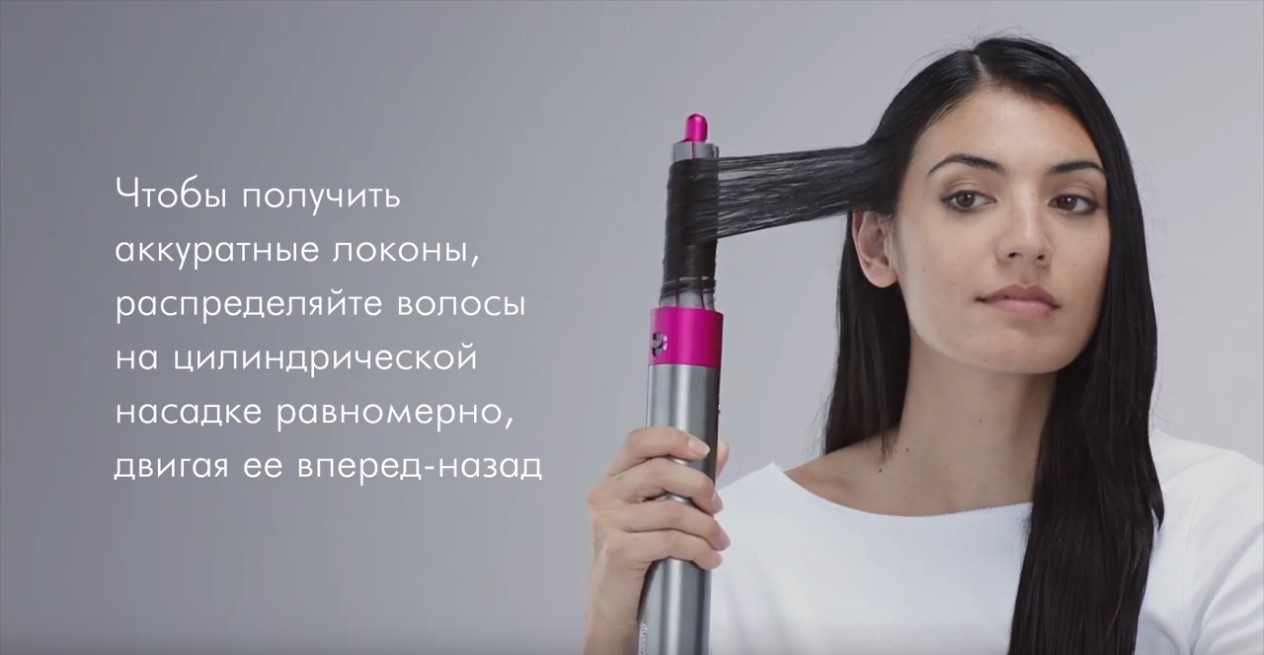 Несложными движениями нужно завить одну сторону волос, а затем вторую, поменяв насадку на противоположную. Если хотите сделать кудри симметричными, обязательно меняйте насадки и накручивайте волосы от лица по направлению стрелок, которые изображены на цилиндрических насадках. Не нужно делать резких движений, чтобы локоны получились аккуратными. Если есть челка, ее не стоит оставлять без внимания. Не используйте расческу, аккуратно уложите локоны руками.
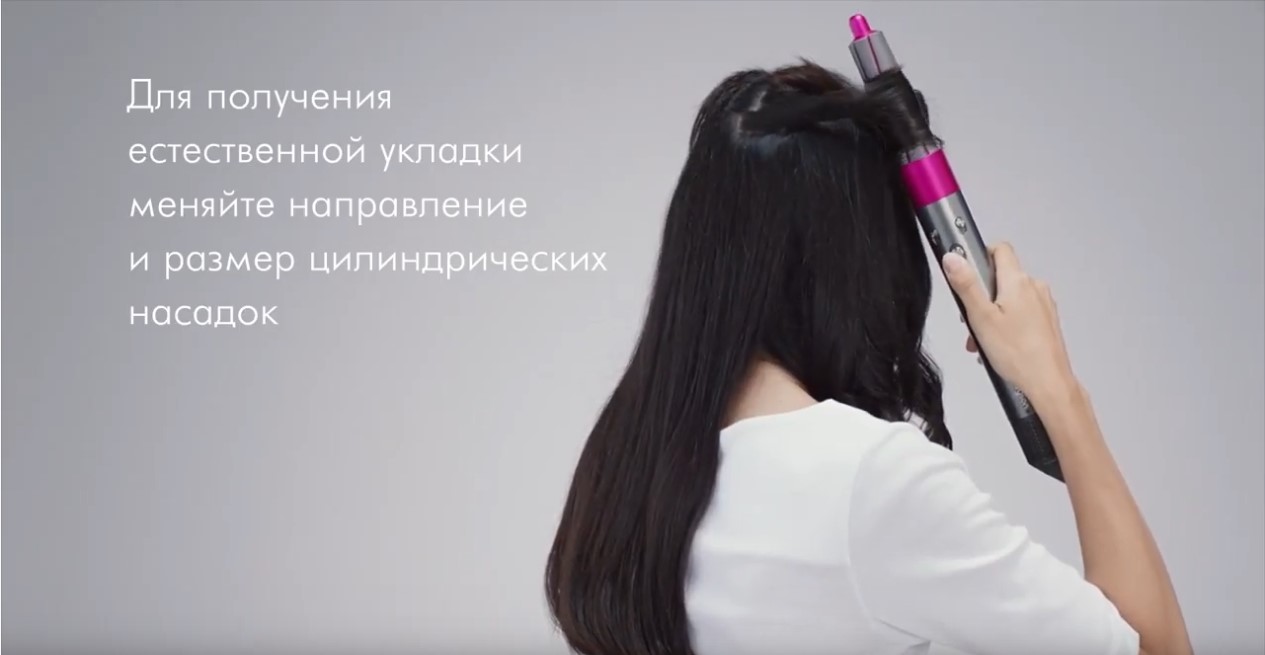 Уложить челку не составит труда — для этого используйте цилиндрические насадки с диаметром 30 мм. Необходимо разделить челку на несколько частей и начинайте сушку с самой нижней части. Просто поднесите стайлер Dyson Airwrap к корням волос, затем уложите вторую часть прядей. И финальным штрихом нужно захватить все волосы сразу.
При укладке у линии роста волос нужно быть аккуратней, чтобы челка не торчала вверх. Сбоку нужно укладывать челку в направлении от лица, удерживая аксессуар диагонально. Если не получается с первого раза уложить аккуратно челку, волосы можно слегка намочить и попробовать еще раз.
Совет! Чтобы волосы не путались, их нужно разделить на несколько прядей. Удерживайте в руках самый кончик волос и поднесите его к насадке. Не нужно накручивать волосы на стайлер, прибор сделает все за вас.
Для длинных волос на создание прически уйдет не больше 30 минут. Девушки с короткими волосами тратят меньше времени: 15-20 минут. С каждым разом эффект получается лучше, и время будет уходить меньше.
Создаем легкие волны, «пляжные локоны» с помощью насадки 40 мм
Создать прическу “Пляжные локоны” несложно, необходимо начинать укладку с верхней части головы, постепенно опуская стайлер вниз. Для удобства волосы нужно разделить на несколько прядей и работать с ними поочередно. Для небрежных локонов накручивайте волосы от лица. Сначала нужно завивать пряди с одной стороны, затем с другой, рекомендуется начинать с нижних прядей. Возьмите аккуратно прядь в руки и поднесите ее к насадке, дальше мультистайлер сделает все за вас.
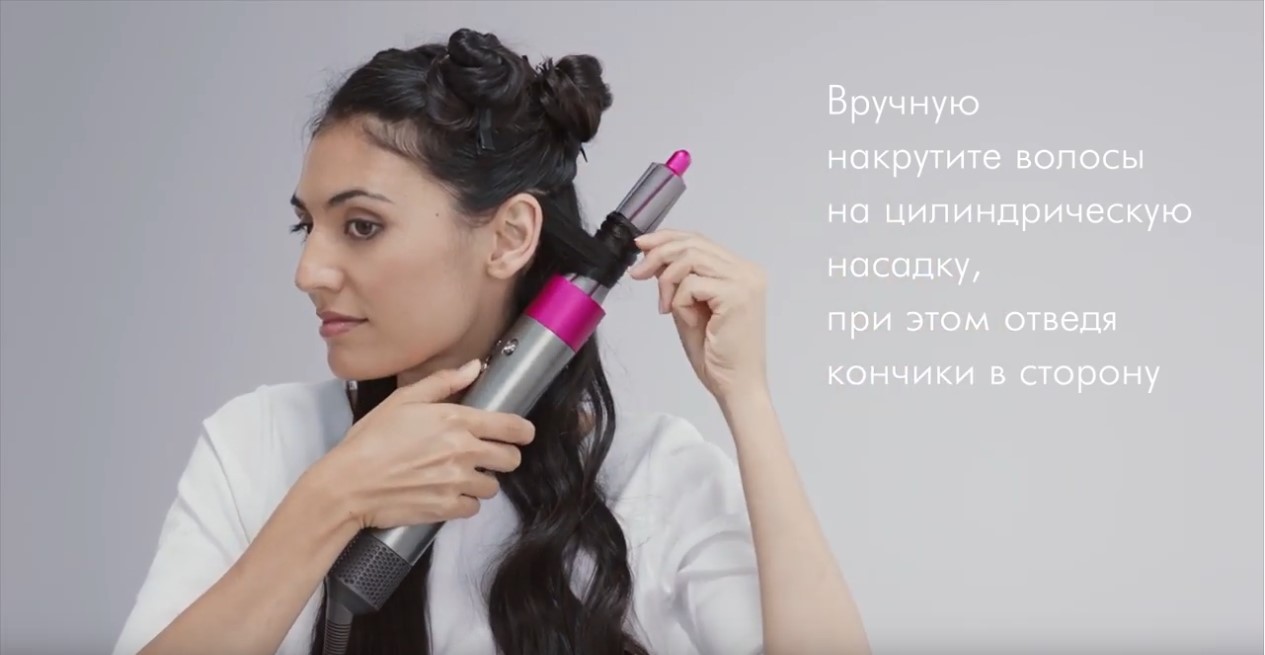 Когда локоны готовы, нужно руками взъерошить волосы, чтобы растрепать их и создать эффект пляжных локонов. Не нужно использовать расческу, растрепать волосы необходимо руками.
Важно! Длинные и тонкие волосы могут плохо держать укладку. После создания прически используйте лак сильной фиксации, чтобы волны не растрепались.
На создание такой прически уходит не больше 10 минут, а если потренироваться, то будет тратиться еще меньше времени. Но если у вас длинные волосы, может потребоваться 15-20 минут.
Как красиво уложить челку у лица
Если с утра не хватает времени на мытье волос, можно сделать красивую укладку челки с помощью стайлера Dyson Airwrap. Для этого ее нужно намочить, предварительно убрав остальные волосы в пучок. Обязательно используйте для сушки овальную насадку стайлера.
Когда волосы будут слегка подсушены, разделите челку на нижнюю и верхнюю часть. Возьмите цилиндрическую насадку 40 мм и начинайте сушку у корней с нижней стороны волос. Для придания объема приподнимайте волосы у корней.
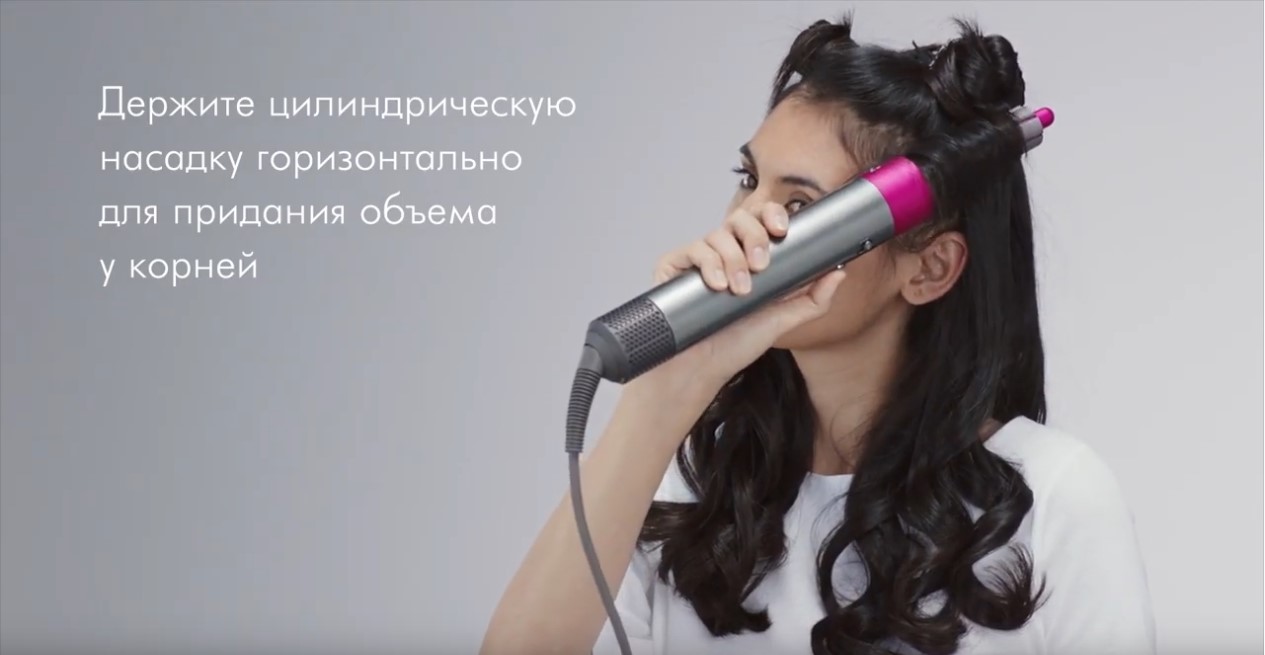
Затем распустите волосы, и, если остается время этой же насадкой подкрутите их у лица, приподнимая корни кверху. Чтобы зафиксировать укладку, нанесите на корни волос сухой шампунь.
Бонус: Как продлить стойкость укладки
Существует большой выбор стайлинговых средств, которые сохраняют прическу на протяжении целого дня, им не страшны дождь, ветер. Самое главное — правильно выбрать средство для фиксации и стойкости укладки:
- Для жирных волос подходят лаки, пенки и муссы с максимальной фиксацией. На корни средства наносить не нужно, только по длине волос.
- Для сухих волос используйте средства без спирта в составе, например, спреи. Лаки и пенки со средней степенью фиксации подойдут для закрепления эффекта.
- Для тонких волос используйте прикорневые средства фиксации. Для этого подойдут спреи или сухие шампуни. Шампунь в таком случае используют не для мытья волос, он наносится на чистые волосы.
- Для кудрявых волос подходит эластичный стайлинг крем.
- Для ослабленных волос рекомендуем наносить кремообразные средства с легкой текстурой.
Если на улице влажно, идет дождь или снег, нужно использовать специальные средства для влажной погоды. Они содержат разглаживающие вещества, предотвращающие волосы от пушения и фиксируют прическу.
Любое средство на волосы нужно наносить в небольшом количестве, чтобы не испортить прическу. Если нанести много стайлинга, вы получите обратный эффект, и прическа рассыплется через несколько часов.
Используя стайлер от Dyson, получится создавать укладки без вреда для волос, как у стилиста. Управление прибором просто, но, если у вас в первые разы не получаются аккуратные локоны, потренируйтесь еще раз и обязательно получится красивая прическа. Не забывайте использовать фиксирующие средства, которые позволяют прическе держаться долгое время.
👋 ! Сегодня расскажу о своём опыте покупки Дайсона, как он работает на длинных, тяжёлых, пушистых волосах.
История покупки
Многие знают, что сейчас все оригинальные магазины с Дайсонами закрыты, а сетевые магазины продают с другой вилкой(Индийской, Китайской, Американской и т.д.) и советуют докупать переходник🤔 Лично я не очень отношусь к работе с переходниками, ведь есть вероятность, что Дайсон может перегореть(опять же, точно не могу сказать). Поэтому мне было крайне важно получить Дайсон с российский вилкой. Как раз в июле месяце поехала в Турцию и решила заодно купить стайлер, но, объехав парочку магазинов и не найдя Дайсон, решила отложить покупку, ведь отдых был в приоритете. За это время я присоединилась к группе в Телеграмме по нахождению Дайсонов и даже хотела купить у байера, но был страх, что человек просто так пропадёт, прихватив мои деньги с собой.
Уже к декабрю месяцу приближался мой день рождения и я заказала близкому человеку стайлер. Иии он у меня!

Оригинальный и с нашей вилкой! Покупали мне его на Авито за 65 тысяч у девушки, которая привезла его из Турции. Очень боялись, что окажется палью, к тому же девушка не разрешила открыть коробку со стайлером, но всё обошлось.
Где сейчас можно купить Дайсон?
Дайсон продаётся в сетевых магазинах, таких как МВидео, Эльдорадо, Технопарк, но тут их нужно ловить и они не всегда в наличии. Также есть на Валдбериз(главное, чтобы ПРОДАВЕЦ БЫЛ САМ ВАЛДБЕРИЗ!) и в магазинах сотовой связи на сайтах. Но, стоит учесть, что техника на этих сайтах идёт НЕ с нашей вилкой(прийдётся покупать переходник). Где купить с нашей вилкой: у байеров из Турции и других стран, где российская вилка или же на Авито, но нужно быть КРАЙНЕ внимательным и не наткнутся на подделку.
Как отличить подделку от оригинала?
Прикрепляю фото, которые помогут Вам (фотографии найдены на просторах Интернета). К сожалению, чтобы точно установить, что перед вами оригинал, нужно рассмотреть сам стайлер, а не его упаковочную коробку. Особое внимание обращайте на чип!
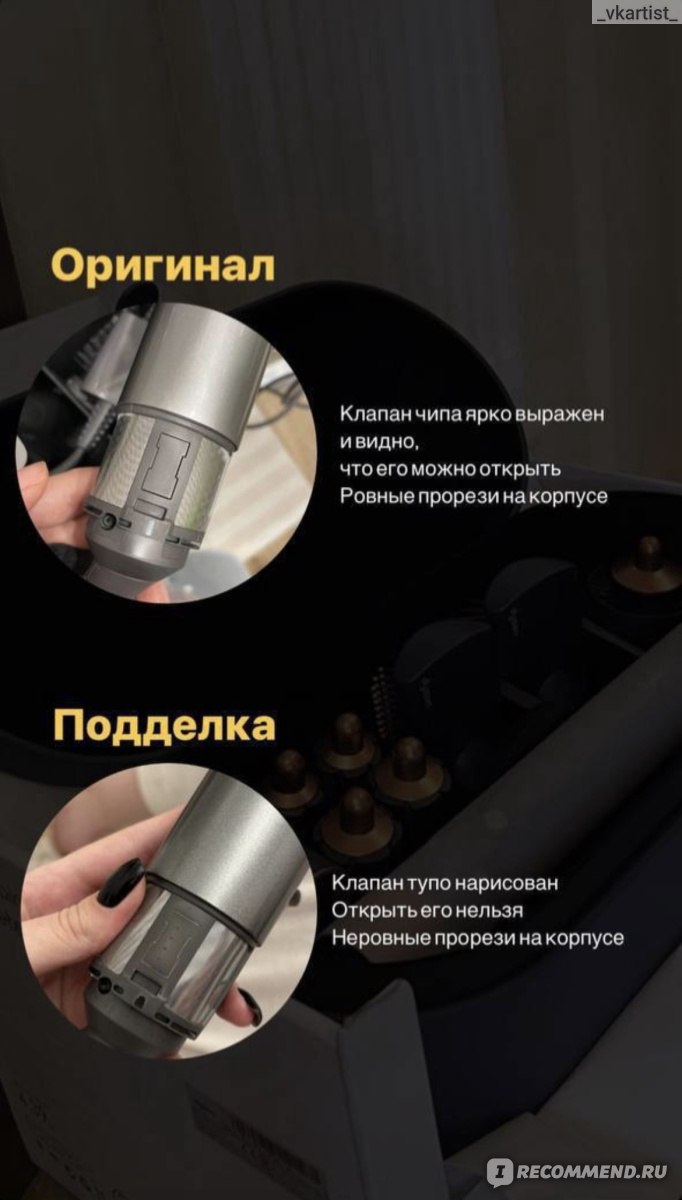
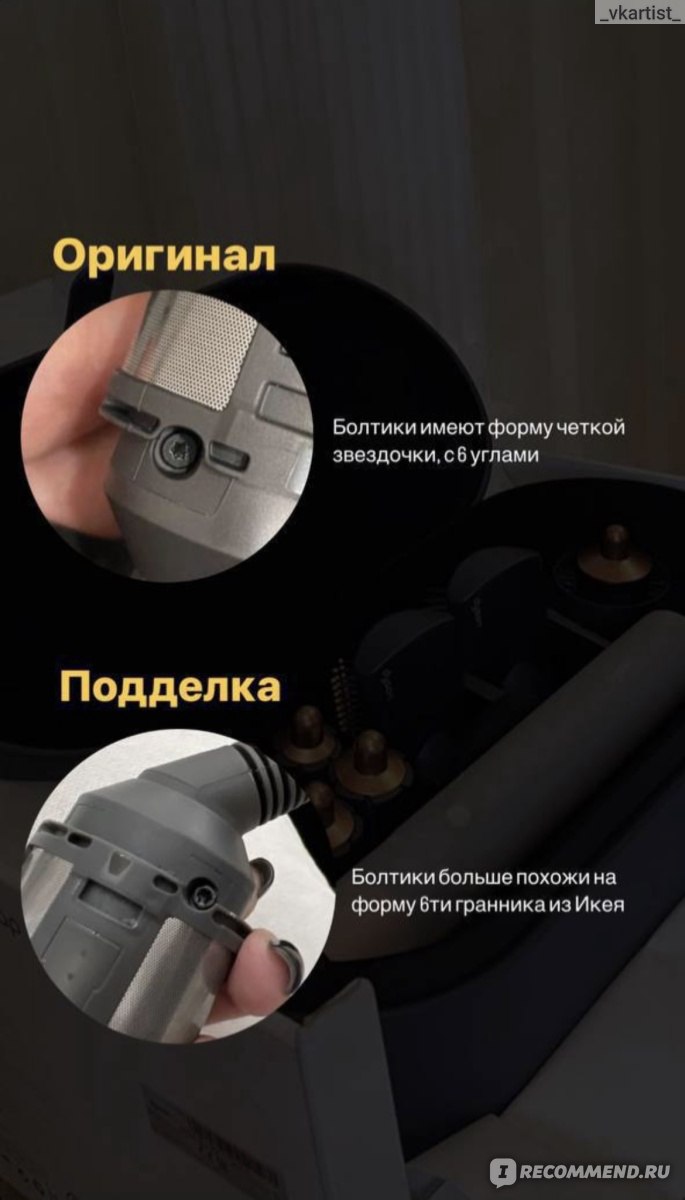


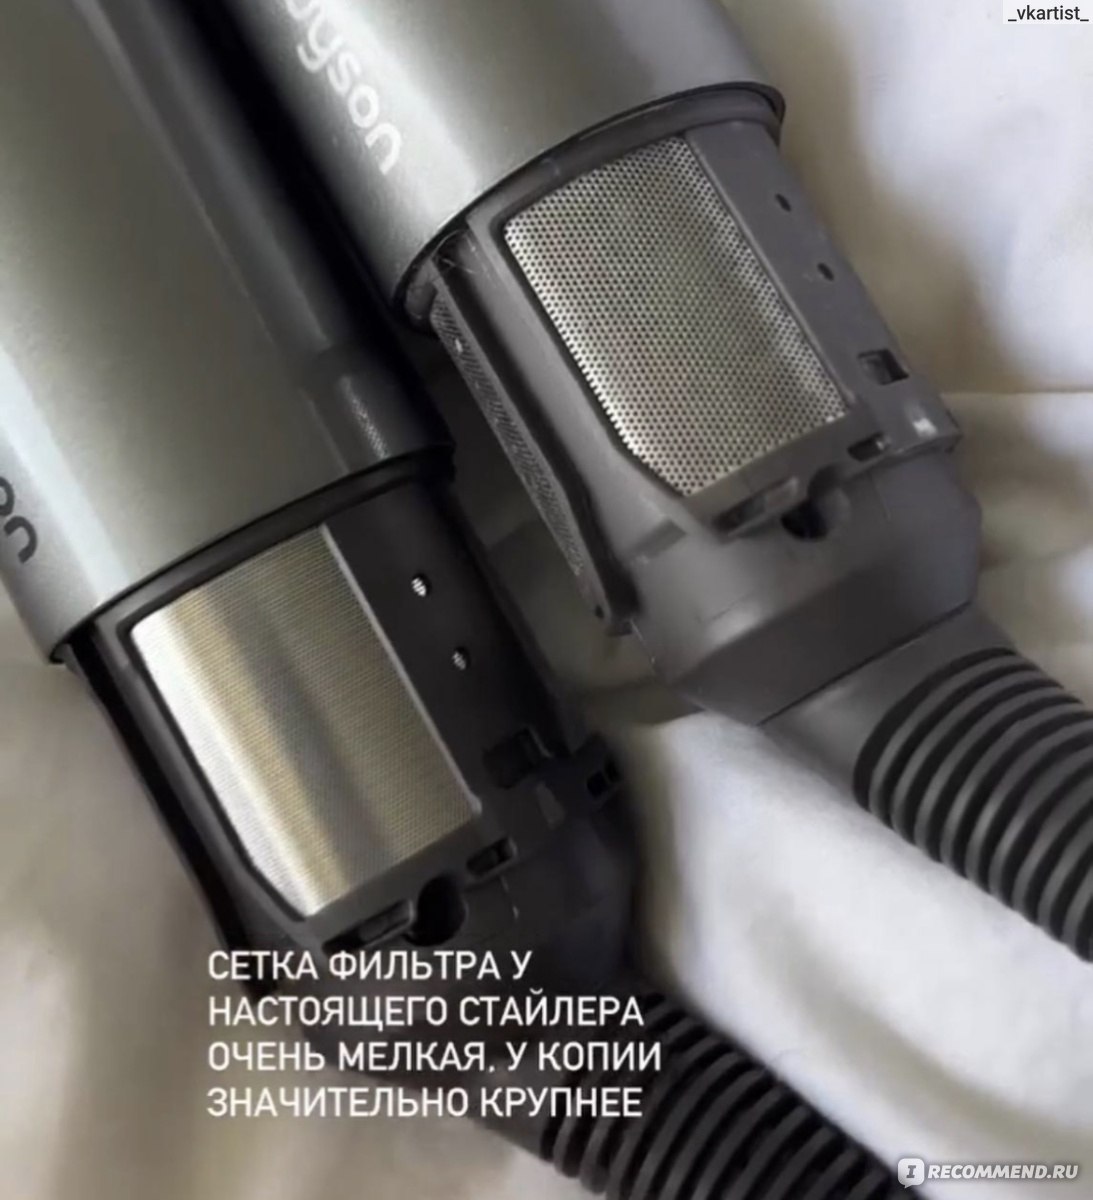
О самом стайлере

Красивый. Несомненно. Очень приятный тактильно, не тяжёлый, рука не устаёт крутить волосы. Провод очень длинный, помогает делать кудри напротив зеркала, пока Дайсон стоит на другом конце ванны. Суперская скорость для укладки! На свою длину делаю минут 10-15. Удобный кейс для хранения, в новой версии крышка кейса служит ковриком для горячих насадок, которых для локонов теперь две (до этого было четыре за счёт разных направлений).
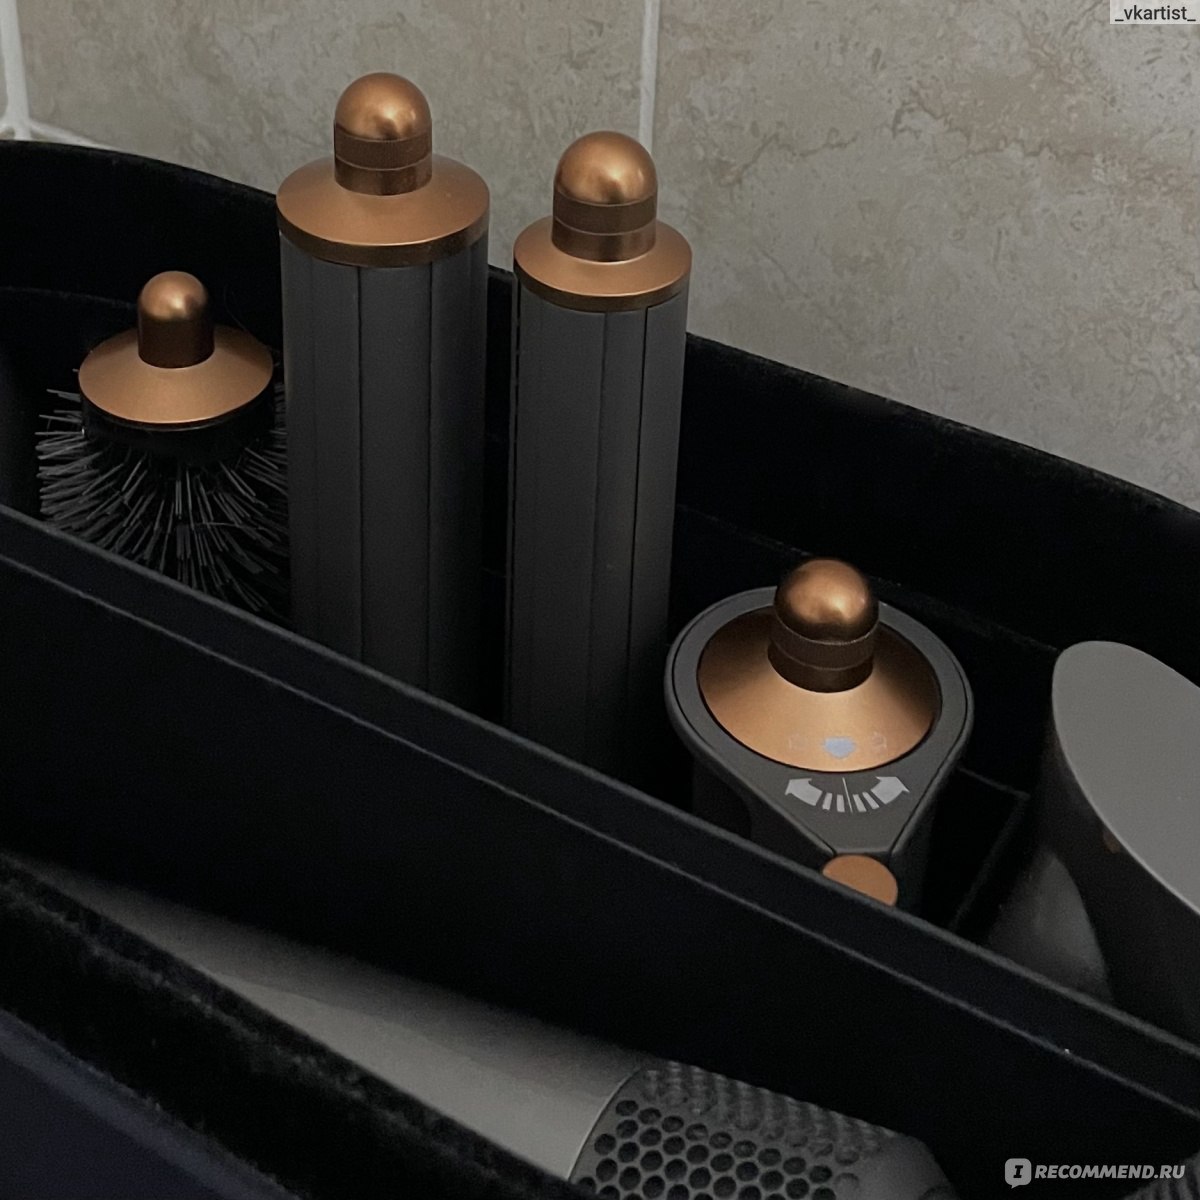
Мой опыт использования, советы
У меня натуральные длинные, тяжелые волосы, при этом пушистые. Сейчас я активно пользуюсь масками, чтобы «пушка» и «антенн» на моей голове и по длине не было. Разумеется, стайлер подойдёт тем, у кого сожженые, сухие волосы. Так причёска будет держаться до следующей помывки. Зная это, я не рассчитывала, что Дайсон сделает мне вау эффект, но хотела лишь получить вид уложенных, ухоженных волос. В основном я использую стайлер ради локонов, реже для сушки или поднятия корней.
И вот мои советы по использованию:
- Обязательно используйте термозащиту! Многие думают, что раз стайлер заявлен как щадящий инструмент, то необязательно использовать термозащиту, но это не так: Дайсон также сильно перегревает волос, как и любая плойка.
- Необязательно делать укладку на влажные волосы. Мне это было очень важно узнать перед покупкой, так как я мою голову вечером, а с утра использую Дайсон. За ночь мои волосы высыхают и утром в первые попытки использовать стайлер я мочила их водой. Но потом перестала это делать и укладка стала получаться даже лучше!
- На муссах и с лаком причёска будет держаться дольше. К сожалению, такая простая истина работает и при использовании стайлера. Не стоит забывать, что это лишь фен, он не выполняет функцию плойки на 100%.
- После того, как вы накрутили локон, не снимайте его с насадки сразу! Лучше воспользуйтесь и заколите локон зажимом или заколкой поближе к голове. Так локон медленнее распустится и укладка сохраниться подольше.
- Снимайте локон с насадки только после её выключения.
- Делайте локоны только на высокой температуре. Бесполезно крутить локон на средней, он распускается через минуты 3-4.
- Обязательно фиксируйте локон холодным воздухом. Происходит это примерно так: накручиваете локон на насадку на самой высокой температуре –> держите 10-15 секунд –> переключаете температуру на самую низкую или тянете ползунок с выключением Дайсона на самый верх –> начинает идти холодный воздух –> держите секунд 10-15 –> выключаете Дайсон –> закалываете локон –> ждите 30-40 минут, чтобы локон остыл и зафиксировал своё положение –> снимайте заколку, побрызгайте лаком.
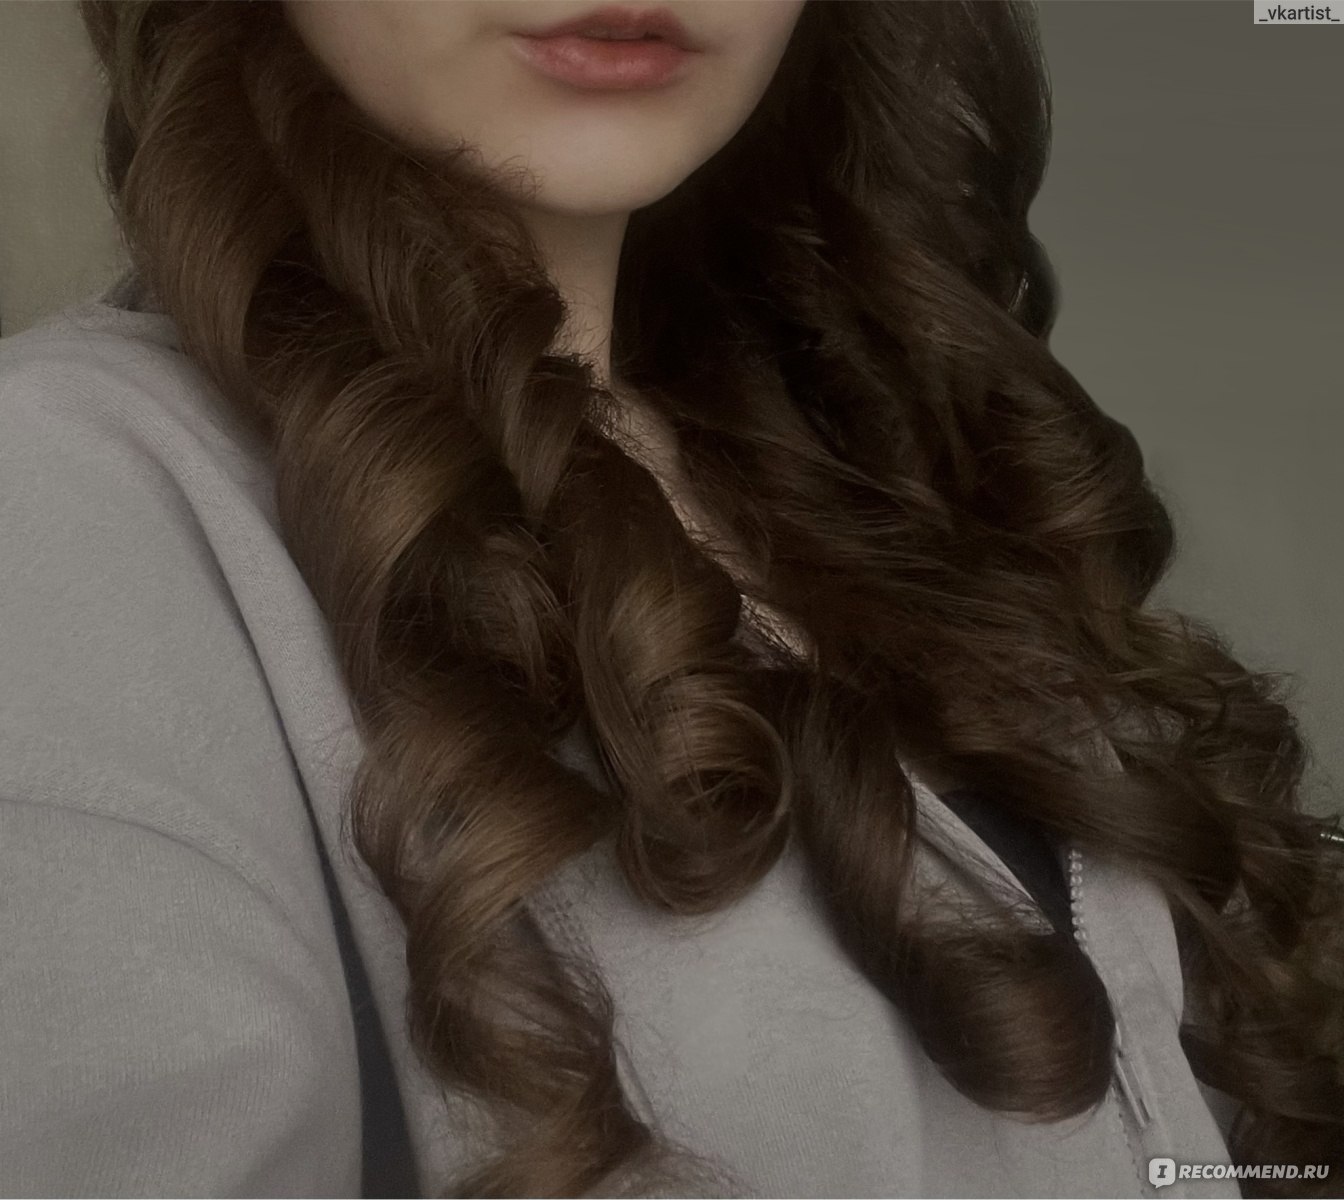
Итог: если использовать Дайсон зная многие фишки, использовать рабочий стайлинг для волос и приноровится к самому инструменту(потому что это не так просто, как может показаться), то красивая укладка обеспечена! К сожалению, если у вас ооочень гладкие волосы, и даже плойка не может сделать вам кудри, стайлер вам не подойдёт.