- Manuals
- Brands
- LG-Ericsson Manuals
- IP Phone
- IPECS 1000i Series
- User manual
-
Contents
-
Table of Contents
-
Bookmarks
Quick Links
1000i Series IP Phone (SMB)
User Guide
Please read this user guide carefully before operating your phone.
Retain it for future reference.
Related Manuals for LG-Ericsson IPECS 1000i Series
Summary of Contents for LG-Ericsson IPECS 1000i Series
-
Page 1
1000i Series IP Phone (SMB) User Guide Please read this user guide carefully before operating your phone. Retain it for future reference. -
Page 2
1000i Series IP Phone (SMB) User Guide Issue 1.0 Revision History ISSUE DATE DESCRIPTION OF CHANGES Feb., 2020 Initial Release Copyright© 2019 Ericsson-LG Enterprise Co., Ltd. All Rights Reserved This material is copyrighted by Ericsson-LG Enterprise Co. Ltd. Any unauthorized reproductions, use or disclosure of this material, or any part thereof, is strictly prohibited and is a violation of Copyright Laws. -
Page 3: Table Of Contents
1000i Series IP Phone (SMB) User Guide Issue 1.0 Table of Contents 1 Introduction ………………… 1 General ……………………1 Feature Information ………………..1 Entering Station Program Data Information …………1 Feature Groupings ………………..1 iPECS 1000i Phone Description …………….2 1.5.1 Phone Layout and Functions ………………
-
Page 4
1000i Series IP Phone (SMB) User Guide Issue 1.0 4.2.1 Placing external (Outside Line) calls …………… 27 4.2.2 Waiting for the next available Outside line ………….. 28 4.2.3 Account Codes: Tracking External calls for billing ……….. 28 4.2.4 Disable dialing from your phone …………….29 4.2.5 Temporarily override dialing restrictions at a phone ………. -
Page 5
1000i Series IP Phone (SMB) User Guide Issue 1.0 Using the Menu ………………..49 9.2.1 Phone Setting ………………….49 9.2.2 Conference Room ………………..51 9.2.3 ICM SMS …………………… 51 9.2.4 Network Configuration ……………….. 52 9.2.5 Button Program………………….. 53 9.2.6 Attendant menu …………………. 53 9.2.7 Additional phone configurations ……………. -
Page 6
1000i Series IP Phone (SMB) User Guide Issue 1.0 Regulatory Information Important Safety Information To prevent unexpected danger or damage please read this information before installing or attempting to repair you phone. Warning and Caution information is provided to alert the consumer of known dangers: Warning: To reduce the possibility of electric shock, do not expose your phone to high humidity areas, such as a bathroom, swimming area, etc. -
Page 7
1000i Series IP Phone (SMB) User Guide Issue 1.0 [EU] European Union Declarations of Conformity Ericsson-LG Enterprise Co.,Ltd. declare that the equipment specified in this document bearing the “ CE” mark conforms tothe Electromagnetic Compatibility Directive(EMCD,2014/30/EU) and Low Voltage Directive(LVD, 2014/35/EU). -
Page 8
1000i Series IP Phone (SMB) User Guide Issue 1.0 Disposal of your old appliance When the crossed-out wheeled bin symbol is attached to a product, it means the product is covered by the European Directive 2012/19/EU. All electrical and electronic products should be disposed of separately from the municipal waste stream via designated collection facilities appointed by government or the local authorities. -
Page 9: Introduction
1000i Series IP Phone (SMB) User Guide Issue 1.0 1 Introduction General Your telephone is connected to an advanced-technology, highly versatile, fully featured telecom system designed to make office communications easy and productive. Employing state-of-the-art Voice over Internet Protocol (VoIP) technology, voice and data converge on a single IP packet network.
-
Page 10: Ipecs 1000I Phone Description
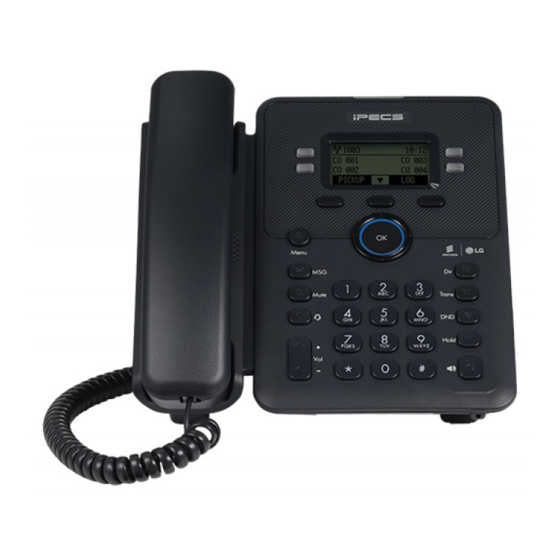
Issue 1.0 iPECS 1000i Phone Description The iPECS 1000i series phones incorporate the latest in VoIP technology and user interface to provide a cost effective, simple to use, productive communications tool. Each 1000i phone includes an LCD, fixed and flexible buttons with LEDs, Navigation keys, and full-duplex speakerphone.
-
Page 11
1000i Series IP Phone (SMB) User Guide Issue 1.0 1020i Layout Figure 1.5.1-2: 1020i Front 1030i Layout Figure 1.5.1-3: 1030i Front… -
Page 12
1000i Series IP Phone (SMB) User Guide Issue 1.0 1040i Layout Figure 1.5.1-4: 1040i Front 1050i Layout Figure 1.5.1-5: 1050i Front… -
Page 13
1000i Series IP Phone (SMB) User Guide Issue 1.0 1.5.1.2 Functions Below is a brief description of the elements called in the 1000i series phone diagram above. Ring/Message Indicator: Flashes when receiving a new call or you have a new message waiting. LCD Display: Displays your phones status, dialing directories, and text message information. -
Page 14: 1000I Installation
1000i Series IP Phone (SMB) User Guide Issue 1.0 1000i Installation The 1000i Phones are shipped with the 1000i Phone, handset and coil cord, adjustable foot-stand, 1.5-meter (~5-foot) Cat 5 cable terminated in RJ-45 connectors, and the Quick Guide. An optional AC/DC adaptor is available for use when the network connection does not provide power to the phone (support IEEE 802.3af PoE -Power over Ethernet-).
-
Page 15
1000i Series IP Phone (SMB) User Guide Issue 1.0 If your LAN port does not support Class 2 Power over Ethernet (PoE), you must install the optional AC Power adaptor. Note do not connect the power adaptor if your port does support PoE. Connect the DC output of the adaptor into the phone and the AC plug into a standard AC power outlet as shown in D. -
Page 16: Global Provisioning
1000i Series IP Phone (SMB) User Guide Issue 1.0 1.6.1 Global Provisioning If you turn on the phone, it will show a “Global Provisioning” menu. You don’t need to use the Global Provisioning in the SMB, so you should skip this menu. Press the “NO”…
-
Page 17: Dss Installation
1000i Series IP Phone (SMB) User Guide Issue 1.0 DSS Installation The DSS for the 1000i Series phone provide 24 additional flexible buttons. The flexible buttons on the DSS are used as with the flexible buttons on the phone proper and can be assigned for any of the flexible button functions.
-
Page 18: 1024Idss Installation
1000i Series IP Phone (SMB) User Guide Issue 1.0 1.7.1 1024idss Installation The DSS should be installed on the phone prior to making any connections to the phone. This simplifies the installation for 1030i Phone and 1024idss. To install the DSS First, assure the phone is NOT connected to power.
-
Page 19: Wall Mount Installation
1000i Series IP Phone (SMB) User Guide Issue 1.0 Wall Mount Installation The following instructions describe the wall mount installation. Note the foot-stand must not be installed. Figure 1.8_Wall Mount Installation If installed, remove the foot-stand from the Phone and DSS. Connect all wiring to the Phone as described in “1.6 1000i Installation”…
-
Page 20: Ehs Adaptor
1000i Series IP Phone (SMB) User Guide Issue 1.0 Remove, reverse and re-install the handset hook so that the hook catches the groove in the handset receiver. Hang the handset up on the handset hook. Complete all wiring connections as described in “1.6 1000i Installation” section. NOTE It may be necessary to remove the phone and tighten or loosen the screws for a secure mounting.
-
Page 21: Entering Text
1000i Series IP Phone (SMB) User Guide Issue 1.0 1.10 Entering Text 1.10.1 Phone Entering Text Several features available to your phone require text entry. Station and Speed dial name assignment, and Intercom Text Messaging all require character entry. Characters are entered by pressing the dial pad digit with the character multiple times based on the character position on the button.
-
Page 22: System Entering Text
1000i Series IP Phone (SMB) User Guide Issue 1.0 1.10.2 System Entering Text Below is a table when entering texts using the System Function. NOTE 1000i series System’s Character Entry Chart. (D1: 1st Digit, D2: 2nd Digit) This Table is available from unified s/w version 4.0.x Table 1.10.2-1: System Entering Text Type 1 Char Char…
-
Page 23
1000i Series IP Phone (SMB) User Guide Issue 1.0 Char Char Char… -
Page 24: Using The Lcd & Speakerphone
1000i Series IP Phone (SMB) User Guide Issue 1.0 2 Using the LCD & Speakerphone Using the LCD Each 1000i model has a different display. The top line of each display shows various icons as shown in the Icons chart below. The 1010i and 1020i have a 4-line display.
-
Page 25
1000i Series IP Phone (SMB) User Guide Issue 1.0 1030i Phone Display 1040i Phone Display 1050i Phone Display… -
Page 26: Upper Line And Flexible Button Icons
1000i Series IP Phone (SMB) User Guide Issue 1.0 2.1.2 Upper line and Flexible button icons Below is a chart list of each icons and their meaning. 2.1.2.1 Upper line Icons Table 2.1.2-1: 1010i, 1020i Icons Description Icon Description The MUTE icon indicates the microphone is On and Off. (1010i only) The Headset icon indicates headset state, when shown the headset is active.
-
Page 27
1000i Series IP Phone (SMB) User Guide Issue 1.0 Call icon indicates call information during a call. The SRTP icon indicates SRTP call. Wake Up icon indicates one or more alarms are saved. EHS icon is displayed when EHSA is installed. If there is an error between EHSA and EHS headset, it will be changed to the EHS OFF icon ( 2.1.2.2 Flexible button icons (1030i, 1040i, 1050i) -
Page 28: Using The Speakerphone
1000i Series IP Phone (SMB) User Guide Issue 1.0 Using the Speakerphone Activate the iPECS Speakerphone at any time (except for Paging) in place of lifting the handset to receive or place calls. Additionally, you may switch between the handset and Speakerphone during a call. By keeping the handset Off-hook, the Group Listen feature is activated, which provides incoming audio over the speaker with outgoing audio from the handset.
-
Page 29: Receiving Calls
1000i Series IP Phone (SMB) User Guide Issue 1.0 3 Receiving Calls Answering a Call While Idle There are three basic types of incoming calls; internal/external ringing calls, Intercom Voice Announce calls, and Hold recalls. Your phone may be assigned Ringing Line Preference; in this case, calls that ring are answered by lifting the handset.
-
Page 30: Using Answering Machine Emulation (Ame)
1000i Series IP Phone (SMB) User Guide Issue 1.0 Using Answering Machine Emulation (AME) When your phone is allowed AME, your calls are connected to your voice mail directly, and, like a normal Answering Machine, the caller’s voice is played over your speaker as it is recorded in the mailbox. Thus, you can screen the call before answering.
-
Page 31: Answering Calls At Night
1000i Series IP Phone (SMB) User Guide Issue 1.0 Answering Calls at Night In the Night mode, Loud Bell Control may be used to send ring signals to external bells. You may answer these calls with Universal Night Answer (UNA). iPECS Phones may be assigned a Flex button as a UNA button.
-
Page 32: Forwarding Calls
1000i Series IP Phone (SMB) User Guide Issue 1.0 Forwarding Calls 3.8.1 Forwarding calls to another Station or Voice Mail Incoming calls may be diverted to other resources of the system. Resources include other stations, the built- in Voice Mail and External Voice Mail. Your LCD and the LCD of the 1000i phone receiving the call indicate the forward status.
-
Page 33: Forwarding Callers To A Text Message
1000i Series IP Phone (SMB) User Guide Issue 1.0 3.8.2 Forwarding callers to a Text Message Using an iPECS Phone, you can send a ‘Text Message’ to internal callers. When calling your Station, internal callers will automatically receive the selected message or you can select a message in response to an internal call, Silent Text Message.
-
Page 34: Placing Calls
1000i Series IP Phone (SMB) User Guide Issue 1.0 4 Placing Calls Internal Calls You can place calls to other stations in the system over the Intercom. The call will ring, or for an ICM Voice Announce call, a splash tone will be heard. Ring or Voice Announce is normally determined by settings at the called station but you may change this by dialing ‘#’…
-
Page 35: Leaving A Message Wait Indication
1000i Series IP Phone (SMB) User Guide Issue 1.0 To make a Voice Over announcement to a busy station: Dial #. After the Splash tone is heard, begin speaking. 4.1.2 Leaving a Message Wait Indication If the called user does not answer or is in DND mode, you may leave a Message Wait indication. The called user will receive a Message Wait indication;…
-
Page 36: Waiting For The Next Available Outside Line
1000i Series IP Phone (SMB) User Guide Issue 1.0 You may be assigned dialing and/or outside Line Access Restrictions, in which case you will receive error tone if you attempt to dial or access a restricted number or outside line. Line and Station Class of Service (COS), which establish dialing restrictions, may vary during Day and Night operation (Day/Night COS).
-
Page 37: Disable Dialing From Your Phone
1000i Series IP Phone (SMB) User Guide Issue 1.0 4.2.4 Disable dialing from your phone You can temporarily ‘Lock’ your phone by activating Temporary COS; the phone is not allowed to place outside calling, except emergency calls. To deactivate Temporary COS you must enter your Authorization code. To activate Temporary COS: Press the Transfer (PGM) button.
-
Page 38: Directory
1000i Series IP Phone (SMB) User Guide Issue 1.0 Directory 4.3.1 Directory button and Search You may search a person’s name by using the Directory button. The search result is applied to all directories. That means, if a user search name [Juliet], then the name is searched in all directory – System Directory, Personal Directory, Internal Station List and LDAP(if LDAP is available status).
-
Page 39: Using Dial By Name And Entering Your Name
1000i Series IP Phone (SMB) User Guide Issue 1.0 When entering a Speed Dial, a 16-character name may be associated with the number for the Dial by Name directory. Refer to section “9.2.1.1 Station Name Program” for details on entering your name in the directory. To place a call using Station Speed Dial: Press the SPEED button and Dial the desired Station Speed Dial bin(index) number.
-
Page 40: Using Redial List
1000i Series IP Phone (SMB) User Guide Issue 1.0 To enter your station user name: Press the Transfer (PGM) button. Dial 74 the Station Name registration code, (for UCP/eMG). ’74’ is the Code that access the registration of the Station Name. Enter the Name, up to 20 characters.
-
Page 41: Call Handling
1000i Series IP Phone (SMB) User Guide Issue 1.0 5 Call Handling Call Transfer: Sending a call to a different destination You can send an active call to another station or other resource of the system, Call Transfer. You can screen the transfer with the receiving party (Screened Call Transfer) or complete the transfer without screening (Unscreened Call Transfer).
-
Page 42: Broker Call: Switching Between Two Calls
1000i Series IP Phone (SMB) User Guide Issue 1.0 Broker Call: Switching between two calls You may switch between the active call and a call on Hold, placing the active call on Hold acting as a broker between two or more parties (Broker Call). iPECS Phone users may ‘broker’…
-
Page 43: Setting Up A Conference Room
1000i Series IP Phone (SMB) User Guide Issue 1.0 5.4.1 Setting up a Conference Room In addition to establishing an ad hoc Conference, up to 9 Conference Rooms can be set up, letting up to 32 parties converse when using a Conference module. When setting up a Conference Room, a password can be designated for invited parties (internal and external parties) to use for accessing the established Conference Room.
-
Page 44: Two-Way Record: Recording A Call
1000i Series IP Phone (SMB) User Guide Issue 1.0 Two-Way Record: Recording a call You may record an active external conversation in your Voice Mail Box. To activate Two-Way Record while on an outside call: ✓ Use the Navigation button to display the next Softkey menu and select the RECORD Softkey, a record warning tone may be heard and recording starts.
-
Page 45: Send & Retrieve Messages
1000i Series IP Phone (SMB) User Guide Issue 1.0 6 Send & Retrieve Messages Responding to a Station Message Waiting Indication Another station can leave a Station Message Waiting indication (MWI) to request a callback when you do not answer or your phone is in the DND mode. The message icon will display on your LCD screen. If programmed, a flashing MSG LED on the iPECS Phone also indicates when there is a Message Waiting.
-
Page 46: Getting Voice Mail Messages
1000i Series IP Phone (SMB) User Guide Issue 1.0 Getting Voice Mail Messages When callers are sent to your Voice Mailbox, they can leave a voice message, in the built-in Voice Mail service, the iPECS Feature Server or an external Voice Mail system. The Voice Mail system allows access to and management of received voice messages.
-
Page 47: Sending And Receiving Short Text Messages
1000i Series IP Phone (SMB) User Guide Issue 1.0 Sending and Receiving Short Text Messages You can exchange short text messages (up to 80 alphanumeric characters) with other iPECS display phone users. If you have short text messages, the message button will be flashing. If the ring/message LED is set to MWI, the ring/message LED will flash.
-
Page 48: Remote System Access
1000i Series IP Phone (SMB) User Guide Issue 1.0 7 Remote System Access Mobile Phone Extension When away from your desk or office you can place and receive iPECS calls on your mobile phone. You may need to activate the Mobile Phone Extension feature and register the Mobile Phone number. To register a mobile phone number: Press the Transfer (PGM) button.
-
Page 49: Misc. Features
1000i Series IP Phone (SMB) User Guide Issue 1.0 8 Misc. Features Call Log In system web admin(Station Data – CLI Attributes), there is Call Log Usage option. Phone self: call log is controlled by each station. System serve: call log is controlled by system. 8.1.1 Call Log — Phone self option You can view a log of incoming, outgoing and missed calls on the display (up to 100 records).
-
Page 50
1000i Series IP Phone (SMB) User Guide Issue 1.0 To save an external number to your Station Speed dial: ✓ Use the Navigation up/down buttons to highlight the desired Call log item. ✓ Press the HOLD(SAVE) button. You can save the number to a Speed Dial by pressing the SELECT Softkey then the SAVE Softkey. -
Page 51: Call Log — System Serve Option
1000i Series IP Phone (SMB) User Guide Issue 1.0 8.1.2 Call Log – System serve option Using an iPECS Phone with 3-Soft buttons, you can view a log of incoming, outgoing and missed calls on the display. A Flex button must be assigned as a {CALL LOG} button, which allows easy access to the Call Log menu.
-
Page 52: Contrast
1000i Series IP Phone (SMB) User Guide Issue 1.0 Contrast The LCD brightness can be adjusted to enhance the display contrast. To change the LCD Contrast: While in an idle state, press the VOLUME + or — button to adjust the brightness (for UCP/eMG). …
-
Page 53: Push-To-Talk (Ptt) Page
1000i Series IP Phone (SMB) User Guide Issue 1.0 To queue for a busy Page Zone: Press the MSG button. Replace the handset, returning to idle. To answer a Meet-me-Page: Lift the handset. Dial Meet-Me-Page code. Please consult with your System Administrator for further information. Push-To-Talk (PTT) Page iPECS Phones can be assigned as a member of one or more of the system’s nine Push-To-Talk (PTT) page groups.
-
Page 54: Alarm/Door Bell
1000i Series IP Phone (SMB) User Guide Issue 1.0 To set the Wake Up Alarm clock: Press the Transfer (PGM) button. Dial 41 (Alarm register code for UCP/eMG), ’41’ is the Code that set the Wake Up Alarm Time. If requested, enter the Wake-up alarm index number, “1 to 5”. Dial the desired 2-digit hour (24-hour mode), then the 2-digit minute for alerting.
-
Page 55: System Voice Memo
1000i Series IP Phone (SMB) User Guide Issue 1.0 System Voice Memo The integrated Voice Mail of your iPECS system incorporates several Voice Memos to provide you with general information such as station number, date, time, and feature status. Voice Memos are heard over the iPECS Phone speaker.
-
Page 56: Hot Desk
1000i Series IP Phone (SMB) User Guide Issue 1.0 Hot Desk iPECS phones in the system may be assigned for Hot Desk operation. These Hot Desk phones let you log- on and use the Hot Desk phone as if it were your station. Once logged-on, the Hot Desk station will take on the attributes assigned to your station number, and you can make and receive calls as normal.
-
Page 57: Display Menu
1000i Series IP Phone (SMB) User Guide Issue 1.0 9 Display Menu Menu Overview The Display Menu permits access to the Phone settings and the Network Configuration for the phone. In addition, the menu includes alternative methods for handling Conference Rooms and Short Text Messages, and configuring the Flexible buttons on your phone.
-
Page 58
1000i Series IP Phone (SMB) User Guide Issue 1.0 7. BACKLIGHT 8. FONT PROGRAM 9. LCD DIMMING 9.2.1.1 Station Name Program After selection, enter the name for your phone using the dial pad. You can enter up to 20 characters. Refer to section “1.10.1 Phone Entering Text”… -
Page 59: Conference Room
1000i Series IP Phone (SMB) User Guide Issue 1.0 9.2.2 Conference Room You can create a Conference Room that others, internal and external can call to join a conference. An alternative procedure to creating and joining a Conference Room is provided in “5.4.1 Setting up a Conference Room”.
-
Page 60: Network Configuration
1000i Series IP Phone (SMB) User Guide Issue 1.0 9.2.4 Network Configuration The network Configuration menu affects the connection of your phone to your local area network; it is intended for access by trained technicians only. The structure of the Network Configuration menu is shown below. Figure 9.2.4: 1000i menu tree of network configuration …
-
Page 61: Button Program
1000i Series IP Phone (SMB) User Guide Issue 1.0 To access Network Config. settings: Press the MENU button and select the Network Configuration sub-menu. Enter the password; to display the sub-menu. (contact to your system administrator) 1. Profile 2. Web Password 3.
-
Page 62: Additional Phone Configurations
1000i Series IP Phone (SMB) User Guide Issue 1.0 Date/Time Set—Enter mm/dd/yy and press the OK button or press the HOLD(SAVE) button; enter hh/mm and press the OK button or press the HOLD(SAVE) button. Set ICM Only Mode—Dial the Station Range for ICM only calls (ex., 103-108=103108), press the OK button or press the HOLD(SAVE) button.
-
Page 63: Features & Flexible Buttons
1000i Series IP Phone (SMB) User Guide Issue 1.0 10 Features & Flexible Buttons 10.1 Entering Station Program Data A special code set is available for iPECS Phone users to assign certain attributes such as Authorization Codes (Passwords). After entering the User Program mode, you dial the codes to select the attribute and setting. Once selected, the setting is saved.
-
Page 64: Web Manager
1000i Series IP Phone (SMB) User Guide Issue 1.0 10.3 Web Manager The Web Manager is a web-based tool for configuring the IP Phone parameters. The Web Manager can access to parameters not available through the Network setting menu. In addition to remote access to the IP Phone configuration, Web Manager is more convenient when configuring a number of IP Phones or parameters of a single IP Phone.
-
Page 65
1000i Series IP Phone (SMB) User Guide Issue 1.0 Figure 10.3-2: 1000i Web Configuration To set the network configurations: Click one menu item in “Network Configuration” category on the left. Check the contents of the selected menu in the right. Change the value of the desired fields, then click the Save button or the Save icon at the top. -
Page 66
1000i Series IP Phone (SMB) User Guide Issue 1.0 Check and change the value of Profile Number item on the top. Click the Save button or the Save icon at the top. The confirmation text that the profile number has changed is displayed in the upper left corner. It is not active yet, and changes to the profile are completed after the restart. -
Page 67: Appendix A: User Program Code
1000i Series IP Phone (SMB) User Guide Issue 1.0 11 Appendix A: User Program Code Extension User Program Code Table The Extension User program menu is shown in the LCD of iPECS Multi-button phones to guide users in programming features and functions. To use these codes, press the Transfer(PGM) key then enter the below code.
-
Page 68
1000i Series IP Phone (SMB) User Guide Issue 1.0 Code Description Active Conference Room De-active Conference Room Monitor Conference Group Multiple Mailbox Greeting {Call Log Display} Button Assignment Headset/Speakerphone Mode Change Ring Mode LCD Display Mode Version Display Background Music Station User Name Registration Display Phone IP Address Change Phone IP Address… -
Page 69
1000i Series IP Phone (SMB) User Guide Issue 1.0 Code Description Bomb Threat History Button Assignment Headset Button Assignment Toggle Ring Mode Button Assignment 8*6XYZA X,Y,Z,A: 1(Day), 2(Night), 3(Timed), 4(Auto) {SPEED} Button Assignment {CONFERENCE} button assignment {CALLBACK} button assignment {DND} button assignment {FLASH} button assignment {MUTE} button assignment {MONITOR} button assignment… -
Page 70: Appendix B: 1000I Series Model Specification
1000i Series IP Phone (SMB) User Guide Issue 1.0 12 Appendix B: 1000i Series Model Specification Enjoy a wide selection of easy-to-use system IP phones to enrich your communications experience with a powerful speaker phone and wideband voice support. 1000i Series phones from Entry level to advanced terminals, designed to best fit the users’ needs. Table 13: 1000i Series Models Specification Specification 1010i…
-
Page 71
1000i Series IP Phone (SMB) User Guide Issue 1.0 Specification 1010i 1020i 1030i 1040i 1050i IM Presence Local(Optional — 48V,0.3A) Power PoE (802.3af) Class 2 Class 2 Class 2 Class 3 Class 3 Codec G.711, G.729AB, G.722, Opus Call Signaling Audio Ericsson-LG Enterprise iPECS protocol Protocol… -
Page 72: Appendix C: Document Abbreviations
1000i Series IP Phone (SMB) User Guide Issue 1.0 13 Appendix C: Document abbreviations Acronym and Abbreviation For the purpose of this document, the following abbreviations hold. The following abbreviations are used to refer to the operating 1000i Series phone described in this Manual. Table 12: Abbreviation and acronym list Acronym Full name…
-
Page 73
1000i Series IP Phone (SMB) User Guide Issue 1.0 Acronym Full name Universal Night Answer Virtual Memory System VoIP Voice over Internet Protocol… -
Page 74: Appendix D: Open Source Software Notice
1000i Series IP Phone (SMB) User Guide Issue 1.0 14 Appendix D: Open Source Software Notice Open Source Software used in this product are listed as below. You can obtain a copy of the Open Source Software License from Ericsson-LG Enterprise Web site, http://www.ericssonlg-enterprise.com. Ericsson-LG Enterprise reserves the right to make changes at any time without notice.
-
Page 1: About This User Guide
LDP-7016D/24D Series User Guide LDP-7016D LDP-7024D About this User Guide: This User guide is intended to familiarize a user with the LDP-7016D and 7024D Keyset. For a more detailed description of the Keysets capabilities, please refer to the System User Guide.
-
Page 2: Table Of Contents
Table of Contents Getting Started LDP-7000 Series Model 7016D & 7024D Input / Output Devices and Button Cable Connection ADP (Additional Device Port) Placing or answering a call 1. Placing a call 2. Answering a call 3 Soft Button & Navigation Button Basic Function 1.
-
Page 3
Table of Contents Menu 1. Basic Program 1.1 Station name program 1.2 Ring program 1.2.1 Select Ring 1.2.2 Select melody 1.3 Mode (H/T/P) Program 1.4 Password Program 1.4.1 Password Register 1.4.2 Password Change 1.5 Language Program 1.6 ENBLOCK Mode Program 2. -
Page 4: Getting Started
Getting Started LDP-7000 Series, Model 7016D & 7024D LDP-7016D/7024D are advanced, user-friendly digital keysets, offering the convenience of 3 soft buttons and a navigation key. • Features -.Trendy and Stylish LDP Family design -.Multi Level 3 Line LCD (3 x 24) -.16 or 24 Flexible buttons with dual-color LED’s…
-
Page 5: Input / Output Devices And Button
Getting Started Input / Output Devices and Buttons Handset Message Waiting LED Earphone-Jack Socket Trans/Pgm Button (Ear/Mic Mode) Speaker Flexible Button (Loop Button) Speed Button Call back Button Dnd/Fwd Button Volume Button Speaker Button Hands-free Microphone Hold/Save Button Menu Button 3 Soft Button Phonebook Button (Same operation as ‘Speed’)
-
Page 6
Getting Started Handset Used for handset call. Earphone-Jack Socket Used to connect optional headset to the phone. Speaker Outputs tones and voice. Speed Button Used to access speed dialling, speed programming, saved number redial, and last number redial. Dnd/Fwd Button The DND (Do Not Disturb) feature blocks all incoming calls. -
Page 7: Cable Connection
Getting Started Cable Connection Cable connections A — Connect the telephone cord (curly cord) to the handset and the other end to the handset jack on the bottom of the telephone. B — Connect the line cable to the port on the bottom of the telephone and the other end to the wall socket.
-
Page 8: Adp (Additional Device Port)
Getting Started ADP (Additional Device Port)
-
Page 9
Getting Started ADP (Additional Device Port) -
Page 10: Placing Or Answering A Call
Placing and Answering a Call 1. Placing a Call ICM Line talk Lift handset Enter the extension number CO Line Dial 9 or select CO line flexible talk button. Lift handset Enter the desired phone number 2. Answering an Outside Call ICM Line talk Lift handset…
-
Page 11: Soft Button & Navigation Button
3 Soft Buttons & Navigation Button 3 Soft Button The 3 Soft Buttons are located beneath the LCD display. The function of each button changes, subject to call status and progress. The current functions are displayed on the LCD screen, directly above each button.
-
Page 12: Basic Function
Basic Function By pressing one of the 3 soft buttons you are able to select the indicated function. For instance, if you want to select call pickup (as shown below), press the first button on the left. If there are more than three functions available at any point, an arrow will be displayed on the LCD display.
-
Page 13: Conference
Basic Function 1.2 Conference Dial the desired station number. CALL TO STA 700 (e.g.700) FEB 01 04 05:34 pm Station 700 answers the call. FLASH Press [CONF] button. CALL TO STA 700 FEB 01 04 05:34 pm TRANS CONF MUTE Dial the phone number of the next desired station.
-
Page 14: Redial
Basic Function 1.3 Redial Press the [REDIAL] button. STATION 700 (T) FEB 01 04 05:34 pm PICKUP CONF REDIAL 123456789 Press [SEND] button to call. BACK NEXT SEND 123456789 Talk LINE 008 00:00:10 TRANS CONF MUTE 2. Off Hook : Press the [FWD] button to forward calls to another STATION 700 (T) station, Voicemail etc.
-
Page 15: Intercom Ring Back
Basic Function 4. Intercom Ring Back : Press to leave a your station number or message. CALL TO STA 700 FLASH : Press to disconnect the line and re-seize. FEB 01 04 05:34 pm FLASH 5. Intercom Busy : Press to leave your station number or message. BUSY : STA 700 CAMP-ON : Press to send a call waiting tone to a busy station [CALLBK]…
-
Page 16: Intercom Talk
Basic Function 9. Intercom Talk TRANS : Press to transfer an incoming call to another station. CALL FROM STA 704 CONF : Press to initiate a conference call. FEB 01 04 05:34 pm MUTE : Press to mute the handset, speakerphone, or headset TRANS CONF MUTE…
-
Page 17: Checking Messages
Basic Function 12. Checking messages NEXT : Press to move to the next message. VMIB MSG FROM EXTERNAL REPEAT : Press to repeat the current message. DELETE : Press to erase the current message. NEXT REPEAT DELETE : Press to tag the current message with your comment VMIB MSG FROM EXTERNAL before forwarding.
-
Page 18: Call Log
Call Log Call Log Button PGM : Trans/Pgm + Flexible button + Trans/Pgm ’57’ Press the [Call Log] button. RECEIVED CALL : Received call list * RECEIVED CALL DIALED CALL : Dialed call list 2. DIALED CALL LOST CALL : Missed call list* LOST CALL * CLI (Calling Line ID) mandatory.
-
Page 19: Dialed Call
Call Log 2. Dialled Call Press [OK] or button. 1. RECEIVED CALL DIALED CALL Press [OK] or button. 123456789 02/01 09:02 BACK 123456789 LINE 125 00:00:03 TRANS CONF MUTE NOTE NOTE BACK Return to the previous…
-
Page 20: Lost Call
Call Log 3. Lost Call Press [OK] or button. LOST CALL Press the [SELECT] button to select the following 0123456789 functions: ANSWER, DEL CUR (delete current) 03/10 16:02 CNT :01 DEL ALL (delete all), SAVE, NAME/TEL BACK SELECT> ANSWER 3.1 ANSWER 0123456789 03/10 16:02…
-
Page 21: Del All (Delete All)
Call Log 3.3 DEL ALL Press [SELECT] until [DEL ALL] appears in display. 0123456789 Press [DEL ALL] to initiate ‘delete all’ function. 14/07 16:02 CNT :01 BACK SELECT > DEL ALL ALL CLI DELETE Press the [HoldSave] button to confirm ‘delete all’ Press HOLD Key function.
-
Page 22: Menu
Menu BASIC PROGRAM 2. ADVANCED PROGRAM Press the [Menu] button. 1. BASIC PROGRAM ADVANCED PROGRAM Press the [Navigation] button. SPEED PROGRAM 4. MOBILE EXTENSION PGM Press the [Navigation] button. 3. SPEED PROGRAM MOBILE EXTENSION PGM Press the [Navigation] button. CONFERENCE ROOM PGM 6.
-
Page 23: Basic Program
Menu 1. BASIC PROGRAM BASIC PROGRAM 2. ADVANCED PROGRAM Press the [MENU] button. Press [OK] or button. 1.1 STATION NAME PROGRAM STATION NAME PROGRAM Press [OK] or button. 2. RING PROGRAM BACK Enter the name. ENTER NAME ( ) BACK For detailed information about entering name, see the page 49.
-
Page 24: Ring Program
Menu 1.2 RING PROGRAM Press [OK] or button. 1. STATION NAME PROGRAM 2. RING PROGRAM BACK ICM RING 2. ICM MELODY BACK Press [Navigation] button. 1. ICM RING ICM MELODY BACK Press [Navigation] button. CO RING 4. CO MELODY BACK Press [Navigation] button.
-
Page 25: Select Ring
Menu 1.2.1 Select Ring Press [OK] or button. ICM RING 2. ICM MELODY BACK RING TYPE : 01 (01-15) Step using [NEXT] or button to select the ring. SELECT [NEXT] BACK NEXT Press [OK] or button. The selected ring type is RING TYPE : 02 (01-15) SELECT…
-
Page 26: Mode(H/T/P) Program
Menu 1.3 MODE(H/T/P) PROGRAM Press the [OK] or button. MODE(H/T/P) PROGRAM 4. PASSWORD PROGRAM BACK Press [NEXT] or button to select the mode. TONE MODE SELECT BY [NEXT] There are three types as follows; BACK NEXT -. HANDSFREE MODE -. TONE MODE -.
-
Page 27: Password Program
Menu 1.4 PASSWORD PROGRAM Press [OK] or button. 3. MODE(H/T/P) PROGRAM PASSWORD PROGRAM BACK 1.4.1 PASSWORD REGISTER Use [Next] or button to select the > PASSWORD REGISTER password register. SELECT BY [NEXT] BACK NEXT Then press [OK] or button. Enter password. (5 digits) ENTER PASSWORD : e.g.) 55555 BACK…
-
Page 28: Password Change
Menu 1.4.2 PASSWORD CHANGE > PASSWORD CHANGE Use [Next] or button to select the password SELECT BY [NEXT] change. BACK NEXT Then press [OK] or button. Enter the current password. (5 digits) ENTER CURRENT PASSWORD e.g.) 55555 BACK Enter the new password. (5 digits) ENTER PASSWORD : e.g.) 33333 BACK…
-
Page 29: Language Program
Menu 1.5 LANGUAGE PROGRAM LANGUAGE PROGRAM Press [OK] or button. 6. ENBLOCK MODE BACK Use [NEXT] or button to select language. > ENGLISH LCD LANGUAGE BACK NEXT > KOREAN Press [OK] or button. LCD LANGUAGE BACK NEXT 1.6 ENBLOCK MODE PROGRAM 5.
-
Page 30: Advanced Program
Menu 2. ADVANCED PROGRAM 1. BASIC PROGRAM ADVANCED PROGRAM Press button. Press [MENU] button. 2.1 WAKE UP PROGRAM 2.1.1 Setting Press button. WAKE UP PROGRAM 2. PRESELECTED MSG PGM BACK Enter the time and select single time or every day. ENTER YOUR WAKEUP TIME -S:Single (once only — Default) HH:MM…
-
Page 31: Canceling
Menu 2.1.2 Canceling Press [OK] or button. WAKE UP PROGRAM 2. PRESELECTED MSG PGM BACK Press [ERASE] button. ENTER YOUR WAKEUP TIME 07 : 00-S *10:34 pm BACK ERASE Press [OK] or button. ERASED WAKEUP TIME 07 : 00-S *10:34 pm BACK ERASE…
-
Page 32: Pre-Selected Msg Pgm
Menu 2.2 PRESELECTED MSG PGM 2.2.1 Select the MSG PGM Press [OK] or button. 1. WAKE UP PROGRAM PRESELECTED MSG PGM BACK button SELECT BY UP/DOWN KEY to select the desired type. BACK OUT OF OFFICE Press [OK] or button. RETURN AT TIME XX:XX BACK Enter the time (24 hr format)
-
Page 33: Canceling/ Changing
Menu 2.2 PRESELECTED MSG PGM 2.2.2 Canceling / Changing Press [OK] or button. 1. WAKE UP PROGRAM 2. PRESELECTED MSG PGM BACK Press [ERASE] button to cancel the pre-selected OUT OF OFFICE message and return to the[Message select mode]. RETURN AT TIME XX:XX Press [BACK] button to return to the previous LCD BACK ERASE…
-
Page 34: Station Cos Program
Menu 2.3 STATION COS PROGRAM Press [OK] or button. STATION COS PROGRAM 4. SPK/HEADSET PROGRAM BACK To activate STA COS (Station Class Of Service), password is required.. 2.3.1 COS DOWN MODE Use [NEXT] or button to select the > COS DOWN MODE SELECT BY [NEXT] COS DOWN MODE.
-
Page 35: Restoring Cos Mode
Menu 2.3.2 RESTORING COS MODE Use [NEXT] or button to select > RESTORE COS MODE SELECT BY [NEXT] the RESTORE COS MODE. BACK NEXT Press [OK] or button. Enter the password (5 digits)to change ENTER CURRENT PASSWORD RESTORE COS MODE. BACK Press [OK] or button.
-
Page 36: Walking Cos Mode
Menu 2.3.3 WALKING COS MODE Use [NEXT] or button to select WALKING COS > WALKING COS MODE MODE. SELECT BY [NEXT] BACK NEXT Press [OK] or button. ENTER COS OVERRIDE CODE Enter the COS Override code (Password — 5 digits) BACK e.g.- 12345 Press [OK] or…
-
Page 37: Spk/Headset Program
Menu 2.4 SPK/HEADSET PROGRAM 3. STATION COS PROGRAM Press [OK] or button. SPK/HEADSET PROGRAM BACK Use [NEXT] or button to toggle the mode. SPEAKER MODE SELECT BY [NEXT] There are two types as follows; BACK NEXT -. SPEAKER MODE -. HEADSET MODE Press [OK] or button to save selected mode.
-
Page 38: Speed Program
Menu 3. SPEED PROGRAM SPEED PROGRAM 4. MOBILE EXTENSION PGM Press [MENU] button. Press [OK] or button. Enter the speed bin number. e.g.) 007 ENTER SPD BIN NO(000) BACK Enter the phone number. > e.g.) 123456789 ENTER CO-BTN/DIGIT (007) BACK DELETE Press [DELETE] button to delete speed bin number.
-
Page 39: Mobile Extension
Menu 4. MOBILE EXTENSION PGM 3. SPEED PROGRAM MOBILE EXTENSION PGM Press [OK] or button. Press [MENU] button. Refer to IP LDK system & LDK system programming manual. 4.1 MOBILE EXT. NUM PGM Press [OK] or button. 1. MOBILE EXT. NUM PGM 2.
-
Page 40: Conference Room
Menu 5. CONFERENCE ROOM PGM CONFERENCE ROOM is not available on the IPLDK-20. CONFERENCE ROOM PGM 6. HOT DESK PROGRAM Press [MENU] button. Press [OK] or button. 5.1 CREATE CONF ROOM CREATE CONF ROOM Press [OK] or button. 2. DELETE CONF ROOM BACK Enter conference room number DIAL NO(1 9) AND PASSWD…
-
Page 41: Hot Desk Program
Menu 6. HOT DESK PROGRAM 5. CONFERENCE ROOM PGM HOT DESK PROGRAM Press [MENU] button. Press [OK] or button. Refer to IP LDK system programming manual. 6.1 HOT DESK LOG IN HOT DESK LOG IN Press [OK] or button. 2. HOT DESK LOG OUT BACK DUMMY STATION 700 Enter password.(5 digits)
-
Page 42: Hot Desk Log Out
Menu 6.2 HOT DESK LOG OUT Press [OK] or button. 1. HOT DESK LOG IN HOT DESK LOG OUT BACK button or button to select AGENT LOGOUT WITH NO FORWARD SET ? forward type and then Press [OK] or button. Forward type — NO FORWARD SET — FORWARD TO VMIB…
-
Page 43: Phone Book
Phone Book [PHONE BOOK] and [DIAL: BY NAME] are the same feature. 1. DIAL BY ICM NAME 3. DIAL BY SYS SPD NAME 2. DIAL BY STA SPD NAME 1. Dial By ICM Name Press [OK] or button. DIAL BY ICM NAME 2.
-
Page 44: Dial By Sta Spd Name
Phone Book 2. Dial By STA SPD Name 1. DIAL BY ICM NAME Press [OK] or button. DIAL BY STA SPD NAME To check the number of the selected name, press the 1:ABC(001) [NAME/TEL] button. 2:DEF(002) Use the button or button to select BACK NAME/TEL…
-
Page 45: Entering Characters
Entering characters…
-
Page 46: Glossary Of Terms
Glossary of Terms Intercom – describes internal calls within the telephone system CO Line Central Office Line – also known as a trunk line, exchange line or outside line Speed Dial A commonly used number stored in a speed bin for easy access Do Not Disturb –…

Коды функций для
программируемых кнопок
Таблица соответствия кодов и функций
модели
LDP- 7208D
Назначение кнопки
[CONF]
Назначение кнопки
[CALLBK]
Назначение кнопки
[DND/FWD]
Назначение кнопки
[FLASH]
Назначение кнопки
[MUTE]
Назначение кнопки
[MON]
Назначение кнопки
[REDIAL]
Установка типа звонка
Блочный режим набора номера
Ear-Mic Гарнитура
Установка типа звонка внутр. вызова
Установка типа звонка внешнего вызова
Понижение класса сервиса
Восстановление класса сервиса
Мобильный класс сервиса
Регистрация кода авторизации
Изменение кода авторизации
Назначение времени сигнала будильника
Установка сообщения об отсутствии
Назначение текста сообщ
—
я об отсутствии
Запись разговора
Запись приветствия
Прослушивание времени и даты
Прослушивание номера абонента
Прослушивание статуса абонента
Запись сообщения для оповещения
Удаление приветствия
Удаление сообщения для оповещения
Смена языка отображения
Фоновая музыка
Программирование имени абонента
Выбор режима Спикерфон
/
Гарнитура
Режим звонка при использовании
гарнитуры
Доступ к функции Код учета
Удержание внутреннего вызова
Назначение кнопки
[LOOP]
Назначение кнопки
[Camp-on]
Назначение кнопки
[Call Log]
Создание групповой конференции
Отмена групповой конференции
TRANS/PGM + 91
TRANS/PGM + 92
TRANS/PGM + 93
TRANS/PGM + 94
TRANS/PGM + 95
TRANS/PGM + 96
TRANS/PGM + 97
TRANS/PGM + 11
TRANS/PGM + 14
TRANS/PGM + 17
TRANS/PGM + 18
TRANS/PGM + 19
TRANS/PGM + 21
TRANS/PGM + 22
TRANS/PGM + 23
TRANS/PGM + 31
TRANS/PGM + 32
TRANS/PGM + 41
TRANS/PGM + 51
TRANS/PGM + 52
TRANS/PGM + 54
TRANS/PGM + 61
TRANS/PGM + 62
TRANS/PGM + 63
TRANS/PGM + 64
TRANS/PGM + 65
TRANS/PGM + 66
TRANS/PGM + 67
TRANS/PGM + 71
TRANS/PGM + 73
TRANS/PGM + 74
TRANS/PGM + 75
TRANS/PGM + 76
TRANS/PGM + 80
TRANS/PGM + 8
3
TRANS/PGM + 84
TRANS/PGM + 85
TRANS/PGM + 57
TRANS/PGM +
43
TRANS/PGM +
44
Функция
Код
15
-
Инструкции по эксплуатации
1

LG GS-5140 инструкция по эксплуатации
(2 страницы)
- Языки:Русский
-
Тип:
PDF -
Размер:
6.26 MB -
Описание:
Телефонный аппарат
Просмотр
На NoDevice можно скачать инструкцию по эксплуатации для LG GS-5140. Руководство пользователя необходимо для ознакомления с правилами установки и эксплуатации LG GS-5140. Инструкции по использованию помогут правильно настроить LG GS-5140, исправить ошибки и выявить неполадки.