Increase more than 700% of Email Subscribers!
Dolor aliquet augue augue sit magnis, magna aenean aenean et! Et tempor, facilisis cursus turpis tempor odio. Diam lorem auctor sit, a a? Lundium placerat mus massa nunc habitasse, arcu, etiam pulvinar.
- Goblinus globalus fantumo tubus dia
- Scelerisque cursus dignissim lopatico
- Montes vutario lacus quis preambul den
- Leftomato denitro oculus softam lorum
- Spiratio dodenus christmas gulleria tix
- Dualo fitemus lacus quis preambul pat
- Montes vutario lacus quis digit turtulis

We hate spam and never share your details.
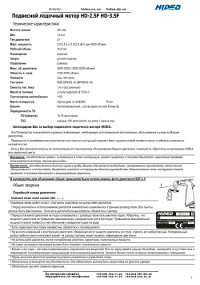
Руководство по эксплуатации и техническому обслуживанию подвесных лодочных моторов Hidea HD-2.5F и HD-3.5F.
- Год издания: —
- Страниц: 10
- Формат: PDF
- Размер: 1,0 Mb

Руководство по эксплуатации и техническому обслуживанию четырехтактного подвесного лодочного мотора Hidea HDF2.5.
- Год издания: —
- Страниц: 22
- Формат: PDF
- Размер: 2,8 Mb

Руководство по эксплуатации и техническому обслуживанию четырехтактных подвесных лодочных моторов Hidea HDF4 и HDF5.
- Год издания: —
- Страниц: 22
- Формат: PDF
- Размер: 3,1 Mb
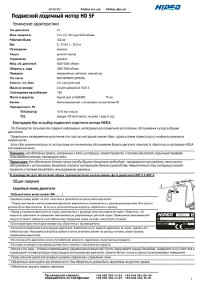
Руководство по эксплуатации и техническому обслуживанию подвесного лодочного мотора Hidea HD5F.
- Год издания: —
- Страниц: 16
- Формат: PDF
- Размер: 1,9 Mb

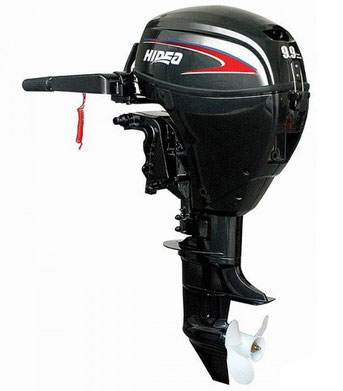
Руководство по эксплуатации и техническому обслуживанию двухтактных подвесных лодочных моторов Hidea HD8F/HD9.8F/HD9.9FLT.
- Год издания: —
- Страниц: 19
- Формат: PDF
- Размер: 1,9 Mb

Руководство по эксплуатации и техническому обслуживанию подвесных лодочных моторов Hidea HD9.9F и HD15F.
- Год издания: —
- Страниц: 9
- Формат: DOC
- Размер: 3,2 Mb

Руководство по эксплуатации и техническому обслуживанию четырехтактных подвесных лодочных моторов Hidea HDF9.9H и HDF15H.
- Год издания: —
- Страниц: 22
- Формат: PDF
- Размер: 6,0 Mb

Руководство по эксплуатации и техническому обслуживанию подвесного лодочного мотора Hidea HDF-15.
- Год издания: —
- Страниц: 21
- Формат: PDF
- Размер: 1,0 Mb

Руководство по эксплуатации и техническому обслуживанию двухтактных подвесных лодочных моторов Hidea HD25F и HD30F.
- Год издания: —
- Страниц: 20
- Формат: PDF
- Размер: 3,4 Mb

Руководство по эксплуатации и техническому обслуживанию двухтактного подвесного лодочного мотора Hidea HD40F.
- Год издания: —
- Страниц: 84
- Формат: PDF
- Размер: 3,7 Mb
- Manuals
- Brands
- Hidea Manuals
- Outboard Motor
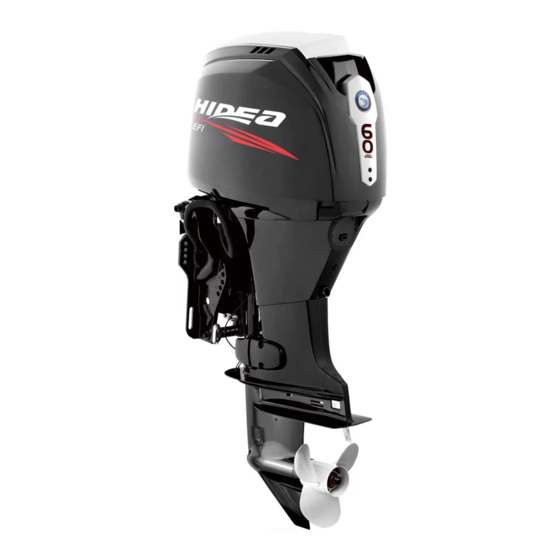
- F60
- Owner’s manual
-
Contents
-
Table of Contents
-
Troubleshooting
-
Bookmarks
Quick Links
Owner’s Manual
Outboard Motor Series
·
F60
·
F40
Related Manuals for Hidea F60
Summary of Contents for Hidea F60
-
Page 1
Owner’s Manual Outboard Motor Series · ·… -
Page 2
Read this manual carefully before operating this outboard motor. Keep this manual onboard in a waterproof bag when boating. This manual should stay with the outboard motor if it is sold. -
Page 3
Thank you for selecting a Hidea outboard TIP: motor. This Owner’s Manual contains infor- The F40, F60 and the standard accessories mation needed for proper operation, mainte- are used as a base for the explanations and nance and care. A thorough understanding of illus- trations in this manual. -
Page 4: Table Of Contents
Table of contents Safety information……………………….1 ….14 Specifications of Battery ……. 1 …. 14 Outboard motor safety Remote control requirements ……….. 1 ……14 Propeller Mounting battery ……..1 ……14 Rotating parts Multiple batteries ……….. 1 ……15 Hot parts Propeller selection ……..
-
Page 5
Table of contents Power trim and tilt switch on remote Command link multifunction speed & …… 26 ……..40 control or tiller handle fuel meters Power trim and tilt switch Command link multifunction ……..41 on bottom cowling………………………..… speedometers Command link multifunction … -
Page 6
Table of contents …. 57 ……71 Manual start and electric start Replacement parts ……….57 ..72 models Maintenance interval guidelines ….. 57 ……73 Checks after engine warm up Maintenance chart 1 ……….. 57 ……75 Shifting Maintenance chart 2 …….. -
Page 7: Safety Information
Safety information tor and the clamp bracket when the motor is Outboard motor safety trimmed or tilted. Keep body parts out of this Observe these precautions at all times. area at all times. Be sure no one is in this area before operating the power trim and tilt Propeller mechanism.
-
Page 8: Gasoline Exposure And Spills
Have an approved personal flotation device tions. Overloading incorrect weight (PFD) on board for every occupant. Hidea distribution can compromise the boats han- recommends that you must wear a PFD dling and lead to an accident, capsizing or…
-
Page 9: Avoid Collisions
Safety information swamping. Accident reporting Avoid collisions Boat operators are required by law to file a Boating Accident Report with their state Scan constantly for people, objects, and oth- er boats. Be alert for conditions that limit your boating law enforcement agency if their boat visibility or block your vision of others.
-
Page 10: Basic Boating Rules (Rules Of The Road)
Safety information Basic boating rules (Rules of the road) “ The general prudential rule ” This rule is called Rule 2 in the International Just as there are rules that apply when you Rules and says, are driving on streets and highways, there “…
-
Page 11: Other Special Situations
Safety information the starboard (right) side must keep out of the way of the other. If the other vessel is on your right, you must keep out of its way; you are the Give-Way vessel. If the other vessel is on your port (left) side, remember that you should maintain course and direction, provided the other vessel gives you the right-of-way as it…
-
Page 12
Safety information If another vessel is around the bend, it too red buoys are passed on the starboard (right) should sound the whistle. Even if no reply is side when proceeding from open water into heard, however, the vessel should still pro- port, and black buoys are to port (left) side. -
Page 13
General information… -
Page 14: General Information
Record your outboard motor serial number in the spaces provided to assist you in ordering spare parts from your Hidea dealer or for reference in case your outboard motor is sto- len. 1. Key number 1.
-
Page 15: Read Manuals And Labels
Read any manuals supplied with the boat. ● Read all labels on the outboard motor and the boat. ● If you need any additional information, contact your Hidea dealer. Warning labels If these labels are damaged or missing, contact your Hidea dealer for replacements. F40, F60…
-
Page 16
General information… -
Page 17
General information Electrical hazard Symbols The following symbols mean as follows. Notice/Warning Remote control lever/gear shift lever operat- ing direction, dual direction Read Owner’s Manual Engine start/ Engine cranking Hazard caused by continuous rotation… -
Page 18: Specifications And Requirements
16. Engine: Dimension: Type: Overall length: 4-stroke L F40 711 mm (28 in) F60 711 mm (28 in) Displacement: 747 cm Overall width: 996.0 cm F40 409 mm (16 in) Bore stroke: F60 409 mm (16 in) 65.0 …
-
Page 19
Gear positions: gear oil SAE#90 Forward-neutral-reverse Tightening torque for engine: Gear ratio: Spark plug: (28/12) F60 (1.84 kgf-m, 13.3 ft-lb) F60 (28/12) F40 25N·m Trim and tilt system: (1.84 kgf-m, 13.3 ft-lb) F40 Power trim and tilt 25N·m Propeller mark: F40… -
Page 20: Battery Requirements
Specifications and requirements (1.84 kgf-m, 13.3 ft-lb) F60 with a start-in-gear protection device(s). This 18.0 Nm device prevents the engine from starting un- (1.84 kgf-m, 13.3 ft-lb) less it is in neutral. Propeller nut: Battery requirements (3.57 kgf-m, 25.8 ft-lb) F60 35.0 Nm…
-
Page 21: Propeller Selection
Your Hidea dealer can help you select the right propeller for your boating needs. Select a propeller that will allow the engine to reach…
-
Page 22: Engine Oil Requirements
If knocking or ping- lowing SAE and API oil classifications ing occurs, use a different brand of gasoline Engine oil type SAE: or premium unleaded fuel. Hidea recomends 10W-30 or 10W-40 that you use alcohol-free (see Gasohol) Engine oil grade API: gasoline whenever possible.
-
Page 23: Ring Free Fuel Additive
(including metric sizes), and While many additives available may reduce electrical tape. deposits, Hidea recommends the use of Ring Waterproof flashlight with extra batteries. ● Free Fuel Additive, available from your An extra engine shut-off cord (lanyard) ●…
-
Page 24: Star Labels
Specifications and requirements rine SI engines. See the label affixed to your engine for details. Approval label of emission control certif- icate This label is attached to the bottom cowling. New Technology; (4-stroke) 1. Manufactured date label location 1. Approval label location Star labels Your outboard motor is labeled with a Cali- fornia Air Resources Board (CARB) star la-…
-
Page 25
Specifications and requirements meet the Air Resources Board’s Personal One Star—Low Emission Watercraft and Outboard marine engine The one-star label identifies engines that 2008 exhaust emission standards or the meet the Air Resources Board’s 2001 ex- Sterndrive and Inboard marine engine 2003- haust emission standards. -
Page 26: Components
Components diagram TIP: * May not be exactly as shown; also may not be included as standard equipment on all mod- els (order from dealer). F40, F60 HIDEA SPEED K m /h kn o t m p h k m m il e…
-
Page 27: Fuel Tank
Components 1. Tachometer unit (Square type)* 2. Tachometer unit (Round type)* 3. Speedometer unit (Square type)* 4. Speed & fuel meter unit (Square type)* 5. Speed & fuel meter unit (Round type)* 6. Fuel management meter (Square type)* Fuel tank If your model was equipped with a portable fuel tank, its function is as follows.
-
Page 28: Fuel Gauge
Components engine will continue to run at idle until the le- Fuel gauge ver is moved about 35 (a detent can be felt). This gauge is located on either the fuel tank Moving the lever farther opens the throttle, cap or on the fuel joint base. It shows the ap- and the engine will begin to accelerate.
-
Page 29: Tiller Handle
Components trol lever in the neutral position and lift the neutral throttle lever. 1. Fully open 2. Fully closed TIP: The neutral throttle lever will operate only when the remote control lever is in neutral. The remote control lever will operate only 1.
-
Page 30: Throttle Friction Adjuster
Components When constant speed is desired, tighten the 1. Throttle indicator adjuster to maintain the desired throttle set- ting. Throttle friction adjuster Engine shut-off cord (lanyard) and clip A friction device provides adjustable resis- The clip must be attached to the engine shut- tance to movement of the throttle grip or the off switch for the engine to run.
-
Page 31: Engine Stop Button
Components Main switch The main switch controls the ignition system; its operation is described below. “ ” (off) ● With the main switch in the “ ” (off) posi- tion, the electrical circuits are off, and the key can be removed. “…
-
Page 32: Power Trim And Tilt Switch On Remote
Components set according to operator preference. An ad- Nut tightening torque: juster lever is located on the bottom of the 3.8 Nm (0.38 kgf-m, 2.8 ft-lb) tiller handle bracket. To increase resistance, turn the lever to the TIP: port side “A”. Steering movement is blocked when the ●…
-
Page 33: Variable Trolling Rpm Switches
Components 1. Power trim and tilt switch Power trim and tilt switch on bottom cowling Variable trolling RPM switches The power trim and tilt switch is located on The trolling speed can be adjusted when the the side of the bottom cowling. Pushing the outboard motor is trolling.
-
Page 34: Trim Tab With Anode
Bolt tightening torque: If the boat tends to veer to the left (port side), F40, F60 18.0 Nm (1.8 kgf-m, 13 ft-lb) turn the trim tab rear end to the port side “A” in the figure. If the boat tends to veer to the…
-
Page 35: Cowling Lock Lever(S) (Turn Type)
Components an additional support device to secure it in the tilt position. Cowling lock lever(s) (turn type) To remove the engine top cowling, turn the cowling lock lever(s) and lift off the cowling. When installing the cowling, check to be sure it fits properly in the rubber seal.
-
Page 36
● when the gear shift is in neutral. If the alert system has activated, stop the ● engine and consult a Hidea dealer im- mediately. TIP: Adding an in-line 10-micron fuel filter has been show to greatly reduce the chance of fuel contamination problems. -
Page 37: Instruments And Indicators
Instruments and indicators the power trim and tilt switch. Digital tachometer If the trim angle of your motor exceeds the ● trim operating range, the top segment on The tachometer shows the engine speed the trim meter display will blink. and has the following functions.
-
Page 38: Low Oil Pressure-Alert Indicator
Instruments and indicators Low oil pressure-alert indicator If oil pressure drops too low, the alert indica- tor will start to blink. For further information, see page 43. NOTICE Do not continue to run the engine if the ● low oil pressure-alert indicator is on and the engine oil level is lower.
-
Page 39: Fuel Gauge
Consult Press the “ ” (set) button; the hour dis- your Hidea dealer on how to correctly set the play will begin blinking. selector switch. NOTICE: Running out of Press the “ ” (mode) button until the fuel can damage the engine.
-
Page 40: Fuel Level-Alert Indicator
Get back to the port soon if an alert device has activated. For charging the battery, con- sult your Hidea dealer. The clock operates on battery power. Dis- connecting the battery will stop the clock. Reset the clock after connecting the battery.
-
Page 41: Overheat-Alert Indicator
Instruments and indicators NOTICE Do not continue to run the engine if the ● low oil pressure-alert indicator is on and the engine oil level is lower. Serious engine damage will occur. The low oil pressure-alert indicator ● does not indicate the engine oil level. Use the oil dipstick to check the re- maining oil quantity.
-
Page 42: Command Link Multifunction
For the optional sensor, consult your Hidea dealer. The tachometer unit is available in round or square types. Check your tachometer unit type.
-
Page 43: Start-Up Checks
The default engine idle speed is reset au- ● sounds and the water separator-alert indica- tomatically when the display is switched to tor blinks, consult your Hidea dealer imme- the normal display. The default engine idle diately. speed is also reset automatically when the…
-
Page 44: Overheat Alert
(fuel filter) while decrease to about 2000 r/min. cruising. In such an event, stop the engine immediately and see page 95 of this manual to drain the water from the fuel filter. Get back to the port soon and consult a Hidea…
-
Page 45: Low Battery Voltage-Alert
Instruments and indicators dealer immediately. NOTICE In such an event, the engine will not oper- ate properly. Consult a Hidea dealer im- mediately. Low battery voltage-alert If the battery voltage drops, the low battery voltage-alert indicator and the battery volt- age value will start to blink.
-
Page 46: Command Link Multifunction Speed & Fuel Meters
For the optional sensors, consult your Hidea dealer. The speed & fuel meter unit is available in round or square types. Check your speed &…
-
Page 47: Command Link Multifunction Speedometers
For the optional sensors, consult display, fuel economy display, and remaining your Hidea dealer. fuel display. The chosen display is selected After the main switch is first turned on, all the by using the “…
-
Page 48
Instruments and indicators ation. For more information, see the operation manual originally supplied with the meter. 1. Set button 2. Mode button 1. Fuel flow meter 2. Multifunction display… -
Page 49: Engine Control System
Alert system NOTICE Do not continue to operate the engine if a alert device has activated. Consult your Hidea dealer if the problem cannot be located and corrected. Overheat alert This engine has an overheat-alert device. If the engine temperature rises too high, the alert device will activate.
-
Page 50
Check the oil level and add oil as needed. If the oil level is correct and the alert device does not switch off, consult your Hidea dealer. The buzzer will sound (if equipped on the ●… -
Page 51: Installation
Test runs at differ- centerline (keel line) of the boat. ent heights can help determine the optimum mounting height. Consult your Hidea deal- er or boat manufacturer for further informa- tion on determining the proper mounting height.
-
Page 52
Installation NOTICE Make sure that the idle hole is high ● enough to prevent water from entering the engine even if the boat is stationary with the maximum load. Incorrect engine height or obstructions ● to the smooth flow of water (such as the design or condition of the boat, or ac- cessories, such as transom ladders or depth finder transducers) can create… -
Page 53: Operation
Operation For 10 hours for breaking in engine First-time operation avoid extended idling, rough water and crowded areas. Fill engine oil 1. For the first hour of operation: The engine is shipped from the factory with- Run the engine at varying speeds up to out engine oil.
-
Page 54: Remove The Top Cowling
Hidea dealer. Fuel system Gasoline and its vapors are highly flam- mable and explosive.
-
Page 55: Engine Shut-Off Cord (Lanyard)
Operation turns smoothly and that it completely re- turns to the fully closed position. Look for loose or damaged connections of ● the throttle and shift cables. Remote control models: Turn the steering wheel full-right and full- ● left. Make sure operation is smooth and unrestricted throughout the whole range with no binding or excessive free play.
-
Page 56: Engine
Consult and the engine can overheat during oper- your Hidea dealer if the oil level is out of ation. specified level or if it appears milky or dirty.
-
Page 57: Power Trim And Tilt System
After installing, check the fitting of the top cowling by pushing it with both hands. If the top cowling is loose, have it repaired by your Hidea dealer. 1. Trim and tilt rod 4. Check that the trim and tilt rod is free of corrosion or other flaws.
-
Page 58: Operating Engine
Operation cording to this procedure to reduce the Do not smoke and keep away from risk of fire and explosion. sparks, flames, static electric discharge, Gasoline is poisonous and can cause or other sources of ignition. ● injury or death. Handle gasoline with If you use a portable container to store care.
-
Page 59: Sending Fuel (Portable Tank)
Operation line is highly flammable, and its vapors are flammable and explosive. Refrain from smoking, and keep away from open flames and sparks while loosen- ing the air vent screw. This product emits exhaust gases ● which contain carbon monoxide, a col- orless, odorless gas which could cause brain damage or death when inhaled.
-
Page 60: Starting Engine
Operation Place the gear shift lever in neutral. 1. Arrow TIP: The start-in-gear protection device prevents Starting engine the engine from starting except when in neu- tral. Attach the engine shut-off cord to a se- Before starting the engine, make sure that cure place on your clothing, or your arm or the boat is tightly moored and that you leg.
-
Page 61
Operation page 57. If the engine is warm and fails to start, ● open the throttle slightly and try to start the engine again. If the engine still fails to start, see page 86. Electric start and remote control models WARNING Failure to attached engine shut-off cord ●… -
Page 62: Checks After Starting Engine
Immediately after the engine starts, re- case or the cooling water pilot hole is lease the main switch and allow it to re- blocked. Consult your Hidea dealer if the turn to “ ” (on). NOTICE: Never turn problem cannot be located and cor- the main switch to “…
-
Page 63: Shifting
Pull the neutral interlock trigger up (if serious engine damage could occur. equipped). Check the oil level and add engine oil if necessary. Consult your Hidea dealer if the cause for the low oil pressure alert cannot be found. Checks after engine warm up…
-
Page 64: Stopping Boat
Operation After the engine is at idle speed in gear move the remote control lever / gear shift lever firmly and crisply into the neutral position. To shift from in gear (forward/reverse) to neutral Close the throttle so that the engine slows to idle speed.
-
Page 65: Stopping Engine
Operation pact the steering wheel or other parts of the 50 r/min each time a switch is pressed. boat. This could increase the risk of If the trolling speed has been adjusted, the ● serious injury. It could also damage the engine returns to the normal trolling speed shift mechanism.
-
Page 66: Trimming Outboard Motor
Operation After stopping the engine, disconnect Remove the key if the boat will be left un- the fuel line if there is a fuel joint on the attended. outboard motor. TIP: The engine can also be stopped by pulling the cord and removing the clip from the en- gine shut-off switch, then turning the main switch to “…
-
Page 67: Adjusting Trim Angle (Power Trim And Tilt)
Operation switch while the boat is moving. Adjust the outboard motor trim angle using the power trim and tilt switch. 1. Power trim and tilt switch 1. Trim operating angle Adjusting trim angle (Power trim and tilt) WARNING 1. Power trim and tilt switch Be sure all people are clear of the out- ●…
-
Page 68: Adjusting Boat Trim
Operation To lower the bow (trim-in), press the switch “ ” (down). Make test runs with the trim set to different angles to find the position that works best for your boat and operating conditions. Adjusting boat trim When the boat is on plane, a bow-up attitude results in less drag, greater stability and effi- ciency.
-
Page 69: Procedure For Tilting Up (Power Trim And Tilt Models)
Operation WARNING Make sure that no one is near the out- board motor when tilting the outboard motor up or down. Otherwise, body parts could be crushed between the outboard motor and the clamp bracket. Leaking fuel is a fire hazard. If there is a Press the power trim and tilt switch “…
-
Page 70: Procedure For Tilting Down (Power Trim And Tilt Models)
Operation and tilt switch “ ” (down) to retract the trim rods. NOTICE: Make sure that the trim rods retracts completely during mooring. This protects the rods from marine growth corrosion, which could damage power trim tilt mechanism. Pull the tilt support lever toward you to Procedure for tilting down (power trim support the engine.
-
Page 71: Shallow Water
Operation Slightly tilt the outboard motor up to the Shallow water desired position using the power trim and tilt switch. WARNING! Using the Power trim and tilt models power trim and tilt switch on the bot- tom cowling while the boat is moving The outboard motor can be tilted up partially or engine is on could increase the to allow operation in shallow water.
-
Page 72: Cruising In Other Conditions
Operation To return the outboard motor to the nor- mal running position, press the power trim and tilt switch and slowly tilt the outboard motor down. Cruising in other conditions Cruising in salt water After operating in salt water, flush the cooling water passages with fresh water to prevent them from becoming clogged.
-
Page 73: Maintenance
Storing outboard motor to secure it in the tilt position. When storing your Hidea outboard motor for When storing or transporting the outboard prolonged periods of time (2 months or motor, make sure to follow the procedure list- longer), several important procedures must ed below.
-
Page 74: Procedure
Remove the top cowling and propeller. If the overheat alert device is activated, ● Install the flushing attachment over the turn the engine off, and consult your Hidea cooling water inlet. NOTICE: Do not run the dealer. engine without supplying it with cooling Run the engine at a fast idle for a few water.
-
Page 75: Lubrication
81. Inspect the oil for the pres- ence of water that indicates a leaky seal. Seal replacement should be performed by an authorized Hidea dealer prior to use. Grease all grease fittings. For further de- tails, see page 76.
-
Page 76
Maintenance 1. Fitting 2. Garden hose adapter 3. Garden hose connector Screw the garden hose adapter onto a garden hose, which is connected to a fresh water supply, and then connect it to the garden hose connector. With the engine off, turn on the water tap and let the water flush through the cool- ing passages for about 15 minutes. -
Page 77: Cleaning The Outboard Motor
Hidea dealer or other qualified fitting after flushing the engine. mechanic do the work. TIP: The procedures involve disassembling When flushing the engine with the boat in the motor and exposing dangerous parts.
-
Page 78: Maintenance Interval Guidelines
Maintenance genuine Hidea parts or parts of equivalent design and quality. Any part of inferior quality may malfunction, and the resulting loss of control could endanger the operator and passengers. Hidea genuine parts and ac- cessories are available from your Hidea dealer.
-
Page 79: Maintenance Chart 1
The “ ” symbol indicates the check-ups which you may carry out yourself. The “ ” symbol indicates work to be carried out by your Hidea dealer. Initial Every 20 hours Item…
-
Page 80
Maintenance Initial Every 20 hours Item Actions (3 months) hours hours hours (1 year) (3 years) (5 years) Fuel filter (can be dis- Inspection or replace- assembled) ment as necessary Fuel line (High pres- Inspection sure) Fuel line (High pres- Inspection or replace- sure) ment as necessary… -
Page 81: Maintenance Chart 2
Maintenance Initial Every 20 hours Item Actions (3 months) hours hours hours (1 year) (3 years) (5 years) Cooling water inlet Inspection Inspection or replace- Main switch/stop switch ment as necessary Wire harness connec- Inspection or replace- tions/wire coupler con- ment as necessary nections (Hi d ea) Meter/gauge…
-
Page 82: Greasing
Maintenance Greasing Hidea marine grease (Water resistant grease) F40, F60 sion becomes excessive, or if carbon Cleaning and adjusting spark plug The spark plug is an important engine com- and other deposits are excessive, you ponent and is easy to inspect. The condition…
-
Page 83: Inspecting Idle Speed
Once the engine has warmed up, verify F40 18.0 Nm (1.84 kgf-m, 13.3 ft-lb) whether the idle speed is set to specifi- F60 18.0 Nm (1.84 kgf-m, 13.3 ft-lb) cation. For idle speed specifications, see page 12. If you have difficulty verifying the…
-
Page 84
Maintenance oil level is above the upper level mark, The engine oil should be extracted with an oil drain until the level meets the changer. specified capacity. Put the outboard motor in an upright po- sition (not tilted). NOTICE: If the out- board motor is not level, the oil level indicated on the oil dipstick may not be accurate. -
Page 85: Inspecting Wiring And Connectors
Inspect that each ground lead is properly ● and lower marks. Consult your Hidea dealer secured. if the oil level is out of specified level. 1. Lower level mark 2.
-
Page 86: Removing Propeller
Otherwise, the propeller could come off during oper- ation and be lost. Apply Hidea marine grease or a corro- Check the propeller shaft oil seal for dam- ● sion resistant grease to the propeller shaft.
-
Page 87: Changing Gear Oil
Propeller nut tightening torque: oil drain screw is at the lowest point pos- F40 35.0 Nm (3.57 kgf-m, 25.8 ft-lb) sible. F60 35.0 Nm (3.57 kgf-m, 25.8 ft-lb) Place a suitable container under the gear case. Align the propeller nut with the propeller Remove the gear oil drain screw and shaft hole.
-
Page 88: Cleaning Fuel Tank
Hypoid gear oil SAE#90 If you have any question about properly ● Gear oil quantity: doing this procedure, consult your Hidea F40 0.610 L dealer. (0.645 US qt, 0.537 Imp.qt) Keep away from sparks, cigarettes, ●…
-
Page 89: Inspecting And Replacing Anode(S)
Replace the gasket with a new one. Re- install the fuel joint assembly and tighten the screws firmly. Inspecting and replacing anode(s) Hidea outboard motors are protected from corrosion by sacrificial anodes. Inspect the external anodes periodically. Remove scales TIP: from the surfaces of the anodes.
-
Page 90: Using A Single Battery
Check the battery’s charge. If your boat is equipped with the digital speedometer, the voltmeter and low battery alert functions will help you monitor the battery’s charge. If the battery needs charg- ing, consult your Hidea dealer. 3. Check the battery connections. They 1. Red cable should be clean, secure, and covered by an 2.
-
Page 91: Disconnecting The Battery
Maintenance Disconnecting the battery 1. Turn off the battery cut-off switch (if equipped) and main switch. NOTICE: If they are left on, the electrical system can be damaged. Disconnect the negative cable(s) from the negative (-) terminal. NOTICE: Always disconnect all negative (-) cables first to avoid a short circuit and damage to the electrical system.
-
Page 92: Trouble Recovery
Q. Has fuel pump malfunctioned? If your outboard motor requires repair, bring it A. Have serviced by a Hidea dealer. to your Hidea dealer. If the engine trouble-alert indicator is flash- Q. Are spark plug(s) fouled or of incorrect ing, consult your Hidea dealer.
-
Page 93
Q. Is fuel contaminated or stale? A. Fill tank with clean, fresh fuel. Q. Is carburetor clogged? A. Have serviced by a Hidea dealer. Q. Is fuel filter clogged? A. Clean or replace filter. Q. Is fuel joint connection incorrect? A. -
Page 94
Q. Is fuel system obstructed? Q. Is water pump or thermostat faulty? A. Check for pinched or kinked fuel line or A. Have serviced by a Hidea dealer. other obstructions in fuel system. Q. Is there excess water in fuel filter cup? Q. -
Page 95: Replacing Fuse
3. Whether damage is found or not, return to the nearest harbor slowly and carefully. Q. Is propeller shaft damaged? 4. Have a Hidea dealer check the out- A. Have serviced by a Hidea dealer. board motor before operating it again.
-
Page 96: Power Trim And Tilt Will Not Operate
Trouble Recovery 1. Fuse puller Power trim and tilt will not operate If the engine cannot be tilted up or down with the power trim and tilt because of a dis- charged battery or a failure with the power trim and tilt unit, the engine can be tilted manually.
-
Page 97: Water Separator-Alert Indicator Blinks While Cruising
5. Unscrew the filter cup from the filter housing. NOTICE: Be careful not to twist the water detection switch lead when unscrewing the filter cup. 1. Water separator-alert indicator F40, F60 Stop the engine. Remove the top cowling. Remove the plastic tie.
-
Page 98
Firmly screw the filter cup onto the filter Have a Hidea dealer inspect the outboard housing. NOTICE: Be careful not to twist motor after returning to port. the water detection switch lead when screwing the filter cup onto the filter housing. -
Page 99: Starter Will Not Operate
Trouble Recovery Starter will not operate An unguarded, rotating flywheel is very ● If the starter mechanism does not operate dangerous. Keep loose clothing and (the engine cannot be cranked with the start- other objects away when starting the er), the engine can be started manually with engine.
-
Page 100: Emergency Starting Engine
Treatment of submerged motor If the outboard motor is submerged, immedi- ately take it to a Hidea dealer. Otherwise some corrosion may begin almost immedi- ately. NOTICE: Do not attempt to run the outboard motor until it has been com- Turn on the main switch.
This manual is also suitable for:
F40
Owner’s manuals PDF for Hidea outboard motor’s free download.
![]()
Hidea HDF 2.5 Owner’s Manual [ENG] PDF
Hidea HDF 2.5 Owner’s Manual [ENG].pdf
Adobe Acrobat Document
4.3 MB
![]()
Hidea HDF2.5 Owner’s Manual [RUS] PDF
Hidea HDF2.5.pdf
Adobe Acrobat Document
2.8 MB
![]()
Hidea HD2.5F/3.5F Owner’s Manual [RUS] PDF
Hidea HD2.5F_3.5F.pdf
Adobe Acrobat Document
1.0 MB
![]()
Hidea HDF4/5 Owner’s Manual [RUS] PDF
Hidea HDF4_5.pdf
Adobe Acrobat Document
3.1 MB
![]()
Hidea HD5F Owner’s Manual [RUS] PDF
Hidea HD5F.pdf
Adobe Acrobat Document
1.9 MB
![]()
Hidea HD9.9F/15F Owner’s Manual [RUS] PDF
Hidea HD9.9F_15F.doc
Microsoft Word Document
3.2 MB
![]()
Hidea HDF15 Owner’s Manual [RUS] PDF
Hidea HDF15.pdf
Adobe Acrobat Document
1.0 MB
![]()
Hidea HD40F Owner’s Manual [RUS] PDF
Hidea HD40F.pdf
Adobe Acrobat Document
3.7 MB
![]()
Hidea HD8F/9.8F Owner’s Manual [RUS] PDF
Hidea HD8F_9.8F.pdf
Adobe Acrobat Document
1.9 MB
![]()
Hidea HDF9.9H/15H Owner’s Manual [RUS] PDF
Hidea HDF9.9H_15H.pdf
Adobe Acrobat Document
6.0 MB
![]()
Hidea HD25F/30F Owner’s Manual [RUS] PDF
Hidea HD25F_30F.pdf
Adobe Acrobat Document
3.4 MB
Hangzhou Hidea Power Machinery Co. Ltd (Taiwan) is one of the most professional manufacturers of outboard motors in the world. This is a high-tech factory with its own design
department, production line and marketing department with an experienced team of specialists. The annual production of motors reaches 50,000 units.
The design department develops not only models, but also improves the equipment according to the product quality control system, which makes it possible to guarantee the product up to 3 years of
operation. Hidea is a subsidiary of First Auto Works Corp (FAW), the largest vehicle manufacturing plant. The corporation provides the company not only with financial assistance,
but also provides serious technical support.
Hidea is certified under the ISO9001 international quality certification system, and is also the holder of many awards and prizes for stable quality and excellent performance,
and has CE, EPA and VCA certificates.
Boat motors Hidea presented a series of 2 and 4-stroke engines. The company is focused on exports and its products today can be seen not only in Ukraine, but also in North
America, in Europe, Africa and Asia. For example, distributors successfully sell these engines in the USA, Canada, Chile, Germany, Russia, Australia, Israel, South Africa, Egypt, etc.
Goals and potential enable Hidea to become a leader in the production of the most efficient, environmentally friendly and affordable engines in the near future. Providing,
therefore, the best deal for their potential users and buyers.