-
Contents
-
Table of Contents
-
Bookmarks
Quick Links
COMPACT DISC STEREO SYSTEM
SISTEMA ESTEREO CON REPRODUCTOR DE DISCOS
COMPACTOS
CHAINE STEREO AVEC LECTEUR DE DISQUES COMPACTS
NSX-V70
NSX-V72
(ilTi5i
DIGITALAUDIO
Related Manuals for Aiwa NSX-V70
Summary of Contents for Aiwa NSX-V70
-
Page 1
COMPACT DISC STEREO SYSTEM SISTEMA ESTEREO CON REPRODUCTOR DE DISCOS COMPACTOS CHAINE STEREO AVEC LECTEUR DE DISQUES COMPACTS NSX-V70 NSX-V72 (ilTi5i DIGITALAUDIO… -
Page 2
(you will find them on the rear of your set) in the space provided below. Please refer to them when you contact AIWA dealer in case of difficulty. Model No. CX-NV701CX-NV72 Serial No, Model No. SX-NV70 Serial (Lot) No. -
Page 3
Felicitations La lecture estereo Aiwa. I’utilisation tome el tiempo Au sujet de la cha~ne y familiarizarse Votre chalne @et @et est fournie avec Ies accessoires de Ias unidades… -
Page 5: Table Of Contents
INIIICIE PREPARATIVES PRECALICIONES … 7 CONEXIONES … 9 POSIClONAMIENTO DE LOS ALTAVOCES …11 ANTES DE LA OPERACION … 13 PIJESTA EN HORA DEL RELOJ … 15 SONIDO AJUSTE DEL SONIDO … 17 ECUALIZADOR GRAFICO … 17 SONIDO AMBIENTAL DSP … 19 RECEPCION DE LA RADIO SINTONIZACION MANUAL …
-
Page 6
Do not period of time, in, a small even when your dealer or an Aiwa or repair. the AC cord and contact a… -
Page 7: Precaliciones
* Si el cable de alimentacion de CA esta estropeado, en contacto con su concesionario o centro Aiwa para que se 10 cambien o reparen inmediatamente. Si se produce algun problems, desconecte alimentacion de CA y pongase en contacto de servicio cualificado.
-
Page 8
IMPORTANT Connect the AC cord after connecting speakers, all optional equipment. There are no differences between the front between the surround speakers. Both connected as L (left) or R (right). Connect the SX-NV70 right speaker to the unit. Connect the speaker cord to the SPEAKERS The cord with the white stripe should be connected terminal… -
Page 9: Conexiones
CONEXIONES IMPORTANTE Conecte el cable de alimentacion de CA despues conectado Ios altavoces, Ias antenas y todos Ios demas equipos opcionales. No existen diferencias entre Ios altavoces Ios altavoces de sonido ambiental. Ambos altavoces podran conectarse como altavoz (L) o como altavoz derecho (R).
-
Page 10
lr FM 75 c1 CONNECTIONS stand the AM antenna on a surface + Fix the claw to the slot. position the antennas AM loop antenna: Position to find the best direction and posikon for radio reception. FM feeder antenna: Extend this antenna horizontally in a T-shape and fix its the wall with cellophane tape, etc. -
Page 11: Posiclonamiento De Los Altavoces
Para poner la antena de AM en position una superficie + Fije el gancho en la ranura. Para colocar Ias antenas Antena de cuadro de AM: Pongala en la direccion y en la position que ofrezcan recepcion de la radio, Antena de FM: Extienda horizontalmente esta antena formando una T y fije sus extremes…
-
Page 12
POWER ._— _ —.. —. ——— ——.. —< BEFORE OPERATION turn the unit on Press one of the function CD). Playback of the inserted tuned station is received The POWER button is also available. The disc compartment DEMO (Demonstration) When the AC cord is connected window demonstrates is turned on, the DEMO display display. -
Page 13: Antes De La Operacion
ANTES DE LA OPERACION Para encenck?r la unidad Pulse uno de Ios botones de funcion (TAPE, TUNER, AUX, CD). La reproduction del disco o de la cinta insertada recibira la emisora previamente sintonizada reproduction directs). Tambien podra utilizarse el boton POWER, El compartimiento de discos puede…
-
Page 14
SETTING THE CLOCK When the AC cord is connected for the first time, the II SET button flashes. Set the time as follows while the power is off. Press the SET button. The hour flashes. Press DOWN or W designate the hour. Press the SET button to set the hour. -
Page 15: Pijesta En Hora Del Reloj
PUESTA EN HORA DEL RELOJ Cuando el cable de alimentacion de CA se conecte vez, el boton II SET parpadeara. Ponga la hors como se indica a continuation, alimentacion r?stedesconectada. Pulse el boton SET. La hors parpadeara. Pulse el boton W DOWN o W la hors.
-
Page 16
“ VOLUME MIN. CEEI—E5BE 1111 + 111111 +11111111 1111 + ‘EiEE1 ELECTRONIC GRAPHIG EQUALIZER “QEEiil ELECTRONIC GRAPHIG EQLIALIZER ADJUSTING THE SOUND VOLUME CONTROL -+ El Turn the VOLUME control @ on the main unit, or press the VOLUME buttons @on the remote control. BBE SYSTEM + H The BBE system It also enriches… -
Page 17: Ajuste Del Sonido
AJWl% DEL SONIDO CONTROL DE VOLUMEN + El Gire ISI control VOLUME @ de la unidad principal o pulse Ios botones VOLUME@ del control remoto. SISTEMA 13BE + H El sistema BBE realza la claridad del sonido de alta frecuencia. Tambien mejora la funcion…
-
Page 18
DSP SURROUND -+ E The DSP (Digital Signal Processor) surround circuits can recreate the effect of sounds reflected from walls or ceilings, sound presence of real environments. There are three modes with matching curves. Press one of the SURROUND button. + @ Equalization curves are selected… -
Page 19: Sonido Ambiental Dsp
SOW(I AMBIENTAL DSP + E Los circuitos de sonido ambiental DSP (procesador digital) pueden crear el efecto de Ios sonidos paredes o el techo, para obtener la presencia ambiente real. Existen tres modos sus correspondientes ecualizacion graficas. Pulse uno de Ios botones SURROUND. Las curvas de ecualizacion se seleccionan…
-
Page 20
TUNING uPWf DOWN MONO MANUAL TUNING Press the TUNEFUBAND button to select the band repeatedly. If the power is turned off, the previously played (Direct Play Function). Press the M DOWN or H UP button to select a station. Each time the button is pressed, the frequency When a station is received, ‘TUNE is displayed for 2 seconds. -
Page 21: Sintonizacion Manual
SINTONIZACION MANUAL Pulse repetidamente el boton TUNER/BAND seleccionar la banda. Si la alimentacion esta desconectada se recibira la emisora previamente sintonizada (funcion de reproduction directs). Pulse e! boton DOWN seleccionar una emisora. Cada vez que pulse el boton, la frecuencia cambiara. Cuando se reciba una emisora, “TUNE”…
-
Page 22
TUNER BAND ‘8 0000 0000 PRESETTING STATIONS + EI The unit can store a total of 32 preset stations. When a station is stored, a preset number is assigned to the station. preset number to tune in to a preset station directly. Press the TUNER/BAND button to select a band, and press the M… -
Page 23: Preajuste De Emisoras
PREAWSTE DE EMISORAS + Esta unidad puede almacenar un total de 32 emisoras. Cuando almacene una emisora, a esa emisora se Ie asignara un numero de preajuste. Utilice el numero de preajuste para sintonizar directamente una emisora preajustada. boton TUNER/BAND para seleccionar Pulse una banda, y pulse M…
-
Page 24
DIRECTION/PRESET DISCDIRECT PLAY BASIC OPERATIONS LOADING DISCS + El Press the CD button, then press the 4 OPEN/CLOSE button to open the disc compartment. with the label side up. To play one or two discs, place the discs on tray 1 and 2. To play three discs, press the DISC CHANGE button to rotate the trays after placing two discs. -
Page 25: Operacicines 13 Asicas
OPERAClONES BASICAS lNTROtNJCCION DE DISCOS -+ Pulse el bot6n CD, y Iuego pulse el boton 4 OPEN/ CLOSE para abrir el compartimiento Introduzca el(los) disco(s) con el Iado de la etiqueta hacia arriba. Para reproch.mir u no o dos discos, ponga Ios discos en Ias bandejas 1 y 2.
-
Page 26
DISC ~ DIRECT PLAY1 0000 0000 Selecting a track with the remote control — 1 Press one of the DISC DIRECT PLAY buttonsto select a disc. 2 Press the numeric buttons and the +10 button to select a track. Example: @To select the 25th track, press the +1O, +1Oand 5 buttons. -
Page 27
OPERACIONES Seleccion de una cancion con el control remoto + 1 Pulse uno de Ios botones DISC DIRECT seleccionar un disco. 2 Pulse Ios botones numericos y el boton +1Opara seleccionar una cancion. Ejemplo: @ Para seleccionar la cancion numero 25, pulse Ios botones +lo, +loy5. -
Page 28
0000 0000 DIRECTION < } PRESET BASIC OPERATIONS PROGRAMMED PLAY Up to 30 tracks can be programmed from any of the inserted discs. Use the remote control. Press the PRGM button twice in stop mode. The PRGM indicator flashes on the display. When the PRGM button is pressed once in step 1, the unit enters the KARAOKE PROGRAM (page 50). -
Page 29
OPERACIONES REPROIXJCCION PROGRAMADA Se podra programar un maximo de 30 canciones de cualquiera de Ios discos introducidos. Utilice el control remoto. dos veces el boton PRGNI estando en el 7 Pulse modo de parada. El indicador PRGM parpadeara en el visualizador. Cuando se pulse una vez el boton PRGM en el paso 1, la unidad se pondra en el modo KARAOKE PROGRAM (pagina 51). -
Page 30
EJECT BASIC OPERATIONS INSERTING TAPES On deck 1, tapes are always played back on both sides. On deck 2, you can select a reverse mode to play back one or both sides. Use normal (type I), CrOz (type 11)or metal (type lV) tapes for playback. -
Page 31: Operaciones Basicas
OPERACIONES BASICAS INSER(XON DE CINTAS En la platina 1, Ias cintas se reproduce caras, En la platina 2, podra seleccionar el modo de inversion para reproducer una o dos caras. * Utilice cintas normales (tipo I), de CrOz (tipo (tipo para la reproduction.
-
Page 32
/—. >1 MUSIC SENSOR If there is a 4-second or longer blank between each track, the search for the beginning of the current or next track during playback can be easily made. When the F of the 4- button to move to the next track or the 4 beginning of the current track. -
Page 33: Reproduction Continua
OPERA ClONES BASICAS SENSOR MUSICAL Si hay un espacio sin grabar de 4 segundos o mas entre cada cancion, la busqueda del principio de la cancion que este siendo reproducida o de”la siguiente cancion podra realizarse facilmente. Cuando el indicador F del boton +> este encendido, pulse el boton * para pasar a la siguiente cancion o el boton <…
-
Page 34
REV MODE UINR rEEpl RECIREC MUTE BASIC RECORDING This section explains how to record from the tuner, CDs, or external equipment. If you want to record from tapes, see pages 36 to 38. Preparation Wind up the tape to the point where recording will start. Use normal (type I) and Cr02 (type Insert the tape to be recorded on into deck 2. -
Page 35: Grabacion Basica
GRABACION BASICA Esta seccion explica como grabar del sintonizador, compactos o equipos exteriors. Si desea grabar de cintas, consulte Ias paginas 37 a 39. Preparation Bobine la cinta hasta el punto donde vaya a empezar la grabacion. Utilice cintas normales (tipo I) y cintas de CrOz (tipo hater la grabacion.
-
Page 36
DOLBY NR DUBBING THE TAPE MANUALLY Preparation Wind up the tape to the point where recording will start. Note that recording will be completed on one side of the tape only. Press the TAPE button. Insert the original tape into deck 1 and the tape to be recorded on into deck 2. -
Page 37: Copiadci Manual De Cintas
COPIADO MANUAL DE CINTAS Preparaci6n Bobine la cinta hasta el punto donde vaya a empezar la grabacion. c Tenga en cuenta que la grabacion se completara en una cara de la cinta solamente. TAPE. Pulse el boton hserte la cinta original en la platina 1 y la cinta que vaya a grabar en la platina 2.
-
Page 38
DUBBING THE WHOLE TAPE This function allows you to make exact copies of both sides of the original tape. The reverse side of both tapes will start simultaneously as soon as the longer tape has been reversed. Dubbing does not start from a point halfway in the tape. The reverse mode is automatically set to =1. -
Page 39: Copiado De Toda La Cinta
COPIADO DE TODA LA CINTA Esta funcion Ie permitira hater copias exactas de ambas caras de la cinta original. La cara de inversion de ambas cintas empezara a moverse al mismo tiempo, tan pronto como termine de invertirse la cinta mas Iarga, La copia no empezara desde un punto ubicado en medio de la cinta.
-
Page 40
DISC DIRECT PLAY-1 Al EDIT RECORDING The Al EDIT function enables CD recording without worrying about tape length and track length. When a CD is inserted, the unit automatically calculates track lengths. If necessary, the order of tracks is rearranged so that no track is cut short. Al EDIT recording will not start from a point halfway into the tape. -
Page 41: Grabacion Con Edicion Al
GRABACION CON EDICION Al La funcion Al EDIT (edition Al) permite grabar discos compactos sin preocuparse de la duration de la cinta y de Ias canciones. Cuando se inserte un disco compacto, automaticamente la duration de Ias canciones. necesario, el orden de Ias canciones podra cambiarse ninguna cancion quede cortada.
-
Page 42
Al EDIT RECORDING To check the order of the programmed Before recording, press the EDIT/CHECK and press the +4 or — button repeatedly. DISPLAY @ Tape side @ Program number @ Programmed track numbers @ Track number To add tracks from other discs to the edit program If there is any time remaining on the tape after step 5 of page 40, you can add tracks from other discs in the CD compartment… -
Page 43: Grabacion Con Edicion Programada
GRABACION CON EDICION Al Para comprobar el orden de Ios numeros canciones programadas Antes de grabar, pulse el boton EDIT/CHECK la cara A o la B, y pulse repetidamente el boton + VISUALIZATION @ Cara de la cinta @ Ntimero del programa @) Numeros de ias canciones…
-
Page 44
4 f!ib,% DISC DIRECT PLAY1 EDIT/CHECK REC/RECMUTE DIRECTION < } PRESET PROGRAMMED Press the numeric buttons to designate the tape length. 10 to 99 minutes Example: When using a 60-minute buttons. DISPLAY @ Tape length @ Tape side A (front side) @ Maximum Press one of the DISC DIRECT PLAY buttons to select a disc and press the numeric buttons to… -
Page 45
GRABACION CON PROGRAMADA Pulse los botones numericos durach5n de la cinta. Se puede especificar una duration de 10 a 99 minutes. Ejemplo: Cuando utilice cintas de 60 minutes, botones 6 y O. VISUALIZATION @ Duration de la cinta @ Cara A de la cinta (cara delantera) @ Tiempo maximo de grabacion para la cara A… -
Page 46
In this case, turn the MIC MIXING MIN. Recommended microphone The use of a unidirectional type microphone prevent howling. Contact your local Aiwa dealer for details. to this unit, with the MIC simultaneously. be used for mixing to MIN and a howling sound away… -
Page 47: Mezcla Microfonica
Le cas echeant, elcligner de l’enceinte ou baisser Ie niveau scmore a I’aide MIC MIXING. est extr6mement fort, il peut &re tourner la commande MIC MIXING microphone de type unidirectionnel pour eviter Ie hurlement, Pour plus de d6tails, Aiwa local, DSF) 4“7…
-
Page 48
VOCAL FADER/MULTIPLEX FUNCTION This unit can use discs or tapes as Karaoke VOCAL FADER/AUTO VOCAL FADER function The VOCAL FADER function makes the singer’s ordinary discs or tapes softer than the accompaniment. AUTO VOCAL FADER function, the VOCAL only while there is audio input through a microphone. -
Page 49: Funcion Vocal Fader/Multiplex
FUNCION VOCAL FADER/ MULTIPLEX Esta unidad puede utilizar discos o cintas karaoke. Funcion VOCAL FADER/AUTO VOCAL FADER La funcion VOCAL FADER hate que la voz del cantante discos cintas normales suene acompahamiento. En la funcion AUTO VOCAL FADER s610 funcionara mientras haya entrada de audio a traves de un microfono,…
-
Page 50
KARAOKE PROGRAM Before or during CD play, you can reserve played after the current track. Each reservation it finishes playing. Use the remote control. Press the PRGM button once. Press one of the DISC DIRECT PLAY buttons to select a disc, and the numeric buttons to select a track. -
Page 51: Programadekaraoke
PROGRAMADEKARAOKE Antes o durante la reproduction de un disco compacto, podra reservar un maximo de 15 canciones despues de la cancion que este siendo reserva se borrara cuando termine de reproducirse Utilice el control remoto. Pulse el boton PRGM una vez. Pulse uno de Ios botones DISC DIRECT PLAY para…
-
Page 52
TUNING DOWN TUNING a— SETTING THE TIMER The unit can be turned the built-in timer. Preparation Make sure the clock is set correctly. Press the TIMER button on the remote control once to display 0, and press the II SET button within 4 seconds, is displayed, and the hour flashes. -
Page 53: Ajuste Del Temporizador
AJUSTE DEL TEMPORIZADOR La unidad podra encenderse a la hors especificada alias gracias al temporizador incorporado. Preparacio,n Asegtirese de que la hors del reloj sea !a corrects. pagina 15). Pulse una vez el boton TIMER dei control remoto para visualizer 0, y pulse e! boton i! SET antes de uue pasen 4 segundos.
-
Page 54
SETTING THE TIMER To cancel timer standby mode temporarily Press the TIMER button on the remote control so that @ or disappears on the display. restore the timer standby mode, press again to display Using the unit while the timer is set You can use the unit normally after setting the timer. -
Page 55: Ajuste Del Temporizador Para Dormir
AJUSTE DEL TEMPORIZADOR Para cancelar temporalmente el modo de espera temporizador Pulse el boton TIMER del control remoto desaparezca del visualizador. Para reponer el modo de espera del temporizador, nuevo el boton para visualizer R?C. Utilizaci6n de la unidad mientras temporizador Podra utiiizar…
-
Page 56: Connecting Optional Equipment
Connect the red plug to the R jack, and the whilte plug to the L jack. When connecting a turntable Use an Aiwa turntable equipped with a built-in equalizer amplifier. LINE OUT JACKS This unit can output the sound signal through the jacks, Use a cable with RCA phono plugs to connect an audio equipment with the LINE IN (analog input) jacks.
-
Page 57: Conexion De Un Equipo Optional
Consulte el manual de instrucciones del equipo conectado para tener mas detalles. Los cables de conexion no estan suministrados. Obtenga Ios cables de conexion necesarios. * Consulte con su concesionario Aiwa local en cuanto al equipo optional adecuado. TOMAS DE VI DEO/EQUIPO…
-
Page 58
13 . CARE AND MAINTENANCE Occasional care and maintenance of the unit and the software are needed to optimize the performance To clean the cabinet Use a soft cloth lightly moistened with “mild detergent Do not use strong solvents, such as alcohol, To clean the heads and tape paths + After every 10 hours of use, clean the heads and tape paths with a head cleaning cassette or cotton swab moistened… -
Page 59: Cuidados Y Mantenimiento
CUIDADOS Y MANTENIMIENTO El mantenimiento y el cuidado ocasional software resultan necesarios para optimizar su unidad. Para Iimpiar la caja Utilice un pafio blando humedecido un POCOen una solution detergence suave. No utilice nunca disolventes alcohol, bencina o diluyente. Para Iimpiar Ias cabezas y Ios puntos por donde pasa la cinta + Ill Despues de cada 10 horas de funcionamiento, y Ios puntos por donde pasa la cinta con un cassette…
-
Page 60
SPECIFICATIONS Main unit CX-NV70/CX-NV72 FM tuner section Tuning range 87.5 MHz to 108 MHz 13.2 dBf Usable sensitivity(lHF) Antenna terminals 75 ohms (unbalanced) tuner section Tuning range kHz to 1710 kHz (10 kHz step) 531 kHz to 1602 kHz (9 kHz step) Usable sensitivity 350 vVlm Antenna… -
Page 61: Especificaciones
ESPECIFICACIONES Unidad principal CX-NV70/CX-NV72 Seccion del sintonizador de FM Gama de sintonizacion 87,5 MHz a 108 MHz Sensibilidad util (IHF) 13,2 dBf Terminals de antena 75 ohmios (desequilibrada) Seccion del sintonizador de AM Gama de sintonizacion 530 kHz a 1710 kHz (pasos de 10 kHz) 531 kHz a 1602 kHz (pasos de 9 kHz)
-
Page 62
SPECIFICATIONS SPEAKER SYSTEM SX-NV70 3 way, bass reflex Cabinet type (Magnetism WOOfer: 140 mm Speaker type Tweeter: 80 mm type Super tweeter: ceramic type 6 ohms Impedance 87 dBIWlm Output sound pressure level 206 x 302 x 265 mm (81/8 x 12 x Dimensions (W x H x D) 10’/2 in,) -
Page 63
ESPECIFICACIONES SISTEMA DE ALTAVOCES SX-NV70 Tipo de caja 3 vias, reflejo hermetico al magnetism) Altavoz para graves: Altavoces 140 mm, tipo conico Altavoz para agudos: 80 mm, tipo conico Superaltavoz 50 mm, tipo ceramico 6 ohmios Impedancia 87 dBIWlm Nivel de presion actistica de salida 206 x 302 x 265 mm Dimensioned (An x Al x Prof) -
Page 64
TROUBLESHOOTING GUIDE If the unit fails to perform as described instructions, check the following guide, GENERAL There is no sound. Is the AC cord connected properly? Is there a bad connection? (+ page Is there a short circuit in the speaker terminals? + Disconnect AC cord,…
 -
Page 65: Guiaparalasolucion Deaverias
GUIAPARALASOLUCION DEAVERIAS Si la unidad no funciona como se describe instrucciones, compruebe la guia siguiente: GENERAIJDADES No hay sonido. LEsta bien conectado el cable de alimentacion LHay alguna conexion mal hecha? (-+ pagina 9) cortocircuito en Ios terminals del altavoz? ~Hay + Desconecte el cable de alimentacion…
-
Page 66
PARTS INDEX Main instructions about each part are indicated,… -
Page 67: Indice De Las Partes
INDICE DE LAS PARTES Se indican Ias instrucciones principals de cada parte. :“ f TUNER/BAND TAPEIDECK ‘ $;, “% Disc compartment ,’ Compartimiento de discos Compartment a disques POWER DEMO @ ‘: Q RECIREC MUTE SYNCHRO DUBBING NORMALIHIGH ‘8 ~~ Ill SET ,’…
-
Page 68
Licensing Corporation. DOLBY et Ie symbole double-D DO sent des marques de Dolby Laboratories Licensing Corporation. AIWA CO.,LTDm LUM?.SY5TEM The word “BBE” and the “BBE symbol” Sound, Inc. of Dolby Under license from BBE sound, La sigla “BBE” y el simbolo BBE Sound, Inc.
This manual is also suitable for:
Nsx-v72

COMPACT DISC STEREO SYSTEM
SISTEMA ESTEREO CON REPRODUCTOR DE DISCOS
COMPACTOS
CHAINE STEREO AVEC LECTEUR DE DISQUES COMPACTS
NSX-V70
NSX-V72
OPERATING INSTRUCTIONS
MANUAL DE INSTRUCCIONES
MODE D’EMPLOI
_n COMPACT
Mi®
DIGITAL AUDIO
View a manual of the Aiwa NSX-V70 below. All manuals on ManualsCat.com can be viewed completely free of charge. By using the ‘Select a language’ button, you can choose the language of the manual you want to view.
Page: 1
o
2
?
1
Zi?&Wf3& tzeA%%@ %s%v70/
V72
Congratulations on your purchase of an Aiwa Stereo System.
To optimize the performance of this system, please take the time
to read through these Operating Instructions and become familiar
with the operating procedures.
About your system
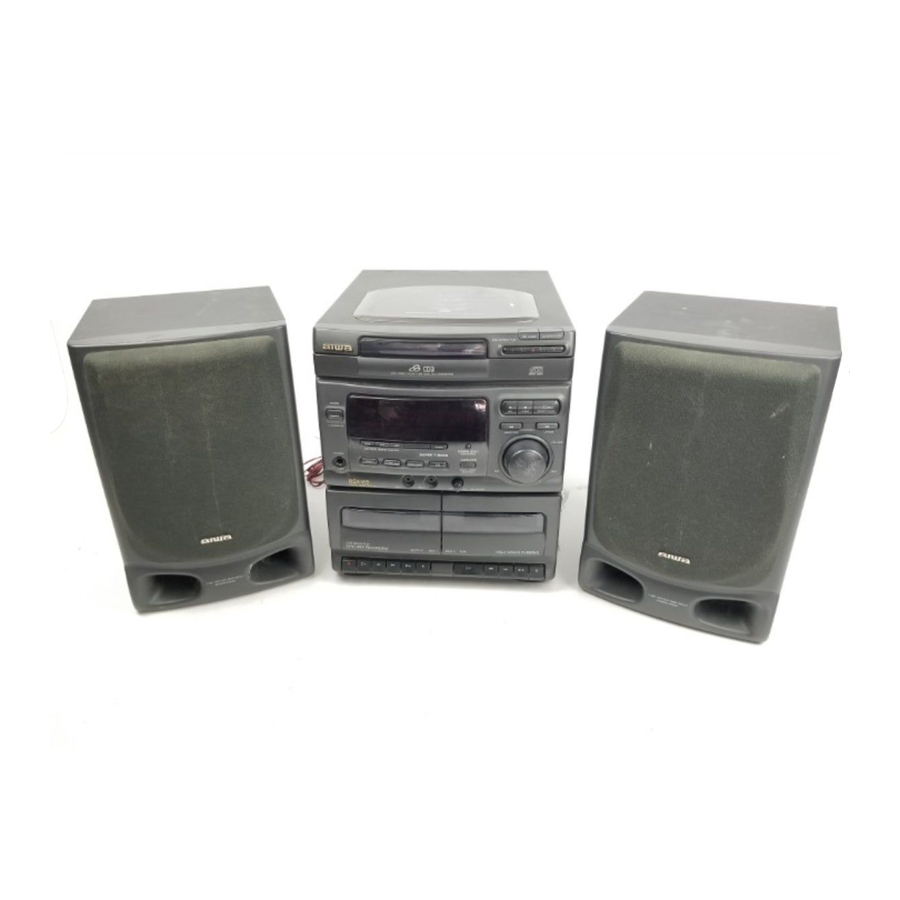
Your system NSX-V70/NSX-V72 is composed of the units ~-~
and supplied with the accessories @)-@ as follows. + ❑
@ CX-NV70/CX-NV72 Compact disc stereo cassette receiver
@ SX-NV70 (L,R) Front speakers
@ Surround speakers SX-R220
@ Remote control
@ FM antenna
@AM antenna
Q1 Operating Instructions, etc.
About this manual + ❑
This manual contains illustrations @ and instructions in three
languages (Z@.
@l Illustration
@ English
@ Spanish
@ French
About the illustrations
Capital letters, bold face numbers, smaller numbers and lower
case letters in the instructions correspond to the letters and
numbers in the illustration column.
For example, the “+ ❑ “ following “About this manual” above
is a reference to ❑ of the illustration,
OWNER’S RECORD
For your convenience, record the model number and serial
number (you will find them on the rear of your set) in the space
provided below. Please refer to them when you contact your
AIWA dealer in case of difficulty.
Model No. CX-NV701CX-NV72 Serial No,
Model No. SX-NV70 Serial (Lot) No.
WARNING
TO REDUCE THE RISK OF FIRE OR ELECTRIC
SliOCK, DO NOT EXPOSE THIS APPLIANCE TO
RAIN OR MOISTURE.
2
AE!!!!!5A
“CAUTION:TO REDUCE THE RISK OF
ELECTRIC SHOCK,
DO NOT REMOVE COVER (OR BACK).
NO USER-SERVICEABLE PARTS INSIDE.
REFER SERVICING TO QUALIFIED
SERVICE PERSONNEL.”
Explanation of Graphical Symbols:
A
The lightning flash with arrowhead symbol, within
an equilateral triangle, is intended to alert the user
to the presence of uninsulated “dangerous volt-
age” within the product’s enclosure that may be of
sufficient magnitude to constitute a risk of electric
shock to persons.
A
The exclamation point within an equilateral tri-
angle is intended to alert the user to the presence
of im~ortant operating and maintenance (servic-
l!—L!l ing) instructions in ttie literature accompanying
the appliance.
Page: 2
a?wea!h“ & A%#4 %S%v?ol
“72
Enhorabuena por haber adquirido un sistema estereo Aiwa.
Para optimizar Ias prestaciones de este sistema, tome el tiempo
necesario para leer este manual de instrucciones y familiarizarse
con Ios procedimientos de funcionamiento.
Acerca de su sistema
Su sistema NSX-V701NSX-V72 esta compuesto de Ias unidades
(~ y @), y ha sido suministrado con IOS accesorios @) a @
siguientes: + ❑
@ CX-NV70/CX-NV72 Sintonizador, amplificador, platina de
cassette y reproductor de discos compactos estereo
@ SX-NV70 (izquierdo y derecho) Altavoces delanteros
(~ Altavoces de sonido ambiental SX-R220
@) Control remoto
(~ Antena de FM
@ Antena de AM
(~ Manual de instrucciones, etc.
Acerca de este manual + ❑
Este manual tiene ilustraciones (3 e instrucciones en tres idiomas
(~-@J
@ Ilustracion
(~ Ingles
(~ Espaflol
@) Frances
Acerca de Ias ilustraciones
Las Ietras mayusculas, 10s numeros en negrita, 10s ntimeros
pequefios y Ias Ietras mintisculas de Ias instrucciones
corresponded a Ias Ietras y numeros de Ias columnas de
ilustraciones.
Por ejemplo, ”+ ❑ “ a continuation de “Acerca de este manual”,
que aparece mas arriba, se refiere a la ❑ de la ilustracion.
Felicitations pour votre achat d’une chalne stereo Aiwa.
La lecture de ce mode d’emploi vous permettra de maltriser
I’utilisation et d’optimiser Ies performances de cette chalne.
Au sujet de la cha~ne
Votre chalne NSX-V70/NSX-V72 est composee des appareils
@et @et est fournie avec Ies accessoires @ a @ comme suit.
+m
~ CX-NV70/CX-NV72 Radio magnetocassette Iecteur de
disques compacts stereo
@ SX-NV70 (G & D) Enceintes avant
@) Enceintes surround SX-R220
@ Telecommande
@ Antenne FM
@ Antenne AM
@ Mode d’emploi, etc.
Au sujet de ce manuel + ❑
Ce manuel comporte des illustrations@) et des instructions en
trois Iangues @ a @.
(3J Illustration
@ Anglais
@ Espagnol
@ Frangais
Au sujet des illustrations
Les Iettres majuscules, Ies numeros en gras, Ies numeros plus
petits et Ies Iettres minuscule correspondent au Iettres et
numeros de la colonne des illustrations.
Par exemple, Ie “+ ❑ “ qui suit “Au sujet de ce manuell” ci-
dessus renvoie a la partie ❑ de I’illustration.
NOTE
This equipment has been tested and found to comply with the
limits for a Class B digital device, pursuant to Part 15 of the FCC
Rules. These limits are designed to provide reasonable protec-
tion against harmful interference in a residential installation.
This equipment generates, uses, and can radiate radio frequency
energy and, if not installed and used in accordance with the
instructions, may cause harmful interference to radio communi-
cations. However, there is no guarantee that interference will not
occur in a particular installation. If this equipment does cause
harmful interference to radio or television reception, which can be
determined by turning the equipment off and on, the user is
encouraged totrytocorrect the interference byoneormore of the
iollowing measures:
— Reorient or relocate the receiving antenna.
Increase the separation between the equipment and re-
ceiver.
— Connect the equipment into an outlet on circuit different
from that to which the receiver is connected.
— Consult the dealer or an experienced radio/TV technician
for help.
ICAUTION
Modifications or adjustments to this product, which are not
expressly approved by the manufacturer, may void the user’s
right or authority to operate this product.
COPYRIGHT
Please check the laws on copyright relating to recordings from
discs, radio or external tape for the country in which the machine
is being used.
DERECHOS DE AUTOR
Compruebe Ias Ieyes sobre derechos de autor, del pais en el
que se utilice el sistema, que esten relacionadas con la grabacion
de discos, programas de radio o cintas.
DROITS D’AUTEUR
Priere de verifier Ies Iois sur la propriete artistique relatives a
I’enregistrement de disques, de la radio ou de cassettes clans Ie
pays d’utilisation de I’appareil.
3
Page: 3
INIIICIE TABLE DES MATMRES
PREPARATIVES PREPARATIONS
PRECALICIONES ………………………………………………………. 7
CONEXIONES …………………………………………………………… 9
POSIClONAMIENTO DE LOS ALTAVOCES ……………….11
ANTES DE LA OPERACION …………………………………….. 13
PIJESTA EN HORA DEL RELOJ ………………………………. 15
Precautions ………………………………………………………… 7
coNNExloNs …………………………….ml
…….m
…….m
…..m
……….9
POSITIONNEMENT DES ENCEINTES ………………………. 11
AVANT L’UTILISATION ………………………………….. …….. 13
REGLAGE DE L’HORLOGE ……………………………………. 15
SONIDO SON
REGLAGE DU SON …………………………………………………. 17
EGALISEUR GRAPHIQUE ……………………………………….. 17
DSP SURROUND …………………………………………………….. 19
AJUSTE DEL SONIDO …………………………………………….. 17
ECUALIZADOR GRAFICO ……………………………………….. 17
SONIDO AMBIENTAL DSP ………………………………………. 19
RECEPCION DE LA RADIO
SINTONIZACION MANUAL ………………………………………. 21
PREAJUSTE DE EMISORAS ……………………………………. 23
SINTONIZACION MEDIANTE NUMERO DE
PREAJUSTE …………………………………………………………… 23
RECEPTION RAD!O
ACCORD MANUEL ………………………………………………….. 21
MEMORISATION DE -STATIONS ………………………………. 23
ACCORD SUR UNE STATION MEMORISEE ………………23
LECTURE DE DISQUES COMPACTS
OPERATIONS DE BASE ………………………………………….. 25
REPRODUCTION DE DISCOS COMPACTOS
OPERACICINES 13
ASICAS ……………………………………….. 25
LECTURE DE CASSETTES
REPRODUCTION DE CINTAS
OPERATIONS DE BASE …………………………m
………..m
……. 31
LECTURE CONTINUE ……………………………………………… 33
OPERACIONES BASICAS ……………………………………….. 31
REPRODUCTION CONTINUA ………………………………….. 33
GRABACK3N ENREGISTREMENT
GRABACION BASICA ……………………………………………… 35
COPIADCI MANUAL DE CINTAS ………………………………. 37
COPIADO DE TODA LA CINTA ………………………………… 39
GRABACION CON EDICION Al ………………………………… 41
GRABACION CON EDICION PROGRAMADA ……………43
ENREGISTREMENT DE BASE …………………………………. 35
DUPLICATION MANUELLE D’UNE CASSETTE ………….37
DUPLICATION DE LA TOTALITE D’UNE CASSETTE,,.. 39
ENREGISTREMENT AVEC MONTAGE ET CALCUL DU
TEMPS ……………………………………………………………………. 41
ENREGISTREMENT AVEC MONTAGE PROGRAMME, 43
KARAOKE
MEZCLA MICROFONICA …………………………………………. 47
FUNCION VOCAL FADER/MULTIPLEX …………………….. 49
PROGRAMA DE KARAOKE …………………………………….. 51
KARAOKE
MIXAGE AVEC MICROPHONE …………………………………. 47
FONCTION VOCAL FADER/MULTIPLEX ………………….. 4QI
PROGRAMME DE KARAOKE ………………………………….. 51
TEMPOIWZADOR
AJUSTE DEL TEMPORIZADOR ……………………………….. 53
AJUSTE DEL TEMPORIZADOR PARA DORMIR ………..55
MINUTERIE
REGLAGE DE LA MINUTERIE …………………………………. 53
REGLAGE DE LA MINUTERIE D’ARRET.., ……………….. 55
OTRAS Cf3NEX10NES
AUTRES CONNEXIONS —.
CONNEXION D’UN APPAREIL OPTIONNEL
ECOUTE DE SOURCES EXTERNES …………… . .. . . . ..Z
CONEXION DE UN EQUIPO OPTIONAL …………………… 57
ESCUCHA DE FUENTES DE SONIDO EXTERNAS .,,…57
GENERALIDADES
GENERALITIES
SOINS ET ENTRETIEN …………………………………………… 59
SPECIFICATIONS ……………………………………………………. 61
EN CAS DE PROBLEME ………m
…………………………………. 65
CUIDADOS Y MANTENIMIENTO ……………………………… 59
ESPECIFICACIONES ………………………………………………. 61
GUIA PARA LA SOLUCION DE AVERIAS …………………. 65
INDICE DE LAS PARTES …………………………………………. 67
NOMENCLATURE …………………………………………………… &r
Page: 4
PRECAUTIONS
Follow the advice below for safe and correct operation.
On AC voltage
Before connecting the AC cord, check that the rated voltage
shown on the rear panel matches your local voltage.
On placement
● Do not use the system in places which are extremely hot, cold,
dusty or humid.
$,s,-
, .-
‘.,.,,. ● Do not use the system in places which are subject to vibration.
● Place the system on a flat, even surface.
● To prevent internal heat build up, keep adequate space around
the unit. + ❑
In particular, do not place the system in an airtight rack.
● If using the system near the television or radio, noise may be
heard from the television, radio or this system. Move this system
away from the affected television or radio.
On safety
● When disconnecting the AC cord, pull out by the plug. Do not
pull the cord itself.
● When the system is not used for an extended period of time,
disconnect the AC cord. When the cord is plugged in, a small
amount of current continues to flow to the system, even when
the power is turned off.
● (f the AC cord is damaged, contact your dealer or an Aiwa
service center for immediate replacement or repair.
Should any trouble occur, disconnect the AC cord and contact a
qualified service representative.
6
Page: 5
IMPORTANT
● Connect the AC cord after connecting speakers, antennas, and
all optional equipment.
● There are no differences between the front speakers, and
between the surround speakers. Both speakers can be
connected as L (left) or R (right).
1
2
3
4
5
Connect the SX-NV70 right speaker to the unit.
Connect the speaker cord to the SPEAKERS R terminals.
● The cord with the white stripe should be connected to the @
terminal and the black cord to the @ terminal.
Connect the other SX-NV70 left speaker to the
unit.
Connect the speaker cord to the SPEAKERS L terminals in
the same manner as step 1.
Connect the SX-R220 surround speakers.
Connect the supplied AM antenna @ and FM
antenna a.
Connect the AC cord to an AC outlet.
To be continued.
8
Page: 6
❑
✚
[
Jr
lr FM
[
75 c1
CONNECTIONS
To stand the AM antenna on a surface + ❑
Fix the claw to the slot.
To position the antennas
AM loop antenna:
Position to find the best direction and posikon for radio reception.
FM feeder antenna:
Extend this antenna horizontally in a T-shape and fix its ends to
the wall with cellophane tape, etc.
m
● Do not leave objects generating magnetism near the speakers.
● Do not bring the FM antenna near metal objects or curtain rails.
● Do not bring the AM antenna near other optional equipment,
the stereo system itself, the AC cord or speaker cords, since
noise will be picked up.
● Do not unwind the AM antenna wire.
CONNECTING AN OUTDOOR ANTENNA
For better FM reception, use of an outdoor antenna is
recommended.
Connect the outdoor antenna to the FM 75,~’terminals. + ❑
To connect other optional equipments+ page 56.
POSITIONING THE SPEAKERS
Position the speakers to make the most of the DSP surround
effect.
Standard positioning + ❑
@ Front speakers
@ Surround speakers
Place the surround speakers behind the listening area.
To mount the surround speakers on the wall + ❑
Mount each speaker on a s~ot that can hold its weight.
Sound is not heard from the surround speakers when the DSP
surround is set to off.
10
Page: 7
POWER I I $
._— _ —..
—.
——— ——..
—< .
R6(AA)
BEFORE OPERATION
To turn the unit on
Press one of the function buttons (TAPE, TUNER, VIDEO/AUX,
CD).
Playback of the inserted disc or tape begins, or the previously
tuned station is received (Direct Play Function).
The POWER button is also available.
The disc compartment may open and close for resetting the unit.
DEMO (Demonstration) mode
When the AC cord is connected for the first time, the display
window demonstrates the functions of the unit. When the power
is turned on, the DEMO display is overridden by the operation
display. When the power is turned off, the DEMO mode is
restored.
To cancel DEMO mode
Press the DEMO button. To reenter, press again.
Illumination guide
Whenever the AC cord is connected or one of the function buttons
is pressed, the buttons for that operation light up or flash.
Example: When connecting the AC cord, the II SET button
flashes to guide in setting the current time.
Flash window
The window on the top of the unit lights up or flashes while the
power is turned on.
To turn off, press the ■ CLEAR button while pressing the CD
button. To turn back on, repeat the above.
● Do not perform this operation during recording.
After use
Press the POWER button to turn off the power. The display
changes to the clock.
Using the headphones
Connect headphones to the PHONES jack with a stereo standard
plug (06.3 mm, 1/4 inch).
No sound is output from the speakers while the headphones are
plugged in,
REMOTE CONTROL
Inserting batteries + ❑
Detach the battery cover on the rear of the remote control and
insert two R6 (size AA) batteries.
When to replace the batteries
The maximum operational distance between the remote control
and the sensor in the display window should be approximately 5
meters (16 feet). When this distance decreases, replace the
batteries with new ones.
● If the unit is not going to be used for an extended period of
time, remove the batteries to prevent possible electrolyte
leakage.
● The remote control may not operate correctly when:
— the line of sight between the remote control and the remote
sensor is exposed to intense light, such as direct sunlight.
— other remote controls are used nearby (television, etc.).
12
Page: 8
SETTING THE CLOCK
When the AC cord is connected for the first time, the II SET
button flashes.
Set the time as follows while the power is off.
1
2
3
4
5
Press the SET button.
The hour flashes.
Press the K DOWN or W UP button to
designate the hour.
Press the SET button to set the hour.
The hour stops flashing and the minute starts flashing.
Press the M DOWN or W UP button to
designate the minute.
Press the SET button to set the minute and
complete setting.
The minute stops flashing on the display and the clock starts
from 00 second.
To correct the current time
Press the POWER button to turn the unit off. Press the II SET
button and carry out steps 1 to 5 above.
To display the current time
Press the CLOCK button on the remote control. The clock is
displayed for 4 seconds.
However, the time cannot be displayed during recording.
To switch to the 24-hour standard
Press the CLOCK button on the remote control and then press
the W button within 4 seconds.
Repeat the same procedure to restore the 12-hour standard.
If the clock display flashes while the power is off
This is caused by a power interruption. The current time needs
to be reset,
If power is interrupted for more than approximately 24 hours, all
settings stored in memory after purchase need to be reset.
14
Page: 9
cvn “
VOLUME
o
0
DOWN UP
a
VA
o
VOLUME
MIN. ● MAX
❑
✎ CEEI—E5BE
m
II + 1111
+ 111111
+11111111
-)
❑ ✝ m — T-BASS
~ II + 1111 + 111111 + 11111111 —
‘EiEE1
ELECTRONIC
GRAPHIG
EQUALIZER
“QEEiil
ELECTRONIC
GRAPHIG
EQLIALIZER
ADJUSTING THE SOUND
VOLUME CONTROL -+ El
Turn the VOLUME control @ on the main unit, or press the
VOLUME buttons @on the remote control.
BBE SYSTEM + H
The BBE system enhances the clarity of high-frequency sound.
It also enriches the KARAOKE function to provide a pleasant
and clear sound of your voice.
Press the BBE button.
Each time it is pressed, the level changes. Select one of the four
levels, or the off position to suit your preference.
SUPER T-BASS SYSTEM + ❑
The T-BASS system enhances the realism of low-frequency
sound.
Press the T-BASS button.
Each time it is pressed, the level changes. Select one of the four
levels, or the off position to suit your preference.
SOUND ADJUSTMENT DURING
RECORDING
The output volume and tone (except BBE) of the speakers or
headphones may be freely varied without affecting the level of
the recording.
Recording with BBE
The desired source can be recorded with the BBE function to
enhance the clarity of high-frequency sound. When playing back
a tape recorded with BBE, it is recommended that BBE be set to
off.
GRAPHIC EQUALIZER + ❑
This unit provides the following three different equalization curves.
ROCK: Powerful sound emphasizing treble and bass,
POP: More presence in the vocals and midrange.
CLASSIC: Enriched sound with heavy bass and fine treble.
Press one of the ELECTRONIC GRAPHIC EQUALIZER
buttons. + @
To cancel the selected mode+@
Press tne selectect butlon again. “EQ oFF is displayed
To select with the remote control + @
Press the GEQ button repeatedly until the desired equalization
curve is displayed.
~ ROCK — POP + CLASSIC — EQ oFF
I (cancel) 1
16
Page: 10
DSP SURROUND -+ E
The DSP (Digital Signal Processor) surround circuits can recreate
the effect of sounds reflected from walls or ceilings, to obtain the
sound presence of real environments.
There are three modes with matching graphic equalization
curves.
Press one of the SURROUND button. + @
Equalization curves are selected automatically to match the
SURROUND modes shown in parentheses.
DISCO (ROCK) :Littlereverberation and medium range surround
to resemble a disco.
LIVE (POP) :Little reverberation and wide range surround to
resemble a live stage.
HALL (CLASS IC):Long reverberation and medium range
surround to resound like a hall.
● The GEQ curve can also be selected or turned off to suit your
preference.
To cancel the selected mode+ D
Press the selected button again. “S-OFF is displayed.
When the music source is monaural
Select LIVE mode to obtain a simulated stereo effect.
. The sound is not heard from the surround speakers when:
-the source is monaural.
-the DSP surround is turned off.
● When a connected microphone is used, the DSP surround is
automatically canceled.
18
Page: 11
2 TUNING
W DOWN uPWf
MONO
MANUAL TUNING
1
2
Press the TUNEFUBAND button to select the band
repeatedly.
If the power is turned off, the previously tuned station will be
played (Direct Play Function).
n
Press the M DOWN or H UP button to select
a station.
Each time the button is pressed, the frequency changes.
When a station is received, ‘TUNE is displayed for 2 seconds.
During FM stereo reception, ii(m)))is displayed.
To search for a station quickly (Auto Search)
Keep the W DOWN or FM UP button pressed. until the tuner
starts searching for a station. After tuning in to a station, the
search stops.
To stop the Auto Search manually, press the M DOWN or M
UP button.
● The Auto Search may not stop at stations with very weak
signals.
When an FM stereo broadcast contains noise
Press the MONO TUNER button to display “MONO” on the
display. + ❑
Noise is reduced, although reception is monaural.
To restore stereo reception, press the button so that MONO
disappears.
To change the AM tuning interval
The default setting of the AM tuning interval is 10 kHz/step. If
you use this unit in an area where the frequency allocation system
is 9 kHz/step, change the tuning interval as follows.
Press the POWER button while pressing the TUNER/BAND
button.
To reset the interval, repeat this procedure.
● When the AM tuning interval is changed, all preset stations
(see page 22) are cleared. The preset stations have to be set
again.
20
Page: 12
1 TUNER
BAND
‘8
2
0000
0000
000
b
PRESETTING STATIONS + EI
The unit can store a total of 32 preset stations. When a station
is stored, a preset number is assigned to the station. Use the
preset number to tune in to a preset station directly.
1
2
3
Press the TUNER/BAND button to select a band,
and press the M DOWN or Bt UP button to
select a station.
Press the II SET button to store the station.
A station is assigned a preset number from 1 in consecutive
order for each band.
DISPLAY
@ The frequency
@ The preset number
@ The preset numbers
The selected preset number’ flashes,
Note that only the first 20 numbers are displayed, even if
stations 21 to 32 have been stored.
Repeat steps 1 and 2.
The next station will not be stored if a total of 32 preset stations
have already been stored for all the bands.
PRESET NUMBER TUNING + I=
Use the remote control to select the preset number directly.
1
2
Press the TUNER/BAND button to select a band.
Press the numeric buttons to select a preset
number.
Example:
To select preset number 25, press the +10, +10 and 5 buttons.
To select preset number 10, press the +10 and O buttons,
DISPLAY
@ Preset number
@ Frequency
Selecting a preset number on the main unit
Press the TUNEFVBAND button to select a band. Then, press
the 4> DIRECTION/PRESET button repeatedly.
Each time the button is pressed, the next highest number is
selected.
To clear a preset station
Select the preset number of the station to be cleared. Then, press
the Z CLEAR button, and press the II SET button within 4
seconds,
The preset numbers of all other stations in the band with higher
numbers are also decreased by one.
22
Page: 13
@
DIRECTION/PRESET
[ dm )
b
@
DISCDIRECT
PLAY
OQO
b
BASIC OPERATIONS
LOADING DISCS + El
Press the CD button, then press the 4 OPEN/CLOSE
button to open the disc compartment. Load disc(s)
with the label side up.
To play one or two discs, place the discs on tray 1 and 2.
To play three discs, press the DISC CHANGE button to rotate
the trays after placing two discs. Place the third disc on tray 3.
Close the disc compartment by pressing the A OPEN/CLOSE
button.
DISPLAY
@ Total playing time of the selected disc
@ Disc tray number of a disc to be played
@ Total number of tracks on the selected disc
@ Music calendar (only the first 20 tracks are displayed)
PLAYING DISCS + El
Load discs at first.
@To play all discs in the disc compartment, press
the 4> button.
Play begins with the disc on tray 1.
@To play one disc only, press one of the DISC
DIRECT PLAY buttons.
The selected disc is played once.
DISPLAY
@ Playing time of track
@ Number of track being played flashes.
@ Number of track being played
To stop play, press the ■ button.
To pause play, press the II button. To resume play, press again,
To search for a particular point, keep the 44 or * button
pressed and release the button on the desired point.
To skip to the beginning of a track, press the 44 or W button
repeatedly.
To remove discs, press the 4 OPEN/CLOSE button.
To start play when the power is off (Direct Play Function)
Press the CD button. The power is turned on and play of the
loaded disc(s) begins.
To replace discs before play, press the 4 OPEN/CLOSE button
to open the disc compartment.
To check the remaining time
Press the CD EDIT/CHECK button during play. The amount of
time remaining until all tracks finish playing is displayed. To
restore the play time display, repeat the above again.
To be continued.
24
Page: 14
1
2
1
DISC
~ DIRECT PLAY1
amm
b
2 0000
0000
000
b
BASIC OPERATIONS
Selecting a track with the remote control — ❑
1 Press one ofthe DISC DIRECT PLAY buttonsto select a disc.
2 Press the numeric buttons and the +10 button to select a
track.
Example:
@To select the 25th track, press the +1O,+1Oand 5 buttons.
@To select the 10th track, press the +1Oand O buttons.
Selected track starts to play and continues to the end of that
disc.
Replacing discs during play
While one disc is playing, the other discs can be replaced without
interrupting play.
1 Press the DISC CHANGE button.
2 Remove the discs and replace with other discs.
3 Press the A OPEN/CLOSE button to close the disc
compartment.
● When loading an 8-cm (3-inch) disc, put it onto the inner circle
of the tray.
● Do not place more than one compact disc on one disc tray.
● Do not tilt the unit with discs loaded, Doing so may cause
malfunctions.
RANDOM PLAY
All the tracks on the selected disc or on all the discs can be
played randomly.
Press the RANDOM button on the remote control.
To cancel random play, press again.
m
● Even if the * button is pressed, a previously played track
cannot be skipped. The unit returns to the beginning of the
current track only.
● Direct selection of the tracks with the numeric buttons is not
possible.
REPEAT PLAY
All the tracks on the selected disc or on all the discs can be
played repeatedly.
Press the REPEAT button on the remote control.
To cancel repeat play, press again.
Page: 15
3
0000
0000
000
b
5
Q
DIRECTION < } PRESET
b
BASIC OPERATIONS
PROGRAMMED PLAY
Up to 30 tracks can be programmed from any of the inserted
discs.
Use the remote control.
1
2
3
4
5
Press the PRGM button twice in stop mode.
The PRGM indicator flashes on the display.
● When the PRGM button is pressed once in step 1, the unit
enters the KARAOKE PROGRAM (page 50).
Press one of the DISC DIRECT PLAY buttons to
select a disc.
The selected disc is indicated on red on the display.
Go to the next step when the tray stops rotating.
Press the numeric buttons and the +1 Obutton to
program a track.
Example:
To select the 25th track, press the +1O, +1O and 5 buttons.
To select the 10th track, press the +1Oand O buttons.
DISPLAY
@ Program number
@ Selected track number
@ Total playing time of the selected tracks
@)Total number of selected tracks
Repeat steps 2 and 3 to program other tracks.
Press the <F button to start play.
To check the program
Each time the 4 or w button is pressed before playing, a
disc number, track number, and program number will be
displayed.
To clear the program
Press the ■ CLEAR button in stop mode.
To add tracks to the program
Before playing, repeat steps 2 and 3. The track will be
programmed after the last track.
To change the programmed tracks
Clear the program and repeat all the steps again.
During the programmed play, the CD EDIT/CHECK, DISC
CHANGE and RANDOM buttons do not function.
28
Page: 16
Q
A
EJECT
2
BASIC OPERATIONS
INSERTING TAPES
● On deck 1, tapes are always played back on both sides.
On deck 2, you can select a reverse mode to play back one or
both sides.
● Use normal (type I), CrOz (type 11)or metal (type lV) tapes for
playback.
Press theTAPE button and press the A EJECT mark
to open the cassette holder. + ❑
Insert a tape with the exposed side down and with the side to be
played first facing the foreground. Push the cassette holder to
close.
To select a reverse mode (deck 2 only) + ❑
Each time the REV MODE button is pressed, the reverse mode
changes.
To play one side only, turn on =.
To play from front side to back side once only, turn on c1.
To play both sides repeatedly, turn on c=).
● When tapes are loaded in both decks, the ZI on the display
indicates Continuous Play. (See page 32.)
PLAYING BACK A TAPE + H
Insert a tape.
Press” the DOLBY NR button and turn Dolby NR
on or off to match the playback tape.
For tapes recorded with DOLBY NR, turn on DO NR.
For tapes recorded without DOLBY NR, turn off DO NR.
Press the <P button to start play.
DISPLAY
@ Playback side of the tape
D: The side facing the foreground (the front side) is being
played.
Q: The side facing the background (the back side) is being
played.
@ Tape counter indicates the tape running length.
When tapes are inserted to both decks
Press the TAPE button to select a deck at first.
The selected deck number is displayed.
To stop play, press the ■ button.
To pause play(deck 2 only), press the II button. To resume
play, press again.
To change the playback side, press the 4* DIRECTION/
PRESET button in play or pause mode.
To fast forward or rewind, press the + or W button in stop
mode. Then press the ■ button to stop the tape.
To start play when the power is off (Direct Play Function)
Press the TAPE button. The power is turned on and play of the
inserted tape begins.
To set the tape counter to 0000
Press the 9 CLEAR button in the stop mode.
The counter is also set to 0000 when the cassette holder is
opened.
30
Page: 17
II
d /—.
>1
0
c
o
b
❑
✎
m
A
BASIC OPERATIONS
MUSIC SENSOR
If there is a 4-second or longer blank between each track, the
search for the beginning of the current or next track during
playback can be easily made.
When the F of the 4- button ie illuminated, press the PF
button to move to the next track or the 4 button to move to the
beginning of the current track.
When the 4 of the <~ button is illuminated, press the <
button to move to the next track, or the — button to move to
the beginning of the current track.
The search function uses a music sensor that may not be able
to detect tracks for tapes with:
“ blanks of less than 4 seconds between tracks.
● noisy blanks.
● long passages of low-end sound.
● low overall recording levels.
CONTINUOUS PLAY
After playback on one deck finishes, the tape in the other deck
will start to play without interruption.
1
2
3
4
Insert tapes into decks 1 and 2.
Press the TAPE/DECKl/2 button to select the
deck to be played back first.
Press the REV MODE button to select Z>.
Press the <> button to start playback.
Playback continues until the 1 button is ~ressed.
About cassette tapes
● To prevent accidental erasure, break off the plastic tabs on
the cassette tape after recording with a screwdriver or other
pointed tool. + ❑
@ Side A/@ Tab for side A
To record on the tape again, cover the tab openings with
cellophane tape, etc. (On CrOz tapes, take care not to cover
the CrOz tape detection slot @.)
● 120-minute or longer tapes are extremely thin and easily
deformed or damaged. They are not recommended.
. Take up any slack in the tape with a pencil or similar tool before
use. Slack tape may break or jam in the mechanism.
*H
DOLBY NR system
The Dolby Noise Reduction system reduces tape hiss noise.
For optimum performance when playing back a tape recorded
with the DOLBY NR system, turn on the DOLBY NR system.
32
Page: 18
1
1 \’ J
2 REV MODE
3 ❑
UINR
b
5 rEEpl
RECIREC MUTE
BASIC RECORDING
This section explains how to record from the tuner, CDs, or
external equipment. If you want to record from tapes, see pages
36 to 38.
Preparation
● Wind up the tape to the point where recording will start.
● Use normal (type I) and Cr02 (type II) tapes for recording.
Insert the tape to be recorded on into deck 2.
Insert the tape with the side to be recorded first facing
the foreground and the exposed side down.
Press the REV MODE button to select the reverse
mode.
To record on one side only, turn on ~.
To record on both sides, turn on => or ~=).
Press the DOLBY NR button to turn Dolby NR on
or off.
To record with DOLBY NR, turn on ❑U NR.
To record without DOLBY NR, turn off DU NR.
Press one of the function buttons and prepare
the source to be recorded.
To record from a CD, press the CD button and load the
disc(s).
To record from a radio broadcast, press the TUNER button
and tune in to a station.
To record from the connected source, press the VIDEO/
AUX button and play.
Press the ● REC/REC MUTE button to start
recording.
When the selected function is CD, playback and recording
start simultaneously.
To stop recording, press the ■ button.
To pause recording, press the II button. (Applicable when the
source is TUNER, VIDEO/AUX.) To resume recording, press
again.
To start recording with the remote control
First press the ./0 REC/REC MUTE button, and then press the
4> button within 2 seconds.
INSERTING BLANK SPACES
Insertion of 4-second blank spaces enables activation of the
Music Sensor function. (Applicable when the source is TUNER
or VIDEO/AUX.)
1 Press the ● REC/REC MUTE button during recording or
while in recording pause mode.
— on the display flashes for 4 seconds and the tape
runs without recording. After 4 seconds, the deck enters the
recording pause mode.
2 Press the II button to resume recording.
To insert a blank space of less than 4 seconds, press the ●
REC/REC MUTE button again while _ is flashing.
To insert blank spaces of more than 4 seconds, after the
deck enters recording pause mode, press the ● REC/REC MUTE
button again. Each time the button is pressed, a 4-second blank
space is added.
34
Page: 19
3
DOLBY NR
7!?
DUBBING THE TAPE MANUALLY
Preparation
● Wind up the tape to the point where recording will start.
● Note that recording will be completed on one side of the tape
only.
1
2
3
4
5
Press the TAPE button.
Insert the original tape into deck 1 and the tape
to be recorded on into deck 2.
Insert each tape with the side to be played back or recorded
first facing the foreground.
Press the DOLBY NR button to turn off the Dolby
NR.
00 NR on the display goes out.
Press the TAPE/DECK 1/2 button to select deck
1.
Press the ● REC/REC MUTE button to start
recording,
Playing and recording start simultaneously.
To stop dubbing
Press the ■ button.
To set the Dolby NR when playing back the dubbed tape
Press the DOLBY NR button and turn Dolby NR on or off to
match the original tape.
To erase a recording
Make sure the microphone is not connected to this unit.
1 Insert the tape to be erased into deck 2 and press the TAPE/
DECK 1/2 button to display TAPE 2.
2 Wind up the tape to the point where the erasure is to be
started.
3 Set the reverse mode by pressing the REV MODE button.
4 Press the ● REC/REC MUTE button to start the erasure.
36
Page: 20
DUBBING THE WHOLE TAPE
This function allows you to make exact copies of both sides of
the original tape.
The reverse side of both tapes will start simultaneously as soon
as the longer tape has been reversed.
m
● Dubbing does not start from a point halfway in the tape.
● The reverse mode is automatically set to =1.
● The Dolby NR does not affect recording.
1
2
3
Press the TAPE button.
Insert the original tape into deck 1 and the tape
to be recorded on into deck 2.
Insert each tape with the side to be played back or recorded
first facing the foreground.
Press the SYNCHRO DUBBING button once or
twice to start recording.
For recording at normal speed:
Press it once to display N-DUB.
For recording at high speed:
Press it twice to display H-DUB.
The tapes are rewound to the beginning of the front sides,
and then recording starts.
To stop dubbing
Press the ■ button.
To set the Dolby NR when playing back the dubbed tape
Press the DOLBY NR button and turn Dolby NR on or off to
match the original tape.
m
● Recording does not start, if the erasure prevention tab on either
side of the tape is broken off.
● If the leader segment of the tape to be recorded on is longer
than that of the original tape, recording on the reverse side
may stop midway through the recording. In this case, dub each
side manually following the procedure in “DUBBING THE TAPE
MANUALLY.
38
Page: 21
4 DISC
~ DIRECT PLAY-1
aam
Al EDIT RECORDING
The Al EDIT function enables CD recording without worrying
about tape length and track length. When a CD is inserted, the
unit automatically calculates track lengths. If necessary, the order
of tracks is rearranged so that no track is cut short.
m
Al EDIT recording will not start from a point halfway into the
tape. The tape must be recorded from the beginning of either
side.
Use the remote control from steps 3 to 6.
1
2
3
4
5
6
Insert the tape into deck 2, and press the DOLBY
NR button to turn Dolby NR on or off.
Insert the tape with the side to be recorded first facing the
foreground.
Press the CD button and load the disc(s).
Press the EDIT/CHECK button once.
“EDIT” lights up and “Al” flashes on the display.
Each time it is pressed, the display changes.
Al EDIT — PRGM EDIT
Press one of the DISC DIRECT PLAY buttons to
select a disc.
Press the numeric buttons on the remote control
to designate the tape length.
10 to 99 minutes can be specified.
Example: When using a 60-minute tape, press the 6 and O
buttons.
In a few seconds, the microcomputer determines the tracks
to be recorded on each side of the tape.
DISPLAY
0 Tape length
@ Tape side A (front side)
@ Remaining time of side A
@ Selected tracks for side A
First press the ● /0 REC/REC MUTE button and
then press the <> button within 2 seconds to
start recording.
The tape is rewound to the beginning of the front side, the
lead segment is played through for 10 seconds, and then
recording starts. After recording on the front (side A) ends,
recording on the back (side B) starts.
To stop recording
Press the ■ button. Recording and CD play stop simultaneously.
To clear the edit program
Press the Z CLEAR button twice so that “EDIT” disappears on
the display.
40
Page: 22
Al EDIT RECORDING
To check the order of the programmed track numbers
Before recording, press the EDIT/CHECK to select side A or B,
and press the +4 or — button repeatedly. + ❑
DISPLAY
@ Tape side
@ Program number
@ Programmed track numbers
@ Track number
To add tracks from other discs to the edit program
If there is any time remaining on the tape after step 5 of page 40,
you can add tracks from other discs in the CD compartment .
1 Press the EDIT/CHECK button to select side A or B.
2 Press one of the DISC DIRECT PLAY buttons to select a disc.
3 Press the numeric buttons to select tracks.
~ 90es out and m{ starts flashing on the display.
A track whose playing time is longer than the remaining time
cannot be programmed.
4 Repeat steps 2 and 3 to add more tracks.
Time on cassette tapes and editing time
The cassette recording time is usually a little longer than the
specified recording time printed on the label. This unit can
program tracks to use the extra time. When the total recording
time is a little longer than the tape’s specified recording time
after editing, the display shows the extra time (without a minus
mark), instead of the time remaining on the tape (with the minus
mark).
m
● Recording is inhibited if the erasure prevention tab on either
side of the tape is broken off.
● The Al EDIT function cannot be used with discs containing 31
tracks or more.
PROGRAMMED EDIT RECORDING
The PROGRAMMED EDIT function enables CD recording while
checking the remaining time on each side of the tape as the
tracks are programmed.
m
The programmed edit recording will not start from a point halfway
in the tape. The tape must be recorded from the beginning of
either side.
Use the remote control from stetx 3 to 8.
1
2
3
Insert the tape into deck 2, and press the DOLBY
NR button to turn Dolby NR on or off.
Insert the tape with the side to be recorded first facing the
foreground.
Press the CD button and load the disc(s).
Press the EDIT/CHECK button twice.
“EDIT” lights up and “PRGM” flashes on the display.
To be continued.
Page: 23
4 f!ib,%
5
DISC
~ DIRECT PLAY1 +10 n
u
7 EDIT/CHECK
r BJ
8 REC/RECMUTE
E i
DIRECTION < } PRESET
●/o
o
PROGRAMMED EDIT RECORDING
4
5
6
7
8
Press the numeric buttons to designate the tape
length.
10 to 99 minutes can be specified.
Example: When using a 60-minute tape, press the 6 and O
buttons.
DISPLAY
@ Tape length
@ Tape side A (front side)
@ Maximum recording time for side A
Press one of the DISC DIRECT PLAY buttons to
select a disc and press the numeric buttons to
program a track.
Example: To select the 10th track of the disc 2, press DISC
DIRECT PLAY 2, numeric buttons +10 and O.
DISPLAY
~ Remaining time of side A
@ Total number of programmed tracks
~ Programmed tracks
Repeat step 5 for the rest of the tracks for side A.
A track whose playing time is longer than the remaining time
cannot be programmed.
Press the EDIT/CHECK button to select side B
and program the tracks for side B.
After confirming B on the display, repeat step 5.
First press the ./0 REC/REC MUTE button and
then press the +> button within 2 seconds to
start recording.
The tape is rewound to the beginning of the front side, the
lead segment is played through for 10 seconds, and then
recording starts. After recording on the front (side A) ends,
recording on the back (side B) starts,
To stop recording
Press the ■ button. Recording and CD play stop simultaneously.
To clear the edit program
Press the ■ button twice so that “EDIT” disappears on the display.
To change the program of each side
Press the EDIT/CHECK button to select side A or B, and press
the ■ CLEAR button to clear the program of the selected side.
Then program tracks again.
To check the order of the programmed track numbers
-H
Before recording, press the EDIT/CHECK button to select side
A or B, and press the + or * button repeatedly.
DISPLAY
@ Program number
@ Track number
@ Programmed track numbers
m
Recording is inhibited if the erasure prevention tab on either side
of the tape is broken off,
44
Page: 24
1
4 MIC
a’””’
Q
MIN. . MAX
5 DIGITAL
-’Ho
@
MIN* ● MAX
MICROPHONE MIXING
Two microphones (not supplied) can be connected to this unit,
allowing you to sing along to music sources.
Use a microphone with a mini plug (a3.5 mm, l/E inch).
Before connecting a microphone
Set the MIC MIXING control to MIN.
1
2
3
4
5
Connect your microphone to the MIC jack.
Press one of the function buttons to select the
source to be mixed, and play the source.
Adjust the volume and tone of the source.
Adjust the microphone volume with the MIC
MIXING control.
The volume of both microphones is adjusted simultaneously.
Adjust the echo with the DIGITAL ECHO control.
To record microphone sound mixed with source sound
Follow the procedure for recording from the source (pages 34 to
36).
The SYNCHRO DUBBING button cannot be used for mixing
recording.
When not using the microphones
Set the MIC MIXING and DIGITAL ECHO controls to MIN and
remove the microphones from the MIC jacks.
m
● When a connected microphone is used, the DSP SURROUND
system is automatically canceled.
● If the microphone is held too near the speakers, a howling sound
may be produced. In this case, hold the microphone away
from the speakers, or decrease the sound level using the MIC
MIXING control.
● If sound through the microphone is extremely loud, it may be
distorted. In this case, turn the MIC MIXING control toward
MIN.
Recommended microphone
The use of a unidirectional type microphone is recommended to
prevent howling. Contact your local Aiwa dealer for details.
46
Page: 25
VOCAL FADER/MULTIPLEX
FUNCTION
This unit can use discs or tapes as Karaoke sources.
VOCAL FADER/AUTO VOCAL FADER function
The VOCAL FADER function makes the singer’s voice on
ordinary discs or tapes softer than the accompaniment. In the
AUTO VOCAL FADER function, the VOCAL FADER operates
only while there is audio input through a microphone.
MULTIPLEX/AUTO MULTIPLEX function
The MULTIPLEX function mutes the vocal part on multi audio
discs or tapes, so that the accompaniment is output through
both speakers. In the AUTO MULTIPLEX function, the
MULTIPLEX operates only while there is audio input through a
microphone.
Press the VOCAL FADER/MULTIPLEX button repeatedly
to select the function.
Each time it is pressed, the function can be selected cyclically.
+,
@ ?OCAL FADER
@ AUTO VOCAL FADER
@ MULTIPLEX
@ AUTO MULTIPLEX
@ Cancel
Multi audio discs and tapes
The MULTIPLEX function is designed to work with multi audio
discs and tapes which have the vocal part on the right channel
and the accompaniment on the left channel.
m
● The VOCAL FADER function may not operate correctly with
the following kinds of CDs or tapes.
— Those with monaural sound
— Those recorded with strong echoes
— Those with the vocal part recorded on the right or left side of
the sound width
● While the VOCAL FADER function is on, the sound is output
as monaural.
48
Page: 26
L/
KARAOKE PROGRAM
Before or during CD play, you can reserve up to 15 tracks to be
played after the current track. Each reservation is cleared when
it finishes playing.
Use the remote control.
1
2
3
4
5
Press the PRGM button once.
Press one of the DISC DIRECT PLAY buttons to
select a disc, and the numeric buttons to select
a track.
Press the KARAOKE ENTER button.
DISPLAY
@ Reserved disc number
@ Reserved track number
Repeat steps 2 and 3 to reserve other tracks.
Press the 4> button to start play.
After playing a track, it is cleared from the program. Another
track can be reserved instead of the cleared track.
DISPLAY
@ Number of remaining reserved tracks
@ Currently playing disc
@ Currently playing track number
@ Disc number of the last reservation
@ Track number of the last reservation
To add the reservation during play
Repeat steps 2 and 3.
To check the reserved tracks
Press the EDIT/CHECK button repeatedly. Each time it is
pressed, the disc number and track number are displayed in the
reserved order.
To stop play
Press the ■ button. By pressing the 4> button, play starts
again.
To skip a track
Press the — button. The skipped track is cleared from the
program.
To clear all the reservations
Press the * button repeatedly until “K -“O is displayed.
*m
By pressing it once more, the Karaoke Program is canceled.
m
● If the reserved track number does not exist on the selected
disc, the unit stops playing and the display flashes. In this case,
press the * button to skip the error track. Then press the
<> button to start play with the next reserved track.
● When the PRGM button is pressed repeatedly in step 1, PRGM
is displayed and the unit enters the CD program play mode
(page 28).
To cancel the program play, press the ■ CLEAR button.
Page: 27
u
2 TUNING
w DOWN UP* SET
— ~m
b b
4 TUNING
L/
a—
SETTING THE TIMER
The unit can be turned on at the specified time every day with
the built-in timer.
Preparation
Make sure the clock is set correctly. (See page 14.)
1
2
3
4
5
6
Press the TIMER button on the remote control
once to display 0, and press the II SET button
within 4 seconds,
O is displayed, and the hour flashes.
If you do not press the II SET button within 4 seconds, another
operation may start.
Designate the hour of the timer-on time by
pressing the W DOWN or * UP button, and
the II SET button. Repeat to designate the minute
of the timer-on time.
After you designate the timer-on time, TIMER and one of the
source name flashes alternately on the display for 4 seconds.
Within 4 seconds, press one of the function
buttons to select a source.
“TIMER and the selected source name flash alternately for 4
seconds. At this time, the selected function button does not
light up.
● If this step is not completed within 4 seconds, repeat from
step 1.
● If the TUNER button is pressed, the band cannot be selected
in this step.
Within 4 seconds, select the duration for the
timer-activated period with the K DOWN or W
UP button.
The duration for the timer-activated period can be set between
10 and 240 minutes in 10-minute steps.
● If this step is not completed within 4 seconds, repeat from
step 1.
Prepare the source.
To listen to a CD, load the disc to be played first on tray 1.
To listen to a tape, insert the tape into deck 1 or 2.
To listen to the radio, tune in to a station.
Press the POWER button to turn the unit off after
adjusting the volume and tone,
O remains on the display after the power is turned off (timer
standby mode).
When the timer-on time is reached, the unit turns on and
begins play with the selected source.
To check the specified time and source
Press the TIMER button on the remote control. The timer-on
time and the selected source name are displayed for 4 seconds,
However, the duration for the timer-activated period will not be
displayed.
52
Page: 28
SETTING THE TIMER
To cancel timer standby mode temporarily
Press the TIMER button on the remote control so that @ or R~C
disappears on the display.
~ restore the timer standby mode, press again to display 0 or
REC
Using the unit while the timer is set
You can use the unit normally after setting the timer.
Before turning off the power, repeat step 5 to prepare the source,
and adjust the volume and tone.
● Timer playback and timer recording will not begin unless the
power is turned off.
● Connected equipment cannot be turned on and off by the built-
in timer of this unit. Use an external timer.
TIMER RECORDING
Timer recording is applicable for TUNER and VI DEO/AUX (with
an external timer) sources only.
Press the TIMER button twice on the remote control so that
~Cappears on the display, and press the II SET button within
4 seconds. Repeat the steps in page 52 from step 2 and insert
the tape to be recorded into deck 2 after step 5.
SETTING THE SLEEP TIMER
The unit can be turned off automatically after a specified time
passes.
Use the remote control.
1 Press the SLEEP button.
“SLEEP” @ lights up, and SLEEP @ is displayed for 4
seconds.
2 Within 4 seconds, press the * or FP button to
specify the time until the power is turned off.
Each time the button is pressed, the time changes between
10 and 240 minutes in 10-minute steps. The specified time
@is displayed.
To check the time remaining until the power is turned off
Press the SLEEP button once. The remaining time is displayed
for 4 seconds.
To cancel the sleep timer
Press the SLEEP button twice so that “SLEEP on the display
disappears.
Page: 29
I
I
CONNECTING OPTIONAL
EQUIPMENT -+ ❑
Refer to the operating instructions of the connected equipment for
details.
● The connecting cords are not supplied. Obtain the necessary
connecting cords.
● Consult your local Aiwa dealer for adequate optional equipment.
VIDEO/AUX JACKS
This unit can input the sound signal through the jacks,
Use a cable with RCA phono plugs to connect an audio equipment
(turntables, LD players with analog output jacks, VCRs, etc.).
Connect the red plug to the R jack, and the whilte plug to the L jack.
When connecting a turntable
Use an Aiwa turntable equipped with a built-in equalizer amplifier.
LINE OUT JACKS
This unit can output the sound signal through the jacks,
Use a cable with RCA phono plugs to connect an audio equipment
with the LINE IN (analog input) jacks.
CD DIGITAL OUT JACK (NSX-V72 only)
This unit can output CD digital sound signals through the jack.
Use an optical cable to connect a digital audio equipment (digital
amplifier, DAT decks, MD recorders, etc.).
Remove the dust cap (a) from the CD DIGITAL OUT (OPTICAL)
jack.
When the CD DIGITAL OUT (OPTICAL) jack is not being
used
Attach the supplied dust cap.
SUPER WOOFER Q JACK
Connect an optional powered sub woofer with a built-in-amplifier to
the jack.
LISTENING TO EXTERNAL
SOURCES
To play equi ment connected to the VIDEO/AUX jacks, proceed as
h
follows. + =
1 Press the VIDEO/AUX button.
VIDEO appears on the display.
2 Play the connected equipment.
To change a source name in the display
When the VI DEO/AUX button is pressed, VIDEO is displayed initially.
It can be changed to AUX or TV.
With the power on, press the POWER button while pressing the
VIDEO/AUX button.
Repeat the procedure to select one of the names.
To adjust the sound level of the external source + ❑
When the sound level of the external source is much higher or much
lower than that of other function sources, adjust it as follows.
1
2
Press the VIDEO/AUX button and play the equipment.
Turn the VI DEO/AUX INPUT LEVEL control on the rear panel
until the sound level becomes the same as that of other function
sources.
Page: 30
13
.
m
CARE AND MAINTENANCE
Occasional care and maintenance of the unit and the software
are needed to optimize the performance of your unit.
To clean the cabinet
Use a soft cloth lightly moistened with “mild detergent solution.
Do not use strong solvents, such as alcohol, benzine or thinner.
To clean the heads and tape paths + ❑
After every 10 hours of use, clean the heads and tape paths with
a head cleaning cassette or cotton swab moistened with cleaning
fluid or denatured alcohol. (These cleaning kits are commercially
available.)
When cleaning with a cotton swab @, wipe the recording/
playback head ~, erasure head (deck 2 only) @, capstans@,
and pinchrollers @.
After cleaning the heads and tape paths with a liquid head
cleaning cassette or a moistened swab, wait until the cleaned
parts are completely dried before inserting the tapes,
To demagnetize the heads
The heads may become magnetized after long-term use. This
may narrow the output range of recorded tapes and increase
noise. After 20 to 30 hours use, demagnetize the heads with any
commercially available demagnetizer.
Care of discs+ ❑
● When a disc becomes dirty, wipe the disc from the center out
with a cleaning cloth.
● After playing a disc, store the disc in its case. Do not leave the
disc in places that are hot or humid.
Care of tapes
● Store tapes in their cases after use.
QDo not leave tapes near magnets, motors, television sets, or
any source of magnetism. This will downgrade the sound quality
and cause noise.
● Do not expose tapes to direct sunlight, or leave them in a car
parked in direct sunlight.
58
Page: 31
SPECIFICATIONS
Main unit CX-NV70/CX-NV72
FM tuner section
Tuning range
Usable sensitivity(lHF)
Antenna terminals
AM tuner section
Tuning range
Usable sensitivity
Antenna
Amplifier section
Power output
Total harmonic distortion
Inputs
outputs
Cassette deck section
Track format
Frequency response
Signal-to-noise ratio
Recording system
Heads
87.5 MHz to 108 MHz
13.2 dBf
75 ohms (unbalanced)
530 kHz to 1710 kHz (10 kHz
step)
531 kHz to 1602 kHz (9 kHz step)
350 vVlm
Loop antenna
FTC RULE
100 watts per channel, Min.
RMS at 6 ohms, from 65 Hz to 12
kHz, with no more than 1 Y. Total
Harmonic Distortion
0.1 YO (50W, 1 kHz, 6 ohms, DIN-
AUDIO)
VI DEO/AUX: 150 mV adjustable
MIC 1, MIC 2:1 mV (10 kohms)
LINE OUT: 200 mV
SUPER WOOFER: 2.45 V
SPEAKERS: accepts speakers of
6 ohms or more
SURROUND SPEAKERS:
accepts speakers of 16 ohms or
more
PHONES (stereo jack): accepts
headphones of 32 ohms or more
4 tracks, 2 channels stereo
CrOz tape: 50 Hz – 16000 Hz
Normal tape: 50 Hz – 15000 Hz
60 dB (Dolby B NR ON, Cr02 tape
peak level)
AC bias
DECK 1: Playback head x 1
DECK 2: Recording/playback/
erase head x 1
Compact disc player section
Laser Semiconductor laser (k= 780 nm)
D-A converter 1 bit dual
Signal-to-noise ratio 85 dB (1 kHz, O dB)
Harmonic distortion 0.03 % (1 kHz, O dB)
Wow and flutter Unmeasurable
60
Page: 32
SPECIFICATIONS
SPEAKER SYSTEM SX-NV70
Cabinet type
Speaker
Impedance
Output sound pressure level
Dimensions (W x H x D)
Weight
GENERAL
Power requirements
Power consumption
Dimensions of main unit
(W XHXD)
Weight of main unit
3 way, bass reflex
(Magnetism sealed type)
WOOfer: 140 mm (55/8 h.) COne
type
Tweeter: 80 mm (3’/4 in.) cone
type
Super tweeter: 50 mm (2 in.)
ceramic type
6 ohms
87 dBIWlm
206 x 302 x 265 mm (81/8 x 12 x
10’/2 in,)
2.9 kg (6 Ibs. 6 OZ)
120 V 60 Hz, fixed
11OW
260 x 307.8 x 337 mm
(10’/4 X 12’/8 x 133/8 in.)
7.8 kg (17 Ibs. 3 02)
Specifications and external appearance are subject to change without
notice due to product improvement.
62
Page: 33
TROUBLESHOOTING GUIDE
If the unit fails to perform as described in these operating
instructions, check the following guide,
GENERAL
There is no sound.
● Is the AC cord connected properly?
● Is there a bad connection? (+ page 
● Is there a short circuit in the speaker terminals?
+ Disconnect the AC cord, then correct the speaker
connections.
● Is an incorrect function button pressed?
Sound is emitted from one speaker only.
● Is the other speaker disconnected?
The output sound is not stereo.
0 Is the Karaoke function turned on? (+ page 48)
An erroneous display or a malfunction occurs.
+ Reset the unit as stated below.
TUNER SECTION
There is constant, wave-like static.
● Is the antenna connected properly? (+ page
● Is the signal weak?
+ Connect an outdoor antenna.
The reception contains noise interferences or the sound
is distorted.
* Is the system picking up external noise or multipath distortion?
+ Change the orientation of the antenna.
+ Move the unit away from other electrical appliances.
CASSETTE DECK SECTION
The tape does not run.
● Is deck 2 in pause mode? (+ page 30)
The sound is off-balance or not adequately high.
● Is the playback head dirty? (+ page 58)
Recording is not possible.
● Is the erasure prevention tab on the tape broken off? (+ page
32)
● Is the recording head dirty? (+ page 58)
Erasure is not possible.
● Is the erasure head dirty? (+ page 58)
● Is a metal tape being used? (+ page 34)
High frequency sound is not emitted.
● Is a tape recorded without Dolby NR played back with the Dolby
NR system operating? (+ page 30)
● Is the recording/playback head dirty? (+ page 58)
CD PLAYER SECTiON
The CD player does not play.
● Is the disc correctly inserted? (+ page 24)
● Is the disc dirty? (+ page 58)
● Is the lens affected by condensation?
+ Wait approximately one hour and try again,
To reset
If an unusual condition occurs in the display window or the
cassette decks, reset the unit as follows.
1 Press the POWER button to turn off the power.
2 Press the POWER button to turn the power back on while
pressing the ❑ CLEAR button. Everything stored in memory
after purchase is canceled.
If the power cannot be turned off in step 1 because of a
malfunction, reset by disconnecting the AC cord and repeat step
2.
64
Page: 34
PARTS INDEX
Main instructions about each part are indicated,
Page: 35
INDICE DE LAS PARTES NOMENCLATURE ——
Se indican Ias instrucciones principals de cada parte. Les principals instructions concernant chaque partie sent
indiquees.
:“
f TUNER/BAND TUNER BAND 20-21
‘ $;, TAPEIDECK 1/2 TAPE DECK 1/2 30-31
“% Disc compartment — 24-25
Compartimiento de discos
,’ +
~ Compartment a disques
4 POWER POWER 12-13
4
_J
;$: DEMO — 12-13
@ ‘: Q RECIREC MUTE O REC/REC MUTE 34-35
7 , SYNCHRO DUBBING NORMALIHIGH 38-39
‘8 ~~ Ill SET II SET 14-15, 22-23, 24-25,
30-31, 52-53
9 ,’ PHONES — 12-13
$0 DOLBY NR — 30-31
. . .
.
W REV MODE [DECK 2] — 30-31
‘%2 CD EDIT/CHECK EDIT/CHECK 24-25, 40-45, 50-51
.
.
73 Deck l/Platina l/Platine 1 — 30-31
.,. ,.’
‘%4’ VOCAL FADERIMULTIPLEX KARAOKE VOCAL FADER/MULTIPLEX 48-49
jj L II CLEAR ■ CLEAR 12-13, 14-15, 22-23, 24-25,
;,,<
28-29, 30-31, 34.35
/.
.jL1 ~ Display window —
Visualizador
F’en~tre d’affichage
,17 ‘ VIDEO/AUX VIDEO/AUX 56-57
“W! CD CD 24-25
t;$l DISC CHANGE —
?D” $ OPENICLOSE
26-27
= OPEN/CLOSE 24-25
~1 DISC DIRECT PLAY DISC DIRECT PLAY 24-25
22.. Sensor for remote control —
,,,, Sensor para el control remoto
Capteur pour telecommande
:,
23 VOLUME VOLUME (A, V) 16-17
224: T-BASS T-BASS 16-17
2?, BBE — 16-17
:26 SURROUND — 18-19
.g7”i ELECTRONIC GRAPHIC EQUALIZER GEQ 16-17
,.
28> 1%, * TUNING UP m, w UP 14-15, 20-21, 24-25, 3CI-33
.>.
‘ 29: MIC MIXING — 46-47
:30” DIGITAL ECHO — 46-47
31, “ MIC 1, MIC 2 — 46-47
“ ‘q~ , -44, — TUNING DOWN -, M DOWN 14-15, 20-21, 24-25, 30-33
:33. Deck 2/Platina 2/Platine 2 — 30-31
.34.; ~~ DIRECTIONIPRESET 4> DIRECTION/PRESET 22-23, 24-25, 30-31
$5. -_ PRGM 28-29, 50-51
.; 36;’ — SLEEP 54-55
,’,
37’: “ -– TIMER 52-53
. :3g,: _
1 —0,+10 22-23, 26-29, 40-44, 50-51
, #“’ – RANDOM 26-27
,/@ ,,’ -– CLOCK 14-15
: @ — REPEAT/MONO TUNER 20-21, 26-27
42:; _
KARAOKE ENTER 50-51
~;7
Page: 36
DOLBY NR LUM?.SY5TEM
.
.
.
Dolby noise reduction manufactured under license from Dolby .
Laboratories Licensing Corporation.
“DOLBY” and the double-D symbol DO are trademarks of Dolby
Laboratories Licensing Corporation.
●
Reduccion de ruido Dolby fabricado bajo Iicencia de Dolby Labo-
ratories Licensing Corporation.
DOLBY y el simbolo de la D doble 00 son marcas de Dolby
Laboratories Licensing Corporation. .
Reduction de bruit Dolby fabriquee sous Iicence de Dolby Labo-
ratories Licensing Corporation.
DOLBY et Ie symbole double-D DO sent des marques de Dolby
Laboratories Licensing Corporation.
The word “BBE” and the “BBE symbol” are trademarks of BBE
Sound, Inc.
Under license from BBE sound, Inc.
La sigla “BBE” y el simbolo “BBE” son marcas registradas de
BBE Sound, Inc.
Bajo Iicencia de BBE Sound, Inc.
Lexpression “BBE” et Ie symbole “BBE” sent des marques
deposees de BBE Sound, Inc.
Sous Iicence de BBE Sound. Inc.
AIWA CO.,LTDm
Для того, чтобы скачать инструкции по эксплуатации для музыкальных центров Aiwa, необходимые Вам, выберете модель,
соответствующую Вашему устройству.
Список моделей для музыкальных центров Aiwa Вы можете увидеть ниже. Когда Вы найдете необходимый Вам файл, кликните напротив
него кнопку «Скачать», чтобы перейти на конечную страницу для загрузки руководства пользователя для музыкальных центров Aiwa. Обратите
внимание, представленные в нашем каталоге инструкции пользователя для музыкальных центров Aiwa находятся в PDF формате и всегда
доступны для бесплатной загрузки.
Если Вы не можете найти необходимый Вам мануал, свяжитесь с нами. Просто оставьте свой запрос на отсутствующий файл через нашу
контактную форму, и мы постараемся Вам помочь.
Инструкций найдено (65 результаты)
| Продавец | Модель | Комментарии | Скачать | +CD |
|---|---|---|---|---|
| Aiwa | NSX-S111 | Инструкция Aiwa NSX-S111, NSX-S116, NSX-S16 | Скачать | |
| Aiwa | NSX-S116 | Инструкция Aiwa NSX-S111, NSX-S116, NSX-S16 | Скачать | |
| Aiwa | NSX-S16 | Инструкция Aiwa NSX-S111, NSX-S116, NSX-S16 | Скачать | |
| Aiwa | NSX-S223 | Инструкция Aiwa NSX-S223 | Скачать | |
| Aiwa | NSX-S778 | Инструкция Aiwa NSX-S778, NSX-S787 | Скачать | |
| Aiwa | NSX-S787 | Инструкция Aiwa NSX-S778, NSX-S787 | Скачать | |
| Aiwa | NSX-S90 | Инструкция Aiwa NSX-S90 | Скачать | |
| Aiwa | NSX-SZ10 | Инструкция Aiwa NSX-SZ10, NSX-SZ17 | Скачать | |
| Aiwa | NSX-SZ1055 | Инструкция Aiwa NSX-SZ1055 | Скачать | |
| Aiwa | NSX-SZ17 | Инструкция Aiwa NSX-SZ10, NSX-SZ17 | Скачать | |
| Aiwa | NSX-SZ2 | Инструкция Aiwa NSX-SZ2 | Скачать | |
| Aiwa | NSX-SZ205 | Инструкция Aiwa NSX-SZ205 | Скачать | |
| Aiwa | NSX-SZ305 | Инструкция Aiwa NSX-SZ305 | Скачать | |
| Aiwa | NSX-SZ315 | Инструкция Aiwa NSX-SZ315 | Скачать | |
| Aiwa | NSX-SZ40 | Инструкция Aiwa NSX-SZ40 | Скачать | |
| Aiwa | NSX-SZ42 | Инструкция Aiwa NSX-SZ42 | Скачать | |
| Aiwa | NSX-SZ50 | Инструкция Aiwa NSX-SZ50 | Скачать | |
| Aiwa | NSX-SZ500 | Инструкция Aiwa NSX-SZ500 | Скачать | |
| Aiwa | NSX-SZ505 | Инструкция Aiwa NSX-SZ505 | Скачать | |
| Aiwa | NSX-SZ510 | Инструкция Aiwa NSX-SZ510 | Скачать |
Страницы:
1
2
3
4
Обзор
- Автомагнитолы Инструкция (31)
- Диктофоны Инструкция (6)
- Магнитофоны и магнитолы Инструкция (25)
- Музыкальные центры Инструкция (65)
- Плееры Инструкция (4)
![]()
AIWA CX-NV700LH NSX-V700

Type:  (PDF)
(PDF)
Size
11.2 MB
Page
34
Category
AUDIO
SERVICE MANUAL
If you get stuck in repairing a defective appliance
download
this repair information for help. See below.
Good luck to the repair!
Please do not offer the downloaded file for sell only
use it for personal usage!
Looking for similar aiwa manual?
Document preview [1st page]

Click on the link for free download!
Document preview [2nd page]

Click on the link for free download!
Please tick the box below to get download link:
- Also known:
AIWA CXNV-700LH NSXV-700 CXNV700LH NSXV700 CXNV 700 LH NSXV CX NV700LH NSX V700 CX-NV700LH NSX-V700
- If you have any question about repairing write your question to the Message board. For this no need registration.
- If the site has helped you and you also want to help others, please Upload a manual, circuit diagram or eeprom that is not yet available on the site.
Have a nice Day! - Please take a look at the below related repair forum topics. May be help you to repair.
Warning!
If you are not familiar with electronics, do not attempt to repair!
You could suffer a fatal electrical shock! Instead, contact your nearest service center!
Note! To open downloaded files you need acrobat reader or similar pdf reader program. In addition,
some files are archived,
so you need WinZip or WinRar to open that files. Also some files are djvu so you need djvu viewer to open them.
These free programs can be found on this page: needed progs
If you use opera you have to disable opera turbo function to download file!
If you cannot download this file, try it with CHROME or FIREFOX browser.
Relevant AUDIO forum topics:
Tisztelt Kollégák keresek AIWA CX-NV900 EZ hez STK419-130 végfokot
Üdv tisztelt kollégák!
A címbéli compact hifi készülék (hátulján Model No.:CX-NS-70V) bizonytalanul működik. Alap esetben agyhalottnak tűnik, nincs készenlét, be sem kapcsolható, pedig a tápegysége működik. Egy-két nap állás után ha úgy gondolja elindul, működik, bár a kijelző először kissé zavarodott karaktereket is megjelenít, de működik. Rövid időre áramtalanítva majd újra üzembe helyezve tökéletesen működik, ha készenlétbe kapcsoljuk, bármikor újra beüzemelhető. Viszont ha egy órára áramtalanításra kerül, akkor megint csak újabb egy-két napos üzemszünet után kapcsol csak be. Doksit találtam, bár nehéz rajta eligazodni.
Esetleg ha valakinek volt már ilyen megoldott hibaesete.
Sziasztok!
Egy Aiwa RX-30-at javítok, tuner-hibás. A 3sk73-ra terelődött a gyanú. Az volna a kérdésem, mivel semmit nem találtam róla, hogy helyettesíthető-e pl. BF964, vagy BF966-al? Persze, megfelelő lábelrendezés után.
Köszönettel
Attila
Üdv ismét Mesterek!
Egy jó ismerősömé a fenti készülék és jó lenne életre kelteni!
Nagy volt a buli, aztán fogalmam sincs hogy, de a készülék használat közben leesett neki kb. fél méterről, azóta nem csinál semmit. Ismerős elmondása szerint először még a power led világított a bekapcsolónál, de már az sem.
Szétszedtem, törést, repedést nem látok. A «kis» táp megvan, ami a digitális vezérlést (és a kijelző meghajtást) látja el, de ahogy néztem hasonló service manualban, az IC-nek 3,3V kellene, de itt 5V-ot mérek.
Egy ilyen eséskor mely alkatrészek a leginkább sérülékenyek? Logikusan végiggondolva a nagyobb tömegű, nagyobb tehetetlenségű dolgokra gondolnék, mint pl. elkók, amik esetleg zárlatba mehetnek… Ebben nincs tapasztalatom, hogy az integrált áramkörök mennyire tűrik az ilyesmit, el tudnak-e pusztulni egy efféle baleset következtében.
Gondoltam van köztetek olyan, aki esetleg már találkozott ilyesmivel.
Köszönöm!
Similar manuals:
If you want to join us and get
repairing help
please sign in or sign up by completing a simple electrical test
or write your question to the Message board without registration.
You can write in English language into the forum (not only in Hungarian)!
E-Waste Reduce