
Contents
Before Getting Started…
Watch Face and Display Indicators
Navigating Between Modes
Mode Overview
Shifting the Hands
Viewing the Face in the Dark
Useful Features
Time Adjustment
Using Watch Operations to Adjust the Time
Setting
Using the Watch in a Medical Facility or
Aircraft
Using Mobile Link with a Mobile
Phone
Getting Ready
Auto Time Adjustment
Mode Customization
Customizing the Timekeeping Mode Screen
Viewing Step Count Data
Recording Your Current Location (Location
Memory)
Checking the Distance and Bearing to a
Location Memory Point (Location Indicator)
Auto Altitude Calibration
Recording Waypoints and Their Altitudes
(Route Log)
Configuring World Time Settings
Adjusting Hand Alignment
Phone Finder
Configuring Watch Settings
Changing the Home City Summer Time Setting
MA1909-EB
© 2019 CASIO COMPUTER CO., LTD.
Connection
Connecting with a Phone
Canceling a Connection with a Phone
Using the Watch in a Medical Facility or
Aircraft
Unpairing
If you purchase another phone
Digital Compass
Taking a Compass Reading
Calibrating the Compass
Calibrating Compass Readings
Setting Up for True North Readings
(Magnetic Declination Calibration)
Magnetic North and True North
Digital Compass Reading Precautions
Altitude Measurement
Checking the Current Altitude
Calibrating Altitude Readings (Offset)
Checking the Altitude Differential from a
Reference Point
Setting the Auto Measurement Interval
Recording Altitude Readings
Specifying the Altitude Measurement Unit
Altitude Reading Precautions
Barometric Pressure
Measurement
Checking the Current Barometric Pressure
Checking Changes in Barometric Pressure
Over Time
Checking the Change in Barometric Pressure
between Two Readings
Barometric Pressure Change Indications
Calibrating Barometric Pressure Readings
(Offset)
Specifying the Barometric Pressure Unit
Barometric Pressure Reading Precautions
Temperature Measurement
Checking the Current Temperature
Calibrating Temperature Readings (Offset)
Specifying the Temperature Unit
Temperature Reading Precautions
Viewing Altitude Records
Viewing Saved Data
Deleting a Particular Record
Deleting All Records
Sunrise and Sunset Times
Looking Up Today’s Sunrise and Sunset
Times
Looking Up Sunrise and Sunset Times by
Specifying a Day
Stopwatch
Measuring Elapsed Time
Measuring a Split Time
Timer
Setting the Timer Start Time
Using the Timer
Alarms and Hourly Time Signal
Configuring Alarm Settings
Configuring the Hourly Time Signal Setting
Turning Off an Alarm or the Hourly Time Signal
World Time
Checking World Time
World Time City Setting
Swapping Your Home City Time and World
Time
Selecting UTC (Universal Coordinated Time)
as Your World Time City
Operation Guide 5601
1
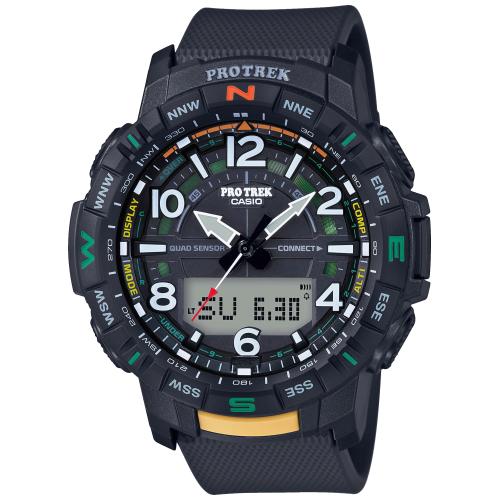
Need a manual for your Casio Pro Trek PRT-B50-1ER Watch? Below you can view and download the PDF manual for free. There are also frequently asked questions, a product rating and feedback from users to enable you to optimally use your product. If this is not the manual you want, please contact us.
Is your product defective and the manual offers no solution? Go to a Repair Café for free repair services.
Manual

Rating
Let us know what you think about the Casio Pro Trek PRT-B50-1ER Watch by leaving a product rating. Want to share your experiences with this product or ask a question? Please leave a comment at the bottom of the page.
Are you satisfied with this Casio product?
Yes No
2 votes
Frequently Asked Questions
Our support team searches for useful product information and answers to frequently asked questions. If you find an inaccuracy in our frequently asked questions, please let us know by using our contact form.
My mechanical watch runs fast, what can I do? Verified
This might be caused by exposure to a magnetic field. It can be solved by a demagnetisation process performed by a professional watchmaker.
This was helpful (662)
A battery in my device is oxidized, can I still safely use it? Verified
Ja, the device can still be safely used. Firstly, remove the oxidizd battery. Never use bare hands to do this. Then clean the battery compartment with a cotton swab dipped in vinegar or lemon juice. Let it dry and insert new batteries.
This was helpful (653)
What do AM and PM stand for? Verified
AM stands for Ante Meridiem and indicates that the time is before midday. PM stands for Post Meridiem and indicates that the time is past midday.
This was helpful (571)
What is a ‘Chronograph’? Verified
A ‘Chronograph’ is literally a ‘writer of time’. The term is used to describe clocks and watches that tell the time of day as well as measure a certain period of time, like a stopwatch.
This was helpful (518)
What is GMT? Verified
GMT stands for Greenwich Mean Time (sometimes called UTC, standing for Coordinated Universal Time). It is the time for the longitude 0, that passes through Greenwich near London.
This was helpful (350)
What is a quartz movement? Verified
Watches and clocks with a quartz movement are driven by a battery. This sends an electric current through quartz crystals that will vibrate. These vibrations are passed on to the movement. Because the vibrations have a fixed frequency, watches and clocks with a quartz movement are extremely precise.
This was helpful (350)
There is moisture on the inside of the glass of my Casio watch, what should I do? Verified
Casio states that if the moisture appeared after an extreme change in temperature and disappears relatively quickly afterwards, there is probably nothing wrong. If the moisture does not disappear, you should have your watch repaired as soon as possible.
This was helpful (49)
- Bluetooth® Smart
Часы оснащены технологией Bluetooth®, которая предлагает энергосберегающую возможность передачи данных нажатием кнопки. С помощью Bluetooth® вы можете подключить часы к смартфону, не используя провод, и получить доступ к целому ряду полезных функций. - Smartphone time
Если часы подключены к смартфону, время устанавливается автоматически и отображается текущее время, так что во всем мире. - Двойная электролюминесцентная подсветка
Одно нажатие кнопки обеспечит подсветку не только цифрового дисплея, но и аналогового циферблата, что максимально облегчает считывание информации. - Неоновый дисплей
Светящееся покрытие обеспечивает длительную подсветку в темное время суток после короткого воздействия света. - Цифровой компас
Встроенный цифровой компас определяет северный магнитный полюс. - Барометр (260 / 1.100 hPa)
Специальный датчик измеряет давление воздуха (диапазон измерений составляет 260 / 1100 гПа, 1 гПа = 0,75 мм рт. ст. или 1 мм рт. ст. = 1,333 гПа) и отображает измеренное значение на экране в виде символа. Это дает возможность заранее определить изменения погоды. - Термометр (-10°C / +60°C)
Датчик измеряет температуру окружающего воздуха вокруг часов и отображает ее на экране в градусах °C (-10°C /+60°C). - Высотометр 10,000 м
Встроенный датчик давления определяет изменения в атмосферном давлении и преобразовывает полученные результаты в абсолютную высоту до 10 000 м. - График набора высоты
График набор высоты суммирует количество метров, на которое Вы поднялись за один период времени таким образом, что Вы сразу же сможете увидеть общий подъем, выполненный на одном отрезке пути. - Память данных высотометра
В зависимости от модели в памяти данных часов можно сохранить до 40 записей о высотных точках рельефа местности и получить к ним доступ в любое время. Каждая из этих записей состоит из измеренной абсолютной высоты, а также даты и времени. В дополнение к отдельным абсолютным высотам также сохраняется максимальное и минимальное значение абсолютной высоты за время измерений. - Steptracker
Меры Шаг Tracker через шаги акселерометра и отображает их на дисплее часов. - Данные о восходе/закате солнца
После введения географического местоположения, на экране будет отображаться восход и закат солнца для любой установленной даты. - Location Indicator
Индикатор местоположения указывает направление и расстояние до ранее сохраненного местоположения.
Эта функция может быть очень полезна, если вы заблудились и хотите вернуться в домик, на озеро или в машину. - Mission Log
После активации функции журнала миссии сохраняются в смарт-маршрута и высот профиля и могут быть просмотрены позже на карте. Кроме того, фотографии автоматически сохраняются в журнале миссии, когда они сделаны во время хранения гастролей. - Функция мирового времени
Отображение текущего времени в основных городах и конкретных областях по всему миру. - Функция секундомера- 1/100 сек. — 24 часа
Прошедшее время измеряется с точностью в 1/100 секунды. Пределы измерения достигают 24 часов. - Таймер — 1/1 мин. — 24 часа
Для поклонников точности: таймеры обратного отсчета напомнят Вам о текущих или особенных событиях, издав звуковой сигнал в установленное время. Время можно предварительно настроить от 1 минуты и до 24 часов. Идеальное решение для людей, которым необходимо ежедневно принимать лекарства или выполнять промежуточные упражнения (тренировки). - 5 ежедневных будильников
Будильник напомнит Вам о повторяющихся событиях с помощью звукового сигнала, установленного Вами на определенное время. Вы также можете активировать почасовой сигнал времени, сообщающий о каждом полном часе. Эта модель имеет пять независимых будильников для оповещения о важных встречах. - Включение/выключение звука кнопок
Можно отключить звук при нажатии кнопок. Это означает, что часы больше не будут издавать звуковой сигнал при переключении от одной функции на другую. Заранее установленные звуковые сигналы или таймеры обратного отчета остаются активными, если звук кнопок отключен. - Функция перемещения стрелок
Нажатие на кнопку обеспечит перемещение стрелок в такое положение, которое позволит Вам легко считать информацию с маленьких цифровых дисплеев – например, дату или показатели секундомера. - Функция поиска телефона
Не помните, куда положили смартфон? При нажатии кнопки на ваших часах смартфон подает звуковой сигнал. - Автоматический календарь
После настройки автоматический календарь всегда отображает точную дату. - 12/24-часовое отображение времени
Отображение времени можно в 12-часовом или 24-часовом формате. - Минеральное стекло
Прочное, устойчивое к царапинам минеральное стекло защищает часы от повреждений. - Корпус из полимерного пластика
Корпус смолы является идеальным компаньоном каждого дня. Это прочное, легкое и относительно нечувствительно к холоду, жаре или другим внешним воздействиям. - Ремешок из полимерного материала.
Натуральный полимерный материал является идеальным для изготовления ремешка благодаря своей чрезвычайной прочности и гибкости. - пряжка
Браслет оснащен застежкой. - Индикатор низкого уровня заряда аккумулятора
Эта иконка появляется в том случае, когда пришло время заменить батарейку. - 2 года — 1 аккумулятор
Аккумулятор обеспечивает часы достаточным питанием приблизительно на два года. - Водонепроницаемость (10 Бар)
Идеально подходит для плавания с маской и трубкой: часы являются водонепроницаемыми до 10 Бар (ISO 2281). - Габариты (Ш x В x Г)
57,5мм x 50,8мм x 15,58мм - Вес
Примерно 65 гр
Возможны технические изменения и ошибки.
Размеры изображения не соответствуют натуральной величине. Цвета могут отличаться от цветов оригинала.
View a manual of the Casio Pro Trek PRT-B50-1ER below. All manuals on ManualsCat.com can be viewed completely free of charge. By using the ‘Select a language’ button, you can choose the language of the manual you want to view.
Page: 1
Contents
Before Getting Started…
Watch Face and Display Indicators
Navigating Between Modes
Mode Overview
Shifting the Hands
Viewing the Face in the Dark
Useful Features
Time Adjustment
Using Watch Operations to Adjust the Time
Setting
Using the Watch in a Medical Facility or
Aircraft
Using Mobile Link with a Mobile
Phone
Getting Ready
Auto Time Adjustment
Mode Customization
Customizing the Timekeeping Mode Screen
Viewing Step Count Data
Recording Your Current Location (Location
Memory)
Checking the Distance and Bearing to a
Location Memory Point (Location Indicator)
Auto Altitude Calibration
Recording Waypoints and Their Altitudes
(Route Log)
Configuring World Time Settings
Adjusting Hand Alignment
Phone Finder
Configuring Watch Settings
Changing the Home City Summer Time Setting
MA1909-EB © 2019 CASIO COMPUTER CO., LTD.
Connection
Connecting with a Phone
Canceling a Connection with a Phone
Using the Watch in a Medical Facility or
Aircraft
Unpairing
If you purchase another phone
Digital Compass
Taking a Compass Reading
Calibrating the Compass
Calibrating Compass Readings
Setting Up for True North Readings
(Magnetic Declination Calibration)
Magnetic North and True North
Digital Compass Reading Precautions
Altitude Measurement
Checking the Current Altitude
Calibrating Altitude Readings (Offset)
Checking the Altitude Differential from a
Reference Point
Setting the Auto Measurement Interval
Recording Altitude Readings
Specifying the Altitude Measurement Unit
Altitude Reading Precautions
Barometric Pressure
Measurement
Checking the Current Barometric Pressure
Checking Changes in Barometric Pressure
Over Time
Checking the Change in Barometric Pressure
between Two Readings
Barometric Pressure Change Indications
Calibrating Barometric Pressure Readings
(Offset)
Specifying the Barometric Pressure Unit
Barometric Pressure Reading Precautions
Temperature Measurement
Checking the Current Temperature
Calibrating Temperature Readings (Offset)
Specifying the Temperature Unit
Temperature Reading Precautions
Viewing Altitude Records
Viewing Saved Data
Deleting a Particular Record
Deleting All Records
Sunrise and Sunset Times
Looking Up Today’s Sunrise and Sunset
Times
Looking Up Sunrise and Sunset Times by
Specifying a Day
Stopwatch
Measuring Elapsed Time
Measuring a Split Time
Timer
Setting the Timer Start Time
Using the Timer
Alarms and Hourly Time Signal
Configuring Alarm Settings
Configuring the Hourly Time Signal Setting
Turning Off an Alarm or the Hourly Time Signal
World Time
Checking World Time
World Time City Setting
Swapping Your Home City Time and World
Time
Selecting UTC (Universal Coordinated Time)
as Your World Time City
Operation Guide 5601
1
Page: 2
Pedometer
Counting Steps
Causes of Incorrect Step Count
Hand Alignment Adjustment
Adjusting Hand Alignment
Other Settings
Enabling the Button Operation Tone
Reflecting Altitude Differential in Activity
Measurements
Returning the Watch to Its Factory Default
Settings
International Travel
Other Information
City Table
Summer Time Table
Supported Phones
Specifications
Mobile Link Precautions
Copyrights and Registered Copyrights
Troubleshooting
Operation Guide 5601
2
Page: 3
Before Getting
Started…
Thissectionprovidesanoverviewofthewatch
and introduces convenient ways it can be
used.
Important!
● This watch is not a special-purpose
measuring instrument. Measurement
function readings are intended for
general reference only.
● Whenever using the Digital Compass
of this watch for serious trekking,
mountain climbing, or other activities,
be sure to always take along another
compass to confirm readings. If the
readings produced by the Digital
Compass of this watch are different
from those of the other compass,
perform figure 8 calibration or 2-point
calibration of the watch compass to
ensure better accuracy.
ー Compass readings and calibration
will not be possible if the watch is in
the vicinity of a permanent magnet
(magnetic accessory, etc.), metal
objects, high-voltage wires, aerial
wires, or electrical household
appliances (TV, computer,
cellphone, etc.)
l Digital Compass
● The watch’s Altimeter Mode calculates
and displays relative altitude based on
barometric pressure readings
produced by its pressure sensor.
Because of this, altitude values
displayed by the watch may be
different from your actual elevation
and/or sea level elevation indicated for
the area where you are located.
Regular calibration in accordance with
the local altitude (elevation)
indications is recommended.
l Altitude Measurement
Note
● The illustrations included in this
operation guide have been created to
facilitate explanation. An illustration
may differ somewhat from the item it
represents.
Watch Face and Display
Indicators
③
①
⑤
⑥ ⑦
⑧ ⑨ ⑩ ⑪ ⑫ ⑬ ⑭
② ④
A The second hand points to [R] when the
watch is standing by for connection with a
phone.
B With 12 o’clock as the reference point, the
second hand indicates either north
(compass reading) or the approximate
angle differential from your current
location to a destination (Location
Indicator).
C The second hand points to [C] when the
watch is connected with a phone.
D The second hand indicates altitude/
barometric pressure differential.
E Flashes while the watch’s hands are
shifted for easier reading.
F Displayed when the indicated time is
summer time.
G Displayed when an alarm is turned on.
H Displayed during p.m. times while 12-hour
timekeeping is being used.
I Displayed while Auto Light is enabled.
J Displayed while Route Log is enabled.
K Displayed while barometric pressure
trend information is enabled.
L Shows the barometric pressure
measurement unit.
M Shows the altitude and distance
measurement unit.
N Appears when the hourly time signal is on.
● Battery Replacement
When battery power goes low, will start to
flash and some functions will become
disabled. If continues to flash, replace the
battery.
Request battery replacement from a CASIO
service center or your original retailer.
Navigating Between Modes
Your watch has the modes shown below.
● To return to the Timekeeping Mode from
any other mode, hold down (E) for at least
two seconds.
E
E
E
E
E
E
E
A E
C
E
E
E
A
C
Altitude Record Recall
Mode
Thermometer Mode
Barometer Mode
Digital Compass Mode
Altimeter Mode
Sunrise/Sunset Mode
Stopwatch Mode
Timer Mode
World Time Mode
Timekeeping Mode
Alarm Mode
Use the buttons in the illustration above to
navigate between modes.
Operation Guide 5601
3
Page: 4
Note
● You can use PRO TREK Connected to
change the arrangement of modes, or
to delete or add modes.
l Mode Customization
● To perform operations with PRO TREK
Connected, you first need to pair the
watch with the phone where the app is
installed.
l C Pair the watch with a phone.
Mode Overview
● Timekeeping Mode
This mode shows the current time and date.
You can also configure settings to show a
barometric pressure graph, World Time, step
count, and/or sunrise and sunset times.
You can navigate between display screens by
pressing (D).
D
D
D
D
Day of the week, month, day
Hour, minute, second
Barometric pressure
graph, month, day
Step count
Barometric
pressure graph
Daily step
count
One second
later
Note
● You can use PRO TREK Connected to
add the items below to the display.
You can also remove items from the
display and rearrange their display
locations.
ー Year, month, day
ー Barometric pressure graph
ー World Time hour and minute
ー Home City sunrise and sunset times
l Customizing the Timekeeping
Mode Screen
● To perform operations with PRO TREK
Connected, you first need to pair the
watch with the phone where the app is
installed.
l C Pair the watch with a phone.
Connecting with a Paired Phone to Adjust
the Watch’s Time
Press (B).
l Triggering Immediate Time Adjustment
Searching for a Paired Phone
Hold down (B) for about 5 seconds.
l Phone Finder
● Digital Compass Mode
Use this mode to take direction and bearing
angle readings.
l Digital Compass
③
①
②
D
Remeasure
Display screen
navigation
Objective
A North indication
B Bearing at 12 o’clock
C Bearing angle at 12 o’clock
● Altimeter Mode
Use this mode to take an altitude reading for
your current location.
l Altitude Measurement
①
② ③
Remeasure
Display screen
navigation
A Altitude differential/current time seconds
B Altitude graph
C Altitude
● Barometer Mode
Use this mode to take barometric pressure
readings at your current location.
l Barometric Pressure Measurement
①
② ③
Remeasure
Display screen
navigation
A Barometric pressure differential/current
time seconds
B Barometric pressure graph
C Barometric pressure
● Thermometer Mode
Use this mode to take temperature readings
at your current location.
l Temperature Measurement
①
Remeasure
A Temperature
Operation Guide 5601
4
Page: 5
● Altitude Record Recall Mode
Use this mode to view altitude records.
l Viewing Altitude Records
①
Data search
Data search
A Number of the record displayed last time
the Altitude Record Recall Mode was
used
● Sunrise/Sunset Mode
Use this mode to check the sunrise and sunset
times for your Home City.
l Sunrise and Sunset Times
⑤
③
②
①
④
Date search
Date search
A Year, month, day
B Sunrise time
C Sunrise indicator
D Sunset time
E Sunset indicator
● Stopwatch Mode
Use this mode to measure elapsed time.
l Stopwatch
②
①
③
Start/Stop
Split/reset
A Stopwatch minutes
B Stopwatch seconds
C Stopwatch: 1/100 second
● Timer Mode
Use this mode to countdown from a desired
start time.
l Timer
②
①
③
Start/Stop
Reset
A Timer hours
B Timer minutes
C Timer seconds
● Alarm Mode
The watch will beep when an alarm time is
reached.
l Alarms and Hourly Time Signal
When the last screen was an alarm screen
②
②
③
①
Select alarm/
hourly time signal
Select alarm/
hourly time signal
On/off
When the last screen was the hourly time
signal screen
④
Select alarm/
hourly time signal
Select alarm/
hourly time signal
On/off
A Alarm number
B Alarm enabled/disabled
C Alarm hour/minute
D Hourly time signal enable/disable
● World Time Mode
This mode shows the current time in 38 cities
and UTC (Coordinated Universal Time) time.
l World Time
③
②
①
Select city
Show current city
Select city
A Home City time
B World Time City
C World Time City current time
Shifting the Hands
Hand shift moves the hands out of the way for
easy viewing of display information.
1. While holding down (L), press (E).
This will shift the analog hands to allow
easy viewing of display information.
2. To return the hands to their normal
timekeeping positions, hold down (L) as
youpress(E)again,orpress(E)tochange
to another mode.
Note
● The hands will resume normal
timekeeping automatically if you
change modes or if you leave the
watch with its hands shifted and do not
perform any operation for about one
hour.
Operation Guide 5601
5
Page: 6
Viewing the Face in the Dark
The face of the watch can be illuminated for
viewing in the dark.
● To illuminate the face manually
Pressing (L) turns on illumination.
● Illumination will turn off automatically if an
alarm starts to sound.
● To illuminate the face when Auto Light
is enabled
If Auto Light is enabled, the face illumination
will turn on automatically whenever the watch
is positioned at an angle of 40 degrees or
more.
40
degrees
or more
Important!
● Auto Light may not operate properly
when the watch is at a horizontal angle
of 15 degrees or greater from
horizontal as shown in the illustration
below.
● Electro-static charge or magnetism
can interfere with proper auto light
operation. If this happens, try lowering
your arm and then angle it towards
your face again.
● When moving the watch you may note
a slight rattling sound. This is due to
operation of the auto light switch,
which determines the current
orientation of the watch. It does not
indicate malfunction.
Note
● Auto Light is disabled when any one of
the conditions below exists.
ー Alarm, timer alert, or other beeper
sounding
ー Hand movement operation is in
progress
ー Watch in the Compass Mode
● Configuring the Auto Light Setting
Holding down (L) for at least three seconds in
the Timekeeping Mode toggles Auto Light
between enabled and disabled.
● [LT] is displayed while Auto Light is
enabled.
● If you do not disable it manually, Auto Light
remains enabled for approximately six
hours. After that, it becomes disabled
automatically.
On
● Specifying the Illumination Duration
You can select either 1.5 seconds or three
seconds as the illumination duration.
1. Enter the Timekeeping Mode.
l Navigating Between Modes
2. Hold down (D) for at least two seconds.
Release the button when the name of the
currently selected Home City appears on
the display.
Home City
3. Press (E) three times so [LT] is displayed.
4. Press (A) to toggle between the two
illumination duration settings.
[1]: 1.5-second illumination
[3]: 3-second illumination
5. Press (D) twice to exit the setting screen.
Useful Features
Pairing the watch with your phone makes a
number of the watch’s features easier to use.
Auto time adjustment
l Auto Time Adjustment
12:30
Selection of More Than 300 World Time
cities
l Configuring World Time Settings
Data transfer to a phone
l Viewing Step Count Data
Operation Guide 5601
6
Page: 7
Use your phone to check the distance and
bearing to a point in Location Memory
l Checking the Distance and Bearing to a
LocationMemoryPoint(LocationIndicator)
Use your phone to record route waypoints
and their altitudes
l Recording Waypoints and Their Altitudes
(Route Log)
In addition, a number of other watch settings
can be configured using your phone.
To transfer data to a watch and to
configure settings, you first need to pair
the watch with your phone.
l Getting Ready
● Your phone needs to have the CASIO “PRO
TREK Connected” app installed to pair with
the watch.
Time Adjustment
Your watch can connect with a phone to obtain
information that it uses to adjust its date and
time setting.
Important!
● Disable Auto Time Adjustment when
you are on an aircraft or in any other
location where radio signals may
cause problems.
l Using PRO TREK Connected to
Configure Settings
l Using Watch Operations to
Configure Settings
Referring to the information below, configure
the time setting in accordance with the method
that suits your own lifestyle.
Do you use a phone?
Time adjustment by connecting with your
phone is recommended.
l Auto Time Adjustment
12:30
If your phone cannot connect with the
watch
You can adjust time settings by
performing operations on the watch.
l Using Watch Operations to Adjust the
Time Setting
Using Watch Operations to
Adjust the Time Setting
If your watch cannot connect with a phone for
some reason, you can use watch operations
to adjust date and time settings.
● Setting a Home Time City
Use the procedure in this section to select a
city to use as your Home City. If you are in an
area that observes summer time, you can also
enable or disable summer time.
Note
● The initial factory default summer time
setting for all cities is [AUTO]. In many
cases, the [AUTO] setting lets you use
the watch without switching between
summer time and standard time.
1. Enter the Timekeeping Mode.
l Navigating Between Modes
2. Hold down (D) for at least two seconds.
Release the button when the name of the
currently selected Home City appears on
the display.
Home City
3. Use (A) and (C) to change the Home City.
● For details refer to the information
below.
l City Table
4. Press (E).
5. Use (A) to select a summer time setting.
Each press of (A) cycles through available
settings in the sequence shown below.
● [AUTO]
The watch switches between standard
time and summer time automatically.
● [OFF]
The watch always indicates standard
time.
● [ON]
The watch always indicates summer
time.
6. Press (D) twice to exit the setting screen.
Operation Guide 5601
7
Page: 8
● Setting the Time/Date
1. Enter the Timekeeping Mode.
l Navigating Between Modes
2. Hold down (D) for at least two seconds.
Release the button when the name of the
currently selected Home City appears on
the display.
Home City
3. Press (D).
This causes the seconds to flash.
4. Keep pressing (E) until the setting item
you want to change is selected.
● Each press of (E) moves to the next
setting item in the sequence shown
below.
Day
Month
Year
Minutes
Hours
Seconds
5. Configure the date and time settings.
● To reset the seconds to 00: Press (A). 1
is added to the minutes when the
current count is between 30 and 59
seconds.
● Use (C) and (A) to change the other
settings.
6. Repeat steps 4 and 5 to configure time
and date settings.
7. Press (D) to exit the setting screen.
● Switching between 12-hour and 24-
hour Timekeeping
You can specify either 12-hour format or 24-
hour format for the time display.
1. Enter the Timekeeping Mode.
l Navigating Between Modes
2. Hold down (D) for at least two seconds.
Release the button when the name of the
currently selected Home City appears on
the display.
Home City
3. Press (E) four times.
This causes [12H] or [24H] to flash on the
display.
4. Press (A) to toggle the setting between
[12H] (12-hour timekeeping) or [24H] (24-
hour timekeeping).
24-hour timekeeping
12-hour timekeeping
5. Press (D) twice to exit the setting screen.
Using the Watch in a Medical
Facility or Aircraft
Whenever you are in a hospital, on an aircraft,
or in any other location where connection with
a phone may cause problems, you can
perform the procedure below to disable auto
time adjustment. To re-enable auto time
adjustment, perform the same operation
again.
1. Enter the Timekeeping Mode.
l Navigating Between Modes
2. Hold down (D) for at least two seconds.
Release the button when the name of the
currently selected Home City appears on
the display.
Home City
3. Press (E) five times.
This displays [RCV].
4. Press (A) to select the auto time
adjustment setting you want.
[OFF]: Auto time adjustment disabled.
[ON]: Auto time adjustment enabled.
5. Press (D) twice to exit the setting screen.
Note
● If the watch is paired with a phone,
PRO TREK Connected can be used to
disable auto time adjustment.
l Using PRO TREK Connected to
Disable Auto Time Adjustment
Operation Guide 5601
8
Page: 9
Using Mobile Link with
a Mobile Phone
While there is a Bluetooth connection
between the watch and phone, the watch time
setting is adjusted automatically. You can also
change the watch’s other settings.
Note
● This function is available only while
PRO TREK Connected is running on
the phone.
● This section describes watch and
phone operations.
X : Watch operation
Y : Phone operation
Getting Ready
To use your watch in combination with a
phone, you first need to pair them. Perform the
steps below to pair the watch with a phone.
● A Install the required app on your
phone.
In Google Play or the App Store, search for the
CASIO “PRO TREK Connected” app and
install it on your phone.
● B Configure Bluetooth settings.
Enable the phone’s Bluetooth.
Note
● For details about setting procedures,
see your phone documentation.
● C Pair the watch with a phone.
Before you can use the watch in combination
with a phone, you first need to pair them.
1. Move the phone to be paired with close to
(within one meter of) the watch.
2. Y Tap the “PRO TREK Connected” icon.
3. Y Perform the operation shown on the
screen of the phone to be paired with.
● If a pairing prompt message appears,
perform the operation shown on the
phone screen.
● After pairing starts, the second hand will
move to [R]. When pairing is complete,
the second hand will move to [C].
● If pairing fails for some reason, the
watch will return to the state in step 1 of
this procedure. Perform the pairing
procedure again from the beginning.
Note
● The first time you start up PRO TREK
Connected, a message will appear on
your phone asking if you want to
enable location information
acquisition. Configure settings to allow
background use of location
information.
Auto Time Adjustment
The watch will connect with a phone at preset
times each day and adjust its time settings.
● Using Auto Adjust
Your watch adjusts its time setting four times
a day according to a preset schedule. If you
leave your watch in the Timekeeping Mode, it
will perform the adjustment operation
automatically as you go about your daily life,
without any operation required by you.
12:30
Important!
● The watch may not be able to perform
auto time adjustment under the
conditions described below.
ー While the watch is too far away from
its paired phone
ー While communication is not possible
due to radio interference, etc.
ー While the phone is updating its
system
ー While PRO TREK Connected is not
running on the phone
Note
● If the watch does not indicate the
correct time even if it is able to connect
with a phone, adjust the hand and day
indicator alignment.
l Adjusting Hand Alignment
● If there is a World Time City specified
with PRO TREK Connected, its time
will also be adjusted automatically.
● The watch will connect with the phone
and perform auto time adjustment at
around 12:30 a.m., 6:30 a.m., 12:30
p.m. and 6:30 p.m. The connection is
automatically terminated after auto
time adjustment is complete.
Operation Guide 5601
9
Page: 10
● Triggering Immediate Time Adjustment
The watch’s time setting will be adjusted
automatically whenever you establish a
connection between the watch and a phone.
Whenever you want to adjust the watch’s time
setting based on your phone’s time, perform
the procedure below to connect with a phone.
1. Move the phone close to (within one meter
of) the watch.
2. X Press (B).
[TIME] flashes to indicate that the watch
has started the connection operation.
When a connection is established
between the watch and phone, [OK] will
appear, time information will be acquired,
and then the watch’s time setting will be
adjusted.
Trying to connect After time
adjustment
Note
● You can perform the above operation
for time adjustment from any watch
mode.
● The connection is terminated
automatically after time adjustment is
complete.
● If time adjustment fails for some
reason, [ERR] will appear.
Mode Customization
You can use PRO TREK Connected to
customize modes by rearranging them on the
screen, and by deleting or adding modes.
Important!
● You cannot perform mode
customization operations on the
watch. Use PRO TREK Connected to
configure settings.
The modes below can be rearranged or
deleted.
● Barometer Mode
● Thermometer Mode
● Altitude Record Recall Mode
● Sunrise/Sunset Mode
● Stopwatch Mode
● Timer Mode
● Alarm Mode
● World Time Mode
1. Y Tap the “PRO TREK Connected” icon.
2. X Hold down (B) for at least two seconds
until the second hand points to [R] twice.
When a connection is established
between the watch and phone, [APP] will
change to [OK], and the second hand will
move from [R] to [C].
Trying to connect Connection
successful
3. Y Perform the operations shown on the
phone screen to configure mode settings.
Note
● Increasing or decreasing the number
of modes may change mode functions
and/or settings.
● Even if you remove the Barometer
Mode, you can still display the
barometric pressure graph on the
Timekeeping Mode screen.
● Even if you remove the Sunrise/Sunset
Mode, you can still display sunrise and
sunset times on the Timekeeping
Mode screen.
● To initialize Mode Customization
Important!
● Initializing Mode Customization also
initializes watch settings.
Note
● Mode Customization cannot be
initialized while Route Log is enabled.
1. X Enter the Timekeeping Mode.
l Navigating Between Modes
2. X Hold down (D) for at least two seconds.
Release the button when the name of the
currently selected Home City appears on
the display.
Home City
3. X Press (D).
This causes the seconds to flash.
Seconds
4. X Hold down (C) for at least five seconds.
Release it when [RESET] stops flashing.
This initializes Mode Customization.
5. X Press (D) to exit the setting screen.
Operation Guide 5601
10
Page: 11
Customizing the
Timekeeping Mode Screen
You can use PRO TREK Connected to
rearrange display items on the Timekeeping
Mode, and to add or remove items.
Important!
● Note that you cannot use watch
operations to configure display item
settings. Use PRO TREK Connected
to configure settings.
The items below can be displayed.
● Day of the week, month, day
● Year, month, day *
● Barometric pressure graph, month, day
● Barometric Pressure Graph *
● Hour, minute, second
● World Time hour, minute *
● Step count
● Home Time City sunrise/sunset times *
* Item that can be added using PRO TREK
Connected. These items are not displayed
under initial default settings.
1. Y Tap the “PRO TREK Connected” icon.
2. X Hold down (B) for at least two seconds
until the second hand points to [R] twice.
When a connection is established
between the watch and phone, [APP] will
change to [OK], and the second hand will
move from [R] to [C].
Trying to connect Connection
successful
3. Y Perform the operations shown on the
phone screen to configure mode settings.
Viewing Step Count Data
PRO TREK Connected can be used to view
the information below, which is measured by
the watch.
● Your step count and physical exertion over
the past 24 hours
● Weekly number of steps, calories burned
1. Y Tap the “PRO TREK Connected” icon.
2. X Hold down (B) for at least two seconds
until the second hand points to [R] twice.
When a connection is established
between the watch and phone, [APP] will
change to [OK], and the second hand will
move from [R] to [C].
Trying to connect Connection
successful
3. Y Follow the instructions on the screen to
display pedometer data.
Note
● You can also use PRO TREK
Connected to specify a daily step
target.
● Though the step count is displayed on
the watch in real time, PRO TREK
Connected displays step counts at the
time when a connection is established
between the watch and phone.
Because of this, the step counts
displayed by PRO TREK Connected
may be different from those displayed
by the watch.
Recording Your Current
Location (Location Memory)
You can use PRO TREK Connected to record
current location information.
1. Y Tap the “PRO TREK Connected” icon.
2. X Enter the Timekeeping Mode or
Compass Mode.
l Navigating Between Modes
3. X Hold down (C) for at least five seconds
until [MEMORY] starts to flash. Release
the button when the second hand points
to [R] twice.
If location information is successfully
acquired after a connection is established
between the watch and phone,
[MEMORY] will change to [OK], and the
second hand will move from [R] to [C].
● [ERR] will appear on the display if
connection fails for some reason.
● [FAILED]n[POSITION] will appear in
sequence if location information
acquisition fails for some reason.
Trying to connect Connection
successful
4. Y Perform the operation shown on the
phone screen to view the Location
Memory information record.
● You can have only one location record
in memory. Saving location information
while there is already a location record
in memory will overwrite the existing
record with the new information.
Note
● If there is location information stored in
Location Memory, you can use
Location Indicator to check the
distance and bearing to the stored
location.
l Checking the Distance and Bearing
to a Location Memory Point
(Location Indicator)
Operation Guide 5601
11
Page: 12
Checking the Distance and
Bearing to a Location
Memory Point (Location
Indicator)
The watch acquires current location
information from the phone, and then displays
the bearing and distance from your current
location to the location recorded in Location
Memory.
l Recording Your Current Location (Location
Memory)
Bearing to memory point
Distance to memory point
Memory point
Important!
● Note that PRO TREK Connected
operation is disabled while Location
Indicator is in use.
1. Y Tap the “PRO TREK Connected” icon.
2. X Enter the Timekeeping Mode or
Compass Mode.
l Navigating Between Modes
3. X Hold down (C) for at least two seconds
until [INDICATE] starts to flash. Release
the button when the second hand moves
to [R].
When a connection is established
between the watch and phone and
location information acquisition is
successful, [INDICATE] will change to
[OK], and the second hand will move from
[R] to [C].
After two seconds the distance from your
current location to the recorded location
will appear on the display, and the second
hand will indicate the bearing to the
destination.
*2
Distance from your current
location
Bearing to destination
After two seconds
*1
Second hand
*1
When the second hand is within the range
between 55 seconds to 05 seconds
(indicating that you are within 30 degrees
of the bearing to the destination), [ ] will
be displayed as a light figure on a dark
background.
*2
[G] is shown on the display when you are
within 80 meters of the destination. [G] will
disappear from the display if you move to
a distance of 161 meters or more from the
destination.
4. X Check the display distance and the
bearing to your destination on the display.
Note
● Location Indicator remains enabled for
three minutes.
● The watch connects with the phone
and acquires location information
every 10 seconds or each time (B) is
pressed, and uses the information to
refresh the distance and the bearing to
the point stored in Location Memory.
● Location Indicator will become
disabled automatically about three
minutes after it is enabled. You can
also disable it manually by pressing
any button besides (B) or (L).
● Pressing (B) or (L) while Location
Indicator is enabled will cause it to
remain enabled for three minutes after
the button is pressed.
● Pressing (B) to update data causes [
TRY] to appear on the display and
remain displayed until data updating is
complete.
● [ FAIL] will appear on the display in
the cases below.
ー When it has been 30 seconds or
more since the last update and
location information acquisition fails
ー When it has been 60 seconds or
more since the last update
ー When data acquisition fails after you
press (B)
● The display range for the distance to a
destination is 0 to 99,999 meters (0 to
327,995 feet). [ ——] will be shown for
the distance to the destination when it
is outside the display range.
● [ERR] will appear on the display if
connection fails for some reason.
● The message [NO-DATA] will appear
when there is no data in Location
Memory.
● [FAILED]n[POSITION] will appear in
sequence if the first location
information acquisition fails.
● [ ] or [G] will flash on the display if the
watch detects abnormal magnetism
while Location Indicator is in use.
● [ ERR] will appear on the display if a
direction sensor error occurs while
Location Indicator is in use.
Operation Guide 5601
12
Page: 13
Auto Altitude Calibration
Enabling auto altitude calibration with PRO
TREK Connected will cause altitude values to
be acquired by PRO TREK Connected, which
will be used to automatically correct the
watch’s altitude reading.
Important!
● Use PRO TREK Connected to enable
or disable auto altitude calibration. It
cannot be enabled or disabled on the
watch.
Note
● If an altitude value acquired by PRO
TREK Connected satisfies accuracy
conditions, the watch will automatically
correct is altitude reading.
● Auto altitude calibration is performed
at the same time as auto time
adjustment.
● Auto altitude calibration is not
performed for 12 hours after the time
setting is adjusted manually.
Recording Waypoints and
Their Altitudes (Route Log)
Route Log uses PRO TREK Connected GPS
to record the waypoints of your routes. At the
same time, the watch takes altitude readings
everytwominutesandstorestheminmemory,
and automatically transfers altitude data to
PRO TREK Connected every hour.
1. Y Tap the “PRO TREK Connected” icon.
2. X Enter the Timekeeping Mode or
Altimeter Mode.
l Navigating Between Modes
3. X Hold down (A) for at least five seconds
until [LOG] starts to flash. Release the
button when the second hand moves to
[R].
When a connection is established
between the watch and phone, [LOG] will
change to [LOG ON], and the second
hand will move from [R] to [C].
● This indicates that Route Log is
enabled.
Trying to connect Connection
successful
● To disable Route Log, hold down (A)
again for at least five seconds.
Note
● [LOG] is displayed while Route Log is
enabled.
● Route Log becomes disabled
automatically 12 hours after it is
enabled.
● Route Log remains enabled even if you
change to another mode.
● Data Transfer
After Route Log is enabled, data transfer
starts when the number of altitude records in
watch memory reaches 30.
● Auto data transfer is performed during the
normal state of each mode.
The display cycles as shown below as data is
being transferred.
● The second hand will point to [R].
● If data transfer fails for some reason, the
watch will return to the previous screen with
[LOG] flashing.
Note
● If auto transfer fails for some reason,
the watch will keep trying up to five
times at 10-minute intervals. Or data is
transferred when a PRO TREK
Connected connection is established.
● The watch has enough memory to hold
up to 60 altitude records. Recording
data when there are already 60
records in memory will automatically
delete the oldest record to make room
for the new one.
Operation Guide 5601
13
Page: 14
Configuring World Time
Settings
Specifying a World Time City with PRO TREK
Connected causes the watch’s World Time
City to change accordingly. The standard
time/summer time setting of the World Time
will be adjusted automatically without any
watch operation required by you.
Note
● PRO TREK Connected World Time
lets you select from among
approximately 300 cities as the World
Time City.
● Selecting a World Time City
1. Y Tap the “PRO TREK Connected” icon.
2. X Hold down (B) for at least two seconds
until the second hand points to [R] twice.
When a connection is established
between the watch and phone, [APP] will
change to [OK], and the second hand will
move from [R] to [C].
● If connection fails for some reason,
[ERR] will appear on the display
momentarily and then the watch will
return to the mode it was in before you
started the connection procedure.
Trying to connect Connection
successful
3. Y Perform the operation shown on the
phone screen. The World Time setting will
be reflected on the watch.
Note
● You can use PRO TREK Connected to
configure settings for user cities that
are not included in the watch’s built-in
World Time Cities. You must use PRO
TREK Connected to select a user city
as your World Time City.
● Configuring the Summer Time Setting
1. Y Tap the “PRO TREK Connected” icon.
2. X Hold down (B) for at least two seconds
until the second hand points to [R] twice.
When a connection is established
between the watch and phone, [APP] will
change to [OK], and the second hand will
move from [R] to [C].
● If connection fails for some reason,
[ERR] will appear on the display
momentarily and then the watch will
return to the mode it was in before you
started the connection procedure.
Trying to connect Connection
successful
3. Y Perform the operation shown on the
phone screen to select a summer time
setting.
● “Auto”
The watch switches between standard
time and summer time automatically.
● “OFF”
The watch always indicates standard
time.
● “ON”
The watch always indicates summer
time.
Note
● While the summer time setting is
“Auto”, the watch will switch between
standard time and summer time
automatically. You do not need to
switch between standard time and
summer time manually. Even if you are
in an area that does not observe
summer time, you can leave the
watch’s summer time setting as “Auto”.
● For information about summer time
periods, refer to the “Summer Time
Table” or PRO TREK Connected.
● Swapping Your World Time and Home
Time
1. Y Tap the “PRO TREK Connected” icon.
2. X Hold down (B) for at least two seconds
until the second hand points to [R] twice.
When a connection is established
between the watch and phone, [APP] will
change to [OK], and the second hand will
move from [R] to [C].
● If connection fails for some reason,
[ERR] will appear on the display
momentarily and then the watch will
return to the mode it was in before you
started the connection procedure.
Trying to connect Connection
successful
3. Y Perform the operation shown on the
phone screen to swap your Home Time
with your World Time.
Note
● The watch will not perform auto time
adjustment for 24 hours after you swap
your Home Time and World Time.
Adjusting Hand Alignment
If the hands are out of alignment even though
auto time adjustment is being performed, use
PRO TREK Connected to adjust them.
1. Y Tap the “PRO TREK Connected” icon.
2. X Hold down (B) for at least two seconds
until the second hand points to [R] twice.
When a connection is established
between the watch and phone, [APP] will
change to [OK], and the second hand will
move from [R] to [C].
● If connection fails for some reason,
[ERR] will appear on the display
momentarily and then the watch will
return to the mode it was in before you
started the connection procedure.
Trying to connect Connection
successful
3. Y Perform the operation shown on the
phone screen to correct hand alignment.
Operation Guide 5601
14
Page: 15
Phone Finder
You can use phone finder to trigger a tone on
the phone to make it easy to find. The tone is
forced to sound even if the phone is in vibrate
mode.
Important!
● Do not use this function in areas where
phone call tones are restricted.
● The tone sounds at a high volume. Do
not use this function when listening to
phone output over earphones.
1. X If the watch is connected with a phone,
press any button besides (L) to terminate
the connection.
● After the connection is terminated, the
watch will return to the mode it was in
before connection was established.
Example: After connecting from the
Timekeeping Mode
Connected Disconnected
2. X Hold down (B) for at least five seconds
until the second hand points to [R] three
times.
The phone will sound a tone when it
establishes a connection with the watch.
● It will take a few seconds before the
phone tone sounds.
Connected
Searching for phone
3. X Press any button besides (L) to stop the
tone.
● You can press any watch button to stop
the phone tone only during the first 30
seconds after it starts to sound.
Configuring Watch Settings
You can use PRO TREK Connected to
configure the settings below.
● Timer start time
● Alarms
● Digital Compass
● Altimeter
● Barometer
1. Y Tap the “PRO TREK Connected” icon.
2. X Hold down (B) for at least two seconds
until the second hand points to [R] twice.
When a connection is established
between the watch and phone, [APP] will
change to [OK], and the second hand will
move from [R] to [C].
● If connection fails for some reason,
[ERR] will appear on the display
momentarily and then the watch will
return to the mode it was in before you
started the connection procedure.
Trying to connect Connection
successful
3. Y Select the setting you want to change
and then perform the operation shown on
the phone screen.
Changing the Home City
Summer Time Setting
1. Y Tap the “PRO TREK Connected” icon.
2. X Hold down (B) for at least two seconds
until the second hand points to [R] twice.
When a connection is established
between the watch and phone, [APP] will
change to [OK], and the second hand will
move from [R] to [C].
● If connection fails for some reason,
[ERR] will appear on the display
momentarily and then the watch will
return to the mode it was in before you
started the connection procedure.
Trying to connect Connection
successful
3. Y Perform the operation shown on the
phone screen to change your Home City
summer time setting.
Connection
Connecting with a Phone
This section explains how to establish a
Bluetooth connection with a phone that is
paired with the watch.
● If the watch is not paired with the phone you
wanttoconnectwith,refertotheinformation
below and pair them.
l C Pair the watch with a phone.
1. Move the phone close to (within one meter
of) the watch.
2. X Hold down (B) for at least two seconds
until the second hand points to [R] twice.
When a connection is established
between the watch and phone, [APP] will
change to [OK], and the second hand will
move from [R] to [C].
● If connection fails for some reason,
[ERR] will appear on the display
momentarily and then the watch will
return to the mode it was in before you
started the connection procedure.
Trying to connect Connection
successful
Operation Guide 5601
15
Page: 16
Important!
● If you have problems establishing a
connection, it could mean that PRO
TREK Connected is not running on the
phone. On the phone’s Home Screen,
tap the “PRO TREK Connected” icon.
After the app starts up, hold down the
watch’s (B) button for at least two
seconds.
Note
● The connection will be terminated if
you do not perform any operation on
the watch or phone for a fixed amount
of time.
To specify the connection limit time,
perform the following operation with
PRO TREK Connected: “Watch
settings” n “Connection time”. Next,
selectasettingof3minutes,5minutes,
or 10 minutes.
Canceling a Connection with a
Phone
To terminate a Bluetooth connection, press
any watch button besides (L).
● After the connection is terminated, the
watch will return to the mode it was in before
connection was established.
Example: After connecting from the
Timekeeping Mode
Connected Disconnected
Using the Watch in a Medical Facility
or Aircraft
Whenever you are in a hospital, on an aircraft,
or in any other location where connection with
a phone may cause problems, you can
perform the procedure below to disable auto
time adjustment. To re-enable auto time
adjustment, perform the same operation
again.
1. Y Tap the “PRO TREK Connected” icon.
2. X Hold down (B) for at least two seconds
until the second hand points to [R] twice.
When a connection is established
between the watch and phone, [APP] will
change to [OK], and the second hand will
move from [R] to [C].
● If connection fails for some reason,
[ERR] will appear on the display
momentarily and then the watch will
return to the mode it was in before you
started the connection procedure.
Trying to connect Connection
successful
3. Y Perform the operation shown on the
phone screen to enable or disable auto
time adjustment.
Unpairing
Unpairing the watch from a phone requires
both PRO TREK Connected and watch
operations.
● Deleting Pairing Information from PRO
TREK Connected
1. X If the watch is connected with a phone,
press any button besides (L) to terminate
the connection.
● After the connection is terminated, the
watch will return to the mode it was in
before connection was established.
Connected Disconnected
2. Y Tap the “PRO TREK Connected” icon.
3. Y Perform the operation shown on the
phone screen to unpair.
● Deleting Pairing Information from the
Watch
1. X Hold down (E) for at least two seconds
to enter the Timekeeping Mode.
2. X Hold down (D) for at least two seconds.
Release the button when the name of the
currently selected Home City appears on
the display.
Home City
3. X Press (D).
This causes the seconds to flash.
Seconds
4. X Hold down (C) for at least two seconds.
Release it when [PAIR CLR] stops
flashing.
This deletes the pairing information from
the watch.
5. X Press (D) to return to the Timekeeping
Mode.
If you purchase another phone
You need to perform the pairing operation
whenever you want to establish a Bluetooth
connection with a phone for the first time.
l C Pair the watch with a phone.
Operation Guide 5601
16
Page: 17
Digital Compass
You can use the Digital Compass Mode to
determine the direction of north, and to check
your bearing to a destination.
Important!
● Check the information below to find out
how to ensure correct readings.
l Calibrating Compass Readings
l Digital Compass Reading
Precautions
Taking a Compass Reading
1. Enter the Compass Mode.
l Navigating Between Modes
● Entering the Compass Mode starts
compass readings.
2. Keeping the watch level, point 12 o’clock
in the direction of your desired objective.
● The second hand will point North. The
digital display will show one of 16 literal
direction indications or the bearing
angle.
● You can toggle between literal direction
indications and bearing angle display
by pressing (D).
● To retrigger the compass operation,
press (C).
Interpreting Bearing Readings
D
315°
0°
Bearing angle
Bearing angle to objective
Bearing to objective
North
Objective
Directions: N (North), E (East), W (West), S
(South)
Note
● Normally the Compass Mode
indicates magnetic north. You can also
configure settings to indicate true
north.
l Setting Up for True North Readings
(Magnetic Declination Calibration)
l Magnetic North and True North
● Aftertheinitialreadingisdisplayed,the
watch will continue to take readings
about every second for about the next
60 seconds. The watch will return to
the Timekeeping Mode automatically
about 60 seconds after you press (C).
● Auto Light will not illuminate the face
while a compass operation is in
progress.
● If an alarm or other beeper sounds, or
if you turn on illumination by pressing
(L) while a compass operation is in
progress, the compass operation will
be suspended momentarily. The
compass operation will resume when
the beeper stops or illumination turns
off.
● You can use PRO TREK Connected to
record location information and then
use the watch to display the distance
and bearing to the recorded location.
l Recording Your Current Location
(Location Memory)
l Checking the Distance and Bearing
to a Location Memory Point
(Location Indicator)
● Aligning a Map with Actual
Surroundings (Setting a Map)
Setting a map means to align the map so the
directions indicated on it are aligned with the
actual directions of your location. Once you
set a map, you can more easily get a grasp of
the relationship between map markings and
actual geographic contours. To set a map with
this watch, align north on the map with the
north indication of the watch. Once you set the
map, you can compare your bearing on the
map with your surroundings, which will help
you determine your current location and
destination.
● Note that map reading skills and experience
are required to determine your current
location and destination on a map.
Calibrating the Compass
Calibrating Compass Readings
Perform figure 8 or two-point calibration
whenever you notice the watch’s compass
readings are different from those of another
compass, or before setting out on a climb or
trek.
● Note that accurate compass readings
and/or calibration will not be possible in an
area where strong magnetism is present.
l Digital Compass Reading Precautions
Figure 8 calibration
1. Enter the Compass Mode.
l Navigating Between Modes
2. Hold down (D) for at least two seconds.
Release the button when [SET] starts
flashing and then appears on the
display.
3. Press (C).
Move your arm in a figure 8 pattern as
shown in the illustrations below.
● Allow your wrist to twist.
● Keep your arm as far as possible from
your body as you move it.
● The symbol will stop flashing on the
display while calibration is in progress.
● When calibration is successful, [OK] will
appear on the display and the watch will
return to the Digital Compass screen.
This completes the calibration
operation.
Note
● If [ERR] is displayed, press any button
besides (D) and then perform this
procedure again from step 3.
Operation Guide 5601
17
Page: 18
2-Point Calibration
1. Enter the Compass Mode.
l Navigating Between Modes
2. Hold down (D) for at least two seconds.
Release the button when [SET] starts
flashing and then appears on the
display.
3. Press (E).
This causes [o 1] to appear on the display.
4. While keeping the watch horizontal, press
(C).
This starts calibration of the first point,
which causes [WAIT] to appear on the
display. When calibration is successful,
indicators will appear on the display in the
following sequence: [OK] n [TURN] n
[180°] n [p 2].
5. Rotate the watch 180 degrees, taking care
to be as exact as possible.
6. Press (C).
● This starts calibration of the second
point, which causes [WAIT] to appear
on the display.
● When calibration is successful, [OK] will
appear on the display and the watch will
return to the Digital Compass screen.
This completes the calibration
operation.
Note
● [ERR] will appear if calibration fails for
some reason. If this happens, restart
the above procedure from step 2.
Auto Calibration
Your watch performs auto bearing calibration.
● When bearing calibration starts, the second
hand will move to 12 o’clock, and the digital
display contents will flash.
Second hand
Note
● Auto bearing calibration is performed
when the conditions below exist.
ー Watch is worn on the wrist.
ー Watch is in the Timekeeping Mode.
ー You are walking
● After calibration is successful, auto
calibration will not be performed again
for 24 hours.
Setting Up for True North Readings
(Magnetic Declination Calibration)
If you want the watch to indicate true north
instead of magnetic north, you need to specify
the current magnetic declination direction
(east or west) and declination angle.
l Magnetic North and True North
● The magnetic declination angle value can
be set in 1° (degree) units only. Use a value
that is closest to the angle you want to set.
Example: For an angle of 7.4°, set 7°.
Example: For an angle of 7°.4’ (7 degrees,
40 minutes), set 8°.
Note
● Magnetic declination angles (east or
west) and angle degree values for
specific locations can be found on
geographic maps, mountain climbing
maps, and other maps that include
contour lines.
1. Enter the Compass Mode.
l Navigating Between Modes
2. Hold down (D) for at least two seconds.
Release the button when [SET] starts
flashing and then appears on the
display.
3. Press (E) twice.
[DEC] will appear on the display, followed
by [0°].
4. Use (A) (East) and (C) (West) to change
the magnetic declination direction and
angle.
Setting range: 90° west to 90° east
[0° (OFF)]: Magnetic north
[E]: East declination (Magnetic north is
east of true north.)
[W]: West declination (Magnetic north is
west of true north.)
● To return the setting to [0° (OFF)], press
(A) and (C) at the same time.
Magnetic declination angle
Magnetic declination direction
5. Press (D) to exit the setting screen.
Operation Guide 5601
18
Page: 19
Magnetic North and True
North
There are actually two types of north:
magnetic north and true north.
Magnetic north: North indicated by the needle
of a compass
True north: Direction to the North Pole
As shown in the illustration below, magnetic
north and true north are not the same.
Earth
Magnetic north
True north
Note
● The north indicated on commercially
available maps is normally true north.
Digital Compass Reading
Precautions
Location During Use
Taking readings near sources of strong
magnetism can cause reading error. Keep the
watch away from the following types of items.
Permanent magnets (magnetic accessories,
etc.), metal objects, high-voltage wires, aerial
wires, electrical household appliances (TVs,
computers, cellphones, etc.)
● Note that correct direction readings are not
possible indoors, especially inside of
reinforced concrete structures.
● Accurate direction readings are not
possible in motor vehicles, on boats, on
aircraft, etc.
Storage Location
Exposure of the watch to magnetism can
affect the accuracy of digital compass
readings. Keep the watch away from the types
of items below.
Permanent magnets (magnetic accessories,
etc.), metal objects, electrical household
appliances(TVs,computers,cellphones,etc.)
Altitude Measurement
The watch takes altitude readings and
displays results based on air pressure
measurements taken by a built-in pressure
sensor.
Important!
● The altitude readings displayed by the
watch are relative values that are
calculated based on barometric
pressure measured by the watch’s
pressure sensor. This means that
barometric pressure changes due to
weather can cause altitude readings
taken at the same location to be
different. Also note that the value
displayed by the watch may be
different from the actual elevation and/
or sea level elevation indicated for the
area where you are located. When
using the watch’s altimeter while
mountain climbing, it is recommended
that you regularly calibrate its readings
in accordance with local altitude
(elevation) indications.
l Calibrating Altitude Readings
(Offset)
● The altitude correction value and
barometric pressure changes may
result in display of a negative value.
● Check the information below to find out
about how to minimize differences
between readings produced by the
watch, and values provided by local
altitude (elevation) indications.
l Altitude Reading Precautions
Checking the Current
Altitude
1. Enter the Altimeter Mode.
l Navigating Between Modes
Entering the Altitude Mode will start
altitude measurement and display the
altitude at your current location.
● You can navigate between display
screens by pressing (D).
D
Altitude
Altitude graph
Altitude graph
● The watch takes altitude readings every
second for about the first three minutes.
After that, it takes readings according to
the watch’s auto measurement interval
setting.
● Check the information below to find out
how to configure the auto measurement
interval.
l Setting the Auto Measurement Interval
● To retrigger measurement, press (A).
● Press (E) to return to the Timekeeping
Mode.
Note
● When you enter the Altitude Mode, the
second hand will indicate either
timekeeping seconds, or the
differential between altitude
measurements (whichever was
indicated the last time you were in the
Altitude Mode).
You can change what information is
indicated by the second hand.
l Checking the Altitude Differential
from a Reference Point
● Measurement range: -700 to 10,000
meters (-2,300 to 32,800 feet)
(Measurement unit: 1 meter (5 feet))
Note that calibrating altitude readings
will cause a change in the
measurement range.
● [- —] will appearfor themeasuredvalue
if it is outside the allowable range.
Operation Guide 5601
19
Page: 20
Interpreting Altitude Graph Contents
70m*
6 readings ago
Current reading
* 1 square (v) is 10 m.
Calibrating Altitude
Readings (Offset)
To minimize the difference between locally
indicated and measured values, you should
update the reference altitude value (offset)
before setting off and during treks or any other
activities where you take altitude readings.
Also, you can ensure accurate measurements
by checking a map local altitude indications or
some other source for your current location’s
altitude, and regularly calibrating watch
readings with the latest information while
mountain climbing.
Note
● You can find out the altitude at your
current location from signs, maps, on
the Internet, etc.
● Differences between actual altitude
and watch readings can be caused by
the factors below.
ー Changes in barometric pressure
ー Changes in temperature caused by
variations in barometric pressure
and by elevation
● Though altitude readings can be taken
without calibration, doing so may
produce readings that are very
different from indications by altitude
markers, etc.
1. Enter the Altimeter Mode.
l Navigating Between Modes
2. Hold down (D) for at least two seconds.
Release the button when [SET] starts to
flash and then disappears from the
display.
This displays the current altitude and
enters the Altitude Offset Mode.
3. Use (A) and (C) to change the altitude
value to an elevation value obtained from
another source.
Setting range: -3,000 to 10,000 meters
Setting unit: 1 meter
● To return the altitude setting to its initial
factory default, press (A) and (C) at the
same time.
4. Press (D) to exit the setting screen.
Checking the Altitude
Differential from a Reference
Point
After you set a reference altitude, the second
hand of the watch will indicate the difference
between your current altitude and the
reference altitude. This makes it easy to
measure the altitude difference between two
points while climbing or trekking.
● Changing the Information Indicated by
the Second Hand
1. Enter the Altimeter Mode.
l Navigating Between Modes
2. Hold down (D) for at least two seconds.
Release the button when [SET] starts to
flash and then disappears from the
display.
This displays the altitude for your current
location.
3. Press (E) three times.
This causes the display to show [HAND]
n [DIFF] or [SEC].
4. Use (A) to select [DIFF].
Each press of (A) cycles through the
settings shown below.
[DIFF]: Second hand indicates altitude
differential.
[SEC]: Second hand indicates the current
time seconds.
5. Press (D) to exit the setting screen.
● Setting the Altitude Differential
Measurement Range
1. Enter the Altimeter Mode.
l Navigating Between Modes
2. Hold down (D) for at least two seconds.
Release the button when [SET] starts to
flash and then disappears from the
display.
This displays the altitude for your current
location.
3. Press (E) twice.
This displays the altitude differential
measurement range.
4. Use (A) to select [100m] or [1000m].
[100m]: ±100 meters (±328 feet) in 5-
meter (16-foot) units
[1000m]: ±1000 meters (±3280 feet) in
50-meter (164-foot) units
5. Press (D) to exit the setting screen.
● Measuring Altitude
1. Use the contour lines on your map to
determine the altitude differential between
your current location and your destination.
2. Change the information indicated by the
second hand to [DIFF].
l Changing the Information Indicated by
the Second Hand
3. Take an altitude reading of your current
location.
l Checking the Current Altitude
Operation Guide 5601
20
Page: 21
4. Hold down (L) for at least two seconds to
set your current location’s altitude as the
reference altitude.
This causes [DIFF CLR] to stop flashing
and displays the altitude at your current
location.
● The second hand (Altitude Differential
Indicator) will indicate the difference
between the reference altitude and the
current altitude reading. At this time the
second hand should indicate ±0 m (±0
feet).
Current location altitude
Altitude differential indicator
5. While comparing the difference between
the altitude you found on the map and the
altitude differential indicated by the
watch’s second hand, advance towards
your destination.
● When the altitude differential you found
on the map is the same as that indicated
by the second hand, it means you are
close to your destination.
Example: Altitude differential of -30 m (-98
feet) (-300 m (-984 feet))
100 50
0
−50
−100
Altitude differential
indicator
Range: ±100 m (1000 m)
(±328 feet (3280 feet))
Unit: m
Note
● If the altitude differential is outside of
the specified range, the second hand
will indicate [OVER] or [UNDER].
If either of these is indicated while
using the ±100 m (328 feet)
measurement range, change the
range setting to ±1000 m (3280 feet).
● The second hand will move to 9 o’clock
if a reading is outside the allowable
altitude measurement range (-700 m to
10,000 m (-2,300 to 32,800 feet)), or if
a reading error occurs.
Setting the Auto
Measurement Interval
You can select an auto measurement interval
of either five seconds or two minutes.
1. Enter the Altimeter Mode.
l Navigating Between Modes
2. Hold down (D) for at least two seconds.
Release the button when [SET] starts to
flash and then disappears from the
display.
This displays the altitude for your current
location.
3. Press (E).
This causes the auto measurement
interval to appear on the display.
4. Press (A) to toggle the auto measurement
interval between [0’05] and [2’00].
[0’05]: Readings taken every second for
the first three minutes, and then every five
seconds for about the next one hour.
[2’00]: Readings taken every second for
the first three minutes, and then every two
minutes for about the next 12 hours.
5. Press (D) to exit the setting screen.
Note
● The watch will automatically return to
the Timekeeping Mode if you do not
perform any operation in the Altimeter
Mode for about one hour while [0’05] is
selected as the measurement interval
or about 12 hours while [2’00] is
selected.
Recording Altitude Readings
Use the procedure below to record altitude
measurements manually. Auto
measurements are also recorded
automatically.
● Use the Altitude Record Recall Mode to
view or delete records.
l Viewing Altitude Records
● Recording Altitude Data Manually
1. Enter the Timekeeping Mode or Altimeter
Mode.
l Navigating Between Modes
2. Hold down (A) for at least two seconds
until [REC] stops flashing on the display.
This records the current altitude, date,
and time.
● There is enough memory to hold up to
14 altitude records.
● Recording data when there are already
14 records in memory will automatically
delete the oldest record to make room
for the new one.
Note
● If Route Log is disabled, the watch will
automatically return to normal Altitude
Mode operation following recording of
altitude data.
● If Route Log is enabled and altitude
data is recorded, the watch will
connect with the phone and transfers
the data to it.
When a connection is established
between the watch and phone, [REC]
will change to [OK], and the second
hand will move from [R] to [C].
l Recording Waypoints and Their
Altitudes (Route Log)
● [ERR] will appear on the display if
connection fails for some reason.
Operation Guide 5601
21
Page: 22
● Auto Altitude Data Recording
The altitude data described below is recorded
automatically while the watch is in the Altitude
Mode. One record each is maintained in
memory for each of these items.
A
B
C D
F
E
End point
Start point
High Altitude (MAX): E
Low Altitude (MIN): F
Cumulative Ascent (ASC): A+C*
Cumulative Descent (DSC): B+D*
* Cumulative ascent and cumulative descent
values are updated whenever there is a
difference of at least ±15 m (±49 feet) from
one reading to the next.
Note
● Auto recording ends when you exit the
Altimeter Mode. Re-entering the
Altimeter Mode restarts recording of
cumulative values from where it was
stopped when you last exited the
Altimeter Mode.
● Auto measurement continues if you go
from the Altimeter Mode to another
mode while Route Log is enabled.
● Every time an auto measurement
operation is performed while Route
Log is enabled, the watch checks the
currently saved values of the following
data items and updates them as
required: MAX, MIN, ASC, DSC.
l Recording Waypoints and Their
Altitudes (Route Log)
● [ERR] will appear on the display if
connection fails for some reason.
Specifying the Altitude
Measurement Unit
You can select either meters (m) or feet (ft) as
the Altimeter Mode display unit.
Important!
● When Tokyo (TOKYO) is set as the
Home City, the altitude unit is fixed as
meters (m) and cannot be changed.
1. Enter the Timekeeping Mode.
l Navigating Between Modes
2. Hold down (D) for at least two seconds.
Release the button when the name of the
currently selected Home City appears on
the display.
Example: When your Home City is Los
Angeles
Home City
3. Press (E) seven times.
This causes [UNIT] to appear, with [m] or
[ft] flashing.
4. Press (A) to toggle the altitude unit
between meters and feet.
[m]: Meters
[ft]: Feet
Feet
Meters
5. Press (D) twice to exit the setting screen.
Altitude Reading
Precautions
Effects of Temperature
When taking altitude readings, take the steps
below to keep the watch at as stable a
temperature as possible. Changes in
temperature can affect altitude readings.
● Take readings with the watch on your wrist.
● Take readings in an area where
temperature is stable.
Altitude Readings
● Do not use this watch while skydiving, hang
gliding,paragliding,gyrocopterflying,glider
flying, or engaged in other activities where
altitude changes suddenly.
● Altitude readings produced by this watch
are not intended for special-purpose or
industrial level use.
● In an aircraft, the watch measures the in-
cabin pressurized air pressure, so readings
will not match altitudes announced by the
crew.
Altitude Readings (Relative Altitude)
This watch uses International Standard
Atmosphere (ISA) relative altitude data
defined by the International Civil Aviation
Organization (ICAO). Barometric pressure
generally becomes lower as altitude
increases.
Correct measurement may not be possible
under the conditions below.
● During unstable atmospheric conditions
● During sudden temperature changes
● After the watch has been subjected to
strong impact
Barometric Pressure
Measurement
You can use the Barometer Mode to take a
reading of the barometric pressure at your
current location, and to track reading changes
and trends.
Important!
● Check the information below to find out
how to ensure correct readings.
l Barometric Pressure Reading
Precautions
Operation Guide 5601
22
Page: 23
Checking the Current
Barometric Pressure
1. Enter the Barometer Mode.
l Navigating Between Modes
Entering the Barometer Mode starts
measurement, and displays the
barometric pressure at your current
location and a barometric pressure graph.
● After you enter the Barometer Mode,
the watch takes readings about every
five seconds for three minutes. After
that, a measurement is taken about
every two minutes or every five
seconds.
To toggle between measurement
interval settings, hold down (C) for at
least two seconds.
l Changing the Measurement Interval of
the Barometric Pressure Graph
● You can navigate between display
screens by pressing (D).
l Checking Changes in Barometric
Pressure Over Time
D
Barometric pressure
Barometric pressure graph
Barometric pressure graph
● To retrigger measurement, press (A).
● To return to the Timekeeping Mode,
hold down (E) for at least two seconds.
Note
● When you enter the Barometer Mode,
the second hand will indicate either
timekeeping seconds, or the
differential between barometer
measurements (whichever was
indicated the last time you were in the
Barometer Mode).
You can change what information is
indicated by the second hand.
l Checking the Change in Barometric
Pressure between Two Readings
● The watch will automatically return to
the Timekeeping Mode from the
Barometer mode if you do not perform
any operation for about one hour.
● The measurement range is 260 hPa to
1,100 hPA (7.65 inHg to 32.45 inHg) (1
hPa (0.05 inHg) units). [- — -] will appear
for the measured value if it is outside
the allowable range.
Checking Changes in
Barometric Pressure Over
Time
The watch can be configured to show a graph
of pressure readings taken every two hours or
every two minutes.
You can display a graph of barometric
pressure readings for the past 20 hours or the
past 20 minutes. The square (v) at the far right
of the graph indicates the latest barometric
pressure reading.
Barometric pressure
(0.1 hPa per division)
Time
(2 minute per division)
Two-minute measurement interval
Barometric pressure
(1 hPa per division)
Time
(2 hours per division)
Two-hour measurement interval
● Changing the Measurement Interval of
the Barometric Pressure Graph
You can select a measurement interval of two
hours or two minutes for the barometric
pressure graph.
1. Hold down (C) for at least two seconds to
toggle between measurement interval
settings.
C
Two-hour interval Two-minute interval
● When the measurement interval of the
barometric pressure graph is two hours,
measurements are taken every two
minutes.
● When the measurement interval of the
barometric pressure graph is two
minutes, measurements are taken
every five seconds.
Note
● If you switch to the two-minute
measurement interval graph, the
watch will automatically return to the
two-hour measurement interval graph
after 24 hours.
● Note that the graph will not be
displayed immediately after it is
switched to a two-minute
measurement interval graph.
● Predicting Upcoming Weather
A trend
like this:
Indicates this:
Rising barometric pressure,
which indicates that upcoming
weather probably will be fair.
Falling barometric pressure,
which indicates that upcoming
weather probably will be bad.
Note
● Large changes in barometric pressure
and/or temperature can cause past
data readings to be plotted outside of
the visible area of the graph. Though
plots are not visible, the data is still
maintained in watch memory.
● The barometric pressure graph is not
displayed while Barometric Pressure
Change Indications are displayed.
l Barometric Pressure Change
Indications
Operation Guide 5601
23
Page: 24
Checking the Change in
Barometric Pressure
between Two Readings
When you perform the procedure below in the
Barometer Mode, the second hand will
indicate the difference between the current
barometric pressure measurement and the
last auto measurement value (taken at two-
hour or two-minute intervals).
1. Enter the Barometer Mode.
l Navigating Between Modes
2. Hold down (D) for at least two seconds.
Release the button when [SET] starts to
flash and then disappears from the
display.
This displays the current barometric
pressure and enters the Barometric
Pressure Offset Mode.
3. Press (E).
This causes the display to show [HAND]
n [DIFF] or [SEC].
4. Use (A) to select [DIFF].
Each press of (A) cycles through the
settings shown below.
[DIFF]: Second hand indicates barometric
pressure (Barometric Pressure
Differential Indicator)
[SEC]: Second hand indicates the current
time seconds.
Example: Barometric pressure differential
of -3 hPa (two-hour measurement
interval)
10 5
0
−5
−10
Pressure
Differential Indicator
Range: ±10 hPa
(1 hPa units)*
Unit: hPa
* Two-hour Measurement Interval: ±10
hPa (1 hPa units)
Two-minute Measurement Interval: ±1
hPa (0.1 hPa units)
5. Press (D) to exit the setting screen.
Note
● If the barometric pressure differential is
greater than +10 hPa (when the
measurement interval is two hours) or
+1 hPa (when the measurement
interval is two minutes), the second
hand will point to [OVER]. If it is less
than -10 hPa (when the measurement
interval is two hours) or -1 hPa (when
the measurement interval is two
minutes), the second hand will point to
[UNDER].
● A reading that is outside the allowable
measurement range of 260 hPa to
1,100 hPa (7.65 inHg to 32.45 inHg),
or any measurement error will cause
the second hand to move to 9 o’clock.
Barometric Pressure Change
Indications
Whenever the watch detects a significant
change in air pressure readings (due to
sudden ascent or descent, or to the passage
of a low pressure or high pressure area), it will
beep to let you know. An arrow will also flash
on the display at this time if the watch is in the
Barometer Mode, or if it is in the Timekeeping
Mode with the barometric pressure graph
displayed. The arrow that appears shows the
direction of the pressure change. These alerts
are called “Barometric Pressure Change
Indications”.
This
indicator:
Means this:
Sudden drop in pressure
Sudden rise in pressure
Sustained rise in pressure,
shifting to a fall
Sustained fall in pressure, shifting
to a rise
Important!
● To ensure correct barometric pressure
change indicator operation, enable it in
a location where the altitude is
constant (such as a lodge, camp area,
or on the ocean).
● A change in altitude causes a change
in air pressure. Because of this, correct
readings are impossible. Do not take
readings while ascending or
descending a mountain, etc.
1. Enter the Barometer Mode.
l Navigating Between Modes
2. Hold down (A) for at least two seconds.
If this turns on barometric pressure trend
information, [INFO ON] will stop flashing
and then the [BARO] indicator will appear
on the display.
3. To disable barometric pressure trend
information, hold down (A) again for at
least two seconds.
Note
● If Barometric Pressure Change
Indications are on, barometric
pressure readings are taken every two
minutes even while the watch is not in
the Barometer Mode.
● The barometric pressure change
indicator becomes disabled
automatically 24 hours after it is
enabled.
● You will not be able to turn on
barometric pressure trend information
if the watch’s battery level is low.
● Low battery power will also cause
barometric pressure trend information
to turn off automatically.
Operation Guide 5601
24
Page: 25
Calibrating Barometric
Pressure Readings (Offset)
The watch’s pressure sensor is adjusted at the
factory and normally does not require
calibration. However, you can calibrate the
displayed value if you notice major errors in
readings.
Important!
● The watch will not be able to produce
correct barometric pressure readings if
you make a mistake during the
calibration procedure. Check to make
sure that the value you use for
calibration produces correct pressure
readings.
1. Enter the Barometer Mode.
l Navigating Between Modes
2. Hold down (D) for at least two seconds.
Release the button when [SET] starts to
flash and then disappears from the
display.
This displays the current barometric
pressure and enters the Barometric
Pressure Offset Mode.
3. Use (A) and (C) to change the value.
Setting range: 260 to 1,100 hPa
Setting unit: 1 hPa
● To return the barometric pressure
setting to its initial factory default, press
(A) and (C) at the same time.
4. Press (D) to exit the setting screen.
Specifying the Barometric
Pressure Unit
You can specify either hectopascals (hPa) or
inches of mercury (inHg) as the display unit for
barometric pressure values.
Important!
● When Tokyo (TOKYO) is the Home
City, the altitude unit is fixed as
hectopascals (hPa) and cannot be
changed.
1. Enter the Timekeeping Mode.
l Navigating Between Modes
2. Hold down (D) for at least two seconds.
Release the button when the name of the
currently selected Home City appears on
the display.
Example: When your Home City is Los
Angeles
Home City
3. Press (E) eight times.
This causes [UNIT] to appear, with [hPa]
or [inHg] flashing.
4. Press (A) to toggle between barometric
pressure units.
[hPa]: Hectopascals
[inHg]: Inches of mercury
Inches of mercury
Hectopascals
5. Press (D) twice to exit the setting screen.
Barometric Pressure
Reading Precautions
● The barometric pressure graph produced
by this watch can be used to obtain an idea
of upcoming weather conditions. However,
this watch should not be used in place of
precision instruments required for official
weather prediction and reporting.
● Pressure sensor readings can be affected
by sudden changes in temperature.
Because of this, there may be some error in
the readings produced by the watch.
Temperature
Measurement
The watch can be used to take current air
temperature readings.
Important!
● Check the information below to find out
how to ensure correct readings.
l Temperature Reading Precautions
Checking the Current
Temperature
1. Enter the Temperature Mode.
l Navigating Between Modes
Entering the Temperature Mode will start
temperature measurement and display
the result.
● After you enter the Temperature Mode,
the watch takes readings about every
five seconds for three minutes. After
that, a measurement is taken about
every two minutes.
● To retrigger measurement, press (A).
Note
● The watch will automatically return to
the Timekeeping Mode if you do not
perform any operation in the
Temperature Mode for about one hour.
● The measuring range is -10.0 °C to
60.0 °C (14.0 °F to 140.0 °F) (0.1 °C
(0.2 °F) units). [- — .-] will appear for the
measured value if it is outside the
allowable range.
● To return to the Timekeeping Mode,
hold down (E) for at least two seconds.
Operation Guide 5601
25
Page: 26
Calibrating Temperature
Readings (Offset)
The watch’s temperature sensor is adjusted at
the factory and normally does not require
calibration. However, you can calibrate the
displayed value if you notice major errors in
readings.
Important!
● Check to make sure that the value you
use for calibration produces correct
temperature readings.
● Before calibrating the temperature
reading, remove the watch from your
wrist and leave it in the area where you
plan to measure temperature for about
20 or 30 minutes to allow the case
temperature to become the same as
the air temperature.
1. Enter the Temperature Mode.
l Navigating Between Modes
2. Hold down (D) for at least two seconds.
Release the button when [SET] starts to
flash and then [°C] appears on the display.
This displays the current temperature and
enters the Temperature Offset Mode.
3. Use (A) and (C) to calibrate the
temperature.
Calibration unit: 0.1 °C (0.2 °F)
● To return the barometric pressure
setting to its initial factory default, press
(A) and (C) at the same time.
4. Press (D) to exit the setting screen.
Specifying the Temperature
Unit
You can select either Celsius (°C) or
Fahrenheit (°F) as the temperature display
unit.
Important!
● When Tokyo (TOKYO) is the Home
City, the unit is fixed as Celsius (°C)
and cannot be changed.
1. Enter the Timekeeping Mode.
l Navigating Between Modes
2. Hold down (D) for at least two seconds.
Release the button when the name of the
currently selected Home City appears on
the display.
Example: When your Home City is Los
Angeles
Home City
3. Press (E) nine times.
This will display [UNIT °C] with [°C]
flashing, or [UNIT °F] with [°F] flashing.
4. Press (A) to toggle between temperature
units.
[°C]: Celsius
[°F]: Fahrenheit
Fahrenheit
Celsius
5. Press (D) twice to exit the setting screen.
Temperature Reading
Precautions
Body temperature, direct sunlight, and
humidity all have an effect on temperature
readings. To help ensure more accurate
temperature readings, remove the watch from
your wrist, wipe it dry of any moisture, and
place it in a well-ventilated location not
exposed to direct sunlight. You should be able
to take temperature readings after about 20 to
30 minutes.
Viewing Altitude
Records
You can use the Altitude Record Recall Mode
to view manually recorded and auto recorded
data.
l Recording Altitude Readings
Viewing Saved Data
1. Enter the Altitude Record Recall Mode.
l Navigating Between Modes
This displays a record of data recorded in
the Altimeter Mode.
2. Use (A) and (C) to display the data you
want to view.
● Holding down (A) or (C) scrolls at high
speed.
A
C
C
A
A
C
C
A
A
C
C*
A*
Total Descent
Total Ascent Low Altitude
High Altitude
Auto Recorded Data
Manually Recorded Data
* Each press of a button scrolls to the top
screen of the next manually recorded
data record. There can be up to 14
records in memory, numbered from 1
([-01-]) to 14 ([-14-]).
Operation Guide 5601
26
Page: 27
Note
● If there is no data left in memory due to
a data delete operation, error, or some
other reason, [- — — -] or [0] will appear
on the display.
● If the cumulative ascent (ASC) or
cumulative descent (DSC) value
exceeds 99,999 m (327,995 feet), it
will revert to 0 and continue from there.
● Pressing (D) returns to the top screen
(record number, DSC, ASC, MAX, or
MIN) of the data that you are viewing.
● Manually Recorded Data
After displaying the top screen of a manually
recorded data record (01 through 14), you can
navigate between the record’s data as shown
below.
Example: Manually recorded Record 01
D
D
2 seconds
2 seconds
2 seconds
Altitude Time
Recording date
Record number
● Auto Recorded Data
After displaying an auto recorded data record,
you can navigate between the record’s data
screens as shown below.
High altitude and low altitude
Example: High altitude
D
D
2 seconds
2 seconds
2 seconds
Altitude Time
Recording date
Data type
Cumulative ascent and cumulative
descent
Example: Cumulative ascent
D
2 seconds
Date when
accumulation started.
Data type
Cumulative altitude
D 2 seconds
Deleting a Particular Record
1. Enter the Altitude Record Recall Mode.
l Navigating Between Modes
2. Use the (A) and (C) buttons to scroll
through the top screens of the records and
display the one you want to delete .
3. Hold down the (D) button for
approximately two seconds. Release the
button as soon as [CLEAR] stops flashing.
This deletes the record you selected.
● Note that holding down (D) for more
than five seconds will delete all data.
Deleting All Records
Hold down (D) for at least five seconds until
[ALL CLR] stops flashing. This indicates that
all data was deleted.
Sunrise and Sunset
Times
You can use the watch to check sunrise and
sunset times for your Home City.
Looking Up Today’s Sunrise
and Sunset Times
1. Enter the Sunrise/Sunset Mode.
l Navigating Between Modes
This will cause the display to alternate at
two-second intervals between the sunrise
and sunset times for the current date in
your Home City.
Sunset time
Sunrise time
Every two seconds
Looking Up Sunrise and
Sunset Times by Specifying a
Day
1. Enter the Sunrise/Sunset Mode.
l Navigating Between Modes
2. Use (A) and (C) to change the selected
date.
This displays the sunrise and sunset
times for the day you specified.
Sunset time
Sunrise time
Every two seconds
Operation Guide 5601
27
Page: 28
Stopwatch
The stopwatch measures elapsed time in
1/100-second units for the first hour, and in 1-
second units after that for up to 24 hours.
It can also measure split times.
Measuring Elapsed Time
1. Enter the Stopwatch Mode.
l Navigating Between Modes
2. Use the operations below to measure
elapsed time.
A
A
A
A Stop
Resume
Stop
Start
After first hour
Hour, minute, second
Minutes, seconds,
1/100 seconds
First hour
3. Press (C) to reset the elapsed time to all
zeroes.
Measuring a Split Time
1. Enter the Stopwatch Mode.
l Navigating Between Modes
2. Use the operations below to measure
elapsed time.
A
C
C
A Stop
Split release
Split
Start
After first hour
Hour, minute, second
Minutes, seconds,
1/100 seconds
First hour
3. Press (C) to reset the elapsed time to all
zeroes.
Timer
The timer counts down from a start time
specified by you. A beeper sounds when the
end of the countdown is reached.
● The beeper will not sound if battery power
is low.
Setting the Timer Start Time
The countdown start time can be set in 1-
minute units up to 24 hours.
1. Enter the Timer Mode.
l Navigating Between Modes
2. Hold down (D) for at least two seconds.
Release the button when the minutes
digits start to flash.
This causes the minutes digits to flash.
Minutes
3. Use (A) and (C) to change the timer
minutes setting.
4. Press (E).
This causes the hours digit to flash.
Hours
5. Use (A) and (C) to change the timer hours
setting.
6. Press (D) to exit the setting screen.
Note
● You can also use PRO TREK
Connected to configure timer settings.
Operation Guide 5601
28
Page: 29
Using the Timer
1. Enter the Timer Mode.
l Navigating Between Modes
2. Use the operations below to perform a
timer operation.
A
A
A
(Time up)
Resume
Pause
(Countdown starts)
Start
● A beeper will sound for 10 seconds to
let you know when the end of a
countdown is reached.
● To reset a paused countdown to the
start time, press (C).
3. Press any button to stop the tone.
Alarms and Hourly Time
Signal
The watch will beep when an alarm time is
reached. You can set up to five different
alarms. The hourly time signal causes the
watch to beep every hour on the hour.
● The beeper will not sound if battery power
is low.
Configuring Alarm Settings
1. Enter the Alarm Mode.
l Navigating Between Modes
2. Use (A) and (C) to display the number
([AL1] to [AL5]) of the alarm whose
settings you want to change.
Alarm number
Alarm time
3. Hold down (D) for at least two seconds.
Release the button when the hour digits
start to flash.
● The (alarm) indicator is displayed
when any alarm is turned on.
Hours
4. Use(A)and(C)tochangethehoursetting.
● If you are using 12-hour timekeeping,
[P] indicates p.m.
5. Press (E).
This causes the minutes digits to flash.
Minutes
6. Use (A) and (C) to change the minute
setting.
7. Press (D) to exit the setting screen.
8. Hold down (E) for at least two seconds to
return to the Timekeeping Mode.
● To stop the alarm
To stop the alarm after it starts to sound when
an alarm time is reached, press any button.
Note
● A beeper sounds for 10 seconds when
an alarm time is reached.
● You can also use PRO TREK
Connected to configure alarm time
settings.
Configuring the Hourly Time
Signal Setting
1. Enter the Alarm Mode.
l Navigating Between Modes
2. Press (A) or (C) to display the hourly time
signal screen ([SIG]).
3. Press (D) to toggle the hourly time signal
between enabled (on) and disabled (off).
● (hourly time signal) is shown on the
display while the hourly time signal is
enabled.
Note
● You can also use PRO TREK
Connected to configure the hourly time
signal setting.
Operation Guide 5601
29
Page: 30
Turning Off an Alarm or the
Hourly Time Signal
To stop an alarm or the hourly time signal from
sounding, perform the steps below to turn it
off.
● To have an alarm or hourly time signal
sound again, turn it back on.
Note
● Indicators are displayed while any of
the alarms or the hourly time signal is
turned on.
● The applicable indicators are not
displayed while all of the alarms are
turned off and/or the hourly time signal
is turned off.
Alarm
Hourly time signal
1. Enter the Alarm Mode.
l Navigating Between Modes
2. Use (A) and (C) to scroll through alarm
numbers ([AL1] to [AL5]) and the hourly
time signal ([SIG]) screens until the one
whose setting you want to change is
displayed.
Alarm or hourly time signal
3. Press (D) to turn off an alarm or the hourly
time signal.
● Each press of (D) toggles between ON
and OFF.
● Turning off all alarms will cause
(alarm) to disappear from the display,
while disabling the hourly time signal
causes (hourly time signal) to
disappear from the display.
Note
● If (alarm) is still displayed, it means
that another alarm is still turned on. To
turn off all of the alarms, repeat steps
2 and 3 until the (alarm) indicator
is no longer displayed.
World Time
World Time lets you look up the current time
in any one of 38 cities around the globe, and
UTC (Universal Coordinated Time).
Note
● World Time cities that can be selected
only by using PRO TREK Connected
cannot be selected using watch
operations.
l Configuring World Time Settings
Checking World Time
1. Enter the World Time Mode.
l Navigating Between Modes
After the currently selected World Time
City name appears, the watch will display
the current time in that city.
● To display the World Time City name
while in the World Time Mode, press
(D).
World Time City
World Time
World Time City Setting
Use the procedure in this section to select a
World Time city. If you are in an area that
observes summer time, you can also enable
or disable summer time.
Note
● The initial factory default summer time
setting for all cities is [AUTO]. In many
cases, the [AUTO] setting lets you use
the watch without switching between
summer time and standard time.
1. Enter the World Time Mode.
l Navigating Between Modes
2. Use (A) and (C) to display the city you
want.
3. To change the summer time setting, hold
down (D) for at least two seconds.
Release the button when [AUTO], [OFF],
or [ON] starts to flash.
4. Use (A) to select a summer time setting.
Each press of (A) cycles through available
settings in the sequence shown below.
● [AUTO]
The watch switches between standard
time and summer time automatically.
● [OFF]
The watch always indicates standard
time.
● [ON]
The watch always indicates summer
time.
5. Press (D) to exit the setting screen.
Operation Guide 5601
30
Page: 31
Note
● While [UTC] is selected as the city, you
will not be able to change or check the
summer time setting.
● If you select a World Time City with
PRO TREK Connected and then
change to a different city with a watch
operation, the PRO TREK Connected
city information is deleted from the
watch.
l Configuring World Time Settings
Swapping Your Home City
Time and World Time
In the World Time Mode, hold down (L) for at
least two seconds until starts to flash
and the hands start to move.
This will swap your Home City Time and World
Time.
After swapping
Before swapping
World Time
World Time Home Time
Home Time
Note
● This function comes in handy when
you need to move to another time
zone. For details about how to use it,
go to the section below.
l International Travel
Selecting UTC (Universal
Coordinated Time) as Your
World Time City
In the World Time Mode, pressing (A) and (C)
at the same time will set UTC (Universal
Coordinated Time) as the World Time City and
display its current time.
Pedometer
You can use the pedometer to keep track of
your step count while walking, engaging in
your normal daily activities, etc.
Counting Steps
If you are wearing the watch correctly, the
pedometer will count your steps as you walk
or engage in your normal daily activities.
Important!
● Since this watch’s pedometer is a
wrist-worn device, it may detect non-
step movements and count them as
steps. Also, abnormal arm movements
while walking may cause a miss count
of steps.
● Getting Ready
To enable the most accurate step count, wear
the watch with the face on the outside of your
wrist and tighten the band securely. A loose
band may make it impossible to obtain correct
measurement.
NO
YES
● Counting Steps
The pedometer will start counting your steps
when you start walking.
● To check the step count
Displaying the step count screen.
l Mode Overview
Note
● The step count can show a value up to
999,999 steps. If the step count
exceeds 999,999, the maximum value
(999,999) remains on the display.
● To prevent miscounts, the displayed
count does not increase for about 10
seconds after you start walking. After
you have been walking for about 10
seconds, the correct count appears,
including the steps you took during the
previous 10 seconds.
● The step count is reset to zero at
midnight each day.
● To save power, step counting stops
automatically if you take off the watch
(no detectable watch movement) and
you do not perform any operation for
two or three minutes.
Causes of Incorrect Step
Count
Any of the conditions below may make proper
counting impossible.
● Walking while wearing slippers, sandals, or
other footwear that encourages a shuffling
gait
● Walking on tile, carpeting, snow, or other
surface that causes a shuffling gait
● Irregular walking (in a crowded location, in
a line where walking stops and starts at
short intervals, etc.)
● Extremely slow walking or extremely fast
running
● Pushing a shopping cart or baby stroller
● In a location where there is a lot of vibration,
or riding on a bicycle or in a vehicle
● Frequent movement of the hand or arm
(clapping, fanning movement, etc.)
● Walking while holding hands, walking with
a cane or stick, or engaging in any other
movement in which your hand and leg
movements are not coordinated with each
other
● Normal daily non-walking activities
(cleaning, etc.)
● Wearing the watch on your dominant hand
● Walking for 10 seconds or less
Operation Guide 5601
31
Page: 32
Hand Alignment
Adjustment
Strong magnetism or impact can cause the
time indicated by the analog hands to become
different from the time on the digital display. If
this happens, adjust hand alignment.
Adjusting Hand Alignment
1. Enter the Timekeeping Mode.
l Navigating Between Modes
2. Hold down (D) for at least five seconds.
Release the button when [00] starts to
flash.
This enables adjustment of second hand
alignment.
Second hand
After 3.5 seconds After five seconds
3. If the second hand is not at 12 o’clock, use
(A) and (C) to align it.
4. Press (E).
This enables adjustment of the hour and
minute hands.
Minute hand
Hour hand
5. If the hour hand and minute hand are not
at12o’clock,use(A)and(C)toalignthem.
6. Press (D) to exit the setting screen.
Other Settings
This section explains other watch settings you
can configure.
Enabling the Button
Operation Tone
Use the procedure below to enable or disable
the tone that sounds when you press a button.
1. Enter the Timekeeping Mode.
l Navigating Between Modes
2. Hold down (D) for at least two seconds.
Release the button when the name of the
currently selected Home City appears on
the display.
Home City
3. Press (E) twice.
This causes [KEY♪] or [MUTE] to flash on
the display.
4. Use (A) to select [KEY♪] or [MUTE].
[KEY♪]: Operation tone enabled.
[MUTE]: Operation tone muted.
5. Press (D) twice to exit the setting screen.
Note
● Note that alarm and timer tones will still
sound even while the operation tone is
muted.
Reflecting Altitude
Differential in Activity
Measurements
You can use the procedure below to specify
whether or not you want to reflect altitude
differential in physical exertion
measurements.
Note
● Reflecting altitude differential
information in activity measurements
makes it possible to obtain more
accurate activity calculations.
● PRO TREK Connected is used to
specify your height and weight, and to
calculate physical exertion.
This information is not displayed on the
watch.
1. Enter the Timekeeping Mode.
l Navigating Between Modes
2. Hold down (D) for at least two seconds.
Release the button when the name of the
currently selected Home City appears on
the display.
Home City
3. Press (E) six times.
This will display [SLOPE], followed by a
flashing [ON] or [OFF].
4. Use (A) to select [ON] or [OFF].
[ON]: Altitude differential reflected in
physical exertion measurements.
[OFF]: Altitude differential not reflected in
physical exertion measurements.
5. Press (D) twice to exit the setting screen.
Operation Guide 5601
32
Page: 33
Returning the Watch to Its
Factory Default Settings
This section explains how to return the watch
settings below to their initial factory defaults.
● Watch Settings
● Compass
● Altimeter
● Barometer
● Thermometer
● Altitude recording
● Step count data
● Stopwatch
● Timer
● Alarm
1. Enter the Timekeeping Mode.
l Navigating Between Modes
2. Hold down (D) for at least two seconds.
Release the button when the name of the
currently selected Home City appears on
the display.
Home City
3. Press (D).
This causes the seconds to flash.
Seconds
4. Hold down (C) for at least five seconds.
Release it when [RESET] stops flashing.
5. Press (D) to exit the setting screen.
Important!
● Reset cannot be performed while
Route Log is enabled.
l Recording Waypoints and Their
Altitudes (Route Log)
Note
● Resetting the watch will also delete
information for pairing the watch with a
phone, and unpair them.
International Travel
Use the procedure below to easily change day
and time settings of the watch to a destination
location.
● Before Boarding
1. Configure the World Time to the current
time at your destination.
Destination time
Current time
l Using PRO TREK Connected to
Configure Settings
l Using Watch Operations to Configure
Settings
2. Disable auto time adjustment.
l Using PRO TREK Connected to
Configure Settings
l Using Watch Operations to Configure
Settings
● After Arriving
1. Swap the origin time zone time with the
destination time zone time.
After swapping
Before swapping
Destination time
Destination time
l Using PRO TREK Connected to
Configure Settings
l Using Watch Operations to Configure
Settings
2. Enable auto time adjustment.
l Using PRO TREK Connected to
Configure Settings
l Using Watch Operations to Configure
Settings
3. Adjust the time setting.
l Triggering Immediate Time
Adjustment
Other Information
This section provides non-operational
information you also need to know. Refer to
this information as required.
City Table
City Offset
UTC
Coordinated
Universal Time
0
LONDON London 0
PARIS Paris +1
ATHENS Athens +2
JEDDAH Jeddah +3
TEHRAN Tehran +3.5
DUBAI Dubai +4
KABUL Kabul +4.5
KARACHI Karachi +5
DELHI Delhi +5.5
KATHMANDU Kathmandu +5.75
DHAKA Dhaka +6
YANGON Yangon +6.5
BANGKOK Bangkok +7
HONG KONG Hong Kong +8
EUCLA Eucla +8.75
TOKYO Tokyo +9
ADELAIDE Adelaide +9.5
SYDNEY Sydney +10
LORD HOWE
ISLAND
Lord Howe
Island
+10.5
NOUMEA Noumea +11
WELLINGTON Wellington +12
CHATHAM
ISLAND
Chatham
Islands
+12.75
NUKUALOFA Nuku’alofa +13
KIRITIMATI Kiritimati +14
BAKER ISLAND Baker Island -12
PAGO PAGO Pago Pago -11
HONOLULU Honolulu -10
MARQUESAS
ISLANDS
Marquesas
Islands
-9.5
ANCHORAGE Anchorage -9
LOS ANGELES Los Angeles -8
DENVER Denver -7
CHICAGO Chicago -6
NEW YORK New York -5
HALIFAX Halifax -4
ST. JOHN’S St. John’s -3.5
RIO DE JANEIRO Rio de Janeiro -3
F. DE NORONHA
Fernando de
Noronha
-2
PRAIA Praia -1
Operation Guide 5601
33
Page: 34
● The information in the above table is current
as of January 2019.
● Time zones may change and UTC
differentials may become different from
those shown in the table above. If this
happens, connect the watch with a phone
to update the watch with the latest time zone
information.
Summer Time Table
When “AUTO” is selected for a city that
observes summer time, switching between
standard time and summer time will be
performed automatically at the timing shown
in the table below.
Note
● Summer time start and end dates for
your current location may be different
from those shown below. If this
happens, you can have new summer
time information for your Home City
and World Time city sent to the watch
by connecting the watch with a phone.
If the watch is not connected with a
phone, you can change the summer
time setting manually.
City Name
Summer Time
Start
Summer Time
End
London
01:00, last
Sunday in March
02:00, last
Sunday in
October
Paris
02:00, last
Sunday in March
03:00, last
Sunday in
October
Athens
03:00, last
Sunday in March
04:00, last
Sunday in
October
Tehran
00:00, March 22
or 21
00:00,
September 22 or
21
Sydney,
Adelaide
02:00, first
Sunday in
October
03:00, first
Sunday in April
Lord Howe
Island
02:00, first
Sunday in
October
02:00, first
Sunday in April
Wellington
02:00, last
Sunday in
September
03:00, first
Sunday in April
Chatham
Islands
02:45, last
Sunday in
September
03:45, first
Sunday in April
Anchorage
02:00, second
Sunday in March
02:00, first
Sunday in
November
Los
Angeles
02:00, second
Sunday in March
02:00, first
Sunday in
November
Denver
02:00, second
Sunday in March
02:00, first
Sunday in
November
Chicago
02:00, second
Sunday in March
02:00, first
Sunday in
November
New York
02:00, second
Sunday in March
02:00, first
Sunday in
November
Halifax
02:00, second
Sunday in March
02:00, first
Sunday in
November
St. John’s
02:00, second
Sunday in March
02:00, first
Sunday in
November
Rio de
Janeiro
Midnight, first
Sunday in
November
00:00, third
Sunday in
February or
00:00, fourth
Sunday in
February
● The information in the above table is current
as of January 2019.
Supported Phones
For information about phones that can
connect with the watch, visit the CASIO
website.
https://world.casio.com/os_mobile/wat/
Specifications
Accuracy :
±15 seconds per month average when time
adjustment by communication with a phone is
not possible.
Basic Functions :
Analog
Hour, minute (moves every 10 seconds),
second
Digital
Hour, minute, second, month, day, day of
the week
p.m. (P), 24-hour timekeeping
Full Auto Calendar (2000 to 2099)
Digital Compass :
Measurement range: 0° to 359°
Measurement Units LCD: 1°, Analog: 6°
Continuous Bearing Measurement (1
minute)
North Indication Hand
Bearing calibration (2-point calibration,
figure 8 calibration, magnetic declination
calibration)
Auto bearing calibration
Altimeter (relative altitude) :
Measuring range: -700 to 10,000 m (or
-2,300 to 32,800 ft.)
Displayrange:-3,000to10,000m(or-9,840
to 32,800 ft.)
(Altitude calibration can be used to display
any 10,700 m within the range above.)
Measuring unit: 1 m (or 5 ft.)
Auto measurement interval (2 minutes, 5
seconds)
Altitude calibration
Altitude graph
Altitude differential measurement (-100 to
+100 m/-1,000 to +1,000 m (or -325 to +325
ft./-3,280 to +3,280 ft.))
Altitude Memory
(Manually recorded data: Up to 14 records
of altitude, year, month, day, and time
recorded with the press of a button; Auto
recorded data: One record of high altitude,
low altitude, cumulative ascent, cumulative
descent)
Barometer :
Measurement range: 260 to 1,100 hPa (or
7.65 to 32.45 inHg)
Display range: 260 to 1,100 hPa (or 7.65 to
32.45 inHg)
Measurement unit: 1 hPa (or 0.05 inHg)
Barometric pressure graph
Barometric pressure indicator (-10 to +10
hPa/-1 to +1 hPa (or -0.25 to +0.25
inHg/-0.05 to +0.05 inHg))
Barometric Pressure Change Indications
Operation Guide 5601
34
Page: 35
Temperature :
Measuring range: -10.0 °C to 60.0 °C (or
14.0 °F to 140.0 °F)
Display range: -10.0 °C to 60.0 °C (or
14.0 °F to 140.0 °F)
Measuring unit: 0.1 °C (or 0.2 °F)
Temperature Correction
Sensor Accuracy :
Direction sensor
Measurement accuracy: Within ±10°
(Guaranteed accuracy temperature
range: 10 ℃ to 40 ℃ (50 °F to 104 °F))
Bearing hand indication: Within ±2
gradations
Pressure sensor
Measurement accuracy: Within ±3 hPa
(0.1 inHg)
(Altimeter measurement accuracy:
Within ±75 m (246 ft.))
● Guaranteed accuracy temperature
range: -10 ℃ to 40 ℃ (14 °F to 104 °F)
● Strongimpactorprolongedexposureto
temperature extremes may negatively
affect accuracy.
Temperature Sensor
Measurement accuracy: Within ±2 ℃
(3.6 °F)
(Guaranteed accuracy temperature
range: -10 ℃ to 60 ℃ (14 °F to 140 °F))
Pedometer :
Step count measurement using a 3-axis
accelerometer
Step count display range: 0 to 999,999
steps
Step count reset: Auto reset at midnight
each day
Step count accuracy: ±3% (According to
vibration testing)
Power Saving
Sunrise/Sunset Functions :
Sunrise and sunset times
Day select
Stopwatch :
Measuring units: 1/100 seconds (first hour);
1 second (after first hour)
Measuring capacity: 23:59’59” (24 hours)
Measurement functions: Elapsed time, split
times
Timer :
Setting unit: 1 minute
Countdown range: 1 minute to 24 hours
Countdown unit: 1 second
Time up alert duration: 10 seconds
Alarm :
Time alarms
Number of alarms: 5
Setting units: Hours, minutes
Alarm tone duration: 10 seconds
Hourly time signal: Beep every hour on the
hour
World Time :
Current time in 38 cities (38 time zones),
and UTC (Coordinated Universal Time)
time
Auto summer time setting
Swapping with Home City
One-touch UTC display
Mobile Link :
Auto Time Adjustment
Time setting adjusted automatically at
preset time.
One-touch Time Correction
Manual connection and time adjustment
Phone finder
Watch operation sounds the alert sound
of the phone.
World Time
A selection of more than 300 World Time
cities
Auto Daylight Saving Time (summer time)
switching
Automatic switching between standard
time and summer time.
Route Log
Recording of waypoints and their
altitudes
Location Indicator
Shows the bearing and distance to a
location registered on the watch.
Auto altitude calibration
Automatic altitude calibration at a preset
time
Timer Settings
Alarm Settings
Mode sort sequence and number of modes
setting
Timekeeping Mode display item setting
Altimeter settings
Barometer settings
Compass settings
Step count data transfer
Calories burned calculation (speed
information + altitude information)
Hand alignment correction
Communication Specifications
Bluetooth®
Frequency band: 2400MHz to 2480MHz
Maximum transmission power: 0 dBm (1
mW)
Communication range: Up to 2 meters
(depends on environment)
Double LED light :
LED light for the face (Auto LED light, neon
illuminator, afterglow, selectable
illumination duration (1.5 seconds or 3
seconds))
LED backlight for the digital display (Auto
LED light, super illuminator, afterglow,
selectable illumination duration (1.5
seconds or 3 seconds))
Other :
Low battery alert; operation tone ON/ OFF;
hand shift feature
Power Supply :
CR2025 x 1 (battery sold separately)
Battery life: Approximately 2 years
Conditions
Auto Time Adjustment: 4 times/day
Alarm: Once (10 seconds)/day
Illumination: Once (1.5 seconds)/day
Direction readings: 60 seconds
continuous, 20 times/month
Climbs: 1/month
ー Altitude Measurement
Every second for 3 minutes + every 5
seconds for 57 minutes
ー Barometric Pressure Change
Indications
Every second for 3 minutes + every 2
minutes for 23 hours and 57 minutes
ー Route Log Measurement
Every 2 minutes for 12 hours
ー Location Indicator Measurement
10 times for 3 minutes each
Step counting: 12 hours/day
Auto bearing calibration measurements:
10 times/day
Barometric pressure graph
measurements: 12 times/day
Specifications are subject to change without
notice.
Operation Guide 5601
35
Page: 36
Mobile Link Precautions
● Legal Precautions
● This watch complies with or has received
approval under the radio laws of various
countries and geographical areas. Using
this watch in an area where it does not
comply with or has not received approval
under applicable radio laws may be a
criminal offense. For details, visit the CASIO
Website.
https://world.casio.com/ce/BLE/
● Use of this watch inside of aircraft is
restricted under the aviation laws of each
country. Be sure to follow the instructions of
airline personnel.
● Precautions when using Mobile Link
● When using this watch in combination with
a phone, keep the watch and phone close
to each other. A range of two meters is
recommended as a guideline, but the local
environment (walls, furniture, etc.), the
structure of a building, and other factors
may require a much closer range.
● This watch can be affected by other devices
(electrical devices, audio-visual equipment,
office equipment, etc.) In particular, it can
be affected by operation of a microwave
oven. The watch may not be able to
communicate normally with a phone if a
microwave oven is operating nearby.
Conversely, this watch may cause noise in
radio reception and the video image of a TV.
● Bluetooth of this watch uses the same
frequency band (2.4 GHz) as wireless LAN
devices, and use of such devices in close
proximity of this watch may result in radio
interference, slower communication
speeds and noise for the watch and the
wireless LAN device, or even
communication failure.
● Stopping Radio Wave Emission by This
Watch
The watch is emitting radio waves whenever
the second hand is pointing to [R] or [C].
Also, the watch connects with a phone
automatically as described below.
● Auto adjust (4 times/day)
● While Route Log is enabled (data
transferred each hour)
When in a hospital, on an aircraft, or in any
other area where the use of radio waves is not
allowed, use the operations below to stop
radio wave generation.
● Stopping Radio Wave Generation
Press any button besides (L) to terminate
the Bluetooth connection.
Connected Disconnected
● Disabling Auto Time Adjustment
Configure PRO TREK Connected settings
to disable time adjustment between the
watch and phone.
l Using PRO TREK Connected to Disable
Auto Time Adjustment
Copyrights and Registered
Copyrights
● The Bluetooth® word mark and logos are
registered trademarks owned by the
Bluetooth SIG, Inc. and any use of such
marks by CASIO Computer Co., Ltd. is
under license.
● iPhone and App Store are registered
trademarks of Apple Inc. in the United
States and other countries.
● iOS is a trademark or registered trademark
of Cisco Systems, Inc.
● GALAXY is a registered trademark of
Samsung Electronics Co., Ltd.
● Android and Google PlayTM are trademarks
or registered trademarks of Google LLC.
● Other company names and product names
used herein are trademarks or registered
trademarks of their respective companies.
Troubleshooting
I can’t pair the watch with a
phone.
Q1 I’ve never been able to establish a
(pairing) connection between the
watch and phone.
Are you using a supported phone model?
Check if the phone model and its
operating system are supported by the
watch.
For information about supported phone
models, visit the CASIO Website.
https://world.casio.com/os_mobile/wat/
Did you install PRO TREK Connected on
your phone?
PRO TREK Connected needs to be
installed on your phone in order to
connect with the watch.
l A Install the required app on your
phone.
Are your phone’s Bluetooth settings
configured correctly?
Configure the phone’s Bluetooth settings.
For details about setting procedures, see
your phone documentation.
iPhone Users
● “Settings”n“Bluetooth”n On
● “Settings”n“Privacy”n“Bluetooth
Sharing”n“PRO TREK Connected”n
On
Android Users
● Enable Bluetooth.
Other than the above.
Some phones need to have BT Smart
disabled to use PRO TREK Connected.
For details about setting procedures, see
your phone documentation.
On the Home Screen, tap: “Menu” n
“Settings” n “Bluetooth” n “Menu” n “BT
Smart settings” n “Disable”.
Operation Guide 5601
36
Page: 37
I can’t reconnect the watch
and phone.
Q1 The watch will not re-connect with the
phone after they are disconnected.
Is PRO TREK Connected running?
The watch cannot re-connect with the
phone unless PRO TREK Connected is
running on the phone. On the phone’s
Home Screen, tap the “PRO TREK
Connected” icon. Then on the watch, hold
down (B) for at least two seconds until the
second hand points to [R] twice.
Have you tried turning your phone off and
then back on again?
Turn the phone off and then back on, and
then tap the “PRO TREK Connected”
icon. Then on the watch, hold down (B) for
atleast twoseconds until the secondhand
points to [R] twice.
Is a timer countdown operation in
progress?
Connection with a phone is not possible
while there is 30 seconds or less
remaining on a countdown timer
operation. Stop the countdown operation
before connecting with the phone.
Q2 I can’t connect while my phone is in
the Airplane Mode.
Connection with the watch is not possible
while the phone is in the Airplane Mode. After
exiting the phone’s Airplane Mode, go to the
Home Screen and tap the “PRO TREK
Connected” icon. Then on the watch, hold
down (B) for at least two seconds until the
second hand points to [R] twice.
Q3 I changed the phone’s Bluetooth
from enabled to disabled, and now I
can’t connect anymore.
Onthephone,turnBluetoothoffandthenback
on, and then tap the “PRO TREK Connected”
icon on the Home Screen. Then on the watch,
hold down (B) for at least two seconds until the
second hand points to [R] twice.
Q4 I can’t connect after turning off the
phone.
Turn on the phone and then tap the “PRO
TREK Connected” icon. Then on the watch,
hold down (B) for at least two seconds until the
second hand points to [R] twice.
Phone-Watch Connection
Q1 I can’t establish a connection
between the phone and watch.
Have you tried turning your phone off and
then back on again?
Turn the phone off and then back on, and
then tap the “PRO TREK Connected”
icon. Then on the watch, hold down (B) for
atleasttwoseconds until thesecondhand
points to [R] twice.
Has the watch been re-paired with the
phone?
After deleting pairing information from
PRO TREK Connected, re-pair them.
l Unpairing
l C Pair the watch with a phone.
If you are unable to establish a
connection…
Use the procedure below to delete the
pairing information from the watch, and
then re-pair the watch and phone.
A Hold down (E) for at least two seconds
to enter the Timekeeping Mode.
B Hold down (D) for at least two
seconds. Release the button when
the name of the currently selected
Home City appears on the display.
C Press (D) to cause the seconds digits
to flash.
D Hold down (C) for at least two
seconds. Release it when [PAIR
CLR] stops flashing. This deletes the
pairing information from the watch.
E Press (D) to return to the Timekeeping
Mode.
Operation Guide 5601
37
Page: 38
Changing to a Different
Phone Model
Q1 Connecting the current watch to
another phone.
Pair the watch with the phone.
l If you purchase another phone
Auto Time Adjustment by
Bluetooth Connection (Time
Adjustment)
Q1 When does the watch adjust is time?
The watch will connect with the phone and
perform auto time adjustment at around 12:30
a.m., 6:30 a.m., 12:30 p.m. and 6:30 p.m. The
connection is automatically terminated after
auto time adjustment is complete.
Q2 Auto time adjustment is performed,
but the time setting is not correct.
Is auto time adjustment not being
performed according to its normal
schedule?
Note that auto time adjustment is not
performed for 24 hours after swapping of
the Home Time and World Time, or after
the time setting is adjusted manually on
the watch. Auto time adjustment will
resume 24 hours after either of the above
operations is performed.
Is auto time adjustment enabled?
Auto time adjustment will not be
performed at the scheduled times unless
it is enabled. Enable auto time
adjustment.
l Using the Watch in a Medical Facility or
Aircraft
Q3 Time is not displayed correctly.
If your phone is unable to receive a signal
because you are outside its service range or
for some other reason, the watch may not be
able to display the correct time. If this
happens, connect the phone to its network
and then adjust the time setting.
Altitude Measurement
Q1 Readings produce different results at
the same location.
Watch readings are different from
altitude information available from
other sources.
Correct altitude readings are not
possible.
Relative altitude is calculated based on
changes in barometric pressure measured by
the watch’s pressure sensor. This means that
barometric pressure changes can cause
readings taken at the same location to be
different. Also note that the value displayed by
the watch may be different from the actual
elevation and/or sea level elevation indicated
for the area where you are located. When
using the watch’s altimeter while mountain
climbing, it is recommended that you regularly
calibrate its readings in accordance with local
altitude (elevation) indications.
l Calibrating Altitude Readings (Offset)
Q2 Following a relative altitude reading,
the watch’s second hand points to 9
o’clock.
The second hand will move to 9 o’clock if a
reading is outside the allowable altitude
measurement range (-700 m to 10,000 m
(-2,300 to 32,800 feet)). If [ERR] is displayed,
there may be a problem with the sensor.
l Checking the Altitude Differential from a
Reference Point
Q3 [ERR] appears during measurement.
There may be a problem with the sensor. Try
taking another measurement.
If [ERR] keeps appearing after multiple
measurement attempts, contact a CASIO
service center or your original retailer.
Digital Compass
Q1 The entire display is flashing.
Abnormal magnetism has been detected.
Move away from any potential source of
strong magnetism and try taking a reading
again.
● If the display flashes again, it could mean
that the watch itself has become
magnetized. Move away from any potential
source of strong magnetism, perform figure
8 calibration or 2-point calibration, and then
try taking a reading again.
l Calibrating Compass Readings
l Digital Compass Reading Precautions
Q2 [ERR] appears during measurement.
There is a problem with the sensor or there
may be a source strong magnetic force
nearby. Move away from any potential source
of strong magnetism and try taking a reading
again. If [ERR] keeps appearing after multiple
measurement attempts, contact a CASIO
service center or your original retailer.
l Digital Compass Reading Precautions
Q3 [ERR] displayed following figure 8 or
2-point calibration.
[ERR] on the display could indicate a sensor
problem.
● If [ERR] disappears after about one second,
try performing 2-point calibration again.
● If [ERR] keeps appearing after multiple
attempts, contact a CASIO service center or
your original retailer.
Q4 Directioninformationindicatedbythe
watch is different from that indicated
by a backup compass.
Move away from any potential source of
strong magnetism, perform 2-point
calibration, and then try taking a reading
again.
l Calibrating Compass Readings
l Digital Compass Reading Precautions
Q5 Readings at the same location
produce different results.
Cannot take readings indoors.
Move away from any potential source of
strong magnetism and try taking a reading
again.
l Digital Compass Reading Precautions
Operation Guide 5601
38
Page: 39
Location Memory
Q1 Location Memory does not work.
Is the watch paired with a phone?
The watch needs to be paired with a
phone for Location Memory to work. Pair
the watch with a phone.
l C Pair the watch with a phone.
Are phone settings configured to acquire
location information?
The phone needs to be used to allow use
of PRO TREK Connected location
information for Location Memory to work.
Allow use of location information.
Are phone settings configured to acquire
GPS information?
You may experience problems acquiring
GPS information in environments like the
ones described below.
● Where the view of the sky above is
narrow
● Near trees or buildings
● Near a train station, airport, or other
congested areas
● Locations where there is heavy traffic
and radio wave interference
● Near railway aerial wires, high-voltage
lines, TV towers, etc.
Signal reception is not possible in the
locations described below.
● Where the sky is not visible
● Underground, in a tunnel, under water
● Indoors (Reception may be possible
near a window.)
● Near radio communication equipment
or other devices that generate
electromagnetic waves
Location Indicator
Q1 Location Indicator does not appear
on the display.
Is the watch paired with a phone?
The watch needs to be paired with a
phone for Location Indicator to work. Pair
the watch with a phone.
l C Pair the watch with a phone.
Is Location Memory information being
recorded?
Location information needs to be
recorded in Location Memory for Location
Indicator to work. Record location
information in Location Memory.
l Recording Your Current Location
(Location Memory)
Are phone settings configured to acquire
location information?
The phone needs to be used to allow use
of PRO TREK Connected location
information for Location Indicator to work.
Allow use of location information.
Are phone settings configured to acquire
GPS information?
You may experience problems acquiring
GPS information in environments like the
ones described below.
● Where the view of the sky above is
narrow
● Near trees or buildings
● Near a train station, airport, or other
congested areas
● Locations where there is heavy traffic
and radio wave interference
● Near railway aerial wires, high-voltage
lines, TV towers, etc.
Signal reception is not possible in the
locations described below.
● Where the sky is not visible
● Underground, in a tunnel, under water
● Indoors (Reception may be possible
near a window.)
● Near radio communication equipment
or other devices that generate
electromagnetic waves
Barometric Pressure
Measurement
Q1 Following a relative barometric
pressure reading, the watch’s
second hand points to 9 o’clock.
The second hand will move to 9 o’clock if a
reading is outside the allowable barometric
pressure measurement range (260 hPa to
1,100 hPa (7.65 inHg to 32.45 inHg)). If [ERR]
appears on the display, there may be a
problem with the sensor.
l Checking the Current Barometric Pressure
Q2 [ERR] appears during measurement.
There may be a problem with the sensor. Try
taking another measurement. If [ERR] keeps
appearing after multiple measurement
attempts, contact a CASIO service center or
your original retailer.
Temperature Measurement
Q1 [ERR] appears during measurement.
There may be a problem with the sensor. Try
taking another measurement. If [ERR] keeps
appearing after multiple measurement
attempts, contact a CASIO service center or
your original retailer.
World Time
Q1 The time for a World Time City is not
correct.
The summer time setting (standard time/
summer time) may be wrong.
l World Time City Setting
Operation Guide 5601
39
Page: 40
Pedometer
Q1 Displayed step count is not correct.
While the watch is on your wrist, the
pedometer may detect non-step movements
and count them as steps.
l Pedometer
Also, step count problems can also be caused
by how the watch is being worn and abnormal
arm movement while walking.
l Causes of Incorrect Step Count
Q2 The step count does not increase.
The step count is not displayed at the
beginning of a walk in order to avoid
miscounting of non-walking movements.
It appears only after you have continued
walking for about 10 seconds, with the number
of steps you took during the first 10 seconds
included in to the total.
Q3 [ERR] appears when using the
pedometer.
[ERR] (error) indicates that sensor operation
is disabled because of sensor or internal
circuitry malfunction.
If the indicator remains on the display for more
than three minutes or if it frequently appears,
it could indicate a faulty sensor.
Contact a CASIO service center or your
original retailer.
Alarm
Q1 The alarm does not sound.
Is the alarm setting turned on? If it isn’t, turn it
on so it will sound.
l Configuring Alarm Settings
Hand Movement and Watch
Screen Indications
Q1 I don’t know what mode the watch is
in.
You can determine the current mode by
checking the watch display. Use (E) to
navigate between modes.
l Navigating Between Modes
Q2 All hands are stopped and buttons do
not work.
The battery is dead. Have the battery
replaced.
l Battery Replacement
Q3 The hands suddenly start moving at
high speed.
This is due to one of the reasons below, and
does not indicate malfunction. Simply wait
until normal hand movement resumes.
● Watch is connected with a phone to adjust
its time setting.
l Auto Time Adjustment
Q4 The current time indicated by the
watch is off by one hour or 30
minutes.
The summer time setting may not be correct.
Select the correct setting.
l Changing the Home City Summer Time
Setting
Q5 The time indicated by the hands is
different from the digital time.
Strong magnetism or impact can cause the
hands to go out of alignment. Adjust hand
alignment.
l Adjusting Hand Alignment
● Check the information below to find out how
to align the hands manually.
l Hand Alignment Adjustment
Battery
Q1 is flashing on the digital display.
This indicates that battery power is getting
low.
Have the battery replaced.
l Battery Replacement
Q2 [RECOVER] is flashing on the digital
display.
[RECOVER] may appear on the display when
the watch’s battery power is low, or if you use
the light or other function a number of times
during a short period, which momentarily
causes the battery level to go low. If this
happens, all watch functions, except for
timekeeping, are disabled.
If [RECOVER] remains on the display or if it
keeps appearing, it may indicate that the
battery needs to be replaced.
Operation Guide 5601
40
Описание
Каучуковый ремешок
Ремешок из легкого и современного каучука подкупает своей гибкостью и прочностью. Каучук – гипоаллергенен, не боится влаги и царапин.
Каучуковый корпус
Корпус из каучука может противостоять самым сильным ударам без потери своего внешнего вида и качеств.
Часы на батарейке
Ход кварцевого механизма осуществляется энергией от батарейки. Срок службы батарейки — несколько лет, после чего ее нужно будет заменить.
Водонепроницаемость — 100 м
Водозащита часов позволяет купаться и принимать душ, не снимая их с руки. Глубоко нырять в этих часах не рекомендуется.
Минеральное часовое стекло
Минеральное стекло крайне устойчиво к царапинам и повреждениям; имеет 100% прозрачность, обеспечивает отличную видимость циферблата.
Bluetooth
Часы подключаются к смартфону через протокол Bluetooth. С помощью специального приложения, Вы сможете с помощью телефона быстро настраивать время на часах. Используя кнопки на часах, управлять некоторыми функциями телефона.
GPS
Время на часах синхронизируется с данными международной системы геолокации GPS.
Акселерометр
Акселерометр считает количество сделанных шагов за день. Собранную информацию можно посмотреть в часах. Если часы также оснащены функцией «Bluetooth», эта информация также экспортируется в Ваш смартфон.
Альтиметр (высотомер)
Альтиметр, учитывая Ваши координаты и атмосферное давление, вычисляет, на какой высоте Вы находитесь в данный момент времени.
Барометр
Встроенный датчик измеряет давление воздуха в Паскалях и показывает полученное значение на экране. Это позволяет предугадать изменения погоды. (диапазон измерений составляет 260/1100 гПа, 1 гПа = 0,75 мм рт. ст. или 1 мм рт. ст. = 1,333 гПа)
Будильник
Функция включит звуковой сигнал в заданное вами время.
Функция отображения времени восхода и захода солнца
Часы используют данные о геолокации и вычисляют время восхода и захода на каждый день.
Второй часовой пояс
Часы с показом времени в двух часовых поясах. Время выводится или в дополнительном циферблате, или нажатием кнопки (в зависимости от модели).
Индикатор заряда батарейки
В часах встроен специальный индикатор, который анализирует уровень заряда батарейки и сигнализирует при исходе заряда на нет. В разных часах этот индикатор работает по-разному. В каких-то это специальный значок на циферблате, в каких-то секундная стрелка начинает идти через 2 секунды, тем самым сигнализируя о замене батарейки.
Компас
В часы встроен компас для определения сторон света.
Отображение времени в формате 12/24
Часы с данной функцией способны показать время в 12 и 24 часовом форматах.
Функция перемещения стрелок
Возможность регулировки стрелок с помощью кнопок.
Почасовой сигнал
При активации этой функции часы будут оповещать о наступлении нового часа. Для кого-то станет незаменимой вещью в личном тайм-менеджменте.
Секундомер
Полезная функция для засечки времени. Активируется нажатием определенной кнопки.
Таймер
Таймер — спортивная функция, встроенная в эти часы. Позволит засечь время, по истечении которого часы дадут сигнал. Удобно для тех, кому необходимо выполнять упражнения по времени.
Термометр
Часы показывают температуру воздуха, некоторые модели также способны показать температуру воды.
Хронограф
Часы, оснащенные данной функцией, имеют 2 независимых механизма. Первый механизм для хода часов, второй механизм для секундомера. 2 независимых механизма позволяют использовать их независимо друг от друга и одновременно.
Шагомер
Часы с данной функцией покажут количество сделанных шагов за определенное время.
Кварцевые часы
Кварцевые часы используют энергию батареи. Считаются более точными и удобными.
Подсветка всего дисплея
В этих часах предусмотрена подсветка всего дисплея: светодиодная (LED), электролюминесцентная (за счет преобразования электричества в свет воздействием на атомы фосфора) или тритиевая (может быть самых разных цветов), — в зависимости от модели.
Подсветка стрелок
У этой модели часов на стрелки нанесен накапливающий свет флуоресцирующий материал, за счет которого обеспечивается свечение стрелок в темноте.