-
Contents
-
Table of Contents
-
Troubleshooting
-
Bookmarks
Quick Links
EXCELLENCE
by
H-CMMD4042
MULTIMEDIA DVD-RECEIVER WITH MOTORIZED 7″ TFT DISPLAY AND
TV-TUNER
Instruction manual
DVD-
7″
TFT
Downloaded from Caradio-Manual.com Manuals
Related Manuals for Hyundai H-CMMD4042
Summary of Contents for Hyundai H-CMMD4042
-
Page 1
EXCELLENCE H-CMMD4042 MULTIMEDIA DVD-RECEIVER WITH MOTORIZED 7” TFT DISPLAY AND TV-TUNER Instruction manual DVD- 7” Downloaded from Caradio-Manual.com Manuals… -
Page 2: Table Of Contents
Dear customer! Thank you for purchasing our product. For safety, it is strongly recommended to read this manual carefully before connecting, operating and/or adjusting the product and keep the manual for reference in the future. Table of contents Table of contents ………………………….2 Important safeguards ……………………….6 Installation/ connection……………………….7 Din front-mount (method 1)……………………7…
-
Page 3
General operations……………………….25 Reset the unit ……………………….25 Power on/off ………………………..25 Volume control ……………………….25 Mute function ……………………….25 Setting the audio system ………………………25 Mode selecting ……………………….26 Display operations ……………………….26 Digital tuner operations ………………………27 Mode selecting ……………………….27 Band selection ……………………….28 Manual/ automatic tuning …………………….28 Programming tuner stations ……………………28 AMS (Auto Memory Store) function………………….29 Preset scan…………………………29… -
Page 4
Playing/ pausing ……………………….34 Stop …………………………..34 Playing the previous/ next track ……………………34 Direct entering the number……………………35 Scanning forward and backward …………………..35 Slow playback ……………………….35 Repeat playback……………………….36 Repeat A-B function(for DVD/CD/VCD discs)………………36 Random playback (for DVD/CD/VCD/MP3 discs) ……………….36 Intro playback (for CDDA/VCD discs) …………………36 GOTO function(for DVD/VCD discs)…………………..36 Direct chapter/ track selection (for CD/VCD discs)……………….37 Audio track and channel selection (for CD/VCD/DVD discs) …………..38… -
Page 5
Manual tuning……………………….43 Auto preset memory ……………………..43 Scan tuning………………………….44 Select the TV station……………………..44 Display TV station ……………………….44 AUX IN mode …………………………44 System setup menu ……………………….46 General setup……………………….47 Audio sound processing configuration ………………….48 RDS setup…………………………49 Screen CAL …………………………49 DVD setup menu ………………………..46 Language …………………………51 Video …………………………..51 Audio ………………………….52… -
Page 6: Important Safeguards
Important safeguards Using the device at temperature below -10º may cause the breakage of the device. BEFORE USING PLEASE HEAT UP THE PASSENGER COMPARTMENT TO THE RECOMMENDED TEMPERATURE! Read carefully through this manual to familiarize yourself with this high-quality sound system. Disconnect the vehicle’s negative battery terminal while mounting and connecting the unit.
-
Page 7: Installation/ Connection
Installation/ connection This unit can be installed in any dashboard having an opening as shown on the picture. The dashboard should be ~ 4.5 – 5.5 mm thick in order to be able to support the unit. Din front-mount (method 1) 1.
-
Page 8: Din Rear-Mount (Method 2)
Removing the unit 1. Push trim ring upward and pull out the upper part. Push it downward and pull out the lower part. 2. Unscrew 4 pieces M2 screws. 3. Remove the rubber sheath. 4. Use a screwdriver to bend straight the bended mounting tab and tip out the unit from the mounting bracket. 5.
-
Page 9: Electrical Connection
Electrical connection Downloaded from Caradio-Manual.com Manuals…
-
Page 10
Note: For your driving safety, please link your parking wire with low power level, and keep it controlled by manual brake switch. Wire should be high power level and the unit cannot play video disc. Caution: For some car models you may need to modify wiring of the supplied power cord. Contact your authorized car dealer before installing this unit. -
Page 11
Parking brake cable connections Note: for safety purpose professional installation for the following connections is recommended. For cars with hand brake For cars with foot brake Downloaded from Caradio-Manual.com Manuals… -
Page 12: Unit Controls
Unit controls Monitor 1. BAND button Press it repeatedly to select your desired radio band during TUNER (RADIO) mode. 2. AS button In TUNER (RADIO) mode press it to start automatic station search. 3. LCD display 4. DISP button Use this button to show the playback info or TV channel number on the display.
-
Page 13: Front Panel
repeatedly. To adjust the setting press the buttons. Press it and hold for 2 seconds to exit the mode. Front panel 9. Disc slot 10. VOL knob/ AUDIO / LO/DX button Rotate VOL knob to adjust the volume. Press it (the AUDIO button) to enter audio setting mode. Press the repeatedly to select the audio setting.
-
Page 14
13. AUDIO button In DVD mode press it to select the channel. In VCD mode press it to change the channel. 14. SUBTITLE button In DVD mode press it to select subtitle language. 15. SCN button In DVD mode press it to start/stop scan playback. 16. -
Page 15
22. RESET button Press the RESET button to restore the unit to the original factory settings. 23. Monitor 24. EJECT button Press this button to eject the disc. 25. Cursor buttons buttons In the menu use the cursor buttons to move through it. In DVD mode press the button to fast backward/ fast forward. -
Page 16: Remote Control
Remote control 1. TITLE button – press it to open the disc title list. 2. MENU button – press it to open the disc menu. 3. REPT A-B button – use it to start repeat of the A-B fragment. 4. AUDIO button – in DVD mode press it to change the audio language.
-
Page 17
In DVD mode press this button to slow the playback. Press again to slow rewind playback. 11. GOTO button — press this button to set the player play disc starting at certain time. 12. OPEN/CLOSE button — press this button to slide the monitor up or down. 13. -
Page 18
Changing the battery 1. Press the catch and at the same time pull out the battery tray (pic. 1). 2. Insert the 1 x lithium battery, type CR2025 (3V) battery with the stamped (+) mark facing upward. Insert the battery tray into the remote control (pic.2). Pic. -
Page 19: Lcd Display
LCD display 1. Disc indicator. 2. Disc playback indicators: SCN (scan), RPT (repeat), RDM (random), ALL (all chapters playback). 3. LOUD indicator. 4. Main display. 5. CH (displays the channel), DISC, RADIO (radio station number) indicator. 6. ST (stereo), LOC (local) indicator. Radio display indicators 7.
-
Page 20: Monitor Operations
Monitor operations Open/close TFT monitor 1. Press the OPEN/CLOSE button to open the monitor to the last viewing position. 2. Press the OPEN/CLOSE button to load the monitor to the unit. TFT monitor auto open 1. Enter the GENERAL SETUP menu (please refer to SYSTEM SETUP menu chapter of this manual). 2.
-
Page 21: Image Setting
OR press the WIDE/PIC button on the monitor or the WIDE button on the RC repeatedly to select the aspect ratio: CINEMA => NORMAL => STANDBY. Image setting 1. Press the PIC button on the RC or press and hold for 2 seconds the WIDE/PIC button on the monitor to enter the picture quality setting menu.
-
Page 22
unit. If it doesn’t help please reset the unit. Downloaded from Caradio-Manual.com Manuals… -
Page 23: Touch Screen Operations
Touch screen operations In any mode touch the left corner of the top area of the TFT display to open the main menu. Now you can select the playing source (Radio, DVD/CD, Aux in, TV (if the TV tuner is connected)) by touching the proper button on the display.
-
Page 24
Touch operations under DVD mode during playing the PM3/WMA files Touch operations under Tuner (Radio) mode Downloaded from Caradio-Manual.com Manuals… -
Page 25: General Operations
General operations Reset the unit Operating the unit for the first time or after replacing the car battery, you must reset the unit. Press the RESET button on the front panel to restore the unit to the original factory settings. Power on/off Press POWER/MUTE button on the front panel or the POWER button on the RC to turn the unit on.
-
Page 26: Mode Selecting
2. Press the buttons on the front panel or press the buttons on the RC to select the desired audio setting: EQ => BASS => TREBLE => FADER => BALANCE => LOUD. 3. Press the buttons to adjust the setting. 4.
-
Page 27: Digital Tuner Operations
Digital tuner operations Note: RDS service availability varies with areas. Please understand if RDS service is not available in you area, the following service is not available, either. To activate this function enter the RDS SETUP menu (please refer to SYSTEM SETUP menu chapter of this manual). Mode selecting Press the SRC button repeatedly to select the TUNER (RADIO) mode.
-
Page 28: Band Selection
Band selection Press BAND button on the front panel or the STOP/BAND on the RC once or more to select: FM1, FM2, FM3, FM (OIRT), AM1, AM2, AM3. Manual/ automatic tuning Manual tuning: Press the buttons on the RC or the buttons on the panel repeatedly to select a station upward or downward step by step.
-
Page 29: Ams (Auto Memory Store) Function
AMS (Auto Memory Store) function Select the band. Press AS button on the panel or the PLAY/PAUSE / ENTER / SCAN button on the RC to enter auto search and store mode. The radio will automatically store the 6 strongest available stations to the 6 preset memories of the current band.
-
Page 30: Ta (Traffic Alarm) Function
TA (Traffic Alarm) function In TUNER (RADIO) mode press the button on the panel and hold for 2 seconds to turn ON or turn OFF the TA function. In TA mode press the buttons on the RC or the on the panel to start the traffic announcement program searching until the program is received.
-
Page 31: Region Function
Saving the PTY When the PTY function is on and the unit receives the current program type press the 1~6 button to store it into the channel selected. The default preset channels: P1 – DNEWS, P2 – DSPEECH, P3 – DSPORT, P4 – DPOP M, P5 –…
-
Page 32: Disc Operations
Disc operations Glossary PBC (PlayBack Control) PlayBack Control is a menu recorded on the disc with SVCD or VCD2.0 format. For the discs contained PBC, it can playback interactive software with the menu displayed on TV. And if the disc contains still images, it can playback high definition of still image.
-
Page 33: Discs For Playback
Discs for playback This unit can play disc types: CD/DVD/CDDA/CD-R/-RW/DVD±R/±RW. Compatible with formats: DVD-video/SVCD/VCD/HDCD/MP3/MP4/WMA/Picture-CD/JPEG. The following file types are supported: Audio files: MP3 (*.mp3) WMA (*.wma) Video files: MP4 (*.avi, DIVX3.11/4.0/5.0/6.0 and XVID) MPEG 2(*.vob) MPEG 1(*.dat) Picture file: JPEG (*.jpg) ISO 9660 or ISO 9660 +Joliet format — Max.
-
Page 34: Loading A Disc
Loading a disc 1. Turn the power on. 2. Insert the disc with the printed side facing upward into the slot. The unit will switch to DVD mode automatically. 3. Press the EJECT button on the panel to eject the disc. Playing/ pausing To ensure good system performance, wait until the unit finishes reading the disc information before proceeding.
-
Page 35: Direct Entering The Number
Direct entering the number To enter the 2- or 3-digit number of the track or chapter press the desired buttons with digits on the RC. For example, to enter number 135 press 1 => 3 => 5. Scanning forward and backward 1.
-
Page 36: Repeat Playback
Repeat playback Press the RPT button on the panel or REPT button on the RC once or more to repeat the playback: For VCD/CD: REPEAT SINGLE => REPEAT OFF For DVD: REPEAT TITLE => REPEAT CHAPTER => REPEAT OFF For MP3: REPEAT SINGLE => REPEAT FOLDER => REPEAT OFF RPT icon will appear on the display.
-
Page 37: Direct Chapter/ Track Selection (For Cd/Vcd Discs)
1. During the disc playback press the GOTO button on the RC to enter the Search menu. For VCD discs press the GOTO button repeatedly to select the Track or Disc search. For DVD For MPEG4/VCD Search Track search Disc search Time —:—:— Time…
-
Page 38: Audio Track And Channel Selection (For Cd/Vcd/Dvd Discs)
Audio track and channel selection (for CD/VCD/DVD discs) For DVD playback: press the AUDIO button to change the audio language. OR enter the AUDIO menu (please refer to DVD SETUP menu chapter of this manual). For CD/VCD playback: press the AUDIO button repeatedly to alter the select the channel: Left channel =>…
-
Page 39: On-Screen Display (Osd)
4. Press STOP button to return to menu. 5. Press MENU again to exit menu. On-screen display (OSD) 1. During playback press the DISP button on the RC to show the short playback information on display: DVD disc: T-Title (current/total) C –…
-
Page 40: Changing Size (For Dvd/Vcd Discs)
The playback status will be shown as following: Source: — the current source EQ: user — current equalizer setting Loud: — the loudness status. 2. Press the DISP button on the front panel repeatedly to show the following information on the display: Playback time =>…
-
Page 41: Alter Between 2 Ch And 6 Ch
Press the AUDIO button on the panel or the RC to select the audio language or the channel. Press the REPEAT or RANDOM buttons to select the mode of the playback. Alter between 2 Ch and 6 Ch Press and hold for 2 seconds the RDM button on the panel to alter between 2 Channel mode and 6 Channel mode.
-
Page 42
If you play a non- MP3 file that has the “.mp3” extension, you may hear some noise. In this manual, we refer to what are called “MP3 file” and “folder” in PC terminology as “track” and “album”, respectively. Maximum number of directory level is 8, including the root directory. Maximum number of files and folders per disc is 448. -
Page 43: Tv Tuner Operations
TV tuner operations Switch to TV tuner mode 1. Connect the TV set to the unit. 2. Press the SRC button repeatedly to select the TUNER (TV) mode. OR in the SYSTEM SETUP menu select the TV item. Auto tuning 1.
-
Page 44: Scan Tuning
Scan tuning 1. You can scan each stored channel for 10 seconds in sequence. Press the ENTER button on the panel to start scanning. 2. Press the PLAY/PAUSE / ENTER / SCAN button on the panel or the STOP/BUTTON on the RC to stop auto scanning.
-
Page 45
OR in the main menu select the AUX IN item. Downloaded from Caradio-Manual.com Manuals… -
Page 46: System Setup Menu
System setup menu In any mode touch the left top corner of the screen to open the main MENU. Use the cursor buttons or press the SETUP button on the screen to open the SETUP menu. In SETUP menu press the buttons on the panel or buttons on the RC or touch the desired button on the screen to select the SYS SETUP…
-
Page 47: General Setup
General setup 1. Enter the GENERAL SETUP menu. 2. Use the buttons on the panel or buttons on the RC or touch the desired item on the screen to select the desired setting: Radio, Clock mode, Parking, OSD menu, Clock, Video format, TFT auto open. 3.
-
Page 48: Audio Sound Processing Configuration
TFT auto open: set the monitor working mode when the unit is on and off: On (when the unit is off the monitor draws down into the unit automatically, when it’s on the monitor unfurls automatically), Off (when the unit is off the monitor draws down into the unit automatically, when it’s on the monitor unfurls by pressing the OPEN/CLOSE button on the panel), Manual (when the unit is off or on the monitor draws down or unfurls only by pressing the OPEN/CLOSE button on the panel).
-
Page 49: Rds Setup
Sub phase: if trying to boost the bass output of subwoofer the bass gets more murky. This may indicate that the subwoofer’s output and bass content you hear from other speakers cancel each other out. To remove this problem change the setting of subwoofer: 0D (subwoofer output in phase), 180D (subwoofer output off phase). Bass Q-factor: when the Bass center is selected and adjusting the Q-factor alters the sharpness of the Bass output, the larger the Q-factor, the sharper the bass.
-
Page 50
DVD setup menu In any mode touch the left top corner of the screen to display the main MENU. Use the cursor buttons or touch the SETUP button on the screen to open the SETUP menu. In SETUP menu press the buttons on the panel or buttons on the RC or touch the desired item on the screen to select the DVD SETUP (or… -
Page 51: Language
Language 1. Enter the LANG menu. 2. Use the buttons on the panel or buttons on the RC or touch the desired item on the screen to select the desired setting: Subtitle, Audio, DVD menu. 3. Press the buttons on the panel or buttons on the RC or touch the desired button on the screen to enter the list of values.
-
Page 52: Audio
4. Press the buttons on the panel or buttons on the RC or touch the desired button on the screen to select the desired value. 5. Press PLAY/PAUSE / ENTER / SCAN button to confirm. TV shape: select the width/height of the image: 16:9 (wide screen), 4:3 (normal view). This function is not available for some discs.
-
Page 53: Prologic Ii
DRC: set the DRC (dynamic range control) for better playback for low volume playback: On (use bass to play the more dynamical audio), Off (normal playback). Center delay: the time difference between center and front speakers. The time delay makes audio signal more accurate.
-
Page 54
3. Press the buttons on the panel or buttons on the RC or touch the desired button on the screen to enter the list of values. 4. Press the buttons on the panel or buttons on the RC or touch the desired button on the screen to select the desired value. -
Page 55: Spk Configuration
SPK configuration 1. Enter the SPK CONFIG menu. 2. Use the buttons on the panel or buttons on the RC or touch the desired item on the screen to select the settings: Multi-CH, Stereo, Sub, Center. 3. Press the buttons on the panel or buttons on the RC or touch the desired button on the screen to enter the list of values.
-
Page 56: Rating
Rating This unit has the built in parental lock feature to prevent authorized person to view restricted disc content. 1. Enter the RATING menu 2. Use the buttons on the panel or buttons on the RC or touch the desired item on the screen to select the setting: Password, Rating, Load factory.
-
Page 57: Handling And Cleaning Discs
Handling and cleaning discs Dirty, scratched or warped discs may cause skip ping or noise. Handle the disc only by the edges. To keep clean do not touch its surface. Discs should be stored in their cases after use to avoid scratches. Do not expose discs to direct sunlight, high humidity, high temperature or dust.
-
Page 58: Troubleshooting Guide
Troubleshooting guide Cause Solution Symptom No power. The car ignition is not on. If the power supply is properly connected to the car The fuse is blown. accessory switch the ignition key to “ACC”. Replace the fuse. Disc cannot be loaded. Presence of disc inside the player.
-
Page 59: Specification
Specification General Power supply: 12 V DC Current consumption: max. 10 A Maximum power output: 50 W x 4 channels Compatible formats: DVD/SVCD/VCD/HDCD/MP3/MP4/WMA/CDDA/Picture-CD/JPEG/ CD-R/-RW/DVD±R/±RW playback Dimensions (L x W x H) / weight: 200 x 190 x 55 mm / 2.2 kg Working temperature range: -10º…
-
Page 60
AM section Frequency range: 522 kHz — 1620 kHz Preset memory stations: Audio specification Maximum output: 2 Vrms (+/- 3 dB) Frequency response: 20 Hz — 20 KHz S/N ratio(A-vtd): 70 dB Line out Output: CD max 2000 mV Color system PAL/SECAM/NTSC Sensitivity 65 dB… -
Page 61
…………………………61 ……………………..65 ……………………..66 ……………………66 ……………………67 ………………….68 ……………………….71 …………………………71 ………………………..72 …………………………76 ……………………..79 ……………………..81 …………………..81 ………………….81 ………………….81 ……………………..82 …………………….82 …………………..82 ………………………83 Downloaded from Caradio-Manual.com Manuals… -
Page 62
…………………….84 ……………………….86 ………………………..86 ………………….86 ………………………86 ……………………..87 ……………………87 ……………………..87 ……………………..87 ……………………….88 ……………………….88 ………………………..89 ………………89 ………………….89 …………90 ………………..90 LOC ( ) ………………..90 AF ( )………………..90 TA ( ) ……………..91 PTY ( ) ………………….91 REGION………………………92 RDS …………………………92 ……………………..93 ……………………93 ……………………94 Downloaded from Caradio-Manual.com Manuals… -
Page 63
……………………….95 …………………….95 ……………………95 ……………95 ……………………..95 …………………….96 …………………..96 ……………………96 ……………………….97 DVD/CD/VCD/MP3)……….97 Scan ( CDDA/VCD) ………………..97 GOTO ( DVD/VCD)…………….97 CD/VCD ) …………98 CD/VCD/DVD )…………..98 ……………………99 PBC ( ) …………99 ……………….100 DVD/VCD ) …………..101 )……………101 )……………….101 …………….102 ………………102 3………………………..103 ……………………..105 ……………………….105 Downloaded from Caradio-Manual.com Manuals… -
Page 64
………………….105 ………………………105 ………………105 ……………………106 …………………….106 ………………..106 AUX…………………………106 ……………………….107 ……………………..108 ……………………..109 ……………………….110 ……………………..111 ……………………….107 …………………………. 112 …………………………113 …………………………114 ProLogic II ……………………….. 115 ……………………117 ……………………. 118 ……………………..114 ……………………….120 …………………121 ……………………122 Downloaded from Caradio-Manual.com Manuals… -
Page 65
-10º Downloaded from Caradio-Manual.com Manuals… -
Page 66
~ 4,5 – 5,5 (1); 5 (7) (4). (5), (2). (2). Downloaded from Caradio-Manual.com Manuals… -
Page 67
(2). (1). (3). Downloaded from Caradio-Manual.com Manuals… -
Page 68
Downloaded from Caradio-Manual.com Manuals… -
Page 69
ISO, (+)— (-)— (+)— 12 (+)/ (-)— (+)— ((-)— ACC+/ (+)— (-)— Downloaded from Caradio-Manual.com Manuals… -
Page 70
« » Downloaded from Caradio-Manual.com Manuals… -
Page 71
BAND TUNER ( TUNER ( DISP OPEN/CLOSE ANGLE Downloaded from Caradio-Manual.com Manuals… -
Page 72
WIDE/PIC VOL / AUDIO / LO/DX Downloaded from Caradio-Manual.com Manuals… -
Page 73
AUDIO), TUNER ( : LOCAL DISTANT. POWER/ MUTE [1-6] AUDIO VCD – SUBTITLE STOP Downloaded from Caradio-Manual.com Manuals… -
Page 74
: TUNER ( – ), DVD, DVDC, AUX IN, CAMERA. PLAY/PAUSE / ENTER / SCAN ENTER). PLAY/PAUSE). TUNER ( SCAN). TUNER ( SCAN). RESET RESET, EJECT Downloaded from Caradio-Manual.com Manuals… -
Page 75
TUNER ( TUNER ( TUNER ( Downloaded from Caradio-Manual.com Manuals… -
Page 76
TITLE – MENU – REPT A-B – AUDIO — DISP — SUBTITLE — ANGLE — TUNER ( Downloaded from Caradio-Manual.com Manuals… -
Page 77
PLAY/PAUSE / ENTER / SCAN — ENTER). PLAY/PAUSE). TUNER ( SCAN). – GOTO – OPEN/CLOSE — MUTE — POWER — RPT – SRC — : TUNER ( ), DVD, DVDC, AUX IN, CAMERA. – Downloaded from Caradio-Manual.com Manuals… -
Page 78
VOL +/- — STOP/ BAND – TUNER ( ZOOM – PIC – ANGLE WIDE — DVD SETUP – SYS SETUP – . 1). (CR 2025 3V), . 2). – 6 Downloaded from Caradio-Manual.com Manuals… -
Page 79
: SCN ), RPT ( ), RDM ), ALL LOUD. 5. CH ( ), DISC, RADIO ( 6. ST ( ), LOC ( Tuner ( RDS: REG ), PTY ( ), TA ( ), TP, AF ( ), INFO ( 11. -
Page 80
: SCN ), RPT ( ), RDM ), ALL Downloaded from Caradio-Manual.com Manuals… -
Page 81
OPEN/CLOSE, OPEN/CLOSE, On ( .) ( Off ( .) ( OPEN/CLOSE, Manual ( OPEN/CLOSE, NGLE Downloaded from Caradio-Manual.com Manuals… -
Page 82
NGLE : 16:9 (wide screen), 4:3 (normal view). WIDE/PIC WIDE CINEMA ( ) => NORMAL ( ) => STANDBY ( WIDE/PIC : COLOR ), CONTRAST ( ), BRIGHT ( WIDE/PIC «PRK SW» TFT- « » « ». Downloaded from Caradio-Manual.com Manuals… -
Page 83
« », OPEN OPEN RESET, Downloaded from Caradio-Manual.com Manuals… -
Page 84
(MENU), TFT- (Radio, DVD/CD, Aux in, TV ( DVD- SETUP – (MENU) B – DISP C – D – E – F – : MENU, PLAY/PAUSE, STOP, Downloaded from Caradio-Manual.com Manuals… -
Page 85
MP3/WMA Tuner ( Downloaded from Caradio-Manual.com Manuals… -
Page 86
RESET. POWER/MUTE POWER POWER/MUTE VOL + VOL — Downloaded from Caradio-Manual.com Manuals… -
Page 87
POWER/MU MUTE AUDIO ( : EQ => BASS => TREBLE => FADER => BALANCE => LOUD. SRC, : TUNER ( ) => DVD ) => DVDC => AUX-IN => CAMERA ( DISP, Loud. TUNER ( DISP, Downloaded from Caradio-Manual.com Manuals… -
Page 88
RDS ( RDS, ON ( SRC, — TUNER ( RADIO RDS (AF, TA, TP, PTY) RADIO Downloaded from Caradio-Manual.com Manuals… -
Page 89
B ND STOP/BAND : FM1, FM2, FM3, FM (OIRT), AM1, AM2, AM3. 1~6, 1~6. Downloaded from Caradio-Manual.com Manuals… -
Page 90
PLAY/PAUSE / ENTER / SCAN 1~6. PLAY/PAUSE / ENTER / SCAN, LOC ( LO/DX LOC. AF ( BAND, Downloaded from Caradio-Manual.com Manuals… -
Page 91: Pty ( )
TA ( TUNER ( SEEK, SCAN, AMS PTY ( RDS, TUNER ( PTY. : None, News, Speech, Music, Document, Fock M, Oldies, Nation M, Country, Jazz, Leisure, Travel, Phone in, Religion, Social, Children, Finance, Weather, Other M, Classics, Light M, Easy M, Rock M, Pop M, Varied, Science, Culture, Drama, Educate, Sport, Info, Affairs, News.
-
Page 92: Region
PTY, 1~6, : P1 – DNEWS, P2 – DSPEECH, P3 – DSPORT, P4 – DPOP M, P5 – CLASSIC, P6 – DMUSIC. 1~6, REGION REGION, REGION REGION RDS, Downloaded from Caradio-Manual.com Manuals…
-
Page 93
PBC ( – PBC, – Downloaded from Caradio-Manual.com Manuals… -
Page 94
CD/DVD/CDDA/CD-R/-RW/DVD±R/±RW. : DVD-video, SVCD/VCD/HDCD/MP3/MP4/WMA/ Picture-CD/JPEG. : MP3 (*.mp3) WMA (*.wma) : MP4 (*.avi, DIVX3.11/4.0/5.0/6.0 and XVID) MPEG 2(*.vob) MPEG 1(*.dat) : JPEG (*.jpg) ISO 9660 ISO 9660 + Joliet — – 448. – 99. — 99 44,1 : 32 — 320 : *.ACC, *.DLF, *.M3U, *.PLS, MP3 PRO, DRM. -
Page 95: Dvd
DVD. EJECT PLAY/PAUSE, STOP STOP/BAND PLAY/PAUSE (1-9, 0) 135, 1 => 3 => 5. Downloaded from Caradio-Manual.com Manuals…
-
Page 96
: 2 => 4 => 8 => 20. PLAY/PAUSE, 2 => 4 => 8 => PLAY/PAUSE, : 1/2 => 1/4 => 1/6 => 1/7 ( ), 1/2 => 1/4 => 1/6 => 1/7 PLAY/PAUSE, VCD/CD: REPEAT SINGLE ( ) => REPEAT OFF ( DVD: REPEAT TITLE ( ) =>… -
Page 97: Dvd/Cd/Vcd/Mp3)
REPEAT OFF ( RPT. REPT A-B REPT A-B DVD/CD/VCD/MP3) Scan ( CDDA/VCD) GOTO ( DVD/VCD) GOTO GOT , Downloaded from Caradio-Manual.com Manuals…
-
Page 98: Cd/Vcd
MPEG4/VCD Search Track search Disc search Time —:—:— Time —:—:— Time —:—:— Title/Chapter —/— Track —/— Track —/— : Time ), Title/Chapter ( ), Track ( 18 20 00 , => 8 => 2 => 0 => 0 => 0. PLAY/PAUSE, =>…
-
Page 99: Vcd
channel ( ) => Stereo ( MENU / / / PLAY/PAUSE, TITLE PLAY/PAUSE, PBC ( PBC, MENU, PLAY/ PAUSE, STOP, VCD. MENU, Downloaded from Caradio-Manual.com Manuals…
-
Page 100
DISP C – 00:41:28 – 2/6 Eng – – 2 — Source: — Dolby digital – ByPass – ProLogic VCD2/0 – Title: — 00:02:18 – Downloaded from Caradio-Manual.com Manuals… -
Page 101
Source: — EQ: user – Loud: — Loud. DISP Loud. DVD/VCD ZOOM : 1 => 2 => 3 => 4 => SUB-TITLE SUBT DVD- ANGLE Downloaded from Caradio-Manual.com Manuals… -
Page 102
DIR +/-, – PAGE +/-. – AUDIO – REPEAT RANDOM Dolby Pro-Logic. Dolby Pro-Logic. Downloaded from Caradio-Manual.com Manuals… -
Page 103
MP3 CD MPEG 3 DVD-R/-RW, DVD+R/+RW, CD-ROM, CD-R/-RW. ISO 9660. “.mp3”. “.mp3”, “ MP3” “ ”, PC “ ” “ ” 448. (VBR), Downloaded from Caradio-Manual.com Manuals… -
Page 104
CD-R CD-RW, 44,1 ISO 9660, CD-R MP3 CD-R CD-RW CD-R CD-RW CD-R CD-RW 1. ID3TAG. Downloaded from Caradio-Manual.com Manuals… -
Page 105
SRC, TUNER ( PLAY/PAUSE PLAY/PAUSE STOP Downloaded from Caradio-Manual.com Manuals… -
Page 106: Aux
ENTER PLAY/PAUSE STOP DISP (DVD . .). – AUX IN AUX IN. Downloaded from Caradio-Manual.com Manuals…
-
Page 107
PLAY/PAUSE, SYS.SETUP , ASP , RDS PLAY/PAUSE, Downloaded from Caradio-Manual.com Manuals… -
Page 108
PLAY/PAUSE, . 1, . 2, : 12 Hr (12 ), 24 Hr (24 ). Downloaded from Caradio-Manual.com Manuals… -
Page 109: Asp
, NTSC, PAL, SECAM. On ( .) ( ); Off ( .) ( OPEN/CLOSE, ); Manual ( OPEN/CLOSE, ., Treble ., Sub. w , Sub. W , Bass q-factor. PLAY/PAUSE, Downloaded from Caradio-Manual.com Manuals…
-
Page 110: Rds
: 60 , 80 , 100 , 130 , 150 , 200 Treble : 10 , 12.5 , 15 , 17 Sub.w : 80 , 120 , 160 Sub.w : 0D, 180D. Bass Q-factor: : 1.0, 1.25, 1.5, 2.0. : RDS, CT, PLAY/PAUSE, RDS: Downloaded from Caradio-Manual.com Manuals…
-
Page 111: Dvd
RDS. PLAY/PAUSE, Downloaded from Caradio-Manual.com Manuals…
-
Page 112: Prologic Ii
DVD SETUP , PROLOGIC II, PLAY/PAUSE, , DVD PLAY/PAUSE, SUBTITLE Downloaded from Caradio-Manual.com Manuals…
-
Page 113
AUDIO MENU/TITLE PLAY/PAUSE, : 16:9, 4:3. Downloaded from Caradio-Manual.com Manuals… -
Page 114
(Pan & Scan). , DRC, PLAY/PAUSE, DRC: ), 1 ), …, 5 Downloaded from Caradio-Manual.com Manuals… -
Page 115
), 3 ), …, 15 ProLogic II Dolby ProLogic II — Dolby ProLogic, ProLogic Dolby ProLogic — ProLogic — PROLOGIC II. : Surround mode, Downloaded from Caradio-Manual.com Manuals… -
Page 116
PLAY/PAUSE, Surround: Surround), Surround I ( Dolby ProLogic), Surr matrix ( ), Surr movie ( DVD), Surr music ( : « » ProLogic ProLogic Music : 1, 2, 3, 4, 5, 6. ProLogic Music Downloaded from Caradio-Manual.com Manuals… -
Page 117
: 1, 2, 3, 4, 5, 6. PLAY/PAUSE, 25, 30 Downloaded from Caradio-Manual.com Manuals… -
Page 118
PLAY/PAUSE, PLAY/PAUSE, «8888» ( PLAY/PAUSE, PLAY/PAUSE Downloaded from Caradio-Manual.com Manuals… -
Page 119
Downloaded from Caradio-Manual.com Manuals… -
Page 120
Downloaded from Caradio-Manual.com Manuals… -
Page 121
“ ”. RESET. Downloaded from Caradio-Manual.com Manuals… -
Page 122
: 50 DVD/SVCD/VCD/HDCD/MP3/MP4/WMA/CDDA/Picture-CD/JPEG/ CD-R/ -RW/DVD±R/±RW 200 190 55 / 2,2 -10º — +60º CD, 120 7” 480 234 dpi 16:9 300:1 : 110°, : 130° 65.0 – 74.0 / 87.5 – 108.0 MHz Downloaded from Caradio-Manual.com Manuals… -
Page 123
522-1620 RMS (+/-3 – 20 (A-vtd): . 2000 PAL/SECAM/NTSC Downloaded from Caradio-Manual.com Manuals…
Автомагнитола Hyundai H-CMMD4042
Технические характеристики
| Проигрыватель | CD, DVD |
| Форм фактор | 1 DIN |
| Воспроизведение MP3 | есть |
| Встроенный усилитель | есть |
| Дисплей | 7 » 480×234 |
| Эквалайзер | есть, 4 предустан. |
| Предустановки эквалайзера | Classic, Flat, Pop, Rock |
| Поддерживаемые аудиоформаты | MP3, WMA |
| Поддержка тегов ID3 | есть |
| Поддержка CD-текст | есть |
| Поддержка носителей | CD, CD-R, CD-RW, CDDA, DVD, DVD+R, DVD+RW, DVD-R, DVD-RW, HDCD, Picture CD, SVCD, Video CD |
| Мощность | 4×50 Вт (пиковая) |
| Декодеры | Dolby Digital |
| Дисплей | есть |
| Электропривод дисплея | есть |
| Разрешение дисплея | 480×234 |
| Диагональ дисплея | 7 « |
| Формат дисплея | 16:9 |
| Сенсорный дисплей | есть |
| Поддерживаемые видеоформаты | DivX, MPEG-4 |
| Просмотр фотографий | есть |
| Функция «ТВ-тюнер» | есть |
| Диапазоны | AM, FM |
| Всего предустановок тюнера | 36 |
| Количество предустановок FM | 24 |
| Количество предустановок AM | 12 |
| Поддержка технологии «RDS» | есть |
| Разъемы | 5.1-канальный аудиовыход, ISO-разъем, аудиовход, видеовход x 2, выход на сабвуфер, линейный выход х 2 |
| Аксессуары в комплекте | инфракрасный пульт, ТВ антенна |
Просмотр
Доступно к просмотру 121 страница. Рекомендуем вам скачать файл инструкции, поскольку онлайн просмотр документа может сильно отличаться от оригинала.
-
EXCELLENCE
by
H-CMMD4042
MULTIMEDIA DVD-RECEIVER WITH MOTORIZED 7? TFT DISPLAY AND
TV-TUNER
Instruction manual
?????????????? DVD-??????? ? 7? ???????????????? TFT
???????? ? ?? ???????
??????????? ?? ????????????
-
Dear customer!
Thank you for purchasing our product. For safety, it is strongly recommended to read this manual carefully
before connecting, operating and/or adjusting the product and keep the manual for reference in the future.
Table of contents
Table of contents ...............................................................................................................................................2
Important safeguards .........................................................................................................................................6
Installation/ connection......................................................................................................................................7
Din front-mount (method 1)........................................................................................................................7
Din rear-mount (method 2) .........................................................................................................................8
Electrical connection...................................................................................................................................9
Unit controls....................................................................................................................................................12
Monitor ....................................................................................................................................................12
Front panel ...............................................................................................................................................13
Remote control .........................................................................................................................................16
LCD display .............................................................................................................................................19
Monitor operations ..........................................................................................................................................20
Open/close TFT monitor...........................................................................................................................20
TFT monitor auto open.............................................................................................................................20
Monitor tilt angle adjustment ....................................................................................................................20
Aspect ratio ..............................................................................................................................................20
Image setting ............................................................................................................................................21
Parking cable function ..............................................................................................................................21
Monitor movement mechanism.................................................................................................................21
Touch screen operations ..................................................................................................................................22
2
-
General operations...........................................................................................................................................24
Reset the unit............................................................................................................................................24
Power on/off.............................................................................................................................................24
Volume control .........................................................................................................................................24
Mute function ...........................................................................................................................................24
Setting the audio system ...........................................................................................................................24
Mode selecting .........................................................................................................................................25
Display operations ....................................................................................................................................25
Digital tuner operations ...................................................................................................................................26
Mode selecting .........................................................................................................................................26
Band selection ..........................................................................................................................................27
Manual/ automatic tuning .........................................................................................................................27
Programming tuner stations ......................................................................................................................27
AMS (Auto Memory Store) function ........................................................................................................28
Preset scan................................................................................................................................................28
Local radio station seeking (LOC) ............................................................................................................28
AF (Alternative Frequencies) function......................................................................................................28
TA (Traffic Alarm) function ......................................................................................................................29
PTY (Program Type) function...................................................................................................................29
Region function ........................................................................................................................................30
RDS clock ................................................................................................................................................30
Disc operations................................................................................................................................................31
Glossary ...................................................................................................................................................31
Discs for playback ....................................................................................................................................32
Loading a disc ..........................................................................................................................................33
3
- 1
- 2
- 3
- 4
- 121
Инструкцию для Hyundai CMMD 4042 на русском языке, в формате pdf можно скачать с нашего сайта. Наш каталог предоставляем Вам инструкцию производителя фирмы Hyundai, которая была взята из открытых источников. Ознакомившись с руководством по эксплуатации от Hyundai, Вы на все 100% и правильно сможете воспользоваться всеми функциями устройства.
Для сохранения инструкции «Автомобильная магнитола с DVD + монитор Hyundai CMMD 4042» на русском языке на вашем компьютере либо телефоне, нажмите кнопку «Скачать инструкцию». Если активна кнопка «Инструкция онлайн», то Вы можете просмотреть документ (manual), в своём браузере онлайн.
Если у Вас нет возможности скачать инструкцию по эксплуатации либо просмотреть её, Вы можете поделиться ссылкой на эту страницу в социальных сетях и при удобном моменте скачать инструкцию. Либо добавьте эту страницу в закладки Вашего браузера, нажав кнопку «Добавить страницу в закладки браузера».
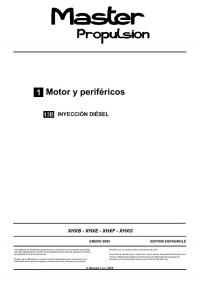
Руководство на испанском языке по техническому обслуживанию и ремонту автомобиля Renault Master Propulsion.
- Автор: —
- Издательство: Renault
- Год издания: 2005
- Страниц: —
- Формат: PDF
- Размер: 6,1 Mb
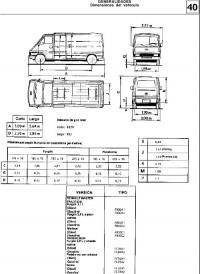
Руководство на испанском языке по техническому обслуживанию и ремонту автомобиля Renault Master первого поколения.
- Автор: —
- Издательство: Renault
- Год издания: —
- Страниц: —
- Формат: PDF
- Размер: 6,7 Mb
Сборник руководств по техническому обслуживанию и ремонту автомобиля Renault Master 1997-2003 годов выпуска.
- Автор: —
- Издательство: Renault
- Год издания: 2001-2003
- Страниц: —
- Формат: PDF
- Размер: 34,9 Mb

Руководство по эксплуатации ремонту автомобилей Renault Laguna Master Propulsion и Renault Mascott 2001-2010 годов выпуска с дизельными двигателями объемом 3,0 литра.
- Автор: —
- Издательство: Гуси-Лебеди
- Год издания: —
- Страниц: 328
- Формат: —
- Размер: —

Руководство по эксплуатации и ремонту автомобилей Nissan Interstar, Renault Master и Opel/Vauxhall Movano с 1998 года выпуска с дизельными двигателями.
- Автор: —
- Издательство: Монолит
- Год издания: —
- Страниц: 434
- Формат: —
- Размер: —
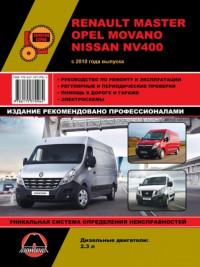
Руководство по эксплуатации и ремонту автомобилей Nissan NV400, Opel Movano и Renault Master с 2010 года выпуска с дизельным двигателем объемом 2,3 л.
- Автор: —
- Издательство: Монолит
- Год издания: 2012
- Страниц: 227
- Формат: PDF
- Размер: 97,1 Mb

Руководство по эксплуатации и ремонту автомобилей Nissan NV400, Opel Movano и Renault Master с 2010 года выпуска с дизельным двигателем объемом 2,3 л.
- Автор: —
- Издательство: Монолит
- Год издания: —
- Страниц: 234
- Формат: —
- Размер: —
Руководство по эксплуатации и техническому обслуживанию автомобиля Renault Master 2011 года выпуска.
- Автор: —
- Издательство: Renault
- Год издания: —
- Страниц: 241/21
- Формат: PDF
- Размер: 8,0 Mb
Сборник мультимедийных схем на нескольких языках (в том числе русском) электрооборудования автомобиля Renault Master 2000-2008 годов выпуска.
- Автор: —
- Издательство: Renault
- Год издания: —
- Страниц: —
- Формат: ISO
- Размер: 978,6 Mb
