-
Contents
-
Table of Contents
-
Bookmarks
Quick Links
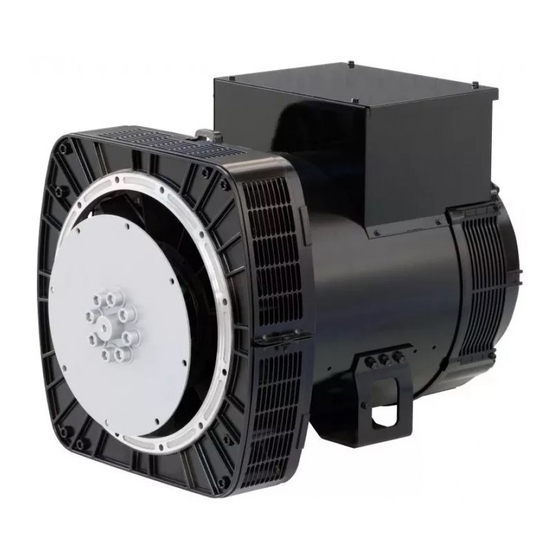
Related Manuals for Leroy-Somer TAL A44
Summary of Contents for Leroy-Somer TAL A44
-
Page 2
Warning symbol for electrical danger to Ali brands and models have been registered personnel. and patents applied for. SAFETY INSTRUCTIONS We wish to draw your attention to the following 2 safety measures which must be complied with: LEROY-SOMER ‘»… -
Page 3: Table Of Contents
5 -SPARE PARTS …………………….. 23 5.1 — First maintenance parts ………………..23 5.2 — Technical support service ………………..23 5.3 -Accessories ……………………23 5.4 — Exploded view, parts list and tightening torque …………. 24 Disposai and recycling instructions LEROY-SOMER ‘»…
-
Page 4: -Receipt
1 i N.D.E. bearing P.R. C..�— ° Made in ……,�o Moteurs Leroy-Somet» — . lr ou!e�nd M�rc-ellin .erny, f,0014— & 8518 — NEM.A Mtl — Jl & lOOU 6915 A!nqo■lêmeCed’ .e x 9-Fr•■ce · LEROY-SOMER ‘»…
-
Page 5: Technical Characteristics
:-�=== ==:•oE j /CWJ 2k0hms OPTION QPTIONAI Rég lage ten5ion extérieur �—-+-+—+—-+—+—-+-� Extemal remote voltage trimer Remove link R1-R2 if use potenliometer OPTIONAL R791T :Serie 813èlt Blaèt Greeri [;µ �-i �-i OPEN FOR 60l-lz LEROY-SOMER ‘»…
-
Page 6
C’Cl yellow :i:i � green * Delta C’Cl C connection blue * For delta connection (1 PH- 3PH): use terminais N and U, connect N and N1. OPTIONAL R791T Black Black Black Blue Green/Yellow ConsultR 120 manual ref.5243 LEROY-SOMER ‘»… -
Page 7
* For F and FF connection, link N and N1 · � · i / 1 OPTIONAL :�. : -.- : : 1 PH R791T Black Black Black �I t ..b_…il i;; _ Blue e—1— OPEN FOR 6DHz GreenNellow ConsultR120 manual ref.5243 LEROY-SOMER ‘»… -
Page 8
— i—, TI04: ln/ A 3 PH I R. 7911 QUI/RIR · oni� R18il ‘-+- — ‘!—‘ O!’EN E 01 O<ùlor .::::: C0: N TACT$ 11′,1 0 !11 F(J Ui;:NI$ Pl!R 1.$1 Ntvln, CONTACTS ll\lDT SUPI’ D BY LS LEROY-SOMER ‘»… -
Page 9
1111 pour TAL.OU � IONAJ… IJ CHor T.AL 044 1 Nùi’iBlack .-.—-+—, 110�: .:;: PH QWFHR li:. 01 Star,oo1 y ‘-+-+-‘ OilBII E 01 10 ow’or Cê.!iTACli’S ON I RJUli:NIS Pli. fi Lli CONTACR !NOT SUPP D B’I’ LEROY-SOMER ‘»… -
Page 10: -Installation
5876 en — 2020.01 / a TALA44 Low Voltage Alternators — 4 pole 3 -INSTALLATION The TAL A44 is equipped with two air deflectors that prevent access to the upper Personnel undertaking the various and lower holes of the flange. Coupling for…
-
Page 11: Checks Prior To First Use
— the standard direction of rotation is clock wise as seen from the drive end (phase rotation in order 1 — 2 — 3). For anti-clockwise rotation, swap 2 and 3. — the winding connection corresponds to the site operating voltage (see section 3.3). LEROY-SOMER ‘»…
-
Page 12
Della 220- 240 (1ph) 3ph 3ph (1ph) W(J)-l3 �—-1 — -1— —— (L)V(2)-L2 AREP: R180 L3(W) L2{V) L2 => T3 1 L 1 => T2 U(1)-L1 Ill � ln case of reconnection, ensure thatAVR voltage detection is correct! LEROY-SOMER ‘»… -
Page 13
220-240 220-240 220-240 SHUNT: R120 U=>T10/N=>T1/N=>N1/V=>n.c. AREP / PMG : R180 L 1 => T1 / L2 => T10 � Voltage LM= 1/2voltage LL � 1 n case of recon nection, ensure thatAVR voltage detection is correct ! LEROY-SOMER ‘»… -
Page 14: Commissioning
The connections inside the terminal box After operational testing, replace all must never be sub j ected to stress due to access panels or covers. cables connected by the user. TheAVRisused to make any adjustments to the machine. LEROY-SOMER ‘»…
-
Page 15: -Servicing -Maintenance
• Electrical servicing Commercially-available volatile degreasing After cleaning the alternator, it is essential to agents can be used. check the winding insulation (see sections 3.2 and 4.5). LEROY-SOMER ‘»…
-
Page 16: Bearings
— Broken or bent shaft end humming and vibration — Shifting and short-circuit of main field — Fan fractured or coming loose on shaft — lrreparable damage to rotating diodes/ A VR, surge suppressor LEROY-SOMER ‘»…
-
Page 17: Electrical Faults
— Faulty AVR to the rated value during and replace any — Main field open circuit or short-circuited ope ration defective components (**) Warning : The AVR internai protection may eut in (overload lost connection. short circuit). LEROY-SOMER ‘»…
-
Page 18
,.f»‘ box to check that the connections are fullytightened. Variac 220V 1) Stop the unit, disconnect and isolate the AVR wires. 2) There are two ways of creating an assembly with separate excitation. LEROY-SOMER ‘»… -
Page 19: Dismantling, Reassembly
-1 T20 and T30 TORX bit — 1 puller (U35)/(U32/350) • Boit tightening torque See section 5.4. • Access to diodes — Remove the air intake grille [51 ]. — Check all 3 modules using an ohmmeter or a battery lamp. LEROY-SOMER ‘»…
-
Page 20: Installation & Maintenance Of The Pmg
— Remove the revolving field coil (rotor) and place on special V-shaped supports. NOTE: If intervention is required on the revolving field coil (rewinding, replacement of components), the rotor assembly must be rebalanced. LEROY-SOMER ‘»…
-
Page 21: Table Of Characteristics
0.008 3.43 12.94 0.459 Dedicated single-phase M: 4-pole SHUNT excitation 4-wire Resistances at 20 °c (0) — Series connection Type UN stator Rotor Field coil Armature 0.024 2.35 11.65 0.423 0.019 2.64 12.94 0.459 0.014 3.15 12.94 0.459 LEROY-SOMER ‘»…
-
Page 22
0.365 0.575 Dedicated single- phase Ml: SHUNT 4- wire 0.308 0.480 0.417 0.611 Type LIN stator Rotor � After operational testing, it is essential to replace all access panels or covers. Don’t forget the boit (29) earth continuity. LEROY-SOMER ‘»… -
Page 23: Spare Parts
To ensure correct operation and the safety of our machines, we recommend the use of original manufacturer spare parts. ln the event of failure to comply with this advice, the manufacturer cannot be held responsible for any damage. LEROY-SOMER ‘»…
-
Page 24: Exploded View, Parts List And Tightening Torque
5876 en — 2020.01 / a TALA44 Low Voltage Alternators — 4 pole 5.4 — Exploded view, parts list and tightening torque • Single bearing, SHUNT or AREP ‘ Çl —=-==—- — — — —-,. .. \ ·.., � � �,�/ LEROY-SOMER ‘»…
-
Page 25
Non drive end (NOE) Coupling dises shield Tie rod Fixing bolts Plastic cover Spacer shims Diode bridge Terminal box lid assembly Surge suppressor Terminal box bolts (+ PCB) Air intake guard O ring seal Non drive end (NOE) bearing LEROY-SOMER ‘»… -
Page 26: Disposai And Recycling Instructions
— major plastic components, such as the terminal box structure on some products. These components are usually marked with plastic type information. Ali materials listed above need special treatment separate waste from reclaimable material and should be handed to specialized disposai companies. LEROY-SOMER ‘»…
-
Page 28
LEROY-SOM ER www.leroy-somer.com/epg Linkedin.com/company/leroy-somer Twitter. com/E PG _ Alternators Facebook.com/LeroySomer. EPG YouTube.com/LeroySomerOfficiel _,._’\Il for dreams 5876 en — 2020. 01 / a…
(Ocr-Read Summary of Contents of some pages of the Leroy-Somer LSA Series Document (Main Content), UPD: 27 June 2023)
-
15, Leroy-Somer LSA Series 15 Alternator LSA 46.1 / 47.1 AREP. 4 Pole Alternador LSA 46.1 / 47.1 AREP. 4 Polos Bobinagem Winding 60 Hz50 Hz 220 — 240 240 120 — 130 — 200 220 — 240 6 7 8 110 — 120 240 — 260 100 110 — 120 1/2 1/2 1/2 120 — Terminais do regulador : 0V.(L3) — 220V(L2) AVR terminals 12 FIOS — 12 WIRES AV (D.E) W1 U1 V1 3 2 1 11 12 6 5 8 9 L3 L2 M 10 4 7 Monofásico Single phase M L3(W) 1 7 12 10 4 9 3 6 11 52 8 L2(V) G Ligação desaconselhada Connection …
-
22, 5.7.2 — Características — alimentação standard ; 2 enrolamentos auxiliares (X1X2,Z1Z2) — alimentação shunt ; max 150V — 50/60 Hz — corrente de sobrecarga nominal : 10A, 10s — protecção electrónica (sobrecarga, curto-circuito; falta de tensão): a corrente de excitação aumenta durante 10 segundos até atingir o valor máximo depois baixa até próximo de 1A. Deve-se parar o alternador (ou cortar a alimentação) para rearmar o dispositivo. — protecção na entrada…
-
34, L1 U1 L2 V1 L3 W1 Ligação à massa To be connected to frame N Alternator LSA 46.1 / 47.1 AREP. 4 Pole Alternador LSA 46.1 / 47.1 AREP. 4 Polos 8 — ACESSÓRIOS 8.1 — Condensadores para supressão de fre- quências parasitas (sistema trifásico) 3 x 0,5 µF Esquema de ligações : Ligados aos terminais de saída 8.2 — Resistências de aquecimento ao parar (Resistências montadas na fábrica) — Consiste em 2 resistências de aquecimento em forma de fita, instaladas sobre as bobinas do …
-
17, 17 Alternator LSA 46.1 / 47.1 AREP. 4 Pole Alternador LSA 46.1 / 47.1 AREP. 4 Polos Anomalia / Fault Acção / Action Origem da anomalia / Origin of fault B Aquecimento excessivo da estrutura do alternador (mais de 40° C acima da temp. ambiente) Controlar — entradas e saídas de ar do alternador — os aparelhos de medida (voltímetro, amperímetro) — temperatura ambiente — Circuito de ventilação (entradas -saídas) parcialmente obstruídas ou reciclagem de ar quente do alt…
-
3, ÍNDICE 1 — GENERALIDADES …………………………………… 4 1.1 — Especificações 1.2 — Principio de funcionamento 2 — INSTALAÇÃO ……………………………………………. 5 2.1 — Localização 2.2 — Ensaios eléctricos 2.3 — Ensaios mecânicos 3 — ENTRADA EM SERVIÇO ………………………. 7 3.1 — Verificações prévias — Mecânicas…
-
1, Réf. 2012 — O33 / a — 2.96 ALTERNADORES / ALTERNATORS LSA; LSA M; LSA C; LSA K; LSA T 46.1- 47.1 A R E P — 4 Polos /4 pole — R 448 Instalação e manutenção / Installation and maintenance
… -
31, Leroy-Somer LSA Series 7 — PARTS Alternator LSA 46.1 / 47.1 AREP. 4 Pole Alternador LSA 46.1 / 47.1 AREP. 4 Polos 31 Rep Nº Designação Rep Nber Designation 1 1 Conjunto do estator 1 1 Wound stator assembly 4 1 Conjunto do rotor 4 1 Wound rotor assembly 15 1 Turbina 15 1 Fan 18 1 Disco de equilibragem 18 1 Balancing discs 21 1 Anel para levantamento 21 1 Lifting eye 22 1 Escatel 22 1 Key 28 1 Borne de massa 28 1 Earth terminal 30 1 Chumacei…
-
14, 3.3.3 — Ligações dos bornes : LSA 46.1/47.1 — 12 fios 3.3.3 — Output terminals : LSA 46.1/47.1 — 12 fils 14 Alternador LSA 46.1 / 47.1 AREP. 4 Pole Alternador LSA 46.1 / 47.1 AREP. 4 Polos Código de ligações/Connection code Tensão / Tension L.L Ligações de fábrica / Factory connection L1(U) N L3(W) 17 12 10 4 9 3 6 11 5 2 8 L2(V) A Trifásico Three phase Bobinagem Winding 60 Hz50 Hz 190 — …
-
32, 37 79 349 70 90 365 122 1 36 4 48 28 41 371 18 198 364 172 31 466 177 91 120 367 49 30 33 60 284 68 15 62 22 34 344 343 107 100 347 51 21 71 32 Alternator LSA 46.1 / 47.1 AREP. 4 Pole Alternador LSA 46.1 / 47.1 AREP. 4 Polos DUAS CHUMACEIRAS
… -
4, 1 — GENERALIDADES 1.1 — Especificações Alternadores do tipo auto-excitado, sem aneís nem escovas de excitação composta e com regulador de tensão incorporado. Construídos em conformidade com várias normas técnicas internacionais, nomeadamente: — C.E.I : recomendações da Commission Electrotechnique Internationale (34-1) — U.T.E : normas francesas da Union Technique de l’Electricité (NFC 51-111, 105,…
-
11, Leroy-Somer LSA Series 3.2.5 — Esquema de ligações LSA 47.1 : 12 Fios 3.2.5 — Internal connection diagram LSA 47.1 : 12 wires 11 Alternator LSA 47.1 AREP. 4 Pole Alternador LSA 47.1 AREP. 4 Polos P2 P1 U1 Resistência variável L3 L2 R 448 v w X2 Z1 X1 Z2 E+ E- 0V 110V 220V 380V P2 P3 P4 P5 T.I. / C.T. ( Opcional / Optional) Enrolamentos aux. Aux. windings 50Hz 60Hz +- S1 S2 ST1 ST2 P1 F2 F1 ST3 170 — 260 V (50/60Hz) 340 — 520 V(50/60Hz) P1 : Estatismo — Voltag…
-
26, 5.8 — Ajustes no regulador R 448 5.8.1 — Regulação de tensão, frequência, estabilidade 5.8.1.1 — Selecção dos modos de funcionamento — detecção de tensão (transformador) A.F. = 0 — 380 V — frequência (protecção + LAM), selector ST3 A.F. = 50 Hz — tempos de resposta: selector ST2 A..F. = normal — ajuste de tensão : ST4 A..F. = interno 5.8 — AVR adjustment 5.8.1 — Voltage, frequency, stability adjustment 5.8.1.1 — Selection of operation mode — sensing voltage A.F. = 0 — 3…
-
5, 1.2 — Princípio de funcionamento O regulador de tensão é alimentado por 2 enrolamentos auxiliares. Um dos enrolamentos (5A) apresenta uma cur- va característica de shunt (tensão proporcional à tensão do alternador), o outro (5B) apresenta uma curva caracte- rística de série (tensão proporcional à corrente do estator). No momento do arranque, devido ao magnetismo remas- cente da excitact…
-
19, (1) Atenção : Em caso de utilização em monofásico, confirmar que os fios de detecção provenientes do regu- lador estão devidamente ligados aos terminais de saída. (2) Actuação provável da protecção interna (sobrecarga, corte, curto-circuito) 5.4 — Verificação de um díodo de rectificação (1) Important : In the case of single phase operation, check that the sensing leads are correctly connected to the…
-
27, 5.8.1.2 — Procedimento de regulação a) Posição inicial dos potenciómetros — P2 TENSÃO : mínimo para a esquerda. — P3 ESTABILIDADE : ponto intermédio. — P1 ESTATISMO : 0 máximo para a esquerda. — P5 LIMITE DA CORRENTE DE EXCITAÇÃO : máximo para a direita (ver 5.8.2.), para ajustar se estritamente necessário. — Potenciómetro exterior Rhe = 470 Ω (remover ST4 ) : posição intermédia. b) Instalar um voltímetro analógico (de…
-
10, Leroy-Somer LSA Series 3.2.4 — Esquema de ligações LSA 47.1 : 6 Fios 3.2.4 — Internal connection diagram LSA 47.1 :6 wires 10 Alternator LSA 47.1 AREP. 4 Pole Alternador LSA 47.1 AREP. 4 Polos U1 T4 C10 Resistência Variável L3 L2 R 448 v w X2 Z1 X1 Z2 E+ E- 0V 110V 220V 380V P2 P3 P4 P5 P2 T.I. / C.T. ( Opção/Optional) Enrolamentos aux. Aux. windings P1 50Hz 60Hz +- S1 S2 ST1 ST2 P1 F2 F1 ST3 170 — 260 V (50/60Hz) 340 — 520 V(50/60Hz) P1 : Estatismo — Voltage droop P2 : Tens�…
-
35, Alternator LSA 46.1 / 47.1 AREP. 4 Pole Alternador LSA 46.1 / 47.1 AREP. 4 Polos 8.4 — Acessórios de ligação 8.4.1 — Máquinas de 6 fios Para o modo de ligação (C) são necessários : — 3 shunts flexíveis Para o modo de ligação (G) são necessários : — 1 shunt flexível — 1 barra de cobre para o ponto médio. 8.4.2 — Máquinas de 12 fios Para o modo de ligação (A) são necessários : — 6 barras de cobre — 1 barra de cobre para o neutro. Para o modo de ligaçã…

7/16/2019 LEROY SOMER — Generator Manual
http://slidepdf.com/reader/full/leroy-somer-generator-manual 1/66
Page 1
Generator ManualInstallation • Operation • Maintenance
Publication 62047801, 06/28/09
Single or double-bearing
Drive-end air discharge

7/16/2019 LEROY SOMER — Generator Manual
http://slidepdf.com/reader/full/leroy-somer-generator-manual 2/66
Page 2
Table of ContentsIntroduction………………………………………………… 4Foreword…………………………………………………………………. 4Safety instructions……………………………………………………..4
Ratings/description…………………………………………………… 4
Application……………………………………………………………….. 4
Construction and Operating Princip les………… 7
Stator……………………………………………………………………… 7Rotor………………………………………………………………………. 7Bearings…………………………………………………………………. 7Connection boxes…………………………………………………….. 8Excitation system……………………………………………………… 8Optional PMG system……………………………………………….. 9
Other options…………………………………………………………… 9
Instal lat ion………………………………………………….10
Receiving inspection……………………………………………….. 10Unpacking and moving……………………………………………..10Location………………………………………………………………… .10Base design…………………………………………………………… 10Assemble to prime mover, alignment…………………………. 11
Two-bearing alignment…………………………………….11Two-bearing close-coupled alignment………………. 13Single-bearing alignment………………………………… 19
Foot deflection……………………………………………………….. 26
Doweling……………………………………………………………….. 26Electrical connections……………………………………………… 26Space heaters……………………………………………………….. 26Inspection before startup…………………………………………. 27
Operation………………………………………………….. 28Initial startup: generators w/auto & manual control………. 28Initial startup: generators w/auto control only………………. 28Restoring residual magnetism/fieldflashing………………… 29Continuous operation………………………………………………. 30Idling……………………………………………………………………… 31
Parallel operation……………………………………………………..31
Note: Because of rapid changes in designs
and processes and the available variability
of our products, information in this manual
is not contractually binding and is subject to
change without notice.
The image on the front cover is representa-
tive only and may include optional features.
Several variations are available within the
range of generators covered within this
manual.

7/16/2019 LEROY SOMER — Generator Manual
http://slidepdf.com/reader/full/leroy-somer-generator-manual 3/66
Page 3
Maintenance………………………………………………. 33
Schedules……………………………………………………………… 33Maintenance procedures…………………………………………. 34
Visual inspection methods of windings……………… 34Cleaning………………………………………………………. 36Insulation resistance tests at low voltage………….. 36Dry out procedures……………………………………….. 38Bearing lubrication………………………………………… 39Rectifier tests……………………………………………….. 39
Disassembly…………………………………………………………… 42Overall disassembly……………………………………….. 42Exciter armature removal…………………………………43PMG removal………………………………………………… 45
Bearing removal……………………………………………. 45Assembly……………………………………………………………….. 46
Bearing installation………………………………………… 46Overall assembly…………………………………………… 47Exciter installation…………………………………………. 47PMG installation……………………………………………. 48
Storage…………………………………………………………………. 49
Troubleshooting Guide………………………………. 50
Appendices………………………………………………. 511: List of equipment for installation/maintenance…………. 51
2: Standard SAE engineflywheel……………………………… 543: Standard SAE engine flange…………………………………. 55
4: Six-lead generator marking…………………………………… 565: 12-lead generator marking……………………………………. 566: Optional component marking………………………………….577: Six lead generator connections……………………………… 588: 12-lead generator connections………………………………. 599: Single bearing 40 Frame key parts ……………………….. 6010: Single bearing 50/500 Frame key parts………………….6111: Single bearing 60/600 frame key parts………………….. 6212: Single bearing 80/800 frame key parts…………………..63
13: Two bearing 60/600 frame key parts…………………….. 6414: Two bearing 80/800 frame key parts…………………….. 65

7/16/2019 LEROY SOMER — Generator Manual
http://slidepdf.com/reader/full/leroy-somer-generator-manual 4/66
Page 4
Introduction
ForewordThis manual contains instructions for installing, operating and
maintaining AC brushless revolving field generators. These generators
are manufactured in many sizes and ratings and with various options.
Please read this manual in its entirety before unpacking, installing, and
operating your generator.
Safety instructionsIn order to prevent injury or equipment damage, everyone involved in
installation, operating and maintenance of the generator described in this
manual must be qualified and trained in the current safety standards that
govern his or her work.
The following paragraphs define warnings, cautions, and notes as theyare used in this manual:
Warning: Warnings identify an installation, operating or maintenance
procedure, practice, condition, or statement that, if not strictly followed,
could result in serious injury to personnel.
Caution: Cautions identify an installation, operating or maintenance
procedure, practice, condition, or statement that, if not strictly followed,
could result in destruction of or damage to equipment or serious
impairment of system operation.
Note: Notes highlight an installation, operating or maintenance
procedure, condition, or statement and are essential or helpful but are not
of known hazardous nature as indicated by warnings and cautions.
Ratings/description Nameplates, which are located on the side of the generator, include serial
and model number as well as rating information.
Application:The generators have been designed for use in a maximum ambient
temperature of 40° C, and altitude less than 3300 ft (1000 meters)
above sea level in accordance with NEMA MG1. Ambient temperaturesin excess of 40° C, and altitudes above 3300 ft (1000 meters) can be
tolerated with reduced ratings. Refer to the generator nameplate for
rating and ambient temperature and to the factory for appropriate
derating factors. Refer to NEMA MG1 for additional information on
usual/unusual operating conditions.

7/16/2019 LEROY SOMER — Generator Manual
http://slidepdf.com/reader/full/leroy-somer-generator-manual 5/66
Page 5
The generators are self ventilated screen protected designs and are
not suitable for mounting outdoors unless adequately protected by
enclosures. The enclosure must provide suf ficient cooling air so the
generator does not overheat. The enclosure air intake must also be
designed to prohibit the ingress of moisture. The air intake/outlet must
be sized for the air flow required. Consult the factory for air flow and
additional pressure drops.
Dynamic balancing of the generator rotor assembly has been carried out
during manufacture to ISO 1940 Class G2.5. The vibration produced by
the generator is caused by residual unbalance at operating speed. The
fundamental vibration frequencies are shown in Table 1.
Caution: Reduction in cooling air flow or
inadequate protection to the generator can
result in damage and/or failure.
Vibrations generated by the engine are complex and contain harmonics
of the fundamental frequency. The generator will be subjected to these
vibrations, which will result in the generator being subjected to vibration
levels higher than those produced by the generator itself. Our generators
are designed to withstand the vibration levels encountered on generating
sets built to meet the requirements of ISO 8528-9. Table 2 lists the
vibration limits by kVA range and speed for acceptable generator set
operation.
Table 1: Fundamental vibration frequencies
Pole RPMFundamental
vibration frequency
41500 25 Hz
1800 30 Hz
61000 16.7 Hz
1200 20 Hz
Engine RPM kVA Vibration
displacement
mm (rms)
Vibration
velocity
mm/s (rms)
Vibration
acceleration
m/s2 (rms)
Four pole1500 RPM, 50 Hz1800 RPM, 60 Hz
10<kVA≤50 0.64 40 25
50<kVA≤125 0.4 25 16
125<kVA≤250 0.4 25 16
250<kVA 0.32 20 13
Six pole1000 RPM, 50 Hz
1200 RPM, 60 Hz
250<kVA≤1250 0.32 20 13
1250<kVA 0.29 18 11
Table 2: Vibration levels measured on the generator

7/16/2019 LEROY SOMER — Generator Manual
http://slidepdf.com/reader/full/leroy-somer-generator-manual 6/66
Page 6
It is the responsibility of the generating set designer/manufacturer to
ensure the alignment of the genset, stiffness of the skid and mountings
are such that the vibration limits as defined above are met.
If the vibration levels of the generating set are not within what is
specified in Table 2, then 1) Consult the genset builder. The genset
builder should address the genset design to reduce the vibration levelsas much as possible. 2) Consult the factory if the above levels cannot be
met.
Torsional vibrations occur in all engine-driven shaft systems and may be
of a magnitude to cause damage at certain critical speeds. It is therefore
necessary to consider the torsional vibration effect on the generator shaft
and couplings.
It is the responsibility of the generator set manufacturer to ensure
compatibility. Rotor torsional data is available upon request for torsional
analysis.
Grounding terminals are provided on the feet of the generator and inside
the main terminal box. The neutral terminal is NOT connected to the
frame.
Damage and decrement curves along with reactance and time constants
are available upon request to assist the system designer with the
coordination of the protection devices. It is the responsibility of the
user, system designer and/or generator set manufacturer to coordinate
protections on breakers installed or supplied with a generator.
Warning: Exceeding ISO 8528-9 vibration
levels will have a detrimental effect on
the generating set and also the life of
the bearings. This will void the generator
warranty. Refer to the product service group
at the factory if you are in doubt.
Warning: Torsional incompatibility and/or
excessive vibration levels can cause
damage or failure of the generator and/or
genset components.
Warning: Ground the neutral in accordance
to local, national and international codes.
Incorrect grounding and/or protection can
result in personal injury and equipment
damage.
Warning: Protection devices must be
coordinated in order to prevent personalinjury and equipment damage.

7/16/2019 LEROY SOMER — Generator Manual
http://slidepdf.com/reader/full/leroy-somer-generator-manual 7/66
Page 7
Construction and Operating Principles
StatorThe stator consists of the supporting frame, core, and armature windings.
The stator core is made from laminations, thin sheets of electrical steel,
which are stacked and held in place by steel end rings and support bars.
The rings and bars are welded to or are part of the steel frame. Feet are
welded to the bottom of the frame and allow the assembly to be mounted
on the genset base.
The windings (coils) are constructed of layered and insulated copper
wire. The coils are inserted in the core slots, connected together, and the
entire assembly is dipped or vacuum-pressure impregnated with resin.
Stator leads terminate in standard connection lug for ease of connection
to the load.
RotorThe main rotor assembly is the revolving field. It consists of windings
in a core, which is in turn mounted on a steel shaft. The exciter armature
assembly and optional permanent magnet generator (PMG) rotor are also
mounted on the shaft as are the fan(s) and other optional accessories. The
core consists of thin sheets of electrical steel, which are stacked together.
The core makes the salient poles (four or six).
The rotor windings consists of insulated magnet wire wound around
each pole. V-blocks between each pole keep the rotor windings in place.
Damper windings consist of aluminum or copper rods that are inserted
through each pole surface and are attached to copper or aluminum
damper end plates at each end of the lamination stack. The end plates
are attached to adjacent poles to form a continuous damper winding. The
ends of the windings are supported with bars or pole shoes. The rotor
either has epoxy applied during the winding process or is impregnated
with resin or epoxy.
The shaft is made from rolled or forged steel and machined to
accommodate all the rotating generator components. Keyways in the
shaft ensure precise positioning of the revolving field, exciter armature,
and optional PMG rotor. On the exciter side, the shaft has a slot or hole
in its center line for running the revolving field leads to the rectifier.
BearingsThe generator will contain either one or two bearings. Bearings are
typically ball or roller type and are either 1) heavy duty double shielded
bearings, greased for life or 2) regreaseable bearings, which contain fill
and drain ports for easy lubrication.

7/16/2019 LEROY SOMER — Generator Manual
http://slidepdf.com/reader/full/leroy-somer-generator-manual 8/66
Page 8
Connection boxesThe main lead connection box houses the load lead terminals. In
addition, the generator may have auxiliary terminal strips for temperature
detectors, space heaters, sensing leads, and other accessories.
Excitation systemThe excitation system consists of the exciter stator assembly and the
exciter armature assembly:
The exciter stator assembly consists of windings in a core. The core is
made from steel laminations that are stacked and welded together. The
main exciter stator coils are placed in slots in the core and form alternate
North and South poles. The entire assembly is mounted to the end
bracket. The stator is a stationary field, which is powered by the voltage
regulator.
The exciter armature assembly is keyed onto the generator shaft. A three-
phase winding is inserted into slots in the laminations. The coils are heldin place by insulating wedges. The coil extensions are braced with tape.
Output leads from the winding are connected to the rotating rectifier
assembly.
The rotating rectifier is a three-phase full wave bridge rectifier,
converting the AC from the exciter armature to DC, which is transferred
to the revolving field windings. Two designs are used. The standard
design uses positive and negative diode cubes fitted on an aluminum
back plate along with the surge suppressor. The other design, used on
special applications, has two stainless steel plates, each containing three
rotating rectifier diodes, which are mounted on each side of an insulating
hub to form the negative and positive terminals. The plates also act as
heat sinks for the diodes.
Excitation system functional overview: Exciter field control is
established by the strength of the exciter field current developed by
the voltage regulator system. The DC voltage and current levels of the
exciter field signal from the voltage regulator varies depending upon
the generator output voltage and the loading of the output lines (see
Figure 1). The voltage regulator system can be energized by the main
stator (SHUNT excitation system) or by the optional PMG stator (PMG
excitation system).

7/16/2019 LEROY SOMER — Generator Manual
http://slidepdf.com/reader/full/leroy-somer-generator-manual 9/66
Page 9
Optional PMG systemThe permanent magnet generator (PMG) system consists of the PMG
stator and PMG rotor:
The PMG stator is a stationary armature and is mounted next to the
exciter stator. The PMG stator consists of steel laminations. The PMG
windings are placed in slots in the laminations. Insulating wedges are
inserted at the top of each slot to hold the coils in position.
The PMG rotor consists of a magnetized disk and cast pole tips or
permanent magnets assembled into a rotor using round insulating plates
and steel magnet separators. The PMG rotor is secured to an aluminumhub. The PMG rotor hub is keyed to the shaft and secured with a
hardened retaining washer and bolts.
PMG system overview: The PMG system functions as a pilot exciter,
providing power to the automatic voltage regulator power supply. The
PMG is an AC generator that uses permanent magnets in the rotor instead
of electromagnets to provide the magnetic field (see Figure 1).
Other optionsOther options include, but are not limited to, space heaters, filters, and
temperature sensing devices.
Figure 1: Overview of excitation system(with an optional PMG)
Output leads
Voltageregulator
Exciter stator(field)
Main stator
(armature)
Shaft
Main rotor (DC)
RectifierExciter
armature (AC)
PMG stator(armature)
PMG rotor(field)
Prime mover
Power input
Optional

7/16/2019 LEROY SOMER — Generator Manual
http://slidepdf.com/reader/full/leroy-somer-generator-manual 10/66
Page 10
Installation
Receiving inspectionBefore accepting a shipment, examine the packaging for any sign of
damage that might have occurred during transit. Report any damage to
the transportation company and the factory.
Unpacking and movingIf the generator is received during cold weather, reduce condensation on
cold surfaces and failure due to wet windings by allowing the generator
to reach room temperature before removing the protective packing.
Unpack the generator carefully to avoid scratching painted surfaces. Do
not remove the protecting lubricant from the shaft end, drive plates, and
flange machined surfaces. Inspect for loosely mounted components and
the presence of moisture. Inspect to make certain foreign material, such
as crating nails, loose bolts or packing material, which may have falleninto the machine during unpacking, is removed. If damage is noted,
determine the extent of damage and immediately notify the transportation
company claims of fice and the factory. Be sure to give complete and
accurate details when reporting damage.
Move the generator by attaching an overhead hoist to the lifting
eyes installed on the generator frame or by lifting the generator from
underneath the skid with a forklift.
Single-bearing generators are shipped with plastic strips between the
main rotor and stator to maintain air gap and a shipping bar across the
drive discs.
LocationInstall the generator in an area so it complies with all local and industrial
regulations. Locate it in a clean, dry, well-vented area or area that is
suitable for the generator enclosure. Make sure it is easily accessible for
inspection and maintenance.
Protect generators operating intermittently in very damp locations with
space heaters. Slowly warm generators placed in operation after being
subjected to very low temperatures to prevent excessive condensation.
Check winding and insulation resistance before placing the generator inoperation (see instructions later in this manual).
Base designThe type of base to be used will depend upon the nature of the
installation site. However, the generator base must be rigid, level, and
free from vibration. Mounting holes must be larger than the fasteners to
allow for alignment.
Warning: Be alert at all times when
installing, operating and maintaining the
generator. Avoid contact with the uninsulated
metal parts of the generator. Most injuries
occur from faulty ground connections on
portable electrical equipment and failure to
ground stationary equipment.
Test all portable devices frequently to
prove that a solid electrical circuit exits
from the metal frame though the grounding
conductor, in the electrical cord, to the
grounding contact in the attachment plug.
Do not use electrical equipment with frayed,
burned or damaged cords. Always take
extreme care when moving the generator.Be careful to not strike objects or personnel.
Apply lifting force to structural points
specifically provided for lifting. Do not use
the enclosure lifting holes to lift the whole
unit. Use lifting means adequate for the
weight. Observe lifting notices attached
to the generator. Failure to observe these
instructions can result in personnel injury
and damage to the generator.
Caution: Do not attempt to transport a
single-bearing generator without maintainingproper rotor support. Failure to observe this
warning can result in equipment damage.
Caution: Blocking or restriction of normal air
flow into or out of the generator may cause
damage to the electrical windings.

7/16/2019 LEROY SOMER — Generator Manual
http://slidepdf.com/reader/full/leroy-somer-generator-manual 11/66
Page 11
Assemble to prime mover, alignmentFollow either the two-bearing alignment (if your generator model has
two bearings but no adapter to bolt to an engine flywheel housing),
two-bearing close-coupled alignment (if your generator model has two
bearings and an adapter for bolting to a flywheel housing), or single-
bearing alignment (if your generator has one bearing and drive plates).
Two-bearing alignment
Follow the tolerances specified by the coupling manufacturer when they
are tighter than described in this manual.
Use shims, if necessary, between the mounting pad and the base to
properly level and align the generator to the prime mover.
Install the coupling(s) on the generator and engine drive shafts in
accordance with the coupling manufacturer installation procedures. Use
a straight edge and a thickness gauge for rough alignment as shown in
Figure 2. Check for angular and parallel alignment as follows:
Figure 2: Rough alignment
Straight edge
Thickness gauge
Notes: Mounting of the indicators must
allow complete rotation of the prime mover.
Use dial indicators that are rigid so indicator
sag won’t be a factor. Using the shortest
offset distance of the indicator bracket will
reduce the effects of indicator droop or sag.
During alignment, you may also need to
compensate for engine expansion due to
heating. Generator expansion is generallynot considered a factor.
If the genset is moved to a different
location, check alignment before startup.
Caution: Do not pry on the generator fan.
Angular alignment: Fasten a dial indicator to one of the coupling halves,
and scribe the position of the dial button on the face of the opposite
coupling half as shown in Figure 3. Rotate both shafts simultaneously,
keeping the finger or button on the indicator at the reference mark on the
coupling hub. Note the reading on the indicator dial at each one quarter revolution.
A variation of readings at different positions will indicate how the
machine needs to be adjusted to obtain a maximum misalignment of
0.001 inch (0.0254 mm) for each inch (25.4 mm) of the coupling hub’s
radius, total indicator runout. Place or remove slotted shims from under
the front or rear engine or generator mounting pads and/or shift the front
or back half of one component from side to side until the components are
properly aligned. Tighten the mounting bolts, and recheck alignment.

7/16/2019 LEROY SOMER — Generator Manual
http://slidepdf.com/reader/full/leroy-somer-generator-manual 12/66
Page 12
Parallel alignment: Fasten a dial indicator to one of the coupling halves,
and scribe the position of the dial button on the top of the oppositecoupling half as shown in Figure 4. Rotate both shafts simultaneously,
keeping the finger or button on the indicator at the reference mark on the
coupling hub. Note the reading on the indicator dial at each one quarter
revolution. A variation of readings at different positions will indicate how
the machine needs to be adjusted to obtain a maximum misalignment of
0.002 inch (0.0508 mm). Place or remove slotted shims from under all
of the engine or generator mounting pads and/or shift one component
from side to side until the components are properly aligned. Tighten the
mounting bolts, and recheck alignment.
Dial indicator
Figure 3: Angular alignment
Dial indicator
Figure 4: Parallel alignment

7/16/2019 LEROY SOMER — Generator Manual
http://slidepdf.com/reader/full/leroy-somer-generator-manual 13/66
Page 13
Two-bearing close-coupled alignment
Check the engine flywheel housing pilot’s radial and face runout by
mounting a dial indicator and measuring the flywheel to the flywheel
housing as shown in Figure 5. See Table 3 for maximum allowable
runout.
SAE housingnumber
654321
0.5000
0.002 (0.051)0.003 (0.076)0.003 (0.076)0.004 (0.102)0.004 (0.102)0.005 (0.127)0.005 (0.127)0.006 (0.152)0.007 (0.178)
Allowable runout(TIR) inch (mm)
10.500 (266.70)12.375 (314.33)14.250 (361.95)16.125 (409.58)17.625 (447.68)20.125 (511.18)23.000 (584.20)25.500 (647.70)31.000 (787.40)
Housing insidedia., inch (mm)
Table 3: Maximum allowableflywheel housing runout
Figure 5: Flywheel housing check
Shaft
Flywheel
Flywheel housingDial indicator
pointer for radialrunout
Dial indicator pointer forface runout
Notes: Mounting of the indicators must
allow complete rotation of the prime mover.
Use dial indicators that are rigid so indicator
sag won’t be a factor. Using the shortest
offset distance of the indicator bracket will
reduce the effects of indicator droop or sag.
During alignment, you may also need to
compensate for engine expansion due to
heating. Generator expansion is generally
not considered a factor.
If the genset is moved to a different
location, check alignment before startup.
Caution: Do not pry on the fan.

7/16/2019 LEROY SOMER — Generator Manual
http://slidepdf.com/reader/full/leroy-somer-generator-manual 14/66
Page 14
Check the engine flywheel’s radial and face runout by mounting a dial
indicator and measuring the flywheel housing to the flywheel as shown
in Figure 6. See Table 4 for maximum allowable runout.
Table 4: Maximum allowableflywheel runout
Figure 6: Flywheel check
Shaft
Flywheel
Flywheel housing
Dial indicator pointerfor radial runout
Dial indicatorpointer for face
runout
6.57.5810
11.514161821
24
0.002 (0.051)0.002 (0.051)0.002 (0.051)0.003 (0.076)0.003 (0.076)0.004 (0.102)0.005 (0.127)0.005 (0.127)0.006 (0.152)
0.007 (0.178)
Pilotdiameter
Allowable runout(TIR) inch (mm)

7/16/2019 LEROY SOMER — Generator Manual
http://slidepdf.com/reader/full/leroy-somer-generator-manual 15/66
Page 15
Figure 7: Generator adapter check
Shaft
AdapterDial indicator pointerfor radial runout
Dial indicatorpointer for face
runout
Figure 8: Generator coupling check
Shaft
Adapter
Dial indicatorpointer for radial
runout
Dial indicatorpointer for face
runout
Check the generator adapter’s radial and face runout by mounting a
dial indicator on the generator shaft or coupling as shown in Figure 7.
The maximum radial and face runout on the generator adaptor must not
exceed 0.010 inch (0.254 mm).
Check the generator coupling’s radial and face runout by mounting
a dial indicator to the generator adapter as shown in Figure 8. The
maximum radial and face runout on the coupling must not exceed 0.003
inch (0.076 mm).

7/16/2019 LEROY SOMER — Generator Manual
http://slidepdf.com/reader/full/leroy-somer-generator-manual 16/66
Page 16
Measure and record the engine crank shaft end play and generator end play. Set the engine end play to the manufacturer’s recommended
position for alignment. Verify the generator end play is set at a position
of one half of the measured distance or at a position that will allow
full thermal growth of the generator shaft when operated at rated
temperatures.
Mount the generator on the skid, and move the generator to within
0.010 inch (0.254 mm) of the engine. Place two 0.010-inch (0.254 mm)
shims in the horizontal (9 o’clock and 3 o’clock) positions between the
generator adapter and the engine flywheel housing. Raising the rear,
exciter end of the generator as necessary, place two 0.010-inch (0.254
mm) shims in the vertical (6 o’clock and 12 o’clock) positions between
the generator adapter and the engine flywheel housing. This will give
a good starting point for alignment. Remove the vertical shims at this
time. (If necessary, mark holes to be drilled on the base, and remove the
generator at this time.)
Shaft
Flywheel
Flywheel housing
Dial indicator pointerfor radial runout
Dial indicatorpointer for face
runout
Figure 9: Engine coupling check
Install the portion of the coupling that fits into the engine flywheel
following the manufacturer’s recommended procedures and in
accor dance with engine manufacturer’s specifications. Check the
coupling’s radial and face runout by mounting a dial indicator to the
engine flywheel housing as shown in Figure 9. The maximum radial and
face runout on the coupling must not exceed 0.004 inch (0.102 mm).

7/16/2019 LEROY SOMER — Generator Manual
http://slidepdf.com/reader/full/leroy-somer-generator-manual 17/66
Page 17
Mount a dial indicator on the generator shaft or half coupling to the
flywheel radial surface for parallel alignment as shown in Figure 10.
Mount a dial indicator on the flywheel coupling to the face of the
generator half coupling for angular alignment as shown in Figure 10.
Align the engine by rotating the prime mover in 90-degree increments
and measuring total indicator runout. Tighten the generator to the base
before taking each set of readings. Raise or lower the generator byadding or removing shims under the feet.
Shaft
Flywheel housing
Dial indicator pointerfor angular alignment
Dial indicator pointerfor parallel alignment
Flywheel
Figure 10: Alignment checkFollowing the final generator adjustment and runout check, remove
the horizontal shims from the adaptor flywheel housing, and move the
generator all the way to the adaptor. Then tighten the fasteners. Recheck
alignment. Make sure angularity (face) total indicated runout does not
exceed 0.001 inch (0.0254 mm) per inch (25.4 mm) of generator shaft
diameter and parallel (radial) total indicated runout does not exceed
0.003 inch (0.076 mm).
Torque the fasteners to the value shown in Table 5.
Note: Clearances between the adaptor
pilot and the flywheel housing recess are
designed to meet the tolerance of 0.001 to
0.015 inches (0.0254 to 0.381 mm).

7/16/2019 LEROY SOMER — Generator Manual
http://slidepdf.com/reader/full/leroy-somer-generator-manual 18/66
Page 18
Table 5: Recommended lubricated torque values. (If no lubricant is used, increase values by 25%.)
Grade 2
Sizein-lbs. ft-lbs N-M
Min. Max. Min. Max. Min. Max.
4-40 3.3 4.7 0.4 0.5
6-32 6.1 8.7 0.7 1.0
8-32 12.5 17.8 1.0 1.5 1.4 2.0
10-32 20.8 29.7 1.7 2.5 2.3 3.4
1/4-20 50.4 72.0 4.2 6.0 5.7 8.1
5/16-18 92.4 132.0 7.7 11.0 10.4 14.9
3/8-16 159.6 228.0 13.3 19.0 18.0 25.8
7/16-14 252.0 360.0 21.3 30.0 28.5 40.7
1/2-13 378.0 540.0 31.5 45.0 42.7 61.0
9/16-12 46.2 66.0 62.6 89.5
5/8-11 65.1 93.0 88.3 126.1
3/4-10 105.0 150.0 142.4 203.4
7/8-9 141.4 202.0 191.7 273.9
Grade 8
Size in-lbs. ft-lbs N-MMin. Max. Min. Max. Min. Max.
10-32 36 49 4.1 5.5
1/4-20 72 144 6 12 8.1 16.3
5/16-18 156 276 13 23 17.6 31.2
3/8-16 324 444 27 37 36.6 50.2
7/16-14 480 720 40 60 54.2 81.3
1/2-13 780 1020 65 85 88.1 115.2
9/16-12 1140 1500 95 125 128.3 169.5
5/8-11 1560 2040 130 170 176.8 230.5
3/4-10 2760 3600 230 300 311.8 406.77/8-9 4320 5760 660 480 488.1 650.8
1-8 6720 8640 560 720 759.3 976.2
Grade 5
Size in-lbs. ft-lbs N-MMin. Max. Min. Max. Min. Max.
1/4-20 60 84 5 7 6.8 9.5
5/16-18 120 192 10 16 13.5 21.7
3/8-16 228 336 19 28 25.8 38
7/16-14 360 528 30 44 40.7 59.7
1/2-13 540 804 45 67 61 90.8
9/16-12 792 1152 66 96 89.5 130.2
5/8-11 1104 1608 92 134 124.7 181.7
3/4-10 2052 2724 171 227 231.8 307.8
7/8-9 3372 4368 281 364 381 493.51-8 5160 6432 430 536 583 726.7
Class 8.8
Sizein-lbs. ft-lbs N-M
Min. Max. Min. Max. Min. Max.
M4 20 32 1.7 2.7 2.3 3.6
M5 40 64 3.3 5.4 4.5 7.3
M6 65 113 5.4 9.4 7.3 12.8
M8 168 264 14 22 20 30
M10 324 516 27 43 38 58
M12 612 900 51 75 69 101
M14 960 1428 80 119 109 161
M16 126 184 170 250
M18 183 243 248 330
M20 263 341 357 463
M22 367 457 497 619
M24 465 580 631 787
Class 10.9
Sizein-lbs. ft-lbs N-M
Min. Max. Min. Max. Min. Max.
M4 22 36 1.8 3 2.5 4.1
M5 46 74 3.8 6.2 5.2 8.4
M6 77 122 6.4 10.2 8.7 13.8
M8 192 288 16 24 22 32
M10 384 576 32 48 43 66
M12 672 996 56 83 77 112
M14 1080 1554 90 132 122 179
M16 140 206 190 279
M18 205 271 277 368
M20 294 381 398 517
M22 409 510 554 691
M24 531 662 720 898
1-NM =0.737 ft-lbs. =8.85 in-lbs.
ASTM & SAE grade markings
Metric grade markings
Grade 2 Grade 5 Grade 8
Class 8.8 Class 10.9

7/16/2019 LEROY SOMER — Generator Manual
http://slidepdf.com/reader/full/leroy-somer-generator-manual 19/66
Page 19
Single-bearing alignment
Before assembling the generator to the prime mover, remove the exciter
cover and adapter cover. Remove the blocking holding the drive discs to
the adapter and the air gap spacers. Also make sure the generator bearing
end clearance is not less than the total engine crankshaft axial movement
plus 1/16 inch (1.59 mm). The generator is shipped from the factory with
approximately 1/4-inch (6.36 mm) bearing endplay. (This dimension isspecified on the generator’s corresponding outline drawing.)
Check the engine flywheel housing pilots’s radial and face runout by
mounting a dial indicator and measuring the flywheel to the flywheel
housing as shown in Figure 5. See Table 3 for maximum allowable
runout.
Check the engine flywheel’s radial and face runout by mounting a dial
indicator and measuring the flywheel housing to the flywheel as shown
in Figure 6. See Table 4 for maximum allowable runout.
Measure the generator drive plate diameter (dimension S of Figure 11)and flywheel bore diameter (dimension B of Figure 12). Drive plate
diameter must not be greater than the flywheel bore diameter. Also check
to make sure the hole centers match (dimension W of Figure 11 and
dimension C of Figure 12).
Notes: Mounting of the indicators must
allow complete rotation of the prime mover.
Use dial indicators that are rigid so indicator
sag won’t be a factor. Using the shortest
offset distance of the indicator bracket will
reduce the effects of indicator droop or sag.
During alignment, you may also need to
compensate for engine expansion due to
heating. Generator expansion is generally
not considered a factor.
If the genset is moved to a different
location, check alignment before startup.
Caution: Do not pry on the generator fan.
Figure 11: Single bearing generator drive plateand adaptor
S
Y
W A
Adaptor
Bolt holes
Driveplates
Fan
Shaft
Caution: Never grind the OD of drivediscs or attempt to drill out the holes. If the
dive discs do not fit properly, use different
discs or a different flywheel.

7/16/2019 LEROY SOMER — Generator Manual
http://slidepdf.com/reader/full/leroy-somer-generator-manual 20/66
Page 20
Figure 12: SAE flywheel and adapter
Caution: The number and thickness
of drive discs are specified for torque
requirements. Do not remove drive discs
to compensate for spacing.
BC
G
Tappedbolt holes
Flywheel
Measure the axial distance from the surface on the generator adapter to
the outside surface on the drive disc coupling plates (dimension Y inFigure 11). This dimension is specified on the generator’s corresponding
outline drawing. If the dimensions do not match, move the rotor axially
relative to the stator until the dimensions are equal, ensuring the bearing
is not contacting either face. Approximately 0.060 inch (1.52 mm) gap is
needed to avoid axial or thrust loading.
Measure the axial distance from the machined surface on the engine
flywheel housing the bottom of the flywheel drive disc recess
(dimension G in Figure 12). Make sure the difference between
dimensions Y (of Figure 11) and G are less than 1/32 inch (0.79 mm).
If G is more than Y, install additional spacers between the drive discsand the generator hub. If Y is more than G, remove spacers (if supplied)
between the drive discs and generator hub. If not spacers were
provided, move the rotor, ensuring the bearing is not contacting either
face. Approximately 0.060 inch (1.52 mm) gap is needed to avoid axial
or thrust loading.
Support the generator shaft to ease the mating process, and install the
generator to the engine. Make sure the drive discs seat in the recess of
the flywheel housing. Secure the generator to the engine (drive discs to
flywheel, adapter to flywheel housing), and the base. Use lock washers
on all bolts. Torque the adapter and drive discs in a criss-cross pattern
to the values in Table 5.
Ensure that the bolts in the flywheel do not bottom out. If they are too
long or cannot be tightened with a socket or box wrench, use a shorter
bolt or spacers inserted in the bolts as shown in Figure 13 to increase
the clearance between the bolt head and the flywheel.

7/16/2019 LEROY SOMER — Generator Manual
http://slidepdf.com/reader/full/leroy-somer-generator-manual 21/66
Page 21
Figure 13: Disc-to-flywheel installation
Flywheel
Drive plates
Drive hub
Spacer
Bolt
Lock washer
After installing the drive disc-to-flywheel bolts, check the alignment
of the generator. This involves two steps: 1) making sure the generator shaft is centered in the flywheel and 2) making sure the crankshaft and
generator shaft form a straight line horizontally and vertically.
Centering pilot (parallel alignment):
To measure how well the shaft is centered in the flywheel pilot, clamp
a dial indicator to the flywheel housing or generator body. The dial
indicator will read the total runnout of the generator shaft, drive hub, or
fan, which must be machined (see Figure 14).
Drive hub
Shaft
Fan
Adapter
Figure 14: Centering pilot setup
Drive plates
Dial indicator pointer
Note: Indicating from a cast surface will
result in false readings.

7/16/2019 LEROY SOMER — Generator Manual
http://slidepdf.com/reader/full/leroy-somer-generator-manual 22/66
Page 22
1. Clean the machined surface of any dirt, grease, rust, or paint. Use
Emery cloth, if necessary, to ensure a smooth surface to measure
from.
2. Mount a dial indicator to the flywheel housing or generator
stator, to take the readings from the machined surface. Check for
clearance before rotating the shaft.
3. Bar the engine over counterclockwise (facing the flywheel), and
take a reading every 90º. A maximum of 0.005 inch (0.127 mm)
total indicator runnout (TIR) is acceptable.
If the runnout exceeds this amount, roll the highest point to the
top. Loosen the coupling bolts at this point to allow the shaft and
coupling to drop in the flywheel counterbore. Once all the bolts are
loose, re-torque the bolts.
4. Repeat steps 2 and 3, and, if TIR is still unacceptable, remove thecoupling bolts, and rotate the generator shaft 90º with respect to the
engine flywheel. Further adjustments can be made by rotating in
additional 90º increments until the specifications are achieved.
Angular alignment
To measure angular alignment, mount a dial indicator on the shaft of
one machine to read against the shaft face of the other machine (see
Figure 15. The dial indicator can be clamped to the generator fan and
measured from the flexplate-to-flywheel mounting bolt.
Figure 15: Angular alignment
Generator fanFlywheel
Drive plates

7/16/2019 LEROY SOMER — Generator Manual
http://slidepdf.com/reader/full/leroy-somer-generator-manual 23/66
Page 23
Before taking readings, roll the shaft in reverse 45º and then back 45º,
and zero the dial indicator. This sets the axial position of the crankshaft
and the generator shaft.
Take readings at the 12:00, 9:00, 6:00 and 3:00 o’clock positions.
Readings in the 12:00 and 6:00 o’clock positions determine the
vertical alignment, and readings in the 9:00 and 3:00 o’clock positionsdetermine horizontal alignment.
A total indicator reading (TIR) is the difference between the two
readings on opposites sides of the shafts. For example, in Figure 16,
the horizontal TIR is (-0.009) and (+0.004), which is a difference of
0.013 in. (0.330 mm) or 13 thousandths of an inch TIR. Vertical TIR
is (0) and (+0.005), which is a difference of 0.005 in. (0.127mm) or 5
thousandths of an inch TIR.
+0.004-0.009
-0.005
0
Figure 16: Example of runnout readings
The shaft shown in Figure 17 is angularly misaligned from that of the
engine. This could either be vertical or horizontal misalignment.
The distance “S” divided by the distance to the bearing (or rear mount)
“L” is equal to 1/2 TIR divided by the radius from the dial indicator tothe center of the shaft “R.”
S 1/2 (TIR)L R
Thus, the amount of shimming or horizontal sliding required is
S = L x (1/2 TIR)/R
Figure 16: Exaggerated example of shaftmisalignment
R
S
L
=

7/16/2019 LEROY SOMER — Generator Manual
http://slidepdf.com/reader/full/leroy-somer-generator-manual 24/66
Page 24
This relationship is used with the outboard mount or any inboard
mount (closer to the flywheel) as long as the distance to the required
mount is used for “L”.
Make vertical adjustments by adding or removing shims from the
mounts on each end of the generator. Adjust the left-hand and right-
hand inboard mounts the same, and adjust the left-hand and right-handoutboard mounts the same (see Figure 17).
Figure 17: Mount locations
Outboard mount Inboard mount
Engine
Generator
I-beam common skid
Make horizontal adjustments by loosening all the mounting bolts
and moving the generator to the desired side. This can be done with
a jacking screw or a pry bar in the bolt hole. Set up dial indicators to
monitor how far the machine is moved, or, as a alternative method,
rotate the shaft to the 3:00 or 9:00 o’clock position (see Figure 18),
and make adjustments until 1/2 TIR is indicated by the angular dial
indicator.

7/16/2019 LEROY SOMER — Generator Manual
http://slidepdf.com/reader/full/leroy-somer-generator-manual 25/66
Page 25
Figure 18: Setup for horizontal adjustment
Angular alignment is acceptable when the TIR in all directions is less
than 0.005 in (0.127 mm) measured at the flexplate-to-flywheel bolt,
which is 14 in. (355.6 mm) from the shaft center.

7/16/2019 LEROY SOMER — Generator Manual
http://slidepdf.com/reader/full/leroy-somer-generator-manual 26/66
Page 26
Foot deflectionAfter alignment, check for foot deflection or “soft foot” condition on
each shim location to eliminate distortion of the generator frame. Do
this by loosing one mounting bolt at a time and checking deflection
after retightening. Deflection at the shim location from shims under
compression to a loosened condition must not exceed 0.003 inch (0.076
mm).
DowelingIn case the mounting bolts loosen during operation, doweling will
prevent movement of the generator. Dowel as follows:
Check the alignment after the generator has been in operation for at least
48 hours. If alignment is not satisfactory, realign.
Drill holes through the footpads and into the base in two mounting pads
opposite each other. Drill the holes slightly smaller than the dowel pin.
Ream the holes to the proper diameter for the pin. Clean out chips, and
install the pins.
Electrical connectionsIf the generator was subjected to a rapid change in temperature, freezing
or wet conditions during shipment or storage, measure the insulation
resistance of each winding and dry the generator, if necessary, as
described in the maintenance section.
Make all electrical connections (main load, temperature monitoring
device, space heater, AVR) in accordance with local regulations andnational/international electrical code requirements. Check the electrical
diagrams provided with the generator or manual. The main terminals
need to be properly spaced for the load connections. Refer to Table 5 for
the proper torque values for the connections.
Grounding points are provided for properly grounding the system to
the generator frame. The grounding wire must be sized per national/
international codes.
Space heatersWhen the generator has optional space heaters to prevent water
condensation during long periods of downtime, connect the space heatersso they start when the generator is turned off and stop when the generator
is switched on. Refer to the electrical diagrams for the space heater
characteristics.
Warning: The space heaters are designed
to be energized when the generator is
shut down. They are hot enough to cause
skin burns. Terminals for power at the
space heaters are live during operation.
Disconnect power to the space heaters
before removing the generator covers.

7/16/2019 LEROY SOMER — Generator Manual
http://slidepdf.com/reader/full/leroy-somer-generator-manual 27/66
Page 27
Inspection before startupAfter electrical connections have been made, perform the following
checks:
• Check all the connections to the electrical diagrams provided.
• Secure all covers and guards.
• Turn the rotor slowly with the appropriate starting mechanism (bar
the engine or flywheel) through one revolution to see if the rotor
turns freely.
• Determine the direction of the engine rotation, and make sure that it
matches the rotation of the generator.
• Make sure the power requirements comply with the data on the
generator nameplate.
• Make sure that the engine-generator set is protected with an adequate
engine governor and against overspeed above 125% of rated speed.
• Make sure the output of the generator is protected with an overload
protection device, such as circuit breakers or fuses, sized in
accordance with national/international electrical code and local
electrical code standards.
• Remove tools and other items from the vicinity of the generator.
Caution: Do not pry on the fan.

7/16/2019 LEROY SOMER — Generator Manual
http://slidepdf.com/reader/full/leroy-somer-generator-manual 28/66
Page 28
Operation
Initial startup: generators with both automatic and
manual voltage control
1. Disconnect the generator output from the load by opening the maincircuit breaker.
2. Turn the manual voltage adjust rheostat fully counterclockwise, and
actuate the auto-manual switch to the manual position.
3. Start the prime mover, and bring the set to rated speed. Turn the
manual voltage adjust rheostat to reach rated voltage. Close the
output circuit breaker, and apply load in steps until the rated load is
reached. Adjust the manual adjust rheostat as necessary to obtain the
desired output voltage.
4. Gradually reduce load, and adjust the rheostat accordingly until noload is reached. Open the circuit breaker, and stop the prime mover.
5. Turn the voltage adjust rheostat on the voltage regulator fully
counterclockwise.
6. Put the auto-manual switch in auto. Then start the genset, and bring it
to rated speed. Adjust the voltage to the desired value.
7. Close the output circuit breaker. Then check the generator voltage
and voltage regulation. Apply load in steps until the rated load is
reached.
8. Check for vibration levels at no load and rated load. A slight increase
is normal. As the load is maintained for 2-3 hours, the vibration
levels will gradually increase and reach a final level. See Table 2 for
acceptable vibration levels .
Initial startup: Generators with automatic voltage control
only (generator has an automatic voltage regulator (AVR)
with no auto-manual switch)1. Disconnect the generator output from the load by opening the main
circuit breaker.
2. Turn the voltage adjust rheostat fully counterclockwise. Start the
prime mover, and bring the set to rated speed. Turn the voltage adjust
rheostat to obtain the desired voltage.
3. Close the output circuit breaker, and apply load in gradual steps until
the rated load is reach. Note the voltage regulation with the changes
in load steps.
Caution: Do not actuate the auto-manual
switch with the full load applied to the
generator. Whenever possible, stop the
generator before switching.

7/16/2019 LEROY SOMER — Generator Manual
http://slidepdf.com/reader/full/leroy-somer-generator-manual 29/66
Page 29
4. Check for vibration levels at no load and rated load. A slight increase
is normal. As the load is maintained for 2-3 hours, the vibration
levels will gradually increase and reach a final level. See Table 2 for
acceptable vibration levels .
Restoring residual magnetism/ field flashingThe direct current necessary to magnetize the revolving field is obtained
from the exciter. Upon starting the generator, current and voltage is
induced into the exciter by the magnetic lines of force set up by residual
magnetism of the exciter field poles. Residual magnetism of the exciter
field poles may be lost or weakened by a momentary reversal of the field
connection, a strong neutralizing magnetic field from any source, or non-
operation for a long time. If the generator fails to generate voltage after
it has come up to rated speed, it may be necessary to restore residual
magnetism.
To restore the small amount of residual magnetism necessary to begin
the voltage build up, connect a 12 or 24V battery to the exciter field coilcircuit and flash as follows:
1. Open the output circuit breaker, and stop the engine.
2. Disconnect the exciter field coil wires F1 and F2, and connect the
battery positive lead to the field coil lead F1.
3. Flash the field by touching the battery lead to the field coil circuit
terminal F2.
4. Disconnect the battery leads, and reconnect the field coil lead F1, and
reconnect the field coil lead F2.
5. Start the generator, and check for voltage build up. Reflash if
the generator output voltage does not build up, or flash with the
generator running, the field coil wires connected to the regulator, and
a 10-amp or larger diode off the positive terminal of a maximum 12
V battery per Figure 19.
Figure 19: Field flashing setup with the field wires con-nected to the regulator
12 V battery
+
—
10 amp orlarger diode Voltage
regulatorF-
F+
F1(+)F2 (-)
Note: If the polarity of the exciter is reversed
by flashing the field, it may be corrected by
interchanging the battery leads.

7/16/2019 LEROY SOMER — Generator Manual
http://slidepdf.com/reader/full/leroy-somer-generator-manual 30/66
Page 30
Continuous operationOperate the generator within the nameplate values. If the generator is
operated below the rated power factor and voltage, decrease the kVA to
prevent overheating of the field and stator windings. Consult the factory
for derating factors if the application requires the unit to be run beyond
nameplate values.
Rotor overheating may occur when the generator is carrying excessive
unbalanced loads. Negative sequence currents flowing in the field pole
face cause the rotor heating. For a general guide to the allowable phase
unbalance, see Figure 20, Guide to allowable phase unbalance (which is
based on a 10% equivalent negative sequence current).
Figure 20: Guide to allowable phase unbalance
0 20 40 60 80 100
20
40
60
80
100
Max. current in any phase (% of rated)
Min.currentinanyphase(%
ofrated)
Excessiveunbalance
Allowable
unbalance
Caution: Operating the unit beyond name-
plate values may cause equipment damage
or failure.
The guide is used in the following manner: Find the point where the
vertical line (determined by the minimum current in any of the phases
and expressed in percent of rated current) crosses the horizontal line
(determined by the maximum current in any of the phases and expressed
in percent of rated current). Ensure the point where these two lines
intersect is within the permissible allowable unbalance region for safe
operation of the generator.
Loss of fi
eld excitation can result in the unit operating out of synchronization with the system when operating is parallel. This has the
effect of producing high currents in the rotor, which will cause damage
very quickly. Protective relays should be considered to open the circuit
breaker.

7/16/2019 LEROY SOMER — Generator Manual
http://slidepdf.com/reader/full/leroy-somer-generator-manual 31/66
Page 31
IdlingUnless the voltage regulator has V/Hz protection built in, having the
generator set in operating mode while idling the engine can cause
permanent equipment damage. If engine adjustments require that
the engine be run at idle speed and the regulator does not have V/Hz
protection, make the generator regulating system inoperative during
idling by one of the following methods:
When the generator is provided with a voltage shutdown switch, be sure
the switch is set to the idle position while the engine is running at idle
speed.
Where the generator set is provided with field circuit breakers, set the
circuit breaker to the off position while the generator is running at idle
speed.
Where the generator set is provided with an automatic/manual control
switch that has an off position, switch it to off while the engine isrunning at idle speed.
Where the generator set does not have any of the above options, remove
the wires from the voltage regulator input power terminals when the
engine is running at less than rated speed.
Parallel operationFor the generator to operate in parallel with a system in operation, the
phase sequences of the generator must be the same as that of the system.
Use transformers to reduce the voltage to an acceptable level, and then
use a phase rotation meter or incandescent lamp method, described in
electrical machinery handbooks, for a phase sequence check.
The output voltage at the paralleling point must be the same as each
instant, which requires that the two voltages be of the same frequency,
same magnitude, same rotation, and in coincidence with each other.
Voltmeters indicate whether the voltage magnitude is the same, and
frequency meters indicate whether the frequencies are the same. Whether
the voltages are in phase and exactly at the same frequency is indicated
by a synchroscope or by synchronizing lamps.
A synchroscope can be used to indicate the difference in phase angle between the incoming machine and the system. The generator can be
paralleled by using incandescent lamps connected as shown in Figure 21.
The voltage rating of the series lamps must equal the voltage rating of the
transformer-low voltage winding.
Each prime mover in the system must have the same speed regulating
characteristics, and the governors must be adjusted to give the same
speed regulation as determined by applying load that is proportional to
the full load rating of the generator.
Caution: Refer to the voltage regulator
manual for complete details and possible
additional instructions. Damage to the rotat-
ing diodes, generator, and voltage regulator
can be caused if the regulator is operated
improperly.
Caution: Do not make connections or other-
wise make contact with the generator leads
or other devices connected to them unless
the genset is stopped and the phase leads
are grounded.

7/16/2019 LEROY SOMER — Generator Manual
http://slidepdf.com/reader/full/leroy-somer-generator-manual 32/66
Page 32
The voltage regulator must include paralleling circuitry. In addition, the
voltage, droop settings and the V/Hz regulation characteristics must bethe same for all the voltage regulators. This will allow the generators to
properly share reactive loads.
If cross-current compensation is used, paralleling current transformers
must give the same secondary current.
Current transformer secondary windings provide reactive kVA droop
signal to the voltage regulator. Accidental reversal of this electrical
wiring will cause the voltage to attempt to rise with load rather than
droop. If this occurs during paralleling, stop the unit and reverse the
wires at the voltage regulator terminals.
If the set is provided with a unit/parallel switch, set the switch to the
parallel position on the unit being synchronized.
Synchronize the generator by adjusting the speed (frequency) slightly
higher than the system. Observe the synchroscope or the lamps. The
lamps should fluctuate from bright to dark at the rate of one cycle every
2 to 3 seconds. When the generator is in phase (the lights will be dark),
close the circuit breaker. Immediately after closing the breaker, measure
the line current of the generator. The readings must be within the rating
of the unit. A high ammeter reading accompanied by a large kW reading
indicates faulty governor control. A high ammeter reading accompanied
by a large kVAR unbalance indicates problems with the voltage regulator.
Adjusting the cross current or voltage droop rheostat should improve the
sharing of kVAR.
To shut down the generator operating in parallel, gradually reduce the
kW load using the governor to reduce fuel or power. When kW load
and line current approach 0, open the generator circuit breaker. Operate
the generator unloaded for several minutes to dissipate the heat in the
windings. Refer to the prime mover manual for shutdown and cool-down
procedures.
Figure 21: Synchronizing paralleled generators with testlamps
Load lines from the incoming generator
Loadswitch
Synchronizinglamps
System bus

7/16/2019 LEROY SOMER — Generator Manual
http://slidepdf.com/reader/full/leroy-somer-generator-manual 33/66
Page 33
Maintenance
SchedulesA regular preventive maintenance schedule will ensure peak
performance, minimize breakdowns and maximize generator life. The
schedule listed below is a guide for operating under standard conditions.
Specific operating conditions may require reduced or increased
maintenance intervals. Also, if there is a different or more specific
schedule for your generator than the schedule provided below, it will be
included as a supplement to the manual package.
Every day
Visually check generator bearing housings for any sign of grease/oil
seepage.
Check the operating temperatures of the generator stator windings.
Check the control panel voltmeter for proper stability and voltage output.
Monitor the power factor and generator loading during operation.
Every week
Visually inspect the bearing exterior for dirt, and clean if necessary.
Inspect any generator air filters for build up of contaminants, and clean or
replace as required
Every 2000 Hours or 6 months of operation
Remove generator outlet box cover. Visually inspect the stator outputleads and insulation for cracking or damage. Check all exposed electrical
connections for tightness. Check transformers, fuses, capacitors, and
lightning arrestors for loose mounting or physical damage. Check all lead
wires and electrical connections for proper clearance and spacing.
Clean the inside of the outlet box, air screens, and air baf fles with
compressed air or electrical solvent if needed.
Check machine vibrations and bearing condition with a spectrum
analyzer or shock pulse.
Regrease the optional regreaseable-type bearings.
Every 8000 hours or 1 year of operation
Check insulation resistance to ground on all generator windings,
including the main rotating assembly, the main stator assembly, the
exciter field and armature assemblies, and the optional PMG assembly.
Check the space heaters for proper operation.
Check the rotating rectifier connection tightness.
Warning: Do not service the generator
or other electrical machinery without de-
energizing and tagging the circuits as out of
service. Dangerous voltages are present,
which could cause serious or fatal shock.

7/16/2019 LEROY SOMER — Generator Manual
http://slidepdf.com/reader/full/leroy-somer-generator-manual 34/66
Page 34
Every 20,000 hours or 3 years of operation
Remove the endbrackets, and visually inspect the generator end windings
for oil or dirt contamination. Excessive contamination may necessitate
surface cleaning with compressed air and electrical solvent.
Replace the bearing(s) if dictated by operating conditions, otherwise
inspect them for any indiction of wear or damage, and replace as needed.
Inspect the fan and fan hub for damage.
Every 30,000 hours or 5 years of operation
Disassemble the generator (this includes rotor removal).
Clean the generator windings using either (depending upon the severity
of contamination) 1) compressed air and electrical solvent or 2) de-
greaser and high pressure hot water wash. Dry the windings to acceptable
resistance levels (see the dry out procedure).
Inspect the rotor shaft bearing journals and bracket bearing cavity for
wear or scoring.
Replace the bearings.
Maintenance procedures
Visual inspection of windings
Electric machines and their insulation systems are subjected to
mechanical, electrical, thermal and environmental stresses that give rise
to many deteriorating influences. The most significant of these are the
following:
Thermal aging: This is the normal service temperature deteriorating
influence on insulation.
Over temperature: This is the unusually high temperature of operation
caused by conditions such as overload, high ambient temperature,
restricted ventilation, foreign materials deposited on windings, and
winding faults.
Overvoltage: This is an abnormal voltage higher than the normal service
voltage, such as caused by switching or lightning surges or non-linear loads. Operating above rated nameplate voltage will reduce insulation
life.

7/16/2019 LEROY SOMER — Generator Manual
http://slidepdf.com/reader/full/leroy-somer-generator-manual 35/66
Page 35
Contamination: This deteriorates electrical insulation by 1) conducting
current over insulated surfaces 2) by attacking the material to reduce
electrical insulation quality or physical strength, or by 3) thermally
insulating the material so the generator operates at higher than normal
temperatures. Such contaminants include water or extreme humidity, oil
or grease including unstable anti-wear and extreme pressure lubricants,
conducting and non-conducting dusts and particles, industrial chemicalssuch as acids, solvents, and cleaning solutions.
Physical damage: This contributes to electrical insulation failure by
opening leakage paths through the insulation. Physical damages can be
caused by physical shock, vibration, over-speed, short-circuit forces or
line starting, out-of-phase paralleling, erosion by foreign matter, damage
by foreign objects and thermal cycling.
Ionization effects: Ionization (corona), which may occur at higher
operating voltages, is accompanied by several undesirable effects such as
chemical action, heating, and erosion.
To achieve maximum effectiveness, set up a direct visual inspection
program initially to those areas that are prone to damage or degradation
caused by the influences listed above. The most suspect areas for
deterioration or damage are 1) ground insulation, which is insulation
intended to isolate the current carrying components from the non-current
bearing components, and 2) support insulation, which includes blocks
and slot wedges and are usually made from compressed laminates of
fi brous materials, polyester, or similar felt pads impregnated with various
types of bonding agents. Look for the following:
Deterioration or degradation of insulation from thermal aging: Coils witha general puf finess, swelling into ventilation ducts, or a lack of firmness
of the insulation, suggesting a loss of bond with consequent separation of
the insulation layers from themselves or from the winding conductors or
turns.
Abrasion: Abrasion or contamination from other sources, such as
chemicals and abrasive or conducting substances, which damages coil(s)
and connection surfaces.
Cracking: Cracking or abrasion of insulation resulting from prolonged or
abnormal mechanical stress. In stator windings, looseness of the bracing
structure is a certain sign of such phenomena and can itself cause further
mechanical or electrical damage if allowed to go unchecked.
Erosion: Foreign substances impinging against coil insulation surfaces,
which may cause erosion.

7/16/2019 LEROY SOMER — Generator Manual
http://slidepdf.com/reader/full/leroy-somer-generator-manual 36/66
Page 36
Cleaning
Remove dust, preferably using a vacuum cleaner to prevent the
redistribution of the contaminant. A small non-conducting nozzle or tube
connected to the vacuum cleaner may be required to reach dusty surfaces
or to enter into narrow openings. After most of the dust has been
removed, a small brush can be af fixed to the vacuum nozzle to loosen
and allow removal of dirt that is more firmly attached.
If compressed air must be used, exercise care in the application of
pressure to prevent damage to the insulation. If available, (30 PSI (2
Bars) or less) instrument air should be used. In any case, the air must be
clean, oil-free and dry.
Wipe all exposed surfaces with clean cloths to remove any remaining
oil or dirt. It may be necessary to use a cleaning solution made of mild
soap and water in order to effectively remove the dirt. Use clean water to
remove any soap residues.
Any cleaning fluid is more or less a solvent for insulating compounds,
hence avoid the application of these fluids in large quantities. They
should not be allowed to remain in contact with the winding any longer
than necessary to remove the oil and dirt. Also avoid excessive wetting
because it washes impurities into inaccessible crevices.
Dry the machine according to the procedure in this manual until normal
insulation resistance values are obtained at room temperature.
Inspect the generator for any signs of deterioration.
Clean electrical contacts, switch contacts and terminals with an approvedcontact cleaner. Do not file contacts.
Insulation resistance tests at low voltage
Insulation tests are conducted for two reasons: to discern existing
weakness or faults or to give some indication of expected service
reliability.
Insulation resistance tests are based on determining the current through
the insulation and across the surface when DC voltage is applied. The
leakage current is dependent upon the voltage and time of application,
the area and thickness of the insulation, and the temperature and
humidity conditions during the test.
The insulation resistance test is used to determine the insulation
condition prior to application of more extensive testing measures. Refer
to the following electrical measurement procedures for testing detail.
Contact the factory or refer to IEEE Standard. 432-1992 when more
extensive insulation tests are required.
Warning: When using cleaning solvents,
ensure adequate ventilation and user
protection.
Warning: Exercise safety precautions when
using compressed air.
Caution: Use only manufacturer-approved
cleaning fluids.

7/16/2019 LEROY SOMER — Generator Manual
http://slidepdf.com/reader/full/leroy-somer-generator-manual 37/66
Page 37
Exciter field (stator) and PMG armature (stator)
1. Disconnect the exciter leads from the terminals in the ter minal box or
from the voltage regulator.
2. Connect exciter leads to one clamp of 500-volt megger, and connect
the other clamp to the generator frame.
3. Apply 500 V from the megger, and measure the resistance reading
after 1 minute. The reading must be a minimum of 1 megohm. If it is
not, refer to the cleaning or dry out procedures.
4. Ground the exciter field leads to the generator frame for several
minutes after the megger has been disconnected. This will allow the
voltage build up to be properly discharged.
Exciter armature
1. Disconnect the exciter armature leads from the rotating rectifiers.
2. Connect the leads of the exciter armature to one clamp of a 500-volt
megger, and connect the other clamp to a suitable connection on the
shaft.
3. Apply 500 V from the megger, and measure the resistance reading
after 1 minute. The reading must be a minimum of 1 megohm. If it is
not, refer to the cleaning or dry out procedures.
4. Ground the exciter leads to the shaft after disconnecting the megger.
This will allow the voltage build up to be properly discharged.
Main rotor
1. Disconnect the generator field leads from the positive and negative
terminals of the rotating rectifier assembly.
2. Connect the positive and negative leads to one clamp of the 500-volt
megger, and connect the other clamp to the shaft.
3. Apply 500 V from the megger, and measure the resistance reading
after 1 minute. The reading must be a minimum of 1 megohm. If it is
not, refer to the cleaning or dry out procedures.
4. Ground the field leads to the shaft after disconnecting the megger.
This will allow the voltage build up to be properly discharged.
Caution: The insulation resistance tests are
usually made on all or parts of an armature
or field circuit to ground. They primarily
indicate the degree of contamination of the
insulating surfaces or solid insulation by
moisture and other conducting influences
and will not usually reveal complete or uncontaminated ruptures.
Note: The insulation resistance value
increases with decreasing winding
temperatures. All readings must be
corrected to winding temperatures. Use
Table 6 for converting megger readings to
other temperatures (e.g., 100 megohms at
50º C is converted to 170 megohms at 40°
C: 1.7 x 100).
Table 6: Temperature conversionfactor for resistance readings
Winding Temp(º C)
0.230.370.61
1.72.74.57.5142338
61
Conversionfactor
102030405060708090100110
120
Warning: Never apply the megger to the
rotating rectifier, the voltage regulator or
generator accessories (eg., temperature
detection devices, space heaters).

7/16/2019 LEROY SOMER — Generator Manual
http://slidepdf.com/reader/full/leroy-somer-generator-manual 38/66
Page 38
Main stator
1. Disconnect power connections and all control apparatus from the
generator terminals.
2. Measure insulation resistance of each phase separately with the two
other phases shorted to the frame.
3. Use a 500-volt megger connected between the leads of the phase to
be measured and generator frame. The minimum 1-minute insulation
resistance must not be less than that given by the following formula:
Resistancein megohms =Rated generator voltage +1000
1000
If it is less than above, refer to cleaning or dry out procedures.
4. Ground the leads to the frame after the 1-minute megger test. This
will allow the voltage build up to be properly discharged.
5. Repeat with the other phases.
Dry out procedures
If the insulation resistance readings are below the recommended
minimum values specified previously, use one of the dry out procedures
described below. Select the procedure based on the size and location
of the unit, available equipment, and experience of personnel. Before
drying, remove the voltage regulator.
Drying with external heat: Place heat lamps or space heaters (in addition
to the ones already supplied). Monitor winding temperatures. Raise
winding temperature gradually at a rate of 50° F (28° C) per hour up
to 200° F (93° C). Measure insulation resistance at 1-hour intervals.
Typically the insulation resistance will slowly drop while the temperature
is coming up, and then gradually increase and level out.
Drying with AC current in the armature: Short circuit the generator
terminals. Provide DC excitation to the brushless exciter field winding.
Insert a current transformer and an ammeter to read full load current.
Run the generator at rated speed. Apply excitation to the exciter field
until rated current is developed. Monitor winding temperatures until they
stabilize. Continue running until insulation resistance values level off.
Monitor winding temperatures. Raise winding temperature gradually at
a rate of 50° F (28° C) per hour up to 200° F (93° C). Measure insulation
resistance at 1-hour intervals. Typically, the insulation resistance will
slowly drop while the temperature is coming up and then gradually
increase and level out.
Caution: Do not apply heat too rapidly. It
could damage the windings.

7/16/2019 LEROY SOMER — Generator Manual
http://slidepdf.com/reader/full/leroy-somer-generator-manual 39/66
Page 39
Bearing lubrication
Shielded or sealed ball bearings: Shielded or sealed ball bearings are
factory packed with lubricants and generally can be operated several
years without requiring replenishment or change of the grease.
Regreaseable ball or roller bearings: In applications where regreaseable
bearings are used, grease fill fittings and relief valves are incorporatedinto the bearing housing. Lubricate the bearings in accordance with the
lubricating instructions attached to the generator.
Rectifier tests
If a failure of a rotating rectifier is suspected, remove the exciter cover.
Test the entire rectifier assembly with an ohmmeter or test lamp as
follows.
Different designs of rotating rectifier assemblies can be used.
Diode cubes: They consist of three or six diodes depending on thegenerator frame. The figures below show how the rotating rectifier
assemblies are assembled and wired for each frame. Locate and
disconnect all terminals on the rectifier/heat sink assemblies to test
the rectifiers inside the diode cubes. See Figures 22, 23, and 24 for an
overview.
Six discrete diodes: Remove the nut and washer holding the rectifier in
the heat sink, and remove the diode lead wire. Lift the rectifier from the
heat sink. See Figures 25 and 26 for an overview.
Figure 22: 40 Frame rotating rectifier assembly
!#!#
!#
!#
!#
!#

7/16/2019 LEROY SOMER — Generator Manual
http://slidepdf.com/reader/full/leroy-somer-generator-manual 40/66
Page 40
Figure 23: 50/500 Frame rotating rectifier assembly
!# !#
!#
! #
! #
!#
!#
!#
!#!#
!#
!# !#
!#
! #
! #
! #
! #
! # !
#
! #
! #
!# !#
!#
!# !#
!#!#
!#
! #
! #
!#
!#!#
Figure 24: 60/600-80/800 Frame rotating rectifier assembly

7/16/2019 LEROY SOMER — Generator Manual
http://slidepdf.com/reader/full/leroy-somer-generator-manual 41/66
Page 41
Ohmmeter method:
Diode cubes: Using an ohmmeter, measure the resistance between one of the AC terminals and the (-) terminal on the negative (-) rectifier / heat
sink assembly. Note the resistance reading and reverse the ohmmeter
probes. Note the second resistance reading. One of these resistance
readings should be high and one should be low. A low resistance in both
directions indicates a short. A high resistance in both directions indicates
an open rectifier. Repeat this procedure with the other two AC terminals
and the (-) terminal on the negative (-) rectifier / heat sink assembly.
Replace the rectifier / heat sink assembly if defective. Repeat the above
procedure with each of the three AC terminals and the (+) terminal on the
positive (+) rectifier/heat sink assembly.
Discrete components: Connect the ohmmeter leads across the rectifier inone direction (see Figure 26). Note the meter reading. Reverse the leads,
and note the meter reading. The meter should indicate a low resistance
when the leads are across the rectifier in one direction and a high
resistance when the leads are across the rectifier in the opposite direction.
A low resistance in both directions indicates a short. A high resistance in
both directions indicates an open rectifier. Replace the rectifier / heat sink
assembly if defective.
Figure 25: Rotating rectifier assembly, special designs
Negative
Positive
Positive
Caution: Failure to properly secure the
leads can cause equipment damage or
failure.
Reversediode
Standarddiode
Anode
Cathode
Ohmmeter
Figure 26: Testing the rotating rectifier with anohmmeter

7/16/2019 LEROY SOMER — Generator Manual
http://slidepdf.com/reader/full/leroy-somer-generator-manual 42/66
Page 42
Test lamp:
Connect the leads of a test lamp built as shown in Figure 27, consisting
of standard flashlight batteries and a flashlight. Test the rotating rectifiers
as described above but using the two test probes of this makeshift tester
instead of the ohmmeter probes. The light should light in one direction
but not in the other. If the light lights in both directions, the rectifier isshorted. If the light does not light in either direction, the rectifier is open.
Replace the rectifier/heat sink assembly if defective.
Replace defective rectifiers with rectifiers of the same operating
characteristics as rectifiers installed in the generator at the factory.
Order rectifiers by part number, including the model, serial number and
generator part number.
Surge protectors may be included on the rotating rectifier assembly.
Disconnect one lead of the surge protector, and connect the probes of an
ohmmeter or makeshift test lamp as shown in Figure 23, across the surge
protector in either direction. If the light comes on, the surge protector is
defective. Order surge protectors by part number, including the model,
serial number and generator part number. Following replacement, make
sure that the revolving field, exciter armature, and rotating diode leads
are properly secured.
Disassembly
Overall disassembly
1. Remove the terminal box cover, and disconnect the load leads and
all other generator leads. Tag the leads to ensure they are correctly
connected when the generator is reassembled.
2. Remove the bolts securing the generator to the base and the engine,
and move the generator to an area that allows suf ficient room for
disassembly.
3. Remove the coupling or drive plates.
4. Remove the exciter cover, rotating diode assembly, optional PMG if
necessary, and the exciter assembly as explained later.
5. Support the shaft. Remove the exciter-end bracket bolts, and remove
the bracket. Tap lightly with a rubber or fi ber mallet to loosen
the bracket if necessary. Repeat with the drive-end bracket (if
applicable).
Figure 27: Test lamp
Caution: Failure to properly secure the
leads can cause equipment damage or failure.
Note: The following procedures are meant
to be a general guide. Procedures for your
unit may vary.
Warning: Ensure the generator has stopped
and is de-energized before disassembly.
Warning: Use a hoist and slings or chainsto support components during removal. Use
lifting devices that are selected for generator
component weights, which can be found on
the mechanical data sheet. Be extremely
careful not to damage components.

7/16/2019 LEROY SOMER — Generator Manual
http://slidepdf.com/reader/full/leroy-somer-generator-manual 43/66
Page 43
6. Remove the fan from the hub where applicable. If necessary, make
sure to mark the location of the fan for reinstallation.
7. Float out the rotor (see Figure 28). First attach a thick-wall pipe over
the shaft on the drive end. Attach slings around the pipe on one end
and around the shaft on the opposite end. Lift up the rotor, and move
it out, resting the rotor as the slings are moved down the pipe for thenext lifting stage. Finally attach slings to each side of the core for
moving the rotor to the final work space.
Figure 28 Floating the rotor
Drive end Exciter end
Warning: Make sure the pipe is strong
enough to support the weight of the rotor
and that it does not have rough edges on
the inside, which could damage the shaft.
Caution: To prevent tension on the shaft,
put the slings around the largest shaft steppossible.
Caution: Make sure the rotor does not
rest on the stator during the stages of
movement. Make sure the rotor does not hit
the stator.
Caution: Ensure the generator field wires
are flat in the wireway so they don’t tear
during pulling. Do not pull on the edges of
the heat sinks or on the exciter armature
windings.
Warning: Pull the PMG and exciter rotor
straightly off. The assembly may pull toward
other steel components. Be careful that your
fingers or hands do not get pinched.
Exciter removal (see Figures 29 and 30)
1. Remove the exciter cover.
2. Remove the rotating diode assembly and/or PMG, if needed, as
explained separately. Disconnect the exciter stator leads.
3. Locate and remove the four bolts in the end of the shaft that hold the
retaining washer. Remove the retaining washer.
4. Remove the aluminum sleeve, and slide the exciter rotor off the shaft.
5. Remove the four bolts that hold the exciter stator to the bearing
bracket.
6. Mark the location of the exciter for reassembly, and remove the
exciter stator.

7/16/2019 LEROY SOMER — Generator Manual
http://slidepdf.com/reader/full/leroy-somer-generator-manual 44/66
Page 44
Retainingbolts
PMG stator
Exciter stator
Retainingwasher
ShaftExciterarmature
PMG rotor
spacer
Bearing
Rotating diodeassembly
Figure 29 Exciter armature assembly, PMG, 40, 50/500 Frames
Figure 30: Exciter armature assembly, 60/600 and 80/800 Frames
Retainingwasher
PMG rotor
Exciterarmature
PMG rotor
Aluminum
sleeve
PMG rotorspacer
Rotating diodeassembly
Shaft

7/16/2019 LEROY SOMER — Generator Manual
http://slidepdf.com/reader/full/leroy-somer-generator-manual 45/66
Page 45
Optional PMG removal
1. Remove the exciter cover.
2. Remove the rotating diode assembly and/or the exciter, if needed, as
explained separately.
3. Disconnect the PMG stator leads.
4. Remove the four bolts that hold the PMG stator to the bearing
bracket. Mark the location for reassembly, and remove the PMG
stator.
4. Remove the PMG rotor spacer if supplied, and slide the PMG rotor
assembly off the shaft.
5. Wrap the PMG rotor in plastic to avoid contamination as it will
attract metal particles.
Bearing removal
1. Remove the endbracket(s) to expose the bearing(s).
2. Use a puller to remove the bearing from the shaft end with a cap (see
Figure 31). Replace it with a new bearing.
Figure 31: Pulling the bearing
Puller againstbearing
Cap to protect shaft end
Outer ring Inner ring

7/16/2019 LEROY SOMER — Generator Manual
http://slidepdf.com/reader/full/leroy-somer-generator-manual 46/66
Page 46
.Assembly
Bearing installation (done prior to installing the rotor)
1. Heat the bearing to 220º to 250º F (104º to 121º C) in a clean oven or
with an induction heater.
2. Start the heated bearing on the shaft. Then use a fi ber or soft metal
tube to tap the bearing into place.
3. Ensuring that pressure is applied only to the bearing inner ring,
press the bearing onto the shaft until the inner ring seats against the
bearing shoulder on the shaft.
4. Grease the generator bearing and/or bearing bracket cavity after the
bearing has cooled according to bearing type as follows:
Shielded bearings are factory packed with grease. Fill the bearing
bracket cavity to 40% with high quality ball bearing grease of NLGI#2 grade, which must be capable of lubricating satisfactorily over a
temperature range of the lowest ambient temperature to 250° F (121°
C). Standard grease is Chevron SRI or Polyrex EM with mineral oil
base.
With optional regreaseable ball or roller bearings, fill the bearing
to 30% with grease. Fill the bearing bracket cavity to 60%, and
add 3 shots or 3 oz. (85 gr.) to the bearing cap with high quality
ball bearing grease of NLGI #2 grade, which must be capable of
lubricating satisfactorily over a temperature range of the lowest
ambient temperature to 250°F (121° C). Standard grease is Chevron
SRI or Polyrex EM with mineral oil base. Table 7 provides anindication of the amount of grease to add to the bearing.
Caution: Make sure all components are
clean before assembly.
Note: Torque fasteners to the values speci-
fied in Table 5 unless otherwise specified.
Frame Bearing type Grams
40 6016 C3 9 ±2
50/500 6217 C3 26 ±3
60 6322 C3 146 ±7
600 6321 C3 123 ±6
80/800 6326 C3 219 ±11
Table 7: Optional regreaseable ball or roller bearingfi
ll of 30%
Warning: Grease migrates between the
shields and into the bearing. The sametype of grease must be used. Grease
incompatibly can cause bearing and
generator failure.

7/16/2019 LEROY SOMER — Generator Manual
http://slidepdf.com/reader/full/leroy-somer-generator-manual 47/66
Page 47
Overall assembly
1. Float in the rotor until the rotor and stator laminations line up.
Position the rotor such that a full pole face is at the bottom.
2. Install the endbrackets. Support the rotor during installation. Put anti-
corrosion agent on the bare mating surfaces.
3. Install the exciter, rotating diodes and optional PMG as described
below.
4. Install the covers.
5. Install the coupling or drive plates.
6. Reconnect the load leads, exciter leads and accessories, if applicable.
Exciter installation (see Figures 29 and 30)
1. Assemble the exciter stator to the bearing bracket with four retaining bolts and washers.
2. Connect the exciter stator leads.
3. Clean the shaft and inside of the exciter laminations.
4. Place the key in the slot in the shaft, if applicable.
5. Lay the generator field wires flat in the wire slot with the wire ends
protruding past the end of the shaft if applicable.
6. Position the exciter armature assembly in line with the shaft, andturn the assembly to the position where the keyway in the exciter
laminations is in line with the key in the generator shaft.
7. With hand force, push the exciter armature assembly over the shaft,
so the edge of the armature is against the shoulder on the shaft or
sleeve.
8. Route the main rotor leads through the retaining washer.
9. Secure the exciter rotor assembly using the retaining washer and four
retaining bolts at the end of the shaft.
10. Connect the exciter armature and evolving field wires to the rectifier
terminals.
11. Measure the air gap between the exciter armature and exciter field.
Nominal values are shown in Table 8. If the air gap is less than 0.02
inch (0.058 mm), 1) check generator-engine alignment, 2) check for
bearing wear, 3) check for misalignment of the exciter armature or
stator.
Caution: Ensure the generator field wiresare flat in the wire slot so they don’t tear
during assembly. Do not pull on the edges
of the heat sinks or on the exciter armature
windings.
Caution: Do not pound on the rectifier or
armature windings.
Note: To measure air gap, measure com-
pletely around the gap between the exciter
armature and exciter field with a feeler
gauge. Keep the gauge at the tightest point,
and turn the generator over to measure the
air gap as the rotor turns.
Caution: Do not pry on the fan.

7/16/2019 LEROY SOMER — Generator Manual
http://slidepdf.com/reader/full/leroy-somer-generator-manual 48/66
Page 48
Optional PMG installation (See Figures 25 and 26)
1. Attach the PMG stator to the bearing bracket.
2. Place the main rotor leads in the shaft slot.
3. Carefully slide the PMG onto the shaft. Avoid contact between the
rotor and stator that could damage the windings or the permanentmagnets.
4. Connect the PMG stator leads.
5. Measure the air gap between the PMG rotor and PMG stator.
Nominal values are shown in Table 8. If the air gap of the PMG
is less than 0.020 inch (0.508 mm), 1) check generator-engine
alignment, 2) check for bearing wear, 3) check for misalignment of
the armature, PMG or stator.
Caution: Ensure the generator field wires
are flat in the wire slot so they don’t tear
during assembly. Do not pull on the edges
of the heat sinks or on the exciter armature
windings.
40 Frame 50/500 Frame 60/600 Frame 80/800 FrameInch mm Inch mm Inch mm Inch mm
Exciter stator ID 6.446 163.7 6.446 163.7 10.125 257.2 10.125 257.2
Exciter rotor OD 6.318 160.5 6.318 160.5 9.98 253.5 9.98 253.5
Exciter air gap* 0.0624 1.63 0.064 1.63 0.0725 1.84 0.0725 1.84
PMG stator ID 7.187 182.5 9.9925 253.8 9.9925 253.8 9.9925 253.8
PMG rotor OD 7.116 180.7 9.893 251.3 9.893 251.3 9.893 251.3
PMG air gap* 0.0355 0.90 0.04975 1.26 0.4975 1.26 0.04975 1.26
Table 8: Exciter and PMG air gap
*Nominal values do not include varnish and red sealer buildup.

7/16/2019 LEROY SOMER — Generator Manual
http://slidepdf.com/reader/full/leroy-somer-generator-manual 49/66
Page 49
StorageIf the generator is not installed in its operating location as soon as
received, store it in a clean, dry area, not subject to vibrations or sudden
temperature or humidity changes. Make sure the storage area temperature
is between 10º F (-12º C) and 120º F (49º C) and the relative humidity is
less than 60%. If possible, storage should be in an ambient temperature
of approximately normal room temperature. Protect the shaft from
corrosion by applying an anti-corrosion agent. Cover the unit with a
durable cover.
Prepare units that cannot be stored in a temperature and humidity
controlled area as follows:
Install desiccant bags in the exciter cover and inside the end bells.
Vacuum seal the unit in a covering of plastic or other material designed
for that purpose.
Adequately tag the generator to ensure that preservative greases and
desiccant bags are removed before the unit is placed in operation.
If space heaters are supplied, energize them to keep condensation from
the windings.
For storage longer than 2 months, rotate the shaft a minimum of 10
revolutions every 60 days.Warning: If necessary, remove the covers
around the space heaters to reduce the risk
of fire.
Caution: Grease used in ball and roller
bearing generators is subject to timedeterioration. Before placing the unit into
service after long-term storage, check the
bearings for corrosion, and replace the
grease or bearing(s).

7/16/2019 LEROY SOMER — Generator Manual
http://slidepdf.com/reader/full/leroy-somer-generator-manual 50/66
Page 50
Troubleshooting Guide
(corrective maintenance)
Between regular preventive maintenance inspections, be alert for any
signs of trouble. Correct any trouble immediately. See Table 9 for symptoms, causes and remedies.
Warning: Problems left uncorrected can
result in injury or serious damage, which canresult in costly repairs and downtime.
Symptom Cause Remedy
No Voltage Defective voltage regulator, opened circuitbreaker, or fuse(s)
Check the voltage regulator. Reset the circuitbreaker or replace fuses if open.
Overvoltage, undervoltage, or overloaddevices tripped (when protective devicesare incorporated into the circuit)
Check for the cause of the abnormal condition.Correct any deficiencies. Reset devices.Check the generator nameplate for nominaloperating values.
Open circuit in exciter field Check continuity of shuntfield and leads
to voltage control. (Use ohmmeter orwheatstone bridge) If open infield coils,remove exciterfield assembly and returnassembly to factory for repair.
Loss of residual magnetism Restore residual magnetism orflashfield. Whenthe voltage regulator is a model that requiresflashing, install an automatic field flashingsystem.
Open circuit in stator windings Check for continuity in the windings. Return thegenerator to the factory for repair if open.
Malfunction of automatic voltageregulator
See troubleshooting of voltage regulator.Correct deficiencies.
Short-circuited generator output leads Clear lead to restore voltage buildup.
Open in rotating rectifiers Check rotating rectifiers, and replace if open.
Open in generatorfield Check for continuity and return rotor tofactory for repair if field coils are open.
Shorted or grounded surge protector Check for shorts or grounds. Replace .
Shorted or grounded rotating rectifier Check for shorts grounds. Replace or repair.
Shorted or grounded exciter armature Check for shorts or grounds. Replace or repair.
Low voltage Shorted leads between the exciter armatureand generatorfield
Test and repair.
Incorrect stator connections Check connections and reconnect

7/16/2019 LEROY SOMER — Generator Manual
http://slidepdf.com/reader/full/leroy-somer-generator-manual 51/66
Page 51
Troubleshoot ing Guide (cont.)
Symptom Cause Remedy
Low voltage(cont.)
Improper adjustment of voltage adjustrheostat
Adjust rheostat.
Excessive load Reduce load. With three-wire, single-phase andfour-wire, three-phase generators, the load oneach leg must be as evenly balanced as possibleand must not exceed the rated current on any leg.
Line loss Increase the size of the line wire.
High resistance connections (hot) Make better connections.
Shorted main or exciter field Test the field coils for possible short bychecking resistance with an ohmmeter orresistance bridge. Return the rotor assemblyto the factory for repair if field coils are shorted.
Low power factor Reduce inductive (motor) load. Some ac
motors draw approximately the samecurrent regardless of load. Do not usemotors of larger horsepower rating thanis necessary to carry the mechanicalload.
Weak field due to operating in a warmtemperature
Improve the ventilation of the generator.Field current can be increased providingthe generator temperature ratingstamped on the nameplate is notexceeded.
Defective rectifiers in rectifier assembly(stationary)
Check rectifier assembly. Replacedefective fuses or rectifiers.
Excessive load Reduce load to rated value.Defective bearing Replace the bearing.
Improper speed of engine drivengenerator set due to defective governor,ignition system, or carburetor
Check and correct deficiencies.
Voltage regulator not operating properly Check the regulator. Adjust, repair or replace.
Fluctuatingvoltage
Prime mover speed fluctuating Check frequency and voltage of incomingpower when the generator set is motordriven. Check engine governor onengine-driven generator sets.
Loose internal or load connections Tighten all connections.
Generator overloaded Reduce load to rated value.dc excitation voltagefluctuating Trace dc excitation circuit. Correct any
defects.
Overspeed Correct speed of prime mover.
Voltage regulator not operating properly Check the regulator. Adjust, repair or replace.
High voltage Improper adjustment of voltage adjustrheostat or voltage regulator
Adjust rheostat and/or voltage regulator.
Voltage regulator not operating properly Check the regulator. Adjust, repair or replace.

7/16/2019 LEROY SOMER — Generator Manual
http://slidepdf.com/reader/full/leroy-somer-generator-manual 52/66
Page 52
Troubleshooting Guide (cont.)
Symptom Cause Remedy
Overheating Clogged ventilating screens and airpassages
Clean all screens and air passages.
Dry or defective bearings Replace defective bearings.
Coupling misaligned Align the generator set.
Generatorfield coils shorted orgrounded
Testfield coils for shorts. Replaceshorted rotor or return it to the factory forrepair.
Unbalanced load or overload, low PF Adjust load to nameplate rating.
Vibrations Defective or dry bearings Replace defective bearings.
Misalignment of generator and primemover
Align the generator set.
Generator not properly mounted Check mounting. Correct defectivemounting.
Transfer of vibration from anothersource
Isolate the generator set from the source of vibration by installing vibration dampenersbetween generator set base and foundation.
Table 9: Troubleshooting

7/16/2019 LEROY SOMER — Generator Manual
http://slidepdf.com/reader/full/leroy-somer-generator-manual 53/66
Page 53
Appendices
Appendix 1: List of equipment required for installation and maintenance:
Test equipment Notes
Ammeter Clamp-on rated, 0 to the generator rated amperage for measuringelectrical current.
Multimeter Digital, for measuring voltage, current, frequency and resistance. Thermometer For measuring temperature in Celsius or FahrenheitMegger To measure insulation resistance.Resistive Bridge To measure resistance of windings.
Special tools
Bearing puller For changing bearing.Exciter puller For pulling exciter armature
Standard too ls
Cable tool Crimping
Flashlight As requiredGrease gun For lubricating bearingsHammer Soft-facedLamp (incandescent) Safety lightScrewdrivers Standard, sized as requiredScrewdrivers Phillips, sized as requiredWrench Adjustable, 12-inchWrench Torque 0 to 800 ft-lb (1085 N-M)Wrench set Allen, 1/8 to 1/2 inchWrench set Socket, 1/4 to 1 Inch (6-25 mm) with 3/8 and 1/2 inch driveWrench set Standard, open-end/box-end combination sized 1/4 to 1 inch (6-25 mVacuum Electric with nonmetallic nozzle
Materials
Air Compressed, dry.Anti-corrosion agent Nox-Rust VC #10 Oil or equivalentCovering material Waterproof desiccant bags for protection from
moisture during long-term equipment storageDetergent As required for cleaningGloves Chemical-protectiveGloves Electrical-protectiveHeaters Space Heater, for eliminating excess moisture in damp areas and dry
out of motor or generator windingsPlastic Protection for long-term storageRags As required for cleaning
Water Warm and clean, for cleaning Tags Warning and cautions

7/16/2019 LEROY SOMER — Generator Manual
http://slidepdf.com/reader/full/leroy-somer-generator-manual 54/66
Page 54
Appendix 2: Standard SAE engine flywheel per SAE J 620
SAE A B C G Holes Size
6-1/27.25
(184.15)8.5
(215.9)7.875(200)
1.188(30.16)
6 5/16-18
7-1/28.125
(206.37)9.5
(241.13)8.75
(222.25)1.188
(30.16)8 5/16-18
88.875
(220.42)10.375
(263.52)9.625
(244.47)2.438
(61.91)6 3/8-18
10 10.875(276.22) 12.375(314.32) 11.625(295.27) 2.125(53.97) 8 3/8-18
11-1/212.375
(314.32)13.875
(352.42)13.125
(333.37)1.563
(39.68)8 3/8-18
1416.125
(409.75)18.375
(466.72)17.25
(438.15)1
(25.4)8 1/2-13
1618.125
(460.37)20.375
(517.52)19.25
(488.95)0.625
(15.875)8 1/2-13
1819.625
(494.78)22.5
(571.52)21.375
(543.92)0.625
(15.875)6 5/8-11
21 23(584.2)
26.5(673.1)
25.25(641.35)
0(0)
12 5/8-11
2425.375
(644.52)28.875
(733.42)27.25
(692.15)0
(0)12 3/4-10
GM-7113.5
(342.9)17.75
(450.0)15.5
(393.7)0.703
(17.85)4X2 5/8-11
GM-5312.375
(314.32)15.5
(393.7)13.875
(352.42)0.734
(18.65)4X2 5/8-11
Inches (mm)

7/16/2019 LEROY SOMER — Generator Manual
http://slidepdf.com/reader/full/leroy-somer-generator-manual 55/66
Page 55
Appendix 3: Standard SAE engine flange per SAE J 617
SAE A B C Holes Size
0031.00
(787.37)34.750
(862.62)33.500
(850.87)16 1/2-13
025.500
(647.67)28.00
(711.17)26.750
(679.42)16 1/2-13
1/223.00
(584.18)25.500
(647.67)24.375
(619.10)12 1/2-13
1 20.125(511.25) 21.750(552.43) 20.875(530.20) 12 7/16-14
217.625
(447.66)19.250
(488.93)18.375
(466.70)12 3/8-16
316.125
(409.56)17.750
(450.83)16.875
(428.61)12 3/8-16
414.25
(361.94)15.875
(403.21)15.00
(380.99)12 3/8-16
512.375
(314.31)14.00
(355.59)13.125
(333.36)18 3/8-16
610.500
(266.69)12.125
(307.96)11.250
(285.74)18 3/8-16
Inches (mm)

7/16/2019 LEROY SOMER — Generator Manual
http://slidepdf.com/reader/full/leroy-somer-generator-manual 56/66
Page 56
Appendix 4: Six-lead generator marking
Appendix 5: 12-lead generator marking
HIGH VOLTAGE SERIES STAR LOW VOLTAGE PARALLEL STAR
U (LI)
U1(T1)
U2(T4)
U5(T7)
U6(T10)
V5(T8)
W (L3)
W1(T3)
V2(T5)W2(T6)
N(L0)
V6(T11)
V1( T2)
V (L2)
W5(T 9)
W6(T 12)
7,
74
774
74
5,)
54
54
54
54
.,
6,
64
64
64
6
4
621517-01
U(L1)
U1(T1)
U2(T4)
W1(T3)
W2(T6)V2(T5)
V1(T2)
W(L3) V(L2)
N(L0)
621518-01
STAR CONNECTION

7/16/2019 LEROY SOMER — Generator Manual
http://slidepdf.com/reader/full/leroy-somer-generator-manual 57/66
Page 57
Appendix 6: Optional component marking
R T D ‘ S
T H E R M O C O U P L E S
S E R I E S
P A R A L L E L
1 2 0 V A C
2 4 0 V A C
S P A C E
H E A T E R S
S H 1
S H 2
S H 3
S
H 4
S H 1
S H 2
S H 3
S H 4
S T A T O R
S T A T O R
B E A R I N G
B E A R I N G

7/16/2019 LEROY SOMER — Generator Manual
http://slidepdf.com/reader/full/leroy-somer-generator-manual 58/66
Page 58
S Y M B O L S
C R 1 — C R 6 R O T A T I N G R
E C T I F I E R S
C R 7 — C R 8 S U R G E S U P P R E S S
I O N
D I O D E S
E 1
P O S I T I V E H E A T S I N K
E 2
N E G A T I V E H E A T S I N K
L 1
E X C I T E R
S T A T O R
L 2
E X C I T E R
A R M A T U R E
L 3
R E V O L V I N G F
I E L D
L 4
S T A T O R
R 5
S U P P R E S S I O N
R E S I S T O R
R F A
R E V O L V I N G F
I E L D A
S S E M B L Y
P O L A R T Y M A R K
O P T I O N A L
P M G
F U S E
F U S E
L 1
O P T I O N A L P A R A L L E L I N G C
U R R E N T T R A N S F O R
M E R
O P T I O N A L
S E N S I N G T
R A N S F O R M E R S
T 3
2 6
2 4
2 2
2 0
2 8
3 0
F 1
F 2
6 5
C R 7
R F A
E 1
R 5
L 2
C R 3
C R 2
C R 1
E 2
C R 6
C R 5
C R 4
— +
+
L 3
C R 8
—
T 1
L 4 T
2
T 4
T 5
T 6
Appendix 7: Six-lead generator connections

7/16/2019 LEROY SOMER — Generator Manual
http://slidepdf.com/reader/full/leroy-somer-generator-manual 59/66
Page 59
Appendix 8: 12-lead generator connections
S Y M B O L S
C R 1 — C R 6 R O T A T I N G R
E C T I F I
E R S
C R 7 — C R 8 S U R G E
S U P P R E S S
I O N
D I O D E S
E 1
P O S I T I V E
H E A T S I N K
E 2
N E G A T I V E
H E A T S I N K
L 1
E X C I T E R
S T A T O R
L 2
E X C I T E R
A R M A T U R E
L 3
R E V O L V I N G F
I E L D
L 4
S T A T O R
R 5
S U P P R E S S I O N
R E S I S
T O R
R F A
R E V O L V I N G F
I E L D
A S
S E M B L Y
P O L A R T Y
M A R K
O P T I O N A L
P M G
F U S E
F U S E
L 1
O P T I O N A L
S E N S I N G T
R A N S F O R
M E R S
O P
T I O N A L P A R A L L E L I N G C
U R R E N T T R A N S F O R M E R
2 6
2 4
2 2
2 0
2 8
3 0
F 1
F 2
L 4
T 6
T 3
T 4
T 1 2
T 9
T 1
T 7 T
1 0
T 5
T 8
T 1 1
T 2
6 5
C R 7
R F A
E 1
R 5
L 2
C R 3
C R 2
C R 1
E 2
C R 6
C R 5
C R 4
— +
+
L 3
C R 8
—

7/16/2019 LEROY SOMER — Generator Manual
http://slidepdf.com/reader/full/leroy-somer-generator-manual 60/66
Page 60
Appendix 9: Single bearing 40 frame key parts (Shunt and PMG models)
Item Description
1 Air outlet screen
2 Bearing (Exciter end)
3 Bracket (Exciter end)
4 Drip proof cover
5 Drive discs
6 Exciter armature
7 Exciter cover
8 Exciter stator
9 Fan
11 PMG rotor
12 PMG stator
13 Revolvingfield and shaft
14 Rotating rectifier assembly
15 Stand-off / Buss bar assembly
16 Stator assembly (wound)
17 Terminal box assembly
18 Terminal box top cover
19 Voltage regulator
ShuntOptional PMG
2/4!4)/.
4
19
18
5
9
38
6
7
2
1
13
16
15
17
14
38
6 12
11
7
14

7/16/2019 LEROY SOMER — Generator Manual
http://slidepdf.com/reader/full/leroy-somer-generator-manual 61/66
Page 61
Appendix 10: Single bearing 50/500 Frame key parts (Shunt and PMG models)
Item Description
1 Air outlet screen
2 Bearing (Exciter end)
3 Bracket (Exciter end)
4 Drip proof cover
5 Drive discs
6 Exciter armature
7 Exciter cover
8 Exciter stator
9 Fan
11 PMG rotor
12 PMG stator
13 Revolvingfield and shaft
14 Rotating rectifier assembly
15 Stand-off / Buss bar assembly
16 Stator assembly (wound)
17 Terminal box assembly
18 Terminal box top cover
18
ShuntOptional PMG
8
3
7
6
14
1112 9
5
1
2
7
6
8 3
1316
15
17
14

7/16/2019 LEROY SOMER — Generator Manual
http://slidepdf.com/reader/full/leroy-somer-generator-manual 62/66
Page 62
Appendix 11: Single bearing 60/600 Frame key parts (Shunt and PMG models)
Item Description
1 Air outlet screen
2 Bearing (Exciter end)3 Bracket (Exciter end)
4 Drip proof cover
5 Drive discs
6 Exciter armature
7 Exciter cover
8 Exciter stator
9 Fan
11 PMG rotor
12 PMG stator
13 Revolvingfield and shaft
14 Rotating rectifier assembly
15 Stand-off / Buss bar assembly
16 Stator assembly (wound)
17 Terminal box assembly
18 Terminal box top cover
19 Voltage regulator
Optional PMG
Shunt
N
T0
U
T1W
T3
V
T2
3
2
8
7 1
5
9
6
15
16
13
17
12
11
14
4
ROTATION
C
C
FF
F
T
T
F
T
T
2
2
2
2
2
2
B
B
B
B
B
T
T
T
T
T
T
T
T
T
T
T
C
T
C
T
T
T
T
T
T
T
T
T
T
T
S
S
S
S
S
S
S
S
18
19

7/16/2019 LEROY SOMER — Generator Manual
http://slidepdf.com/reader/full/leroy-somer-generator-manual 63/66
Page 63
Appendix 12: Single bearing 80/800 Frame key parts (Shunt and PMG models)
Item Description
1 Air outlet screen
2 Bearing (Exciter end)3 Bracket (Exciter end)
4 Drip proof cover
5 Drive discs
6 Exciter armature
7 Exciter cover
8 Exciter stator
9 Fan
10 PMG mounting ring
11 PMG rotor
12 PMG stator13 Revolvingfield and shaft
14 Rotating rectifier assembly
15 Stand-off / Buss bar assembly
16 Stator assembly (wound)
17 Terminal box assembly
18 Terminal box top cover
19 Voltage regulator
ROTATION
C
B
C
B
B
C
T
T
T
T
T
T
T
T
T
T
T
T
T
T
T
T
T
T
T
T
T
T
T
T
BS
B
BS
S
S
S
S
S
S
18
4
19
Optional PMG
Shunt
17 15
16
1310
12
11
14
3
2
9
5
1
8
6
7

7/16/2019 LEROY SOMER — Generator Manual
http://slidepdf.com/reader/full/leroy-somer-generator-manual 64/66
Page 64
Appendix 13: Double bearing 60/600 Frame key parts (Shunt and PMG models)
N
T00
U
T11W
T33
V
T22
83
17
12Optional PMG
Shunt
14
7
9
15
16
13
1
220
21
6
11
Item Description
1 Air outlet screen
2 Bearing (Exciter end)
3 Bracket (Exciter end)
4 Drip proof cover5 Drive discs
6 Exciter armature
7 Exciter cover
8 Exciter stator
9 Fan
11 PMG rotor
12 PMG stator
13 Revolvingfield and shaft
14 Rotating rectifier assembly
15 Stand-off / Buss bar assembly16 Stator assembly (wound)
17 Terminal box assembly
18 Terminal box top cover
19 Voltage regulator
20 Bearing (drive end)
21 Bracket (drive end)
4
18
19

7/16/2019 LEROY SOMER — Generator Manual
http://slidepdf.com/reader/full/leroy-somer-generator-manual 65/66
Page 65
Appendix 14: Double bearing 80/800 Frame key parts (Shunt and PMG models)
4
18
19
ENCLOSUREOVERSPEED
RATING
PHASE
RPM
Hz
ROTATION
ARRANGEMENT
STATOR CONN
WEIGHT
INSULATION
AMPS
VOLTS
P.F.
KW
kVA
EMI
MODEL
EXC VOLTS
AMB
DATE
SERIALNO
ALT
EXC AMPS
TEMP RISE
Shunt
17
7
3
8
1012
Optional PMG
11
14
6
9
1316
15
21
20
1
2
Item Description
1 Air outlet screen
2 Bearing (Exciter end)
3 Bracket (Exciter end)
4 Drip proof cover5 Drive discs
6 Exciter armature
7 Exciter cover
8 Exciter stator
9 Fan
10 PMG mounting ring
11 PMG rotor
12 PMG stator
13 Revolvingfield and shaft
14 Rotating rectifi
er assembly15 Stand-off / Buss bar assembly
16 Stator assembly (wound)
17 Terminal box assembly
18 Terminal box top cover
19 Voltage regulator
20 Bearing (drive end)
21 Bracket (drive end)

7/16/2019 LEROY SOMER — Generator Manual
http://slidepdf.com/reader/full/leroy-somer-generator-manual 66/66
Leroy Some North America669 Natchez Trace Drive