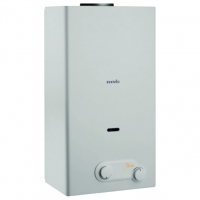
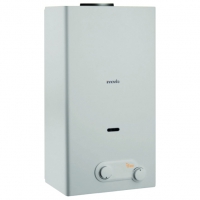
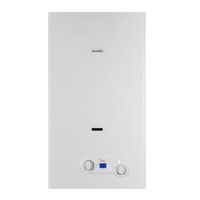
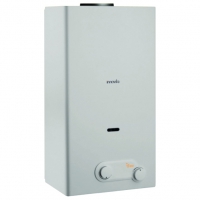
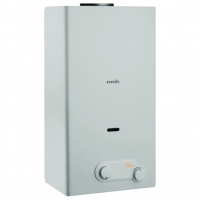
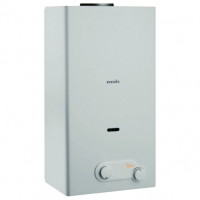
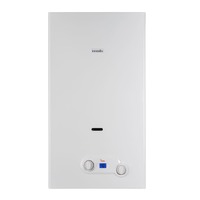
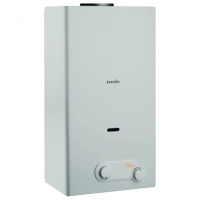
-
Contents
Table of Contents -
Troubleshooting
-
Bookmarks
Quick Links
Primo 6
Primo 11
Instantaneous gas water heater
Installation, operation and maintenance manual
Summary of Contents for innovita Primo 11
-
Page 1
Primo 6 Primo 11 Instantaneous gas water heater Installation, operation and maintenance manual… -
Page 2
Indoor sound power level Model Water heating energy efficiency class Annual energy consumption PRODUCT DATASHEET Innovita Primo 6 Primo 11 Declared load profile Indoor sound power level dB(A) Water heating energy efficiency class Water heating energy efficiency class Annual energy consumption… -
Page 3: Table Of Contents
WARNING This booklet contains information relevant to the user as well as the installer. The user must read the following chapters: General safety, Flue gas device and Operation. Gas Safety (Installation and Use) Regulations 1998 In the interest of safety, it is the law that all gas appliances are installed and serviced by a competent person in accordance with the above regulations, building regulations, codes of practice and byelaws of the local water authority.
-
Page 4: General Safety Warnings
GENERAL SAFETY WARNINGS The Operation Manual is an integral part of the product and so must When using the device the following safety rules must be applied: be carefully preserved in order to accompany the product; if it is lost or damaged another copy can be requested from Morco Products Do not use the machine for purposes other than those inten- Limited on 01482 325 456 or visit our website www.morcoproducts.
-
Page 5
fig. 2 Flue gas release safety device Release hood Heat exchanger Ignition electrode Burner Hydraulic valve Temperature regulator Gas valve Gas input Gas adjustment screws Piezoelectric button Gas control Devices pressure Ignition electrode Thermocouple… -
Page 6: Technical Characteristics
1. TECHNICAL CHARACTERISTICS 1.a Technical Data Primo kW — kcal/h kW — kcal/h Nominal power usage (Pn) 10,1 — 8.686 19,0 — 16.340 Nominal Thermal range (Qn) 12 — 10.320 21,8 — 18.748 Minimal power usage (Pm) 4,9 — 4.214 7,5 — 6.424 Minimal Thermal range (Qm) 6 — 5.160…
-
Page 7: Installation
2.b Wall mounting bustible materials, provide a metal sleeve of 115 mm dia for a Primo 6 and 135mm dia for a Primo 11 which allows an air gap of 25 mm. Warning Flue pipes and terminals should comply with BS 715. Terminals Do not install this device in an area that contains dust, greasy va- shall not be sited within 300 mm.
-
Page 8: E Water Connection
— The diameter of the flue terminal must match that of the water heater may become dangerous. heater (90mm for the Primo 6 litre or 110mm for the Primo 11 litre) — The overall flue length from the top of the water heater to the top of the external flue must be at least 600mm.
-
Page 9: Operation
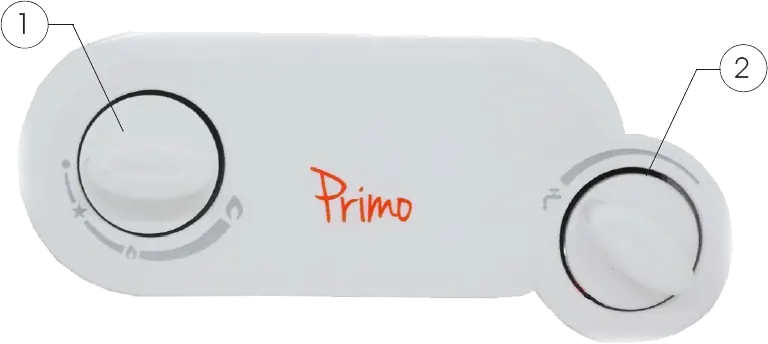
3. OPERATION A = Gas control on/off ● off position activation position minimum gas level maximum gas level B = Water temperature selector fig. 6 3.a. Function When the water heater is not used for long periods close the gas supply tap or the LPG gas valve on the tank.
-
Page 10: B Troubleshooting: Problems And Solutions
4.b Troubleshooting: problems and solutions For the best functioning of the water heater, to prolong its lifetime — Clean the combustion chamber and ensure that it is always safe, ensure that it is inspected at least — Check the ignition, switching off and general functionality of the once a year by a gas safe engineer.
-
Page 11
FOR THE ENGINEER STARTING UP THE APPLIANCE AND FINAL CHECKS • CLEANING THE MAIN BURNER Start the appliance by following the directions given in section 3b, “Usage”, checking that the appliance is working correctly. Pay spe- To carry out the annual cleaning of the burner, proceed as follows: cial attention to the colour of the flames ensuring there is no yellow- –… -
Page 12: Warranty
— Insect or debris in the burner or heat exchanger — Blocked gas or water filters — Incorrect operation caused by damaged mixer taps or shower TMV2 Supplied by Innovita Italy Distributed in U.K. by: MORCO PRODUCTS LTD Morco House…
This manual is also suitable for:
Primo 6
-
Contents
Table of Contents -
Troubleshooting
-
Bookmarks
Quick Links
Primo 6
Primo 11
Instantaneous gas water heater
Installation, operation and maintenance manual
Summary of Contents for innovita Primo 11
-
Page 1
Primo 6 Primo 11 Instantaneous gas water heater Installation, operation and maintenance manual… -
Page 2
Indoor sound power level Model Water heating energy efficiency class Annual energy consumption PRODUCT DATASHEET Innovita Primo 6 Primo 11 Declared load profile Indoor sound power level dB(A) Water heating energy efficiency class Water heating energy efficiency class Annual energy consumption… -
Page 3: Table Of Contents
WARNING This booklet contains information relevant to the user as well as the installer. The user must read the following chapters: General safety, Flue gas device and Operation. Gas Safety (Installation and Use) Regulations 1998 In the interest of safety, it is the law that all gas appliances are installed and serviced by a competent person in accordance with the above regulations, building regulations, codes of practice and byelaws of the local water authority.
-
Page 4: General Safety Warnings
GENERAL SAFETY WARNINGS The Operation Manual is an integral part of the product and so must When using the device the following safety rules must be applied: be carefully preserved in order to accompany the product; if it is lost or damaged another copy can be requested from Morco Products Do not use the machine for purposes other than those inten- Limited on 01482 325 456 or visit our website www.morcoproducts.
-
Page 5
fig. 2 Flue gas release safety device Release hood Heat exchanger Ignition electrode Burner Hydraulic valve Temperature regulator Gas valve Gas input Gas adjustment screws Piezoelectric button Gas control Devices pressure Ignition electrode Thermocouple… -
Page 6: Technical Characteristics
1. TECHNICAL CHARACTERISTICS 1.a Technical Data Primo kW — kcal/h kW — kcal/h Nominal power usage (Pn) 10,1 — 8.686 19,0 — 16.340 Nominal Thermal range (Qn) 12 — 10.320 21,8 — 18.748 Minimal power usage (Pm) 4,9 — 4.214 7,5 — 6.424 Minimal Thermal range (Qm) 6 — 5.160…
-
Page 7: Installation
2.b Wall mounting bustible materials, provide a metal sleeve of 115 mm dia for a Primo 6 and 135mm dia for a Primo 11 which allows an air gap of 25 mm. Warning Flue pipes and terminals should comply with BS 715. Terminals Do not install this device in an area that contains dust, greasy va- shall not be sited within 300 mm.
-
Page 8: E Water Connection
— The diameter of the flue terminal must match that of the water heater may become dangerous. heater (90mm for the Primo 6 litre or 110mm for the Primo 11 litre) — The overall flue length from the top of the water heater to the top of the external flue must be at least 600mm.
-
Page 9: Operation
3. OPERATION A = Gas control on/off ● off position activation position minimum gas level maximum gas level B = Water temperature selector fig. 6 3.a. Function When the water heater is not used for long periods close the gas supply tap or the LPG gas valve on the tank.
-
Page 10: B Troubleshooting: Problems And Solutions
4.b Troubleshooting: problems and solutions For the best functioning of the water heater, to prolong its lifetime — Clean the combustion chamber and ensure that it is always safe, ensure that it is inspected at least — Check the ignition, switching off and general functionality of the once a year by a gas safe engineer.
-
Page 11
FOR THE ENGINEER STARTING UP THE APPLIANCE AND FINAL CHECKS • CLEANING THE MAIN BURNER Start the appliance by following the directions given in section 3b, “Usage”, checking that the appliance is working correctly. Pay spe- To carry out the annual cleaning of the burner, proceed as follows: cial attention to the colour of the flames ensuring there is no yellow- –… -
Page 12: Warranty
— Insect or debris in the burner or heat exchanger — Blocked gas or water filters — Incorrect operation caused by damaged mixer taps or shower TMV2 Supplied by Innovita Italy Distributed in U.K. by: MORCO PRODUCTS LTD Morco House…
This manual is also suitable for:
Primo 6
Официальная гарантия производителя
4.0 (На основе: 22 голосов)
Весь товар сертифицирован
Гарантия и возврат товара
Бесплатная доставка по городу
Моментальная обработка заказа
- Описание
- Характеристики
- Отзывы
- Видео обзор
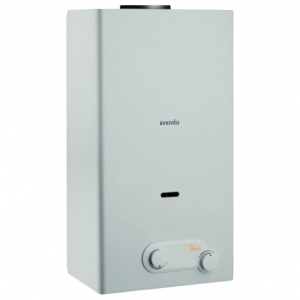
Новинка! Предоставлять потребителям инновационные продукты высочайшего качества является краеугольным камнем успеха компании Innovita.Под ИТАЛЬЯНСКОЙ маркой Innovita производятся газовые водонагреватели с применением современных технологий на всех этапах разработки и производства. Innovita — теперь и в России!
— Производительность 11 л/мин;
— Модель с автоподжигом;
— Включение и устойчивая работа при низком давлении воды (0,2 Бар);
— Возможность перенастройки на сжиженный газ (опция);
— Раздельная регулировка мощности по газу и по протоку воды;
— Термоэлектрический контроль;
— Регулировка давления газа на горелке;
— Автоматическая модуляция мощности;
— Группа безопасности: термостат дымовых газов и ограничитель температуры;
— Компактные размеры и простой монтаж;
— Гарантия 2 года.
A = Gas control on/off
● off position
activation position
minimum gas level
maximum gas level
B = Water temperature selector
fig. 6
3.a. Function
The water heater is designed to produce instantaneous hot water.
The hot water is delivered to several outlets around the home. If
more than one outlet is used at any one time the delivery of hot
water will be reduced at each outlet. The Water heater has 2 main
controls:
— A gas control knob — «A» in Fig 6
— A water temperature control knob – «B» in fig 6
The minimum gas level in fig. 6 will provide approximately 50% of
the available power. Turning the gas control knob counter- clockwise
will increase the power level between 50% and 100%. This function
may be useful to vary the temperature of the water supplied.
The water temperature selector allows water to be supplied anywhe-
re between 50% and 100% of the water heater’s capability. In effect
the selector reduces the water flow through the heater to the taps
to increase the water temperature and increases the water flow to
reduce the water temperature.
In the UK the normal positions for the controls are:
— Gas control – always set to 100% (fully counter clockwise)
— Water control set to 100% (fully counter clockwise) during the
winter months
— Water control set to between 100% and 50% during the summer
months to suit the customer’s preference for hot water tempera-
ture.
3.b Usage
Ensure that the gas tap and all water taps are switched off
— Turn on the Main external gas supply tap on the bottle or tank
— Open the gas tap, not supplied with the device, placed immedia-
tely before the water heater on the gas input pipe
— Rotate knob A to the on position (
way and keep it pressed
— Press the piezo electric button that is located under the water he-
ater on the right-hand side until the spark ignites the pilot flame.
The flame can be seen through the viewing window on the front
of the heater. When it ignites, keep the gas control knob («A» in fig
6), pressed for 20-30 seconds. If the pilot does not stay lit when
the knob is released, repeat the procedure
— Rotate Knob A towards the large flame
necessary to keep the knob pressed down lightly until the final
position is reached
— From this moment the device is able to produce hot water on
request. Opening the hot water tap causes the main burner to
be ignited, and inversely, by closing the hot water tap the main
burner is switched off; but the pilot flame remains switched on for
future requests
— If the main burner or pilot flame is accidentally turned off, the gas
valve automatically blocks the output of gas within 60 seconds so
to avoid any danger. To return the device to an operational mode,
repeat the steps above.
The machine is switched off by rotating knob A to the OFF position (●).
), press the knob down all the
), during rotation it is
A
When the water heater is not used for long periods close the gas
supply tap or the LPG gas valve on the tank.
For the best operational results it is recommended to have a quali-
fied technician service the machine at least once a year
PRECAUTIONS TO BE TAKEN AGAINST FROST AND FREE-
ZING CONDITIONS
If there is a possibility that the area where the device is stalled
could reach below 0°C, the device must be emptied of all water
contained.
During cold spells, if your appliance is located in a place exposed
to frost and freezing conditions, it must be drained down in the fol-
lowing way:
— Turn off the appliance’s water inlet stopcock.
— Open any drain cocks located on the installation pipework
— Turn on all hot and cold water taps.
— Turn temperature selector fully anticlockwise.
— When this operation has been completed, turn off the hot and
cold water taps.
To start up the appliance again, open its water inlet stopcock
4. MAINTENANCE
To maintain the machine at maximum efficiency, have qualified per-
sonnel perform a maintenance check at least once a year.
Before cleaning or performing maintenance, opening or disassem-
bling the panels, switch off the device and turn off the gas supply.
Check the main burner and the pilot flame, the ignition electrode,
the safety valve and that there is no leakage. Check that there is
nothing obstructing the passages within the exchanger smoke
channel.
To clean the outside of the panels utilize a cloth with soap and water.
Do not use solvents, powders or abrasive sponges.
Do not clean the device and/or its parts with flammable materials
(e.g. petrol, alcohol, diesel etc.).
4.a Removing the casing
To remove the outer casing follow the steps below:
— Remove the selector knobs (A and B)
— Remove the screws (C)
— Shift the casing upwards to free it from the upper and lateral hooks
— Shift the casing forwards
— To reinsert the casing, follow the above steps in reverse order.
fig. 7
9
B
Основные преимущества
- Запальная горелка для безопасного розжига
- Мгновенная и непрерывная подача горячей воды
- Высокая эффективность
- Возможность использования с природным газом и СУГ
- Очень низкое пусковое давление воды
- Экономайзер горючего газа
- Регулятор протока воды
- Модуляция выходной мощности
- Компактный размер
- Простая и универсальная установка
- Идеально для малого и среднего водопотребления
- Сертификация ЕС
Внешний вид панели управления
- Экономайзер горючего газа вкл/выкл
- Регулятор температуры воды
Защитные устройства
- Термостат дымовых газов
- Предельный термостат
- Термопара контроля пламени
| Primo 11 | Primo 11c | Primo 14 | ||
|---|---|---|---|---|
| Производительность | л/мин | 11 | 11 | 14 |
| Номинальная тепловая нагрузка | кВт | 21,8 | 21,8 | 27,2 |
| Номинальная теплопроизводительность | кВт | 18,9 | 18,9 | 23,1 |
| Минимальная тепловая нагрузка | кВт | 9 | 9 | 9 |
| Минимальная теплопроизводительность | кВт | 7,5 | 7,5 | 7,5 |
| Проток воды при запуске | л/мин | 2,5 | ||
| Максимальное давление воды на входе | бар | 10 | ||
| Минимальное давление воды на входе | бар | 0,2 | ||
| Масса | кг | 10,60 | 10,60 | 12,10 |
| Высота | мм | 592 | 592 | 650 |
| Ширина | мм | 314 | 314 | 363 |
| Глубина | мм | 227 | 227 | 227 |

File Specifications:1407/1407858-primo_11.pdf file (09 May 2023) |
Accompanying Data:
innovita Primo 11 Gas Heater PDF Installation, Operation And Maintenance Manual (Updated: Tuesday 9th of May 2023 07:00:47 PM)
Rating: 4.4 (rated by 69 users)
Compatible devices: VER 75/4, VFRU24N-1, Blaze&Glow18VN, HS25NG/LP, Lost River PCILVFD18RT, GL18LP, GN30, Dyna-Glo Delux RA100NGDGD.
Recommended Documentation:
Installation, Operation And Maintenance Manual (Text Version):
(Ocr-Read Summary of Contents of some pages of the innovita Primo 11 Document (Main Content), UPD: 09 May 2023)
-
1, Primo 6 Primo 11 Instantaneous gas water heater Installation, operation and maintenance manual WATER HEATERS BOILERS RADIATORS
… -
2, 2 The appliance complies with the European Directive 2010/30/EU “ErP Energy Labelling”. The energy label carries the information regarding the product’s energy efficiency characteristics. In this way the end consumer can identify and compare similar products and can make informed choices regarding high efficiency appliances. Below is a description of the label fixed to the shell of the appliance and the product sheet with the information required by the Dir…
-
3, 3 Gas Safety (Installation and Use) Regulations 1998 In the interest of safety, it is the law that all gas appliances are installed and serviced by a competent person in accordance with the above regulations, building regulations, codes of practice and byelaws of the local water authority. Failure to comply with the regulations may lead to prosecution. It is in your interests and that of your safety that the law is complied to. Related documents The following British Standar…
-
4, 4 B C Measures in mm A H G F 118 E fig. 1 41 116 D GENERAL SAFETY WARNINGS The Operation Manual is an integral part of the product and so must be carefully preserved in order to accompany the product; if it is lost or damaged another copy can be requested from Morco Products Limited on 01482 325 456 or visit our website www.morcoproducts. co.…
-
5, 5 fig. 2 2 1 3 4 15 14 5 13 12 6 7 11 9 10 8 1 Flue gas release safety device 2 Release hood 3 Heat exchanger 4 Ignition electrode 5 Burner 6 Hydraulic valve 7 Temperature regulator 8 Gas valve 9 Gas input 10 Gas adjustment screws 11 Piezoelectric button 12 Gas control 13 Devices pressure 14 Ignition electrode 15 Thermocouple
… -
6, innovita Primo 11 6 1. TECHNICAL CHARACTERISTICS 1.a Technical Data Primo 6 11 kW — kcal/h kW — kcal/h Nominal power usage (Pn) 10,1 — 8.686 19,0 — 16.340 Nominal Thermal range (Qn) 12 — 10.320 21,8 — 18.748 Minimal power usage (Pm) 4,9 — 4.214 7,5 — 6.424 Minimal Thermal range (Qm) 6 — 5.160 9,0 — 7.740 GAS TYPE BUTANE PROPANE BUTANE PROPANE G30 G31 G30 G31 P.C.I. (15° C 1013 mbar) MJ/m 3 116,09 88 …
-
7, innovita Primo 11 7 fig. 4 2. INSTALLATION 2.a Regulations The use of gas devices is controlled by precise regulations. It is essential to observe regulations in force. Installation of liquid petroleum gas (L.P.G) must comply with all the distributor’s requirements and those of the regulations. 2.b Wall mounting Warning Do not install this device in an area that contains dust, greasy va- pour and/…
-
8, 8 fig. 5 H 2 O H 2 O 2.e Water connection Connect the water heater to the water supply. From the front, the cold water input is on the right and the hot water output is on the left. Insert the filter into the water valve input fitting. Remove the plastic nut from the hot water output fitting before connecting it to the water supply. Ensure that the tubes of you water system are not used to earth your electrical system or telephone, they are absolutely inapprop…
-
9, 9 3. OPERATION 3.a. Function The water heater is designed to produce instantaneous hot water. The hot water is delivered to several outlets around the home. If more than one outlet is used at any one time the delivery of hot water will be reduced at each outlet. The Water heater has 2 main controls: — A gas control knob — “A” in Fig 6 — A water temperature control knob – “B” in fig 6 The minimum gas level in fig. 6 will provide approximately 50% of the availabl…
-
10, 10 4.b Troubleshooting: problems and solutions For the best functioning of the water heater, to prolong its lifetime and ensure that it is always safe, ensure that it is inspected at least once a year by a gas safe engineer. The gas safe engineer is to perform the following maintenance operations: — Remove any rust from the burner — Remove any deposit on the glow plug by the electrode — Clean the combustion chamber — Check t…
-
11, 11 FOR THE ENGINEER STARTING UP THE APPLIANCE AND FINAL CHECKS Start the appliance by following the directions given in section 3b, “Usage”, checking that the appliance is working correctly. Pay spe- cial attention to the colour of the flames ensuring there is no yellow- ness which would indicate burner venturis blocked by insect matter. Check the gas operating pressures with the heater under full power at the inlet pressure nipple located on the rig…
-
12, WARRANTY The water heater is guaranteed against manufacturing defects for one year from first commissioning date. However the guarantee is subject to proof of commissioning in accordance with the gas safety (Installation and Use) act of 1998. The guarantee does not cover defects caused by lack of maintenance. Morco Products Ltd. warranty will cover parts and labour if the appliance has been fitted as part of the original equipment in a ca- ravan holiday home or lei…
-
innovita Primo 11 User Manual
-
innovita Primo 11 User Guide
-
innovita Primo 11 PDF Manual
-
innovita Primo 11 Owner’s Manuals
Recommended: Estrosa, Crosstrainer 690s, GPS 10x, BeoSystem 4, Spitfire 1310
Links & Tools
Product Types by innovita:
- Gas Heater
Operating Impressions, Questions and Answers:
Официальная гарантия производителя
4.0 (На основе: 24 голосов)
Весь товар сертифицирован
Гарантия и возврат товара
Бесплатная доставка по городу
Моментальная обработка заказа
- Описание
- Отзывы
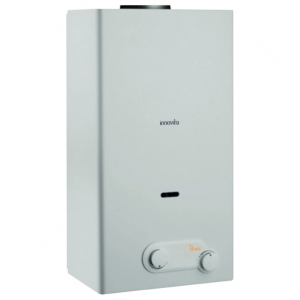
Технические характеристики Innovita Primo 11i NG
- Мощность (кВт) 19.2 кВт
- Диаметр дымохода (мм) 110 мм
- Камера сгорания открытая
- Тип розжига электроподжиг
- Производительность (л/мин) 11 л/мин
- Размеры (ШхВхГ) 314x592x245 мм
- Вес 10.6 кг
- Страна производитель Италия / Иран
Технические характеристики товара могут отличаться от указанных на сайте, уточняйте технические характеристики товара на момент покупки и оплаты. Вся информация на сайте о товарах носит справочный характер и не является публичной офертой в соответствии с пунктом 2 статьи 437 ГК РФ.
Основные преимущества
- Запальная горелка для безопасного розжига
- Мгновенная и непрерывная подача горячей воды
- Высокая эффективность
- Возможность использования с природным газом и СУГ
- Очень низкое пусковое давление воды
- Экономайзер горючего газа
- Регулятор протока воды
- Модуляция выходной мощности
- Компактный размер
- Простая и универсальная установка
- Идеально для малого и среднего водопотребления
- Сертификация ЕС
Внешний вид панели управления
- Экономайзер горючего газа вкл/выкл
- Регулятор температуры воды
Защитные устройства
- Термостат дымовых газов
- Предельный термостат
- Термопара контроля пламени
| Primo 11 | Primo 11c | Primo 14 | ||
|---|---|---|---|---|
| Производительность | л/мин | 11 | 11 | 14 |
| Номинальная тепловая нагрузка | кВт | 21,8 | 21,8 | 27,2 |
| Номинальная теплопроизводительность | кВт | 18,9 | 18,9 | 23,1 |
| Минимальная тепловая нагрузка | кВт | 9 | 9 | 9 |
| Минимальная теплопроизводительность | кВт | 7,5 | 7,5 | 7,5 |
| Проток воды при запуске | л/мин | 2,5 | ||
| Максимальное давление воды на входе | бар | 10 | ||
| Минимальное давление воды на входе | бар | 0,2 | ||
| Масса | кг | 10,60 | 10,60 | 12,10 |
| Высота | мм | 592 | 592 | 650 |
| Ширина | мм | 314 | 314 | 363 |
| Глубина | мм | 227 | 227 | 227 |


