- Manuals
- Brands
- Garmin Manuals
- GPS
- GNS 430
- Pilot’s manual & reference
-
Contents
-
Table of Contents
-
Troubleshooting
-
Bookmarks
Quick Links
GNS 430(A)
Pilot’s Guide and Reference
Related Manuals for Garmin GNS 430
Summary of Contents for Garmin GNS 430
-
Page 1
GNS 430(A) Pilot’s Guide and Reference… -
Page 3
Revision Date of Revision 12/98 4/99 6/99 7/99 4/00 7/00 5/03 5/06 6/06 2/07 10/07 05/08 08/08 12/09 190-00140-00 Rev. P Description Initial Release Update to conform to recent SW changes Added Addendum Update for SW 2.10 Update for SW 2.15 Updated Power On, Wind Vector, Crossfill, DME, and Fuel Plan Added FDE Section, updated per SW 5.01, misc. -
Page 4
Garmin® and AutoLocate® are registered trademarks of Garmin Ltd. or its subsidiaries and may not be used without the express permission of Garmin. -
Page 5: Table Of Contents
SECTION 1: INTRODUCTION … 1-1 1.1 Accessories and Packing List … 1-1 1.2 Key and Knob Functions … 1-2 1.3 Takeoff Tour … 1-5 SECTION 2: COM … 2-1 2.1 Communicating using the GNS 430 … 2-1 SECTION 3: NAV PAGES …
-
Page 6
Terrain data is obtained from third party sources. Garmin is not able to independently verify the accuracy of the terrain data. -
Page 7
CAUTION: The Garmin GNS 430 does not contain any user-serviceable parts. Repairs should only be made by an authorized Garmin service center. Unauthorized repairs or modifications could void both the warranty and the pilot’s authority to operate this device under FAA/FCC regulations. -
Page 8
Center; and 90 days for factory repaired or newly-overhauled products exchanged at Garmin in lieu of repair. Within the applicable period, Garmin will, at its sole option, repair or replace any components that fail in normal use. Such repairs or replacement will be made at no charge to the customer for parts or labor, provided that the customer shall be responsible for any transportation cost. -
Page 9: Section 1: Introduction
The Garmin dealer installs and configures the GNS 430. The GNS 430 is secured in the installation rack with the proper wiring connections. A Garmin dealer can answer questions about the installation, such as location of antennas or any connections to other equipment in the panel.
-
Page 10: Key And Knob Functions
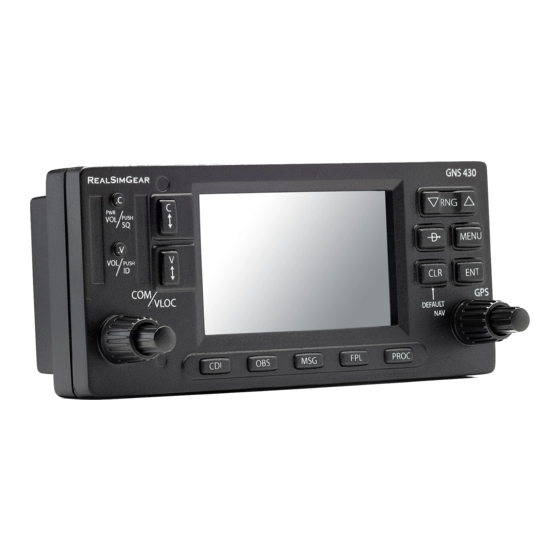
SECTION 1 INTRODUCTION 1.2 KEy AND KNOB FUNCTIONS The GNS 430 is designed to make operation as simple as possible. The key and knob descriptions (Figure 1-1) provide a general overview of the primary function(s) for each key and knob. The takeoff tour (Section 1.3) is intended to provide a brief overview of the primary functions of the GNS 430.
-
Page 11
Left-hand Keys and Knobs (1) COM Power/Volume Knob – Controls unit power and communications radio volume. Press momentarily to disable automatic squelch control. (2) VLOC Volume Knob – Controls audio volume for the selected VOR/Localizer frequency. Press momentarily to enable/disable the ident tone. (3) COM Flip-flop Key –… -
Page 12
SECTION 1 INTRODUCTION NOTE: When the GNS 430 displays a list of information that is too long for the display screen, a scroll bar appears along the right-hand side of the display (Figure 1-2). The scroll bar graphically indicates the number of additional items available within the selected category. -
Page 13: Takeoff Tour
Service staff is available during normal business hours (U.S. Central time zone) at the phone and fax numbers listed on page ii. Garmin can also be reached by mail (page ii) or at our website address, www.garmin.com. Powering up the GNS 430 The GNS 430’…
-
Page 14
SECTION 1 INTRODUCTION The Database Versions Page (Figure 1-4) appears next, which shows the current database information on the NavData and Terrain Data cards. information highlighted in yellow indicates the database is not within its effective dates. The NavData database is updated every 28 days and must be current for approved instrument approach operations. -
Page 15
Turn the small and large right knobs to enter the desired figure (Figures 1-5 and 1-6) and press the ENT Key. Figure 1-6 Fuel Flow Selected The Instrument Panel Self-test Page includes selections to set fuel on board (FOB) to full capacity and access the Checklists Page. -
Page 16: Section 13: Fault Detection & Exclusion
SECTION 1 INTRODUCTION Satellite Status Page The Satellite Status Page (Figure 1-9) appears as the GNS 430 attempts to collect satellite information. When an ‘Acquiring’ status is displayed on the Satellite Status Page, the signal strengths of any satellites received appear as ‘bar graph’…
-
Page 17
Selecting COM and VLOC Frequencies While the GNS 430 is acquiring a position, take a minute to dial in the active and standby frequencies to be used for the first phase of the flight. The GNS 430’ s display is divided into separate windows (or screen areas), including a COM Window, VLOC Window, and the GPS Window (Figure 1-11). -
Page 18
SECTION 1 INTRODUCTION Page Groups Page Groups NAV Group WPT Group AUX Group NRST Group see Section 3 see Section 7 see Section 10 see Section 8 Table 1-1 Page Groups The bottom right corner of the screen (Figure 1-13) indicates which page group (Table 1-1) is currently being displayed, the number of pages available within that group (indicated by square icons), and the placement of the… -
Page 19
Map Page After the GNS 430 acquires satellites and computes a position, the Map Page (Figure 1-14) appears automatically. Map Display Desired Track Map Range Present Position Figure 1-14 Map Page The Map Page displays the present position (using an airplane symbol) relative to nearby airports, VORs, NDBs, intersections, user waypoints, and airspace boundaries. -
Page 20
SECTION 1 INTRODUCTION Press the ENT Key to confirm the identifier. The ‘Activate?’ function field is highlighted (Figure 1-16). Figure 1-16 ‘Activate?’ Highlighted Press the ENT Key to activate a direct-to course to the selected destination. Once a direct-to destination is selected, press and hold the CLR Key to display the Default NAV Page. -
Page 21
NAV/COM Page From the Default NAV Page, turn the small right knob until the NAV/COM Page (Figure 1-20) is displayed. Departure, Enroute, or Frequency List Arrival Airport Frequency Type Figure 1-20 NAV/COM Page The NAV/COM Page displays the available frequencies (communications and navigation) for the departure airport, any enroute airports which are included in the flight plan, and the final destination airport. -
Page 22
SECTION 1 INTRODUCTION To display frequencies for a different airport along the flight plan. Press the small right knob to highlight the airport identifier field. Turn the small right knob to display the list of airports within the flight plan (Figure 1-21). Figure 1-21 Airport Window Continue turning the small right knob to select the desired airport and press the ENT Key. -
Page 23
For approaches, a window appears (Figure 1-23) to select the desired initial approach fix (IAF) or provide a ‘vectors’ option to select just the final course segment of the approach. Turn the small right knob to select the desired option and press the ENT Key. (The ‘vectors’ option extends the final inbound course beyond the final approach fix, allowing the pilot to intercept the final course segment beyond its… -
Page 24
SECTION 1 INTRODUCTION To display the NRST pages: If necessary, press and hold the CLR Key to select the NAV group and display the Default NAV Page. Turn the large right knob to select the NRST Page Group, as indicated by ‘NRST’ appearing in the lower right corner of the screen. -
Page 25
To select a nearby airport as a direct-to destination from the Nearest Airport Page: From the Nearest Airport Page, press the small right knob to activate the cursor. Turn the large right knob to select the desired airport from the list. Press the Direct-to Key, the ENT Key twice to navigate to the nearby airport. -
Page 26
SECTION 1 INTRODUCTION By default, airspace alert messages are turned off. When turned on, the message (MSG) annunciator located directly above the MSG Key flashes to alert the pilot to the airspace message. See Section 10.4, Setup 1 Page: Airspace Alarms for information on enabling airspace alert messages. -
Page 27
Since using flight plans is arguably one of the more complex features of the GNS 430, it will be discussed only briefly here, with focus on creating a new flight plan and activating it to use for navigation. Answers to additional questions about flight plans not found in this brief introduction can be found in Section 5, Flight Plans. -
Page 28
SECTION 1 INTRODUCTION Blank Page 1-20 GNS 430(A) Pilot’s Guide and Reference 190-00140-00 Rev. P… -
Page 29: Section 2: Com
SECTION 2: COM 2.1 COMMUNICATING USING THE GNS 430 The GNS 430 features a digitally-tuned VHF COM radio that provides a seamless transition from communication to navigation, bringing the two most important functions in flying together in one panel-mounted unit. The GNS 430’…
-
Page 30
SECTION 2 While receiving a station, an ‘RX’ indication (Figure 2-1) appears in the upper right corner of the COM Window to the immediate right of ‘COM’. A ‘TX’ indication appears at this location when transmitting (Figure 2-2). ‘TX’ Transmit Indication Figure 2-2 ‘TX’… -
Page 31
Auto-Tuning The GNS 430’ s auto-tune feature allows the pilot to quickly select any database frequency in the GPS Window as the standby frequency. Any COM frequency displayed in the GPS Window can be transferred to the standby COM frequency field, with a minimum of keystrokes required. -
Page 32
SECTION 2 To select a COM frequency for a nearby flight service station (FSS) or center (ARTCC): Turn the large right knob to select the NRST Page Group. Turn the small right knob to select the Nearest Center or Nearest Flight Service Page (Figure 2-7). -
Page 33
To select a COM frequency for any airport in the database: Turn the large right knob to select the WPT Page Group. Turn the small right knob to select the Airport Frequencies Page (Figure 2-9). Figure 2-9 Airport Frequencies Page Press the small right knob to place the cursor on the airport identifier field. -
Page 34
SECTION 2 Stuck Microphone As mentioned previously in this section, when the GNS 430 is transmitting, a ‘TX’ indication appears in the COM Window. If the microphone key is stuck or accidentally left in the on position; or the microphone continues to transmit after the key is released, the COM transmitter automatically times out (ceases transmitting) after 35 seconds of continuous broadcasting. -
Page 35: Section 3: Nav Pages
SECTION 3: NAV PAGES 3.1 MAIN PAGE GROUPS The GNS 430’ s main pages are divided into four separate page groups: NAV, WPT, AUX, and NRST (Table 3-1). Each page group is comprised of multiple pages. The page groups are selected using the large right knob.
-
Page 36: Default Nav Page
SECTION 3 NAV PAGES 3.3 DEFAULT NAV PAGE The first NAV page is the Default NAV Page (Figure 3-3). This page may be quickly selected from any page by pressing and holding the CLR Key. Active Leg of Flight Plan Course Deviation Indicator (CDI) TO/FROM Flag…
-
Page 37
Selecting Desired On-Screen Data At the bottom of the Default NAV Page there are six user-definable fields which display the data needed as the flight progresses (Figure 3-3). By default these fields display: distance to destination (DIS), desired track (DTK), bearing to destination (BRG), ground speed (GS), ground track (TRK), and estimated time enroute (ETE). -
Page 38
A ‘Crossfill?’ option is also provided for the Default NAV Page. This option transfers a direct-to destination or flight plan to a second Garmin 400 Series unit. See Section 10.2, Flight Planning: Crossfill for additional details on using the crossfill option. -
Page 39: Map Page
3.4 MAP PAGE The second NAV page is the Map Page (Figure 3-8), which displays the present position using an airplane symbol, along with nearby airports, NAVAIDS, user- defined waypoints, airspace boundaries, lakes, rivers, highways, and cities. Present Map Display Data Fields Position Number of Pages in…
-
Page 40
SECTION 3 NAV PAGES To select a map range: Press the up arrow of the RNG Key to zoom out to a larger map area. Press the down arrow of the RNG Key to zoom in to a smaller map area and more detail. An autozoom feature is available which automatically adjusts from an enroute range of 2000 nm through each lower range, stopping at a range of 1.0 nm when… -
Page 41
Map Panning Another Map Page function is panning, which allows the map to move beyond its current limits without adjusting the map range. When the panning function is selected (by pressing the small right knob), a target pointer flashes on the Map Display (Figure 3-11). -
Page 42
SECTION 3 NAV PAGES Map Direct-to To designate an on-screen airport, NAVAID, or user waypoint as the direct-to destination: Use the panning function (‘Map Panning’ in this section) to place the target pointer on a waypoint. Press the Direct-to Key to display the select Direct-to Waypoint Page, with the selected waypoint already listed (Figure 3-13). -
Page 43
Press the ENT Key to display an options menu (Figure 3-15). Figure 3-15 Map Panning Options Window ‘Review Airspace?’ should already be highlighted. If not, select it with the small right knob. Press the ENT Key to display the Airspace Information Page for the selected airspace. -
Page 44
SECTION 3 NAV PAGES Table 3-4 lists the settings available for each group: Group Available Settings Orientation, AutoZoom, Land Data, Aviation Data Weather Lightning Mode/Symbol (when applicable) Traffic Traffic Mode/Symbol/Label (when applicable) Airport Large/Medium/Small Airports and Text NAVAID VORs, NDBs, Intersections, and Text Waypoint User Waypoints, Waypoint Text, Flight Plan Wpts… -
Page 45
Press the ENT Key to accept the selected option (Figure 3-19). Figure 3-19 Map Setup Page The automatic zoom feature automatically adjusts the map range from 2000 nm through each lower range, stopping at 1.0 nm when approaching the destination waypoint. -
Page 46
SECTION 3 NAV PAGES To display airspace boundaries, highways, roads, railroad lines, track log data, active flight plan course lines, and lat/long grid lines: From the Map Page Menu, turn the large right knob to highlight ‘Setup Map?’ and press the ENT Key. -
Page 47
To turn the data fields off/on: From the Map Page Menu, turn the large right knob to highlight ‘Data Fields Off?’ (or ‘Data Fields On?’) and press the ENT Key. Selecting Desired On-Screen Data ‘Change Fields?’ allows selection of the data displayed on the four user-selectable data fields along the right-hand side of the Map Page. -
Page 48: Terrain Page
SECTION 3 NAV PAGES 3.5 TERRAIN PAGE NOTE: The TERRAIN Page does not appear on GNS 430 units that are not properly equipped with or configured for TERRAIN. See Section 11 for a full description of TERRAIN functions. TERRAIN Page To display the TERRAIN Page, select the NAV Page Group and turn the small right knob until the TERRAIN Page is displayed (Figure 3-26 and 3-27).
-
Page 49
To display a 360˚ view: Select the TERRAIN Page and press the MENU Key. Select ‘View 360˚?’ (Figure 3-28). Figure 3-28 TERRAIN Page Menu Press the ENT Key. To switch back to a 120˚ view, repeat step 1, select ‘View 120˚?, and press the ENT Key. -
Page 50: Inhibit Mode
SECTION 3 NAV PAGES Inhibit Mode TERRAIN has an inhibit mode that deactivates the FLTA/PDA visual alerts. Pilots should use discretion when inhibiting TERRAIN and always remember to enable the system when appropriate. Only the PDA and FLTA alerts are disabled in the inhibit mode. See Section 11.3 for more information on TERRAIN alerts.
-
Page 51: Nav/Com Page
3.6 NAV/COM PAGE The NAV/COM (navigation communications) Page (Figure 3-34) provides a list of the airport communication and navigation frequencies at the departure, enroute, and arrival airports. The NAV/COM Page makes selection of the frequencies needed along the flight plan quick and convenient.
-
Page 52
SECTION 3 NAV PAGES To scroll through the list of frequencies: Activate the cursor, if not already active, by pressing the small right knob. Turn the large right knob to move the cursor through the list of frequencies. If there are more frequencies in the list than can be displayed on the screen, a scroll bar along the right-hand side of the screen (Figure 3-36) -
Page 53: Position Page
3.7 POSITION PAGE The Position Page displays the present position (by default, in latitude and longitude) and altitude. The Position Page (Figure 3-39) also displays the current track, ground speed, time, and a reference waypoint field. These fields are user-selectable to configure the page to the pilot’…
-
Page 54
SECTION 3 NAV PAGES Press the ENT Key to select the desired data item and return to the Position Page. Press the small right knob momentarily to remove the cursor from the page. The Position Page also features a reference waypoint field, located at the bottom of the page, to indicate bearing and distance to/from a selected waypoint. -
Page 55
Press the ENT Key to select the desired type and return to the Position Page. To select between ‘bearing FROM’ or ‘bearing TO’ to the reference waypoint, turn the small right knob to select the desired bearing reference (Figure 3-45) and press the ENT Key. -
Page 56: Satellite Status Page
SECTION 3 NAV PAGES 3.8 SATELLITE STATUS PAGE The Satellite Status Page provides a visual reference of GPS receiver functions, including current satellite coverage, GPS receiver status, and position accuracy. The Satellite Status Page (Figure 3-47) is helpful in troubleshooting weak (or missing) signal levels due to poor satellite coverage or installation problems.
-
Page 57
Each satellite has a 30-second data transmission that must be collected (hollow signal strength bar, see Figure 3-47) before the satellite may be used for navigation (solid signal strength bar, see Figure 3-46). Once the GPS receiver has determined the present position, the GNS 430 indicates position, track, and ground speed on the other navigation pages. -
Page 58: Vertical Navigation Page
SECTION 3 NAV PAGES 3.9 VERTICAL NAVIGATION PAGE The GNS 430’ s Vertical Navigation Page (the last NAV page, see Figure 3-49) creates a three-dimensional profile to provide guidance from the present position and altitude to a final (target) altitude at a specified location. This is helpful when descending to a certain altitude near an airport or climbing to an altitude before reaching a route or direct-to waypoint (Figure 3-50).
-
Page 59
Turn the small right knob to select ‘Above Wpt’ (AGL) or ‘MSL’, (Figure 3-52) and press the ENT Key. ‘Above Wpt’ uses the altitude of a destination airport as stored in the Jeppesen NavData Card. ‘MSL’ lets the pilot set a specific target altitude for any waypoint category: airport, VOR, NDB, intersection, or user waypoint. -
Page 60
SECTION 3 NAV PAGES With the profile set, the vertical speed required (VSR) is displayed on the Vertical Navigation Page. Expect the following to occur when using the vertical navigation feature: • At one minute prior to reaching the initial descent point, a message ‘Approaching VNAV Profile’… -
Page 61: Section 4: Direct-To Navigation
SECTION 4: DIRECT-TO NAVIGATION 4.1 OVERVIEW The GNS 430’ s direct-to function provides a quick method of setting a course to a destination waypoint. Once a direct-to is activated, the GNS 430 establishes a point-to-point course line (great circle) from the present position to the selected direct-to destination.
-
Page 62
SECTION 4 DIRECT-TO NAVIGATION Selecting a Destination by Facility Name or City In addition to selecting a destination by identifier, the Select Direct-to Waypoint Page (Figure 4-4) also allows the pilot to select airports, VORs, and NDBs by facility name or city location. -
Page 63
To select a direct-to destination from the active flight plan: Press the Direct-to Key. The Select Direct-to Waypoint Page appears, with the waypoint identifier field highlighted. Turn the large right knob to highlight the flight plan (FPL) field (Figure 4-6). Figure 4-6 Highlighted Flight Plan Field Turn the small right knob to display a window showing all waypoints in the active flight plan… -
Page 64
SECTION 4 DIRECT-TO NAVIGATION Shortcuts Shortcuts are available when using the Direct-to Key, allowing the pilot to bypass the use of the small and large right knobs to enter the destination waypoint’ s identifier. A direct-to can be performed from any page displaying a single waypoint identifier (such as the WPT pages for airports and NAVAIDs). -
Page 65
Selecting a Direct-to destination from the Map Page Direct-to destinations may also be selected from the Map Page. If no airport, NAVAID, or user waypoint exists at the desired location, a waypoint named ‘+MAP’ is automatically created at the location of the panning pointer. -
Page 66
SECTION 4 DIRECT-TO NAVIGATION Specifying a Course to a Waypoint When performing a direct-to, the GNS 430 sets a direct great circle course to the selected destination. The course to the destination can also be manually defined using the ‘CRS’ course field on the Select Direct-to Waypoint Page. To manually define the direct-to course: Press the Direct-to Key. -
Page 67: Section 5: Flight Plans
SECTION 5: FLIGHT PLANS The GNS 430 lets the pilot create up to 20 different flight plans, with up to 31 waypoints in each flight plan. The Flight Plan Page Group consists of two pages, (Active Flight Plan Page, Figure 5-1, and Flight Plan Catalog Page, Figure 5-2) accessed by pressing the FPL Key.
-
Page 68
SECTION 5 FLIGHT PLANS A blank Flight Plan Page appears for the first empty storage location (Figure 5-4). Use the small and large right knobs to enter the identifier of the departure waypoint and press the ENT Key. Figure 5-4 Flight Plan Page Repeat step 4 above to enter the identifier for each additional flight plan waypoint. -
Page 69
To delete a waypoint from an existing flight plan: Press the FPL Key and turn the small right knob to display the Flight Plan Catalog Page. Press the small right knob to activate the cursor. Turn the large right knob to highlight the desired flight plan and press the ENT Key. -
Page 70
SECTION 5 FLIGHT PLANS Activating Flight Plans Once a flight plan is defined through the Flight Plan Catalog Page (using the steps outlined previously in this section), it may be activated for navigation. Activating the flight plan places it into ‘flight plan 00’ and overwrites any previous information at that location. -
Page 71
Copying Flight Plans To save a flight plan currently located in ‘flight plan 00’, copy it to an open catalog location (1-19) before the flight plan is cancelled, overwritten, or erased. To copy a flight plan to another flight plan catalog location: From the Active Flight Plan Page, press the MENU Key to display the Active Flight Plan… -
Page 72
400-or 500-series Garmin unit. Some crossfill operations can be done automatically. If both units are set to ‘auto’, a change in the direct-to destination or active flight plan on one unit is seen on the other. -
Page 73
The ‘Cross-side’ field allows the pilot to designate the sending and receiving units in a crossfill operation. Turn the large right knob to select the ‘Cross-side’ field, then turn the small right knob to select ‘To’ or ‘From’ (Figure 5-15). Press the ENT Key to confirm the selection. -
Page 74: Active Flight Plan Page
SECTION 5 FLIGHT PLANS • ‘Sort List By Number?’/’Sort List by Comment?’ — Allows the pilot to sort numerically by the flight plan number or sort alphanumerically based upon the comment assigned to each flight plan. When one option is selected, the other option appears on the Flight Plan Catalog Page Menu.
-
Page 75
Activate Leg which is currently used for navigation guidance). Allows the pilot to transfer the active flight plan between two 400- or 500-series Garmin units Crossfill in a dual unit installation. See Section 10.2, Flight Planning: Crossfill for additional information on this feature. -
Page 76
SECTION 5 FLIGHT PLANS The data fields for DTK and DIS are user-selectable and may be changed to display cumulative distance (CUM) to each waypoint, estimated time of arrival (ETA), estimated time enroute (ETE), or enroute safe altitude (ESA). To change a data field on the Active Flight Plan Page: With the Active Flight Plan Page displayed, press the MENU Key to display the Active Flight… -
Page 77
To select an approach for a direct-to or flight plan destination airport: Choose the ‘Select Approach?’ option from the Active Flight Plan Page Menu (Figure 5-24) and press the ENT Key. Figure 5-24 Active Flight Plan Page Menu A window appears listing the available approaches (Figure 5-25) for the destination airport. -
Page 78
SECTION 5 FLIGHT PLANS To select an arrival for a direct-to or flight plan destination airport: Select the ‘Select Arrival?’ option from the Active Flight Plan Page Menu (Figure 5-27) and press the ENT Key. Figure 5-27 Active Flight Plan Page Menu A window appears listing the available arrivals (Figure 5-28) for the destination airport. -
Page 79
To remove an approach, arrival, or departure from the active flight plan: Select the ‘Remove Approach?’, ‘Remove Arrival?’, or ‘Remove Departure?’ option from the Active Flight Plan Page Menu (Figure 5-30) and press the ENT Key. Figure 5-30 Active Flight Plan Page Menu A confirmation window appears listing the procedure to be removed. -
Page 80
SECTION 5 FLIGHT PLANS Shortcuts A number of shortcuts are available to save time when using the Active Flight Plan Page. These shortcuts speed the process of removing approaches, departures, and arrivals, and aid in selecting a specific flight plan leg for navigation guidance. -
Page 81
The ‘Activate Leg?’ option is discussed previously in this section, which allows the pilot to specify which leg of the flight plan is used for navigation guidance. A shortcut also exists for this operation, using the Direct-to Key. To activate a specific leg of the active flight plan: Press the small right knob to activate the cursor and turn the large right knob to… -
Page 82
SECTION 5 FLIGHT PLANS Blank Page 5-16 GNS 430(A) Pilot’s Guide and Reference 190-00140-00 Rev. P… -
Page 83: Section 6: Procedures
SECTION 6: PROCEDURES 6.1 APPROACHES, DEPARTURES, AND ARRIVALS The GNS 430 allows the pilot to fly non-precision and precision approaches to airports with published instrument approach procedures. All available approaches are stored on the Jeppesen NavData Card, and are automatically updated when the new card is inserted into the GNS 430.
-
Page 84
SECTION 6 PROCEDURES Turn the large right knob to highlight ‘Load?’ or ‘Activate?’ (approaches only) and press the ENT Key. (‘Load?’ adds the procedure to the flight plan without immediately using it for navigation guidance. This allows the pilot to continue navigating the original flight plan, but keeps the procedure available on the Active Flight Plan Page for quick activation when… -
Page 85
Another Procedures Page option allows the pilot to activate the final course segment of the approach. This option assumes the pilot will receive vectors to the final approach fix (FAF) and provides guidance to intercept the final course, before reaching the FAF. To activate the approach, with vectors to final: Press the PROC Key to display the Procedures… -
Page 86
SECTION 6 PROCEDURES Select Destination ‘Select’ and ‘Load’ the approach ‘Activate’ the approach DO NOT USE FOR NAVIGATION Figure 6-7 Sample Approach Approach operations on the GNS 430 typically begin with the same basic steps (refer to Figure 6-7 for the following steps): Select the destination airport using the Direct- to Key, or as the last waypoint in the active… -
Page 87
The steps required to set up and fly the approach are detailed below (refer to Figure 6-8 for the following steps): Prior to departing KFDK, the destination (KLYH) is selected using the Direct-to Key or by creating a flight plan terminating at Lynchburg Regional. -
Page 88
SECTION 6 PROCEDURES Flying the Procedure Turn DO NOT USE FOR NAVIGATION Figure 6-12 Sample Approach with Procedure Turn Refer to Figure 6-12 for the following steps: Within 30 nm of the destination airport, the GNS 430 switches from ‘enroute’… -
Page 89
Figure 6-15 Waypoint Alert Fly the outbound course. Approximately one minute after passing the FAF (LYH), the alert message ‘START PROC TRN’ appears in the lower right corner of the screen. Initiate the procedure turn at any time after receiving this alert message. DO NOT USE FOR NAVIGATION … -
Page 90
SECTION 6 PROCEDURES 11) After crossing the FAF, the destination sequences to the MAP (‘RW03’, the runway threshold, see Figure 6-18). Fly toward the MAP. Figure 6-18 Sequence to MAP NOTE: When viewing the Map Page, note that the final course segment is displayed in magenta (the active leg of the flight plan always appears in magenta) and a dashed line extends the course beyond the MAP. -
Page 91
Press the OBS Key. The missed approach holding point (MAHP; in this case ‘SWARM’ intersection) is automatically offered as the destination waypoint (Figure 6-21). Figure 6-21 Missed Approach Holding Point NOTE: In some cases, an additional hold waypoint is added to the missed approach sequence. -
Page 92
SECTION 6 PROCEDURES Flying an Approach with a Hold Starting where the previous example left off, assume weather conditions resulted in a missed approach at Lynchburg Regional. The pilot has decided to divert to Farmville Regional (KFVX) instead (refer to Figure 6-24 for the following steps). -
Page 93
Figure 6-28 Active Flight Plan Page Figure 6-29 Terminal Mode Refer to Figure 6-29 for the following steps. As in the last example, within 30 nm of the airport, the GNS 430 switches from enroute to terminal mode, and the CDI scale transitions from 5.0 to 1.0 nm, full scale deflection. -
Page 94
SECTION 6 PROCEDURES NOTE: If the pilot needs to lose extra altitude or speed by going around the holding pattern again, press the OBS Key to manually suspend waypoint sequencing before crossing the holding waypoint the second time. If this waypoint has already been passed, re-activate the holding pattern using the steps described in Section 5.2. -
Page 95
13) When approaching the FAF, a waypoint alert (‘NEXT DTK 209°’) appears in the lower right corner (Figure 6-34). Make any course adjustments necessary for the final course segment (FAF to MAP). Figure 6-34 Final Approach 14) After crossing the FAF, the destination sequences to the MAP (‘RW21’, the runway threshold). -
Page 96
SECTION 6 PROCEDURES Flying a DME Arc Approach The GPS overlay for a DME arc approach uses additional Jeppesen-provided waypoints to define the arc. These waypoints are indicated by ‘D’ as the first letter in the waypoint name. This is followed by three numbers which indicate the radial the waypoint lies on. -
Page 97
Figure 6-39 Approach Window DO NOT USE FOR NAVIGATION Billard Muni (Topeka, KS) VOR or GPS Rwy 22 Figure 6-40 Terminal Mode Refer to Figure 6-40 for the following steps. Within 30 nm of KTOP, the GNS 430 switches from enroute mode to terminal mode and the CDI scale transitions from 5.0 to 1.0 nm, full scale deflection. -
Page 98
SECTION 6 PROCEDURES The next point in the approach is an intermediate fix, labeled ‘D025G’. When approaching this intermediate fix, a waypoint alert (‘NEXT DTK 205°’) appears in the lower right corner of the screen (Figure 6-43). As the distance to this fix approaches zero, the alert is replaced by a turn advisory (‘TURN TO 205°’). -
Page 99
10) After crossing the FAF, the destination sequences to the MAP (‘RW22’, the runway threshold). With the needle centered, fly toward the MAP, observing the altitude minimums dictated by the approach plate. When viewing the Map Page, note that the final course segment is displayed in magenta (the active leg of the flight plan always appears in magenta) and a dashed line extends the course… -
Page 100
SECTION 6 PROCEDURES To select ‘VECTORS’ from the Transitions Window: Select Billard Municipal (KTOP) as the destination, using the Direct-to Key, or as the last waypoint in a flight plan. Press the PROC Key and select the ‘VOR 22’ approach using the steps outlined in Section 6.1. -
Page 101
DO NOT USE FOR NAVIGATION Figure 6-51 Terminal Mode In this example, assume ATC vectors result in a rectangular course to intercept final, as follows (refer to Figure 6-51 for the following steps): Within 30 nm of KTOP, the GNS 430 switches from enroute mode to terminal mode and the CDI scale transitions from 5.0 to 1.0 nm, full scale deflection. -
Page 102
SECTION 6 PROCEDURES DO NOT USE FOR NAVIGATION Figure 6-55 Approach Mode Refer to Figure 6-55 for the following steps. At 2.0 nm from the FAF (TOP VOR), the GNS 430 switches from terminal mode to approach mode (Figure 6-56). -
Page 103
Course From Fix Flight Plan Legs Certain approach, departure, and arrival procedures in the Jeppesen database contain course from fix flight plan legs. The GNS 430 is able to load these legs into the flight plan along with the rest of the procedure data, and provide navigation along these legs. -
Page 104
SECTION 6 PROCEDURES At 13.0 nm from the FAF, a waypoint alert (‘NEXT DTK 265°’) appears in the lower right corner of the screen. Turn to intercept the final approach course and watch for the CDI needle to begin to center. When approaching the intermediate fix (CF25), a waypoint alert (‘NEXT DTK 265°’) appears. -
Page 105
MISSED APPROACH: Palmdale (CA) AF Plant 42 VOR/DME or GPS Rwy 25 DO NOT USE FOR NAVIGATION MISSED APPROACH Climb to 5000’ outbound via PMD VOR R-282, then climbing RIGHT turn to 7000’ direct PMD VOR and hold. Figure 6-65 Palmdale Missed Approach In this instance, the leg corresponds to the initial phase of the missed approach, which reads ‘Climb to 5000’… -
Page 106
SECTION 6 PROCEDURES When approaching PMD VOR (the missed approach holding point), an alert message in the lower right-hand corner of the screen recommends the holding pattern entry procedure (‘HOLD PARALLEL’). When flying the holding pattern, a timer appears on the Default NAV Page. -
Page 107
Refer to Figure 6-68 for the following steps. Select the departure (CSTL1) from the Procedures Page, then select the departure runway, (RW02 in this example, see Figure 6-69) and transition (GEDIC). Refer to Section 6.1 for instructions on selecting departures. Figure 6-69 Runway Window When departing the airfield, ‘NEXT DTK 026°’… -
Page 108: Ils Approaches
SECTION 6 PROCEDURES 6.3 ILS APPROACHES Precision approaches can be performed with the GNS 430’ s built-in VLOC (VOR/localizer/glideslope) receivers. The GPS receiver can be used for guidance prior to reaching the final approach fix, but once there, the proper frequency must be selected on the VLOC Window (left side of screen) and the CDI output set to ‘VLOC’.
-
Page 109
The automatic switch from GPS to VLOC occurs gradually to prevent abrupt CDI changes when coupled to an autopilot. The CDI selection can also be changed manually by pressing the CDI Key. Once the switch from GPS to VLOC has occurred, either automatically or manually, it does not automatically switch again until the approach is reactivated or another approach is selected. -
Page 110
SECTION 6 PROCEDURES Press the PROC Key and select the ‘ILS 21’ approach (Figure 6-75) using the steps outlined in Section 6.1. Figure 6-75 Approach Window From the Transitions Window, select ‘SHUTR’ as the IAF (Figure 6-76). Also, select ‘Load?’ (or ‘Activate?’, if already cleared for the approach). -
Page 111
Within 30 nm of KFLG, the GNS 430 switches from enroute mode to terminal mode and the CDI scale transitions from 5.0 to 1.0 nm, full scale deflection. If the approach has not yet been activated, (in steps on the preceding page), do so when cleared for the approach (Figure 6-78). -
Page 112
SECTION 6 PROCEDURES DO NOT USE FOR NAVIGATION Figure 6-82 ILS Approach Course Refer to Figure 6-82 for the following steps. Initiate the procedure turn. The GNS 430 does not provide guidance through the turn. (The procedure turn is displayed on the Map Page and indicated as the active leg on the Default NAV Page and the Active Flight Plan Page.) After approximately one minute, make a turn… -
Page 113
DO NOT USE FOR NAVIGATION Figure 6-85 Final Approach, Flagstaff Refer to Figure 6-85 for the following steps. 12) When approaching SHUTR, a waypoint alert (‘NEXT DTK 210°’) appears in the lower right corner of the screen (Figure 6-84). 13) After crossing SHUTR, the destination sequences to the MAP (‘RW21’, the runway threshold, see Figure 6-86). -
Page 114
SECTION 6 PROCEDURES 15) After crossing the MAP, ‘SUSP’ appears above the OBS Key (Figure 6-88), indicating that automatic sequencing of approach waypoints is suspended at the MAP. A ‘FROM’ indication is displayed on the CDI and Default NAV Page, but course guidance along the final approach course continues. -
Page 115
Points to Remember for Localizer-based Approaches • The default factory setting allows the CDI output to automatically switch from the GPS receiver to the VLOC receiver. If the ‘ILS CDI Capture’ setting is changed to ‘Manual’, the pilot must determine when to select GPS or VLOC guidance during the approach. -
Page 116
SECTION 6 PROCEDURES Blank Page 6-34 GNS 430(A) Pilot’s Guide and Reference 190-00140-00 Rev. P… -
Page 117: Section 7: Wpt Pages
SECTION 7: WPT PAGES 7.1 WPT PAGE GROUP Section 3.1 introduced the GNS 430’ s main page groups (Table 7-1)—NAV, WPT, AUX, NRST—and described each page in the NAV group. This second page group (WPT) provides information for the thousands of airports, VORs, NDBs, intersections, runways, frequencies, and procedures stored on the Jeppesen NavData Card.
-
Page 118
SECTION 7 WPT PAGES To enter a waypoint identifier: Select the desired WPT page and press the small right knob to activate the cursor. Turn the small right knob to select the first character of the waypoint’s identifier. Turn the large right knob to select the next character field. -
Page 119
Duplicate Waypoints Once the identifier, facility name, or location is entered, all six airport pages display information for the selected airport. When entering an identifier, facility name, or location, the GNS 430’ s Spell’N’Find feature scrolls through the database, displaying those waypoints matching the characters that have been entered to that point. -
Page 120: Airport Location Page
SECTION 7 WPT PAGES 7.2 AIRPORT LOCATION PAGE The Airport Location Page (Figure 7-8) displays the latitude, longitude, and elevation of the selected airport. The Airport Location Page also displays facility name and location, as well as fuel availability, available approaches, radar coverage, and airspace type.
-
Page 121: Airport Runway Page
7.3 AIRPORT RUNWAy PAGE The Airport Runway Page (Figure 7-9) displays runway designations, length, surface type, and lighting for the selected airport. A map image of the runway layout and surrounding area is also displayed on the Airport Runway Page. The map image range appears in the lower left corner and is adjustable using the RNG Key.
-
Page 122: Airport Frequency Page
SECTION 7 WPT PAGES To adjust the range of the map image: Press the down arrow of the RNG Key to display a smaller map area. Press the up arrow of the RNG Key to display a larger map area. The following descriptions and abbreviations are used on the Airport Runway Page: •…
-
Page 123
Turn the large right knob to scroll through the list, placing the cursor on the desired frequency (Figure 7-13). If there are more frequencies in the list than can be displayed on the screen, a scroll bar (Figure 7-12) along the right-hand side of the screen indicates the cursor’s position within the list. -
Page 124: Airport Approach Page
SECTION 7 WPT PAGES The following descriptions and abbreviations are used on the Airport Frequency Page: • Type — Usage type: Public, Heliport, Military, or Private • Frequency — Communication frequencies which may include restrictions: Approach Arrival Class C Terminal Communication frequencies without restrictions: ATIS ASOS…
-
Page 125
Turn the small right knob to display a window of available approaches for the selected airport (Figure 7-18). Continue turning the small right knob to select the desired approach. Figure 7-18 Approach Window Press the ENT Key. The cursor moves to the transitions (TRANS) field. -
Page 126
SECTION 7 WPT PAGES Airport Approach Page Options The following options are available for the Airport Approach Page, by pressing the MENU Key: ‘Load into Active FPL?’ allows the pilot to load the selected approach into the active flight plan without activating it. -
Page 127: Airport Arrival Page
7.6 AIRPORT ARRIVAL PAGE The Airport Arrival Page (Figure 7-22) shows the available Airport Standard Terminal Arrival (STAR) procedures for the selected airport. Where multiple transitions or runways are associated with the arrival procedure, that information may also be displayed. A map image provides a layout diagram for each arrival, transition, and runway.
-
Page 128
SECTION 7 WPT PAGES Turn the small right knob to display a window of available runways (Figure 7-25). Continue turning the small right knob to select the desired runway. (‘ALL’ may appear in the runway field, indicating the arrival procedure applies to all runways. -
Page 129: Airport Departure Page
7.7 AIRPORT DEPARTURE PAGE The Airport Departure Page (Figure 7-27) shows the available Airport Standard Instrument Departure (SID) procedures for the selected airport. Where multiple runways or transitions are associated with the departure procedure, that information may also be displayed. A map image provides a layout diagram for each departure, runway, and transition.
-
Page 130: Intersection Page
SECTION 7 WPT PAGES Airport Departure Page Options The following option is available for the Airport Departure Page, by pressing the MENU Key: ‘Load into Active FPL?’ allows the pilot to load the selected departure into the active flight plan. This is identical to loading a departure procedure from the Procedures Page, as described in Section 6.1.
-
Page 131: Ndb Page
7.9 NDB PAGE The NDB Page displays the facility name, city, region/country, latitude, and longitude for the selected NDB (Figure 7-32). The NDB Page also displays the frequency and a weather broadcast indication (if applicable). As mentioned in Section 7.1, NDBs may be selected by identifier, facility name, or location (city).
-
Page 132
SECTION 7 WPT PAGES To select a VOR frequency from the VOR Page: Select the VOR Page from the WPT Page Group, as described in Section 7.1. Press the small right knob momentarily to place the cursor on the VOR identifier field (Figure 7-34). -
Page 133: Creating User Waypoints
7.11 USER WAyPOINT PAGE In addition to the airport, VOR, NDB, and intersection information contained in the Jeppesen NavData Card, the GNS 430 allows the pilot to store up to 1,000 user- defined waypoints. The User Waypoint Page (Figure 7-37) displays the waypoint name (up to five characters long), identifier, radial from two reference waypoints, and distance from one reference waypoint, along with the user waypoint’…
-
Page 134
SECTION 7 WPT PAGES Turn the large right knob to highlight the position field at the bottom of the page. Use the small and large right knobs to enter the position coordinates for the new waypoint (Figure 7-40). Figure 7-40 Present Position Field Selected Press the ENT Key to accept the selected position. -
Page 135: Capture And Save Present Position
Turn the large right knob to highlight ‘Create?’ (Figure 7-42) and press the ENT Key. Figure 7-42 ‘Create?’ Highlighted Press the small right knob to remove the flashing cursor. NOTE: The GNS 430 allows the pilot to create a new user waypoint at a defined radial and distance from the present position.
-
Page 136: Modifying User Waypoints
SECTION 7 WPT PAGES Press the ENT Key to capture the position and display the User Waypoint Page (Figure 7-44). Figure 7-44 User Waypoint Page A four-digit name is automatically assigned to the waypoint. To change this name, turn the large right knob to highlight the name field, then use the small and large right knobs to select a new name.
-
Page 137
To modify a user waypoint by changing reference waypoint information: With the User Waypoint Page displayed, press the small right knob to activate the cursor. Use the small and large right knobs to enter the name of the desired waypoint and press the ENT Key. -
Page 138
SECTION 7 WPT PAGES User Waypoint Page Options The following User Waypoint Page options are available by pressing the MENU Key: ‘View User Waypoint List?’ displays a list of all user waypoints currently stored in memory. To view a list of all user waypoints: From the User Waypoint Page, press the MENU Key to display the User Waypoint Page Menu. -
Page 139
User Waypoint List The User Waypoint List (Figure 7-52) allows the pilot to review, modify, rename, or delete a selected user waypoint, or to delete all user waypoints currently stored in memory. The top of the page shows the number of waypoints used and available memory. -
Page 140
SECTION 7 WPT PAGES To delete a user waypoint from the User Waypoint List: Select the User Waypoint List, as described in this section. Turn the large right knob to highlight the desired user waypoint. Press the CLR Key to display a ‘delete waypoint’ confirmation window (Figure 7-55). -
Page 141: Section 8: Nrst Pages
SECTION 8: NRST PAGES 8.1 NRST PAGE GROUP Section 3.1 introduced the GNS 430’ s main page groups (Table 8-1)—NAV, WPT, AUX, NRST—and described each page in the NAV group. This fourth page group (NRST) provides detailed information for the nine nearest airports, VORs, NDBs, intersections, and user waypoints within 200 nm of the current position.
-
Page 142
SECTION 8 NRST PAGES Not all nine nearest airports, VORs, NDBs, intersections, or user waypoints can be displayed on the corresponding NRST page at one time. The Nearest Airport Page displays detailed information for three nearest airports, with a scroll bar along the right-hand side of the page indicating which part of the list is currently being viewed. -
Page 143
Navigating to a Nearby Waypoint The NRST pages can be used in conjunction with the GNS 430’ s direct-to function to quickly set a course to a nearby facility and can provide navigation to the nearest airport in case of an in-flight emergency. To select a nearby airport, VOR, NDB, intersection, or user waypoint as a direct- to destination:… -
Page 144: Nearest Airport Page
SECTION 8 NRST PAGES 8.2 NEAREST AIRPORT PAGE The Nearest Airport Page displays the identifier, symbol, bearing, and distance to the nine nearest airports (within 200 nm of the present position). For each airport listed, the Nearest Airport Page also indicates the best available approach, common traffic advisory frequency (CTAF), and the length of the longest runway (Figure 8-9).
-
Page 145
Press the COM Flip-flop Key to activate the selected frequency (Figure 8-12). Figure 8-12 Frequency Moved to Active Field Press the small right knob to remove the flashing cursor. Additional communication frequencies, runway infor- mation, and more is available from the Nearest Airport Page by highlighting the identifier of the desired airport and pressing the ENT Key. -
Page 146: Nearest Intersection Page
SECTION 8 NRST PAGES 8.3 NEAREST INTERSECTION PAGE The Nearest Intersection Page (Figure 8-16) displays the identifier, symbol, bearing, and distance to the nine nearest intersections (within 200 nm of the present position). To view additional information for a nearby intersection, start from the Nearest Intersection Page and follow the preceding steps 2 through 4.
-
Page 147: Nearest Vor Page
8.5 NEAREST VOR PAGE The Nearest VOR Page (Figure 8-18) displays the identifier, symbol, bearing, and distance to the nine nearest VORs (within 200 nm of the present position). For each VOR listed, the nearest VOR Page also indicates the frequency and may be used to quickly tune the VLOC receiver to the nearby VOR.
-
Page 148: Nearest User Waypoint Page
SECTION 8 NRST PAGES To view additional information for a nearby VOR: Select the nearest VOR Page, using the steps outlined in Section 8.1. Press the small right knob to activate the cursor. Turn the large right knob to scroll through the list, highlighting the identifier of the desired VOR (Figure 8-20).
-
Page 149: Nearest Center (Artcc) Page
8.7 NEAREST CENTER (ARTCC) PAGE The Nearest Center Page (Figure 8-22) displays the facility name, bearing to, and distance to the five nearest ARTCC points of communication (within 200 nm of the present position). For each ARTCC listed, the Nearest Center Page also indicates the frequency(ies) and may be used to quickly tune the COM transceiver to the center’…
-
Page 150: Nearest Flight Service Station (Fss) Page
SECTION 8 NRST PAGES 8.8 NEAREST FLIGHT SERVICE STATION (FSS) PAGE The Nearest Flight Service Station Page (Figure 8-25) displays the facility name, bearing to, and distance to the five nearest FSS points of communication (within 200 nm of the present position). For each FSS listed, the Nearest Flight Service Station Page also indicates the frequency(ies) and may be used to quickly tune the COM transceiver to the FSS’…
-
Page 151: Nearest Airspace Page
Press the ENT Key to place the selected frequency in the standby field of the COM or VLOC Window (figure 8-28). Figure 8-28 Frequency Moved to Standby Field Press the COM Flip-flop or VLOC Flip-flop Key, as appropriate, to activate the selected frequency.
-
Page 152
SECTION 8 NRST PAGES • If the aircraft has entered an airspace, the message ‘Inside Airspace’ appears (Figure 8-30). The Nearest Airspace Page shows ‘Inside of airspace’. Figure 8-30 Airspace Messages Note that the airspace alerts are based on three- dimensional data (latitude, longitude, and altitude) to avoid nuisance alerts. -
Page 153
Turn the large right knob to scroll through the list, highlighting the desired airspace (Figure 8-33). Figure 8-33 Airspace Highlighted Press the ENT Key to display the Airspace Page for the selected nearby airspace (Figure 8-34). Airspace Name Status and Floor/Ceiling and Type Time to Entry… -
Page 154
SECTION 8 NRST PAGES To return to the Airspace Page, turn the large right knob to highlight ‘Done?’ and press the ENT Key (or press the CLR Key). To return to the Nearest Airspace Page, turn the large right knob to highlight ‘Done?’ and press the ENT Key (or press the CLR Key). -
Page 155: Section 9: Vloc Receiver
SECTION 9: VLOC RECEIVER 9.1 VLOC (VOR/LOCALIZER/GLIDESLOPE) RECEIVER OPERATIONS The GNS 430 includes digitally-tuned VOR/localizer and glideslope receivers with the desired frequency selected in the VLOC Window, along the left-hand side of the display (Figure 9-1). Frequency selection is performed by pressing the small left knob and turning the small and large left knobs to select the desired frequency.
-
Page 156
SECTION 9 VLOC RECEIVER Turn the large left knob to select the desired megahertz (MHz) value. For example, the ‘117’ portion of the frequency ‘117.60’ (Figure 9-3). Figure 9-3 Select VOR Megahertz Frequency Turn the small left knob to select the desired kilohertz (kHz) value. -
Page 157
Press the ENT Key to place the frequency in the standby field of the VLOC Window (Figure 9-6). Figure 9-6 Frequency in Standby Field Press the VLOC Flip-flop Key to activate the selected frequency. Press the small right knob to remove the flashing cursor. -
Page 158
SECTION 9 VLOC RECEIVER Turn the large right knob to highlight ‘Load?’ or ‘Activate?’ (Figure 9-8) and press the ENT Key. (‘Load?’ adds the procedure to the flight plan without immediately using it for navigation guidance. This allows the pilot to continue navigating the original flight plan, but keeps the procedure available on the Active Flight Plan Page for quick activation when… -
Page 159: Section 10: Aux Pages
SECTION 10: AUX PAGES 10.1 AUX PAGE GROUP Section 3.1 introduced the GNS 430’ s main page groups (Table 10-1)—NAV, WPT, AUX, NRST—and described each page in the NAV group. The third page group (AUX) allows the pilot to change unit settings. The AUX pages (Figure 10-1) also provide E6B functions, such as trip planning, fuel planning, density altitude, true airspeed, and winds aloft calculations.
-
Page 160: Flight Planning Page
SECTION 10 AUX PAGES 10.2 FLIGHT PLANNING PAGE The Flight Planning Page (Figure 10-4) provides access (via menu options) to E6B functions for fuel planning, trip planning, density altitude/true airspeed/winds aloft calculations and a ‘Crossfill’ function to transfer flight plans/user waypoints to a second GNS 430. When a menu option is selected, the corresponding page appears providing additional information and features.
-
Page 161
• Crossfill — Allows the pilot to transfer the active flight plan, any stored flight plan, a user waypoint, or all user waypoints between two 400/500-series Garmin units in a dual-unit installation. See Section 5.1, Flight Plan Catalog Options and information following in this section for details. -
Page 162
SECTION 10 AUX PAGES Flight Planning Page: Fuel Planning To perform fuel planning operations: Select ‘Fuel Planning’ from the Flight Planning Page, using the steps described in Section 10.2. The current fuel planning ‘mode’ is displayed at the top of the page (Figure 10-7): ‘POINT TO POINT’… -
Page 163
If the fuel management system does not enter the data automatically, turn the large right knob to highlight the fuel on board (FOB) field (Figure 10-11). Figure 10-11 FOB Highlighted Use the small and large right knobs to enter the amount of fuel on board. Press the ENT Key when finished. -
Page 164
SECTION 10 AUX PAGES Fuel planning figures can be entered and displayed based upon one of three possible configurations: • No fuel sensors connected — In this instance fuel flow is manually entered and is used to calculate fuel on board. When fuel flow or fuel on board is manually entered, the figures are retained the next time the page is displayed (with fuel on board continuously recalculated). -
Page 165
Turn the large right knob to highlight the departure time (DEP TIME) field. Use the small and large right knobs to enter the departure time. Press the ENT Key when finished. (Departure time may be entered in local or UTC time, depending upon unit settings, see Section 10.4, Setup 1 Page: Date/ Time.) The flashing cursor moves to the ground speed… -
Page 166
SECTION 10 AUX PAGES The flashing cursor moves to the barometric pressure (BARO) field. Use the small and large right knobs to enter the barometric pressure (altimeter setting). Press the ENT Key when finished. The flashing cursor moves to the total air temperature (TAT) field. -
Page 167
‘Manual’ (Figure 10-23). ‘Auto’ automatically transfers any selection of (or any change to) a direct-to destination or active flight plan to a second 400/500 series Garmin unit. 190-00140-00 Rev. P Figure 10-23 Crossfill Method Window NOTE: Crossfill requires both 400 and/or 500 Series units to have the same Jeppesen NavData database cycle number. -
Page 168
SECTION 10 AUX PAGES • Active Flight Plan — Transfer the active flight plan to/from a second 400/500-series Garmin unit in a dual unit installation. This option is the default when selecting ‘Crossfill’ from the Active Flight Plan Page. • Flight Plan — Transfer any stored flight plan to/from a second 400/500-series unit, by selecting the flight plan by number. -
Page 169
The flashing cursor moves to the type field under the new message (Figure 10-27). Turn the small right knob to display a window of available options, (Figure 10-28): Event, One Time, Periodic. Press the ENT Key to select. Figure 10-27 Type Field Highlighted Figure 10-28 Type Window The flashing cursor moves to the time/date field. -
Page 170: Utility Page
SECTION 10 AUX PAGES 10.3 UTILITy PAGE The Utility Page (Figure 10-29) provides access (via ‘menu options’) to checklists, a count down/up timer, trip timers, trip statistics, RAIM (Receiver Autonomous Integrity Monitoring) prediction, sunrise/sunset time calculations, software versions, database versions, and terrain database version information.
-
Page 171
• RAIM Prediction — Predicts if GPS coverage is available for the current location or at a specified waypoint at any time and date. Receiver Autonomous Integrity Monitoring (RAIM) performs checks to ensure that the GNS 430 will have adequate satellite geometry during the flight. -
Page 172
SECTION 10 AUX PAGES Utility Page: Checklists To create a checklist: Select ‘Checklist’ from the Utility Page (Figure 10-33), using the steps described at the beginning of this section (10.3). Press the ENT Key to display a list of checklists. Figure 10-33 Checklists Highlighted Press the MENU Key to display an options menu. -
Page 173
To insert a checklist step into an existing checklist: With the Checklists Page displayed, turn the large right knob to select the desired checklist and press the ENT Key. Turn the large right knob to highlight the existing checklist entry which immediately follows the new checklist step. -
Page 174
SECTION 10 AUX PAGES For a count down timer, turn the large right knob to highlight the time field. Use the small and large right knobs to enter the count down time—in hours, minutes, and seconds. Press the ENT Key when finished. To stop the generic timer, turn the large right knob to highlight ‘Stop?’… -
Page 175
Utility Page: Trip Statistics To reset trip statistics readouts: Select ‘Trip Statistics’ from the Utility Page (Figure 10-40), using the steps described at the beginning of this section. Figure 10-40 Trip Statistics Highlighted Press the MENU Key to display the Trip Statistics Page Menu with several reset options (Figure 10-41): Figure 10-41 Trip Statistics Page Menu… -
Page 176
SECTION 10 AUX PAGES The flashing cursor moves to the arrival date field. Use the small and large right knobs to enter the date for which the pilot wants to determine RAIM availability. Press the ENT Key when finished. The flashing cursor moves to the arrival time field. -
Page 177
Press the ENT Key to calculate sunrise and sunset times for the selected location and date (Figure 10-47). Figure 10-47 Sunrise/Sunset Page Utility Page: Software Versions The Software Versions Page (Figure 10-48) displays software version information for each of the various subsystems contained within the GNS 430. -
Page 178: Setup 1 Page
SECTION 10 AUX PAGES 10.4 SETUP 1 PAGE The Setup 1 Page (Figure 10-51) provides access (via menu options) to airspace alarms, CDI scale adjustment, an arrival alarm, units of measure settings, position formats, map datums, and settings for local or UTC time display. When a menu option is selected, the corresponding page appears providing access to the various unit settings.
-
Page 179
CDI Scales and Corresponding Flight Phases: Oceanic Enroute Terminal Approach Figure 10-54 CDI Scales During approach operations the CDI scale gradually ramps down even further, to 0.3 nm. This transition normally occurs within 2.0 nm of the final approach fix (FAF). If a lower CDI scale setting is selected (i.e., 1.0 nm or 0.3 nm) the higher scale settings are not selected during any phase of flight. -
Page 180
SECTION 10 AUX PAGES • ‘Position/Map Datum’ — Configures position readout information to the desired position format. The GNS 430 uses the map datum WGS 84. Note that using a map datum that does not match the charts used by the pilot can result in significant differences in position information. -
Page 181
Setup 1 Page: CDI Scale/Alarms To change the CDI scale: Select ‘CDI/Alarms’ from the Setup 1 Page (Figure 10-58), using the steps described at the beginning of this section. Figure 10-58 CDI/Alarms Highlighted The flashing cursor highlights the ‘Selected CDI’ field. -
Page 182
SECTION 10 AUX PAGES To set the arrival alarm and alarm distance: Select ‘CDI/Alarms’ from the Setup 1 Page, using the steps described at the beginning of this section. Turn the large right knob to highlight the ‘On’/’Off’ field (directly below ‘Arrival Alarm’). Turn the small right knob to select ‘On’… -
Page 183
Figure 10-63 Units Mag/Var Page The following categories, and corresponding units of measure, are available: • DIS, SPD — Distance and speed in Nautical (nautical miles/knots), Statute (miles/miles per hour), or Metric (kilometers/kilometers per hour) terms • ALT, VS — Altitude and vertical speed in Feet/feet per minute, Meters/meters per minute, or Meters/ meters per second •… -
Page 184
SECTION 10 AUX PAGES To display the map datum: Select ‘Position Format/Map Datum’ from the Setup 1 Page, using the steps described at the beginning of this section. The WGS 84 map datum is displayed, this field cannot be changed. Figure 10-66 WGS 84 Map Datum Setup 1 Page: Date/Time To display local time or UTC:… -
Page 185: Setup 2 Page
Restoring Factory Settings When making changes to any Setup 1 Page option, a ‘Restore Defaults?’ menu selection allows the pilot to restore the original factory settings (for the selected option only). For example, with the Airspace Alarms Page displayed, the ‘Restore Defaults?’ option restores all Airspace Alarms Page settings to the original factory values.
-
Page 186
SECTION 10 AUX PAGES Turn the large right knob to select the desired menu option (Figure 10-71), and press the ENT Key (Figure 10-72). Figure 10-71 Nearest Airport Criteria Highlighted Figure 10-72 Nearest Airport Criteria Page The following menu options are available: •… -
Page 187
Figure 10-74 Backlight Mode Window If ‘Manual’ is selected, the flashing cursor moves to the backlight level field. Turn the small right knob to select the desired level. Press the ENT Key to accept the selection. To change the display contrast: Select ‘Display’… -
Page 188
SECTION 10 AUX PAGES The flashing cursor moves to the minimum runway length field (Figure 10-77). To enter a different minimum runway length, use the small and large right knobs to enter the desired length. Press the ENT Key when finished. -
Page 189: Section 11: Terrain
TERRAIN uses terrain and obstacle information supplied by government sources. The data undergoes verification by Garmin to confirm accuracy of the content, per TSO-C151b. However, the displayed information should never be understood as being all-inclusive. GNS 430(A) Pilot’s Guide and Reference…
-
Page 190
SECTION 11 TERRAIN TERRAIN Alerting TERRAIN uses information provided from the GPS receiver to provide a horizontal position and altitude. GPS altitude is derived from satellite measurements. GPS altitude is converted to a mean sea level (MSL)-based altitude (GPS-MSL altitude) and is used to determine TERRAIN alerts. -
Page 191
11.2 TERRAIN PAGE See Section 3.5 for a complete description of the TERRAIN Page and its operation. TERRAIN Symbols The symbols and colors in Figure 11-1 and Table 11-1 are used to represent obstacles and potential impact points on the TERRAIN Page. TERRAIN uses yellow (caution) and red (warning) to depict terrain information relative to aircraft altitude. -
Page 192: Terrain Alerts
SECTION 11 TERRAIN 11.3 TERRAIN ALERTS TERRAIN Alerts are issued when flight conditions meet parameters that are set within TERRAIN software algorithms. TERRAIN alerts typically employ either an ADVISORY or a CAUTION alert severity level, or both. When an alert is issued, visual annunciations are displayed.
-
Page 193
Table 11-2 shows the possible TERRAIN alert types with corresponding annunciations. Alert Type TERRAIN Failure TERRAIN Inhibited TERRAIN Not Available Required Terrain Clearance (RTC) Advisory Required Terrain Clearance (RTC) Caution Imminent Terrain Impact (ITI) Advisory Imminent Terrain Impact (ITI) Caution Required Obstacle Clearance (ROC) Advisory Required Obstacle Clearance (ROC) Caution Imminent Obstacle Impact (IOI) Advisory… -
Page 194
SECTION 11 TERRAIN Table 11-3 shows system status annunciations that may also be issued: Alert Type TERRAIN System Test Fail TERRAIN Alerting is disabled No GPS position or excessively degraded GPS signal System Test in progress System Test pass Forward Looking Terrain Avoidance The Forward Looking Terrain Avoidance (FLTA) alert is used by TERRAIN and is composed of: •… -
Page 195
Premature Descent Alerting A Premature Descent Alert (PDA) is issued when the system detects that the aircraft is significantly below the normal approach path to a runway (Figure 11-5). PDA alerting begins when the aircraft is within 15 nm of the destination airport. PDA alerting ends when the aircraft is either: •… -
Page 196
SECTION 11 TERRAIN TERRAIN NOT AVAILABLE ALERT TERRAIN requires a 3-D GPS navigation solution along with specific vertical accuracy minimums. Should the navigation solution become degraded or if the aircraft is out of the database coverage area, the annunciation ‘TER N/A’ is generated in the annunciation window and ‘TERRAIN NOT AVAILABLE’… -
Page 197: Database Information For Terrain
General Database Information Garmin TERRAIN uses terrain and obstacle information supplied by government sources. The data undergoes verification by Garmin to confirm accuracy of the content, per TSO-C151b. However, the displayed information should never be understood as being all- inclusive. Pilots must familiarize themselves with the appropriate sectional charts for safe flight.
-
Page 198
(compare database cycle numbers to determine if a newer version is available). Updated terrain data cards may be obtained by calling Garmin at one of the numbers listed in the front of this document. Updating terrain/obstacle databases: Acquire a new terrain data card from Garmin. -
Page 199: Section 12: Additional Features
Conditions (VMC). Avoidance maneuvers are not recommended, nor authorized, as a direct result of a TIS intruder display or TIS alert. NOTE: Garmin is not responsible for Mode S geographical coverage. Operation of the ground stations is the responsibility of the FAA. Refer…
-
Page 200
12-2 TIS Limitations NOTE: This section on TIS Limitations is not comprehensive. Garmin recommends the user review the TIS Limitations section of the 3,500 ft Aeronautical Information Manual, Section 1-3-5. -
Page 201
comes between the transponder antenna (usually located on the underside of the aircraft) and the ground-based radar antenna, the signal may be temporarily interrupted. Other limitations and anomalies associated with TIS are described in the AIM, Section 1-3-5. TIS is unavailable at low altitudes in many areas of the U.S., particularly in mountainous regions. -
Page 202
SECTION 12 ADDITIONAL FEATURES TIS Audio Alerting The TIS audio alert is generated when the number of Traffic Advisories (TA) on the GNS 430 display increases from one scan to the next. For example, when the first TA appears on the TIS display, the user is alerted audibly. As long as a single aircraft remains on the TIS display, no further audio alert is generated. -
Page 203
Altitude Deviation Traffic Type Figure 12-4 Traffic Symbol Components Traffic Type Description Traffic This symbol (solid yellow circle) is generated Advisory (TA) when an intruder aircraft approaches on a course that projects to intercept (defined by a 0.5 nm horizontal radius and a relative altitude of ±… -
Page 204
SECTION 12 ADDITIONAL FEATURES • DATA FAIL — ‘DATA FAIL’ is displayed when data is being received from GTX 330 (Figure 12-7), but there was a failure detected in the data stream. The pilot should see the installer for corrective action. -
Page 205
Figure 12-11 Traffic Removed Banner • UNAVAIL — When a 60 second period elapses with no data, TIS is considered to be unavailable. This state is indicated by the text ‘UNAVAIL’ (Figure 12-12). The pilot should be aware that ‘UNAVAIL’ could indicate a TIS coverage limitation due to a line-of-sight situation, a low altitude condition, or a result of flying directly over the radar site… -
Page 206
SECTION 12 ADDITIONAL FEATURES Traffic Page Display Range Various display ranges can be selected for optimal display of TIS traffic information. Changing the display range on the Traffic Page: Press the RNG Key to zoom through the range selections which are: 12/6 nm, 6/2 nm, and 2 Map Page TIS traffic is displayed on the Map Page (Figure 12-15) in addition to the Traffic Page. -
Page 207
Thumbnail Traffic on Map Page The Map Page can display traffic in a thumbnail format in any of the top three data fields on the right-hand side of the Map Page. Displaying Thumbnail Traffic on the Map Page: Turn the small right knob to select the Map Page. -
Page 208
SECTION 12 ADDITIONAL FEATURES Power-Up Test The TIS interface performs an automatic test during power-up. • If the system passes the power-up test, the Standby Screen appears on the Traffic Page. • If the system passes the power-up test and the aircraft is airborne (as determined by system configuration at the time of installation, see the installer for detailed criteria information), traffic is… -
Page 209: Gts 8Xx Traffic Systems
12.2 GTS 8XX TRAFFIC SySTEMS Introduction All information in this section pertains to the display and control of the Garmin GNS 430/GTS 8XX interface, refer to the 400/500 Series Display Interfaces Pilot’ s Guide Addendum (190-00140-10) when interfacing with non-Garmin products…
-
Page 210
SECTION 12 ADDITIONAL FEATURES Pilots should be aware of TAS/TCAS system limitations. If an intruder transponder does not respond to interrogations due to antenna shading or marginal transponder performance, it will not be displayed, or display may be intermittent. Pilots should remain vigilant for traffic at all times when using TAS/TCAS systems for non-transponder equipped airplanes or unresponsive airplanes. -
Page 211
Aural Alerts A TA consists of a displayed traffic symbol (solid yellow circle) and an aural alert. The aural alert announces “traffic”, followed by the intruder aircraft’ s position, altitude relative to own aircraft (“high”, “low”, or “same altitude”), and distance from own aircraft; e.g. “traffic, 12 o’clock, high, 3 miles”. -
Page 212
SECTION 12 ADDITIONAL FEATURES Switching Between Standby and Operating Modes The unit must be in operating mode for traffic to be displayed. The ability to switch out of standby into operating mode on the ground is especially useful for scanning the airspace around the airport before takeoff. -
Page 213
Altitude Display Mode The GTS 8XX has four altitude display modes (Figure 12-24); Normal (±2,700 ft), Above (-2,700 ft to +9,000 ft), Below (-9,000 ft to +2,700 ft), and Unrestricted (±9,900 ft). The GTS 8XX continues to display up to 30 intruder aircraft within its maximum surveillance range, regardless of the altitude display mode selected. -
Page 214
SECTION 12 ADDITIONAL FEATURES Traffic Warning Window When the unit is not on the traffic page and the GTS issues a Traffic Advisory, the Traffic Warning Window (Figure 12-26) is displayed, which shows a small thumbnail map. When the Traffic Warning Window is displayed, press the ENT Key to display the Traffic Page, or press the CLR Key to return to the previous page. -
Page 215
10) Return to the Map Page by pressing the CLR Key. Thumbnail Traffic on Map Page Traffic in a thumbnail format can be displayed in any of the three data fields on the right side of the Map Page (Figure 12-29). Displaying Thumbnail Traffic on the Map Page Turn the small right knob to select the Map… -
Page 216: Weather Data Link Interface
ADDITIONAL FEATURES 12.3 WEATHER DATA LINK INTERFACE This section is written for: • Garmin GNS 430 Main System Software Version 5.01 and later • GDL 49 Main Software Version 2.03 and later • GDL 69/69A Main Software Version 2.14 and later…
-
Page 217
Weather Products The following weather products are available for display on the GNS 430 unit via the Weather Data Link interface: • NEXRAD Data • Graphical METAR Data • Text-based METAR Data • Graphical Temperature/Dewpoint Data • Graphical Wind Data NEXRAD Description WSR-88D weather surveillance radar or NEXRAD (NEXt generation RADar) is a Doppler radar system that… -
Page 218: Nexrad Intensity
SECTION 12 ADDITIONAL FEATURES NEXRAD Intensity Colors are used to identify the different NEXRAD echo intensities (reflectivity) measured in dBZ (decibels of Z). Reflectivity (designated by the letter Z) is the amount of transmitted power returned to the radar receiver. The dBZ values increase as returned signal strength increases.
-
Page 219
Requesting NEXRAD Data NEXRAD data can be requested from the Data Link Page or the Map Page. Requesting NEXRAD data from the Data Link Page: Select the Data Link Page from the AUX Page Group. Press the small right knob to activate the cursor. -
Page 220
SECTION 12 ADDITIONAL FEATURES • Auto Request (GDL 49 Only) — This field is used to set the time interval for the GDL 49 to automatically send a NEXRAD data request. The time options are OFF, 10 min, 15 min, 20 min, 30 min, 45 min, and 1 hour. -
Page 221
Displaying NEXRAD Data on the Weather Page To display NEXRAD Data on the Weather Page: Select the NAV Weather Page (Figure 12-34) using the small and large right knobs. When the GNS 430 unit is configured with the Data Link interface, the Weather Page is the third page in the NAV Page Group (it is the fourth page if a traffic sensor is also configured). -
Page 222
SECTION 12 ADDITIONAL FEATURES Displaying NEXRAD Data on the Map Page When NEXRAD data is received, it is displayed on the Map Page, in addition to the Weather Page and the Default NAV Page. Customizing NEXRAD Data on the Map Page The pilot can customize NEXRAD data on the Map Page by using the Page Menu. -
Page 223
The pilot may use the ‘NEXRAD Off?’ and ‘NEXRAD On?’ fields in the Page Menu (Figure 12-36) to turn off the display of NEXRAD data from the Map Page. Figure 12-36 Map Page Options Menu NOTE: If the GNS 430 is configured for Weather Data Link Interface with a GDL 49 or GDL 69 , pressing the CLR Key while viewing the Map Page reduces the NEXRAD density one… -
Page 224
SECTION 12 ADDITIONAL FEATURES Data Link Request Log Page (GDL 49 Only) The Data Link Request Log Page (Figure 12-39) is used to display the data that was requested. When a request is received, a check mark is placed in the box. Viewing the Data Link Request Log Page: Use the small and large right knobs and select the Data Link Page from the AUX Group of… -
Page 225
• Auto Request — This field is used to set the time interval for the system to automatically send the position. The time options are OFF, 10 min, 15 min, 20 min, 30 min, 45 min, and 1 hr. When an auto request time is selected, the first report is sent after the specified time has elapsed from when the field was set (as opposed to immediately sending a… -
Page 226
SECTION 12 ADDITIONAL FEATURES NOTE: Textual METARs can only be requested by identifier or by flight plan (if the flight plan contains a METAR station identifier). • Center — This field allows the pilot to specify reference points for the request. The following five options are available for the ‘Center’… -
Page 227
Requesting graphical or textual METARs from the Map Page: Select the Map Page. Press the MENU Key. The Map Page Options Menu is displayed (Figure 12-44). Figure 12-44 Map Page Menu Select ‘Request METAR’ and press the ENT Key. The METAR Request Page is displayed. There are four user-selectable parameter fields: Format, Center, Radius, and Position (see preceding pages for detailed information). -
Page 228
SECTION 12 ADDITIONAL FEATURES Weather Legend Page The symbology unique to Graphical METAR, Winds, and Temperature/Dewpoint data is displayed on the Weather Legend Page. The Weather Legend is accessed from the Weather Page. NOTE: All METAR, Wind, and Temp-Dewpoint symbols are depicted at the end of this section. Displaying the Weather Legend: Select the Weather Page and activate the cursor. -
Page 229
Entering an identifier: Select the Data Link Page. Highlight ‘TEXTUAL METAR’ and press the ENT Key. Turn the small right knob and scroll through the list of four letter identifiers. Highlight the desired identifier and press the ENT Key. The text box displays the METAR data for the selected identifier. -
Page 230
SECTION 12 ADDITIONAL FEATURES Monitoring the Data Link The Data Link Status Page provides an indication of the integrity of the Data Link. The Data Link Page allows the pilot to monitor the system and determine the possible cause of a failure. View the Data Link Status Page: From the AUX Page Group, select the Data Link Page. -
Page 231
The GDL 69 Datalink Status Page shows the following fields: • Sat ID/Connectivity — This field shows the current activation status and signal strength of the XM Satellite Radio weather service. Table 12-10 lists the messages that may be shown in the Sat ID field. -
Page 232
SECTION 12 ADDITIONAL FEATURES Standard Aviation Forecast Abbreviations The standard aviation forecast abbreviations are listed in Table 12-12. STANDARD AVIATION FORECAST ABBREVIATIONS ‘+’ – (Heavy) ‘-’ – (Light) ‘/’ – (Missing or separator) Axxxx – Altimeter setting (xxxx are numbers) AFT –… -
Page 233
The symbol in Figure 12-48 indicates the ceiling at KMWM is marginal VFR, with heavy snow and low IFR visibility. The data age is 31-60 minutes old. Ceiling and Visibility — Flight Rules Marginal VFR (green bars) (green bars) (yellow bars) Table 12-15 Ceiling and Visibility Graphics Precipitation Ceiling… -
Page 234
SECTION 12 ADDITIONAL FEATURES To interpret wind speed, add the values of each of the wind speed barbs. In Figure 12-49, there are two long barbs (10 knots each) and one short barb (5 knots each). Thus, the total wind speed is 25 knots. Adding the gust offset to this figure gives winds gusting to 36 knots. -
Page 235
SECTION 13: FAULT DETECTION AND EXCLUSION Fault Detection and Exclusion (FDE) is incorporated in the Garmin GNS 430 main and GPS software version 3.00 and higher. FDE algorithms provide a basis for approval per the requirements for “GPS as a Primary Means of Navigation for Oceanic/Remote Operations”, FAA Notice… -
Page 236: Pre-Departure Verification Of Fde
The trainer software and the document “400/500 Series FDE Prediction Instructions” (190-00643-00) are available on Garmin’ s web site for free download (www.garmin.com). Figure 13-2 Garmin 400 Series Trainer Software GNS 430(A) Pilot’s Guide and Reference…
-
Page 237: Nav Terms
Or, the data was being received, but has been interrupted. If a grey code altitude input is available, it is used instead. If the problem persists, contact a Garmin dealer and check the installation and installation settings. When this message occurs, no…
-
Page 238
Garmin dealer for service. The GNS 430 has detected a failure in its communications transceiver. The COM transceiver may still be usable, but the unit should be returned (at the earliest convenience) to a Garmin dealer for service. -
Page 239
For excessive temperatures, check for adequate ventilation or check cooling air reduced flow. If the message persists, contact a Garmin dealer for assistance. The GNS 430 has detected a problem with the NavData Card. The data is not usable and the Data card failure card should be returned to Jeppesen or a Garmin dealer. -
Page 240
Garmin dealer for service. The GNS 430 has detected a failure in its glideslope receiver. The glideslope receiver may still be usable, but the unit should be returned (at the earliest convenience) to a Garmin dealer for service. -
Page 241
Garmin dealer for service. The internal battery that sustains user memory is low and should be replaced by a Garmin Memory battery low dealer as soon as possible. Failure to do so may result in loss of stored data, including flight plans, user waypoints, unit settings, and satellite data. -
Page 242
No data has been received on the ARINC 429 channel 2 connection for a period exceeding five seconds. If the problem persists, the installation should be checked by a Garmin dealer. No data has been received on the RS-232 channel 1 connection for a period exceeding ten seconds. -
Page 243
The terrain functionality self-test has failed. The operational status of the terrain components Terrain has failed is unknown and the unit should be returned to a Garmin dealer for service. Timer has expired The count down timer has reached zero. -
Page 244
Garmin dealer for service. The GNS 430 has detected a failure in its VLOC receiver. The VLOC receiver may still be usable, but the unit should be returned (at the earliest convenience) to a Garmin dealer for service. -
Page 245: Abbreviations
14.2 ABBREVIATIONS The following is a list of abbreviations used on the GNS 430 and their meanings: ACTV Active Altitude APPRCHING Approaching Approach Airport ARSPC Airspace ARTCC Air Route Traffic Control Center ARVL Arrival Auxiliary AVGAS Aviation Grade Gasoline AVTN Aviation BARO Barometric Pressure…
-
Page 246
SECTION 14 – MESSAGES, ABBREVIATIONS, & NAV TERMS Feet Glideslope Gallons Global Positioning System Ground Speed Heading Inches of Mercury Horizontal Uncertainty Level Highway Identifier Imperial Gallons Instrument Landing System Indicated Intersection INTEG Integrity Kilograms Kilohertz Kilometers Kilometers Per Hour Knots LAT/LON Latitude/Longitude… -
Page 247
Oceanic P.POS Present Position PROC Procedure(s) PROV Province Power Radial RAIM Receiver Autonomous Integrity Monitoring Reference Required/Requirements RESTRICTD Restricted Range Receive Standard Instrument Departure Small Speed Squelch SRFC Surface STAR Standard Terminal Arrival Route Special Use Airspace °T Degree True TACAN Tactical Air Navigation True Airspeed… -
Page 248: Navigation Terms
SECTION 14 – MESSAGES, ABBREVIATIONS, & NAV TERMS 14.3 NAVIGATION TERMS The following navigation terms are used on the GNS 430 and in this Pilot’ s Guide. Refer to Figures 14-1 and 14-2 for graphic representation of navigation terms. NORTH WPT 1 Figure 14-1 Illustrated NAV Terms Term…
-
Page 249
EPE (estimated A measure of satellite geometry quality and additional factors, expressed as a horizontal position error) position error in feet or meters. ESA (enroute safe The recommended minimum altitude within ten miles, left or right, of the desired course on an altitude) active flight plan or direct-to. -
Page 250
SECTION 14 – MESSAGES, ABBREVIATIONS, & NAV TERMS Blank Page 14-14 GNS 430(A) Pilot’s Guide and Reference 190-00140-00 Rev. P… -
Page 251: Appendix A: Data Card Use
APPENDIX A: DATA CARD USE The Jeppesen NavData Card, and the Terrain Data Card (if applicable) supplied with the GNS 430 can be installed or removed when the GNS 430 is on or off. If the NavData Card is not present when the unit is turned on, a ‘No Jeppesen Aviation Database — Limited to user defined waypoints’…
-
Page 252
APPENDIX A DATA CARD USE To remove the NavData or Terrain data card (Figure A-2): Gently press on the tab—using a slight upward motion—at the front center of the data card. This partially deploys the swing arm handle. Rotate the swing arm handle upward (and outward) until it locks into place, perpendicular to the face of the GNS 430 unit. -
Page 253: Appendix B: Specifications
Gillham/Greycode); Fuel Sensor; Fuel/Air Data * Earlier versions of the 430 were designed to be used with 28 Vdc power only. For questions on a particular installation, please refer to a Garmin authorized service center. GNS 430(A) Pilot’s Guide and Reference…
-
Page 254
APPENDIX B SPECIFICATIONS Blank Page GNS 430(A) Pilot’s Guide and Reference 190-00140-00 Rev. P… -
Page 255: Appendix C: Troubleshooting Q & A
If, after reading through the appropriate reference section, the answer cannot be found , please see an authorized dealer or contact Garmin directly at the address or phone numbers listed on page ii. Garmin is dedicated to supporting its products and customers.
-
Page 256
APPENDIX C TROUBLESHOOTING What happens when I select an approach? Can I store a flight plan with an approach, departure, or arrival? When loading an approach, departure, or arrival into the active flight plan, a set of approach, departure, or arrival waypoints is inserted into the flight plan—along with a header line describing the selected instrument procedure (Figure C-2). -
Page 257
NORMAL (no ‘OBS’ annunciator) Automatic sequencing of Manual sequencing- ‘holds’ waypoints on selected waypoint Change in HSI does not Manually select course to affect CDI deflection next waypoint from HSI Always navigates ‘TO’ the Indicates ‘TO’ or ‘FROM’ active waypoint waypoint Must be in this mode for Cannot be set for final… -
Page 258
APPENDIX C TROUBLESHOOTING When should I use the OBS key to return to auto sequencing, and what happens when I do? The most common application for using the OBS Key is the missed approach. The GNS 430 suspends automatic waypoint sequencing (indicated by a ‘SUSP’ annunciation directly above the OBS Key;… -
Page 259
When does turn anticipation begin, and what bank angle is expected? The GNS 430 smooths adjacent leg transitions based upon a nominal 15º bank angle (with the ability to roll up to 25º) and provide three pilot cues for turn anticipation: 1) A waypoint alert (‘NEXT DTK ###°’) flashes in the lower right corner of the screen 10 seconds before the turn point (Figure C-6). -
Page 260
APPENDIX C TROUBLESHOOTING Why does my CDI not respond like a VOR when OBS mode is active? Unlike a VOR, the CDI scale used on GPS equipment is based on the cross-track distance to the desired course, not an angular relationship to the destination (Figure C-8). -
Page 261
Abbreviations 7-4, 7-6,7-8, 7-14, 7-15, 7-17, 14-9 Accessories 1-1 Activate an existing flight plan in reverse 5-4 Activate leg 5-10, 5-15, C-4 Activate the approach 6-3, 6-4, 6-10, 6-19, C-6 Activating flight plans 5-4 Active flight plan options 5-8, 5-10–5-13 Active frequency 1-9, 2-1, 2-2, 2-5, 6-28, 6-33, 9-1, 9-2 Active leg 1-12, 3-2, 5-9, 6-7, 6-8, 6-11, 6-13, 6-17, 6-18, 6-21, 6-30, 6-31, 6-32, C-4… -
Page 262
INDEX Display contrast 10-28, 10-29 DIS (distance) 1-11, 1-12, 3-3, 3-6, 5-8, 5-10, 6-6, 6-15, 6-21, 6-23, 6-29, 7-14, 7-17, 7-18, 7-21, 10-3, 10-7, 10-25, 14-9, 14-12 DME Arc 3-2, 6-14 DOP 3-22, 3-23, 13-1, 14-3, 14-9, 14-12 Duplex operations 8-10 Duplicate waypoints 7-3 Emergency channel select 2-5 ENT Key 1-3… -
Page 263
Map Page 1-11, 3-5, 3-6, 3-7, 3-9, 3-13, 4-5, 6-7, 6-8, 6-13, 6-17, 6-18, 6-23, 6-30, 7-17, 7-19, 10-20, 14-5 Map page options 3-9 Map panning 3-7 Map range 1-2, 1-3, 1-11, 3-6, 3-7, 3-11 Map setup 3-6 Max speed 10-17 Measurement units 1-5, 10-20, 10-21, 10-24, 10-25 MENU Key 1-3 Messages 1-4, 1-17, 1-18, 3-23, 3-26, 8-14, 10-3, 10-9,… -
Page 264
INDEX Select approach 1-14, 5-11, 6-1, 6-4, 6-9, 7-10, 9-3, C-6 Select Arrival 1-14, 5-12, 6-1 Select Departure 1-14, 5-12, 6-1 Self test 1-5 Setup 1 Page 10-20, 10-22, 10-24, 10-25, 10-26 Setup 2 Page 10-27, 10-28, 10-29 Shortcuts 4-4, 5-14 SIDs 1-14, 13-2 Signal strength 1-8, 3-22, 3-23 Sky view 3-22… -
Page 266
Abbey Park Industrial Estate Southampton, SO40 9RB, U.K. p: +44/ (0) 870.8501241 f: +44/ (0) 870.8501251 Garmin Corporation No. 68, Jangshu 2nd Road Shijr, Taipei County, Taiwan p: 886/2.2642.9199 f: 886/2.2642.9099 www.garmin.com © 2009 Garmin Ltd. or its subsidiaries 190-00140-00 Rev. P…
This manual is also suitable for:
Gns 430a
Предложите, как улучшить StudyLib
(Для жалоб на нарушения авторских прав, используйте
другую форму
)
Ваш е-мэйл
Заполните, если хотите получить ответ
Оцените наш проект
1
2
3
4
5
Модераторы: 502, smixer, lt.ak, vova_k
-
borgulev
- Новичок
- Сообщения: 3
- Зарегистрирован: 29 янв 2011, 16:31
- Member of AOPA: No
Garmin 430 на русском
#1
Сообщение
borgulev » 29 янв 2011, 16:34
есть ли у кого-нибудь на русском инструкция для garmin 430
-

lt.ak
- Не Гуру
- Сообщения: 6573
- Зарегистрирован: 19 авг 2008, 02:29

Re: Garmin 430 на русском
#2
Сообщение
lt.ak » 29 янв 2011, 17:09
borgulev писал(а):есть ли у кого-нибудь на русском инструкция для garmin 430
на reaa же уже Лодочник выложил ссылку …
AIM 4-1-9 (g)(1) … «Traffic in the area, please advise» is not a recognized Self-Announce Position and/or Intention phrase and should not be used under any condition.
Failure to comply with this warning will result in future warnings.
-
ЛОДОЧНИК
- Почетный SAONовец
- Сообщения: 4011
- Зарегистрирован: 12 окт 2008, 00:11
- Member of AOPA: Yes
- Откуда: деревня Ватулино
Re: Garmin 430 на русском
#3
Сообщение
ЛОДОЧНИК » 29 янв 2011, 17:11
Есть, а что?))
Я все хочу, мне все здесь надо!
В этой жизни есть простое правило, пусть лучше будет маленький, но свой!
-
lt.ak
- Не Гуру
- Сообщения: 6573
- Зарегистрирован: 19 авг 2008, 02:29
Re: Garmin 430 на русском
#4
Сообщение
lt.ak » 29 янв 2011, 17:18
ЛОДОЧНИК писал(а):Есть, а что?))
он же и на reaa спросил … прямо в той ветке где ты выложил … а ещё говорят что мы недобрые …
AIM 4-1-9 (g)(1) … «Traffic in the area, please advise» is not a recognized Self-Announce Position and/or Intention phrase and should not be used under any condition.
Failure to comply with this warning will result in future warnings.
-
ЛОДОЧНИК
- Почетный SAONовец
- Сообщения: 4011
- Зарегистрирован: 12 окт 2008, 00:11
- Member of AOPA: Yes
- Откуда: деревня Ватулино
Re: Garmin 430 на русском
#5
Сообщение
ЛОДОЧНИК » 29 янв 2011, 17:35
lt.ak писал(а):
ЛОДОЧНИК писал(а):Есть, а что?))
он же и на reaa спросил … прямо в той ветке где ты выложил … а ещё говорят что мы недобрые …
Эта…, в общем…., ну да ладно…… ![]()
Я все хочу, мне все здесь надо!
В этой жизни есть простое правило, пусть лучше будет маленький, но свой!
-
VK68
- PA23 Aztec; R44
- Сообщения: 3705
- Зарегистрирован: 29 мар 2008, 21:09
- Member of AOPA: Yes
Re: Garmin 430 на русском
#6
Сообщение
VK68 » 29 янв 2011, 19:58
Попробовал скачать ,ничего не выходит…можно здесь еще раз выложить?
-
ЛОДОЧНИК
- Почетный SAONовец
- Сообщения: 4011
- Зарегистрирован: 12 окт 2008, 00:11
- Member of AOPA: Yes
- Откуда: деревня Ватулино
Re: Garmin 430 на русском
#7
Сообщение
ЛОДОЧНИК » 29 янв 2011, 22:07
Вот эта ссылка разве не работает? http://rghost.ru/4019922
И ссылка на Як-18 тоже может пригодится. Там в разделе 8.7 практически описание радиооборудования моего Твина стоящего на многих импортных машинах http://files.mail.ru/HAT7Q8
Можно ли закачать сюда, я честно говоря не знаю.
Я все хочу, мне все здесь надо!
В этой жизни есть простое правило, пусть лучше будет маленький, но свой!
-
VK68
- PA23 Aztec; R44
- Сообщения: 3705
- Зарегистрирован: 29 мар 2008, 21:09
- Member of AOPA: Yes
Re: Garmin 430 на русском
#8
Сообщение
VK68 » 29 янв 2011, 22:32
Все получилось, спасибо.
-
lt.ak
- Не Гуру
- Сообщения: 6573
- Зарегистрирован: 19 авг 2008, 02:29
Re: Garmin 430 на русском
#9
Сообщение
lt.ak » 29 янв 2011, 22:43
на случай если потеряются на файлобмениках ![]()
AIM 4-1-9 (g)(1) … «Traffic in the area, please advise» is not a recognized Self-Announce Position and/or Intention phrase and should not be used under any condition.
Failure to comply with this warning will result in future warnings.
-

shura-ag
- Гуру
- Сообщения: 2318
- Зарегистрирован: 30 дек 2008, 12:07
- Member of AOPA: Yes
- Откуда: Москва
- Летаю на:: С152, С172, P2002

Re: Garmin 430 на русском
#11
Сообщение
shura-ag » 31 янв 2011, 09:41
К стати с сайта Garmin можно скачать симулятор для GNS очень удобно осваивать на нем, не нужно в самолет залезать и питание подключать.
http://www8.garmin.com/software/400Seri … or_501.exe
Я уверен, не случайно дерьмо и шоколад примерно одинакового цвета. Тут явно какой-то многозначительный намек. Что-нибудь относительно единства противоположностей. (c)
-
Beer100
- SAONовец со стажем
- Сообщения: 150
- Зарегистрирован: 24 ноя 2018, 14:56
- Member of AOPA: No
- Летаю на:: Diamond
Garmin 430 на русском
#12
Сообщение
Beer100 » 11 май 2019, 21:16
Похоже, на борту окажется GNS-430…
Подскажите, этот аппарат еще имеет право эксплуатироваться в «наших местностях», за исключением как радиостанцией?
Как я бегло ознакомился, в него не зальешь ни актуальную информацию, ни забьешь вручную маршрутик.
Это так?
Опровергните, плиз!
-
shura-ag
- Гуру
- Сообщения: 2318
- Зарегистрирован: 30 дек 2008, 12:07
- Member of AOPA: Yes
- Откуда: Москва
- Летаю на:: С152, С172, P2002
Garmin 430 на русском
#13
Сообщение
shura-ag » 11 май 2019, 21:25
По-моему брифинг плюс заливает актуальную информацию в него, включая аон рф. Обратитесь к ним.
Да и с забитием в ручную маршрута никаких проблем. Хоть точками из базы, хоть пользовательсими. Это правда не очень быстро, но вполне реально.
Я уверен, не случайно дерьмо и шоколад примерно одинакового цвета. Тут явно какой-то многозначительный намек. Что-нибудь относительно единства противоположностей. (c)
-
Beer100
- SAONовец со стажем
- Сообщения: 150
- Зарегистрирован: 24 ноя 2018, 14:56
- Member of AOPA: No
- Летаю на:: Diamond
Garmin 430 на русском
#14
Сообщение
Beer100 » 11 май 2019, 21:30
shura-ag писал(а): ↑11 май 2019, 21:25
Это правда не очень быстро, но вполне реально.
О! Хорошая информация! Торопиться не куда, главное можно. Мы же не на боевые вылеты по тревоге…. ![]()
А сохранять их можно?
PS
в брифинг плюс можно носом ткнуть?
-
shura-ag
- Гуру
- Сообщения: 2318
- Зарегистрирован: 30 дек 2008, 12:07
- Member of AOPA: Yes
- Откуда: Москва
- Летаю на:: С152, С172, P2002
Garmin 430 на русском
#15
Сообщение
shura-ag » 11 май 2019, 21:32
http://navdata.ru
Все созданные планы сохраняются. Там есть ограничение по количеству, не помню точно сейчас.
Я уверен, не случайно дерьмо и шоколад примерно одинакового цвета. Тут явно какой-то многозначительный намек. Что-нибудь относительно единства противоположностей. (c)
Вернуться в «Авионика, Тюнинг, Примочки, Доп. баки, Спас. системы»
Перейти
- Самолетный раздел
- ↳ Общие правила форума и FAQи
- ↳ Исторические FAQ
- ↳ Самолет — выбор, покупка, эксплуатация
- ↳ Общие вопросы выбора и покупки
- ↳ Cessna Aircraft
- ↳ Cirrus
- ↳ Diamond
- ↳ Пилотажники: Extra, Pitts, Giles, Edge
- ↳ HUSKY, Maule
- ↳ L-29, L-39, L-410, Morava
- ↳ Pilatus
- ↳ Piper
- ↳ Tecnam
- ↳ Представители LSA (Light-Sport Aircraft)
- ↳ Як-18Т
- ↳ Як-5Х
- ↳ Остальные отечественные самолёты
- ↳ Деловая (бизнес) авиация
- ↳ Остальные иностранные самолеты
- ↳ KIT — самолёты, РЕТРО-самолеты
- ↳ Гидроавиация
- ↳ Арендуем самолёт
- Вертолетный раздел
- ↳ Вертолет — учимся летать
- ↳ Вертолет — выбор, покупка, эксплуатация
- ↳ Сравнение вертолетов, общие вопросы, советы по покупке и таможне
- ↳ Robinson
- ↳ Eurocopter
- ↳ Bell Helicopter
- ↳ AgustaWestland
- ↳ MD
- ↳ Schweizer
- ↳ Миль
- ↳ Камов
- ↳ Enstorm
- ↳ Другие вертолеты
- ↳ Аренда вертолета, Вертолет и горы
- Учимся летать
- ↳ Class Room, Учимся летать, Техника пилотирования, Погода, Вопросы безопасности полетов
- ↳ Дневники обучения и самостоятельных полетов
- ↳ Обучение за границей
- ↳ U.S.A.
- ↳ Europe
- ↳ Canada
- ↳ СНГ
- ↳ Летная медицина
- ↳ Аэроклубы РФ (Лётные школы)
- ↳ Самолетный и вертолетный спорт, Планеры, Шары
- Владельцам ВС
- ↳ Вертодромы (вертолетные клубы, вертолетные площадки)
- ↳ Аэродромы и посадочные площадки РФ
- ↳ Регистрация воздушного судна, Таможня, Страхование
- ↳ Тех. обслуживание и ремонт самолёта
- ↳ Техническое обслуживание самолетов Cessna
- ↳ Двигатели Continental и Lycoming
- ↳ Двигатель М-14П и самолеты Як-52, Як-18Т
- ↳ Покраска самолетов
- ↳ Куда летим?
- ↳ Ссылки на отчеты
- ↳ Строительство аэродрома, организация аэроклуба, АУЦ, земельные вопросы, регистрация посадочных площадок
- ↳ Организация аэроклуба (создание предприятия)
- ↳ Строительство аэродрома, земельные вопросы, ангары, рулежки…
- ↳ Оборудование и техника для аэродрома
- ↳ Создание и сертификация АУЦ
- ↳ Авиадеревня. Обзоры. Строительство.
- ↳ ГСМ
- ↳ Авионика, Тюнинг, Примочки, Доп. баки, Спас. системы
- ↳ Коммерческая эксплуатация ВС, CPL, APTL, Перегоны, инструктора, предложения, помощь
- ↳ Гарнитуры и шлемы, Одежда и снаряжение для пилотов, Сувениры, полезные мелочи
- Новости АОН, события
- ↳ Новости АОН
- ↳ PilotTV
- ↳ Подготовка программ PilotTV
- ↳ Российские шоу, слёты, конференции
- ↳ Зарубежные
- ↳ Авиационные происшествия
- ↳ Пресс-релизы, пресса, журналисты
- ↳ Журналажа
- ↳ Соревнования
- Сообщество SAON.ru
- ↳ Фотоальбомы, видео, отчёты
- ↳ Фильмотека SAON (фильмы об авиации)
- ↳ Кунсткамера
- ↳ Белый список
- ↳ Библиотека. Файлы. Диски, книги… Лётные карты, сборники, диски с картами
- ↳ Наш портал. Наша курилка. Участники, ассоциации. Вопросы, обсуждения
- ↳ Записки на карте МВЗ
- ↳ Дни рождения
- ↳ Авиационный флуд, флейм, юмор
-
Page 1: Garmin GNS 430
GNS 430 Shown GARMIN International, Inc. 1200 E. 151 st Street Olathe, KS 66062 USA 190-00140-05, Revision C October 2002 400 SERIES MAINTENANCE MANUAL (GNS ¥ 430, GNC ¥ 420, GPS 400)[…]
-
Page 2: Garmin GNS 430
Page A 400 SERIES MAINTENANCE MANUAL Rev. C P/N 190-00140-05 © Copyright 1999-2002 GARMIN Ltd. or its subsidiaries All Rights Reserved GARMIN International, Inc. 1200 East 151st Street, Olathe, Kansas 66062, U.S.A. GARMIN (Europe) Ltd. Unit 5, The Quadrangle, Abbey Park Industrial Estate, Romsey, SO51 9AQ, U.K. GARMIN Corporation No. 68, Jangshu 2[…]
-
Page 3: Garmin GNS 430
400 SERIES MAINTENANCE MANUAL Page i P/N 190-00140-05 Rev. C LIST OF EFFECTIVE PAGES Page Revision Page Revision Page Revision Page Revision A C 4-8 C 5-54 BLANK F7-24 BLANK i C 5-1 C 6-1 C A-1 C i i C5 — 2 C6 — 2 CA — 2 C i i i C5 — 3 C6 — 3 CB — 1 C i v C5 — 4 C6 — 4 CB — 2 C v C 5-5 C 6-5 C B-3 C v i C5 — 6 C6 — 6 CB — 4 C vii C 5-7 C 6-7 C B-5 […]
-
Page 4: Garmin GNS 430
Page ii 400 SERIES MAINTENANCE MANUAL P/N 190-00140-05 Rev. C The following are General Safety Precautions that are not related to any specific procedure and therefore do not appear elsewhere in this maintenance manual. These are recommended precautions that personnel should understand and apply during the many phases of maintenance and repair. KEE[…]
-
Page 5: Garmin GNS 430
400 SERIES MAINTENANCE MANUAL Page iii P/N 190-00140-05 Rev. C TABLE OF CONTENTS SECTION 1 DESCRIPTION AND OPERATION Paragraph Page 1.1 INTRODUCTION ………………………………………………………………………………………. 1-1 1.1.1 Versions Covered by this Manual ………………………………………………….[…]
-
Page 6: Garmin GNS 430
Page iv 400 SERIES MAINTENANCE MANUAL P/N 190-00140-05 Rev. C SECTION 3 TROUBLESHOOTING Paragraph Page 3.1 TROUBLESHOOTING EQUIPMENT …………………………………………………………… 3-1 3.2 TROUBLESHOOTING ORDER …………………………………………………………………… 3-1 3.3 TROUBLESHOOTING PROCEDURES …[…]
-
Page 7: Garmin GNS 430
400 SERIES MAINTENANCE MANUAL Page v P/N 190-00140-05 Rev. C SECTION 5 ALIGNMENT, CALIBRATION, AND TESTING Paragraph Page 5.1 INTRODUCTION ……………………………………………………………………………………. 5-1 5.2 RECOMMENDED TEST EQUIPMENT ……………………………………………………… 5-1 5.3 TEST S[…]
-
Page 8: Garmin GNS 430
Page vi 400 SERIES MAINTENANCE MANUAL P/N 190-00140-05 Rev. C SECTION 5 ALIGNMENT, CALIBRATION, AND TESTING (continued) 5.7.2.8 Sidetone ………………………………………………………………………………………….. 5-18 5.7.2.9 MIC Intercom Test …………………………………………………………………..[…]
-
Page 9: Garmin GNS 430
400 SERIES MAINTENANCE MANUAL Page vii P/N 190-00140-05 Rev. C SECTION 5 ALIGNMENT, CALIBRATION, AND TESTING (continued) 5.7.4 Navigation Assembly I/O Tests ………………………………………………………….. 5-32 5.7.4.1 Localizer Course Deviation Test …………………………………………………………. 5-32 5.7.4.[…]
-
Page 10: Garmin GNS 430
Page viii 400 SERIES MAINTENANCE MANUAL P/N 190-00140-05 Rev. C SECTION 5 ALIGNMENT, CALIBRATION, AND TESTING (continued) 5.7.6.14 MAIN Vertical UP, DOWN Outputs………………………………………………………. 5-47 5.7.6.15 MAIN To/From Output ……………………………………………………………………….. 5-47 5[…]
-
Page 11: Garmin GNS 430
400 SERIES MAINTENANCE MANUAL Page ix P/N 190-00140-05 Rev. C APPENDIX A GNC 420A AND GNS 430A A.1 DESCRIPTION ……………………………………………………………………………………….A-1 A.2 ‘A’ VERSION PART NUMBERS ………………………………………………………………..A-1 A.3 TROUBLESHOOTING ….[…]
-
Page 12: Garmin GNS 430
Page x 400 SERIES MAINTENANCE MANUAL P/N 190-00140-05 Rev. C LIST OF FIGURES Figure Page 2-1 Com Chassis Nut ……………………………………………………………………………………. 2-1 2-2 Signal And Load Drawing-J1 (Sheet 1 of 2) ……………………………………………….. 2-3 2-3 Signal And Load Drawing-J1 ([…]
-
Page 13: Garmin GNS 430
400 SERIES MAINTENANCE MANUAL Page xi P/N 190-00140-05 Rev. C LIST OF TABLES Table Page 1-1 Unit Configuration …………………………………………………………………………………… 1-1 3-1 Unit Board Power Supply Max Current Allowed ………………………………………….. 3-5 3-2 Com Board Power Supply Toleranc[…]
-
Page 14: Garmin GNS 430
Page xii 400 SERIES MAINTENANCE MANUAL P/N 190-00140-05 Rev. C LIST OF TABLES (con’t.) Table Page 6-25 Sub-Assy, CDU, GNC 420, Black (Unit P/N 011-00281-01, Figure 7-4) ……….. 6-23 6-26 Sub-Assy, CDU, GNC 420, Gray (Unit P/N 011-00281-05, Figure 7-4) ………… 6-24 6-27 Sub-Assy, CDU GNC 420A, Black (Unit P/N 011-00281-01, Figure 7-4) …[…]
-
Page 15: Garmin GNS 430
400 SERIES MAINTENANCE MANUAL Page 1-1 P/N 190-00140-05 Rev. C SECTION 1 DESCRIPTION AND OPERATION 1.1 INTRODUCTION References made to the GNS 430 and the GNC 420 throughout this manual equally apply to the GNS 430A and the GNC 420A except where specifically noted. This manual provides board-level maintenance inform ation for the GARMIN 400 Series […]
-
Page 16: Garmin GNS 430
Page 1-2 400 SERIES MAINTENANCE MANUAL Rev. C P/N 190-00140-05 GPS 400: UNIT P/N COLOR 011-00504-00 Black 011-00504-10 Gray GNC 420: UNIT P/N COLOR OPERATING VOLTAGE MINIMUM XMIT PWR 011-00506-00 BLACK 28 V 10 W 011-00506-10 BLACK 14 or 28 V 10 W 011-00506-30 GRAY 14 or 28 V 10 W GNS 430: UNIT P/N COLOR OPERATING VOLTAGE MINIMUM XMIT PWR 011-00280-[…]
-
Page 17: Garmin GNS 430
400 SERIES MAINTENANCE MANUAL Page 1-3 P/N 190-00140-05 Rev. C Each of the configurations includes a color display providing graphical moving map capability. Navigation, communication, and m apping functions are supported by a navigation database provided by a removable database card. The mapping function has additional support provided by a built-[…]
-
Page 18: Garmin GNS 430
Page 1-4 400 SERIES MAINTENANCE MANUAL Rev. C P/N 190-00140-05 1.3 REPAIR PLAN This manual is designed to allow the user to perform board-level repair. If necessary, the unit can be returned to GARMIN for complete service work. Contact GARMIN at the address given on Page A (inside cover) for further service information. 1.4 SPECIFICATIONS Technical[…]
-
Page 19: Garmin GNS 430
400 SERIES MAINTENANCE MANUAL Page 1-5 P/N 190-00140-05 Rev. C 1.5.2 Com Board The Com Board contains the VHF COM Transceiver that provides voice comm unication in the 118.000 to 136.992 MHz general aviation band. The transceiver consists of a 10 or 16 watt (“A” versions) amplitude modulated transm itter (see the unit matrix tables on page 1-1)[…]
-
Page 20: Garmin GNS 430
Page 1-6 400 SERIES MAINTENANCE MANUAL Rev. C P/N 190-00140-05 1.5.5 Glideslope Board The Glideslope Board contains a processor controlled Glideslope Receiver which operates from 329.15 MHz to 335.00 MHz in 150 kHz increments for 40 Glideslope channels. 1.5.6 Inverter Board The Inverter Board supplies high voltage for display operation. 1.5.7 CDU A[…]
-
Page 21: Garmin GNS 430
400 SERIES MAINTENANCE MANUAL Page 2-1 P/N 190-00140-05 Rev. C SECTION 2 SPECIAL TOOLS AND TEST EQUIPMENT 2.1 INTRODUCTION This section identifies the special tools and test equipment needed to maintain the 400 Series Units. Standard equipment is not listed. For any questions regarding special tools and test equipment contact GARMIN at the followin[…]
-
Page 22: Garmin GNS 430
Page 2-2 400 SERIES MAINTENANCE MANUAL Rev. C P/N 190-00140-05 This page left intentionally blank.[…]
-
Page 23: Garmin GNS 430
400 SERIES MAINTENANCE MANUAL Page 2-3 (Page 2-4 blank) P/N 190-00140-05 Rev. C Figure 2-2. J1 Signal and Load Drawing (Sheet 1 of 2)[…]
-
Page 24: Garmin GNS 430
400 SERIES MAINTENANCE MANUAL Page 2-5 (Page 2-6 blank) P/N 190-00140 Rev. C Figure 2-3. J1 Signal and Load Drawing (Sheet 2 of 2)[…]
-
Page 25: Garmin GNS 430
400 SERIES MAINTENANCE MANUAL Page 2-7 (Page 2-8 blank) P/N 190-00140-05 Rev. C Figure 2-4. J2 Signal and Load Drawing[…]
-
Page 26: Garmin GNS 430
400 SERIES MAINTENANCE MANUAL Page 2-9 (Page 2-10 blank) P/N 190-00140-05 Rev. C Figure 2-5. J6 Signal and Load Drawing[…]
-
Page 27: Garmin GNS 430
400 SERIES MAINTENANCE MANUAL Page 3-1 P/N 190-00140-05 Rev. C SECTION 3 TROUBLESHOOTING Each unit in the 400 Series contains static sensitive components. Observe proper anti-static procedures when testing the unit. Hazardous voltages exist on the Inverter Board (all units). Under normal operating conditions the voltages range up to 2500 Vac peak t[…]
-
Page 28: Garmin GNS 430
Page 3-2 400 SERIES MAINTENANCE MANUAL Rev. C P/N 190-00140-05 3.3 TROUBLESHOOTING PROCEDURES 3.3.1 Fuses Check for blown fuses on the Main Board, Com Board, and Nav Board as shown in Figures 3-1 through 3-4. If blown fuses are found, try to determine the cause of the fuse failure before installing a new fuse. F 8 5 0 5A F853 0.75A F851 3A F852 2A […]
-
Page 29: Garmin GNS 430
400 SERIES MAINTENANCE MANUAL Page 3-3 P/N 190-00140-05 Rev. C LOCA TION OF F600 (7A FUSE ) ON -00/-02/-03 COM BOARDS Figure 3-2. Com Board Fuse Location/F600 LOCATION OF F600 ON -04 REV C COM BOARDS TO PRES ENT (F600 REPLACED WITH R611, EXCEPT ON -0 4 REV A AND B BOARD) Figure 3-3. Com Board Fuse Location/F600 (Replaced by R611)[…]
-
Page 30: Garmin GNS 430
Page 3-4 400 SERIES MAINTENANCE MANUAL Rev. C P/N 190-00140-05 F501 1 AMP J6 F502 1 AMP Figure 3-4. Nav Board Fuse Locations 3.3.2 Power Supply Checks 3.3.2.1 Current Measurements Taking intra-board and external current measureme nts is one way of determining a faulty board. To measure the currents, use a spare ribbon cable and spread the cable wir[…]
-
Page 31: Garmin GNS 430
400 SERIES MAINTENANCE MANUAL Page 3-5 P/N 190-00140-05 Rev. C The values listed in Table 3-1 are with the display backlight at maximum brightness. Table 3-1. Unit Board Power Supply Max Current Allowed Unit (Main Board) Unit Status Max Current (A) @ 27.5 V Max Current (A) @ 13.8 V (Optional) GPS 400 ON 0.66 1.32 GNC 420 ON RX—0.99 TX—3.36 RX?[…]
-
Page 32: Garmin GNS 430
Page 3-6 400 SERIES MAINTENANCE MANUAL Rev. C P/N 190-00140-05 3.3.2.3 Glideslope Board Replace the Main Board if any voltage on the G/S Board is not within tolerance. Replace the G/S Board if excessive current is measured. Table 3-3. Glideslope Board Power Supply Tolerances Connector/Pin Voltage (V) Tolerance (V) Max Current (mA) Comments J25 Pin […]
-
Page 33: Garmin GNS 430
400 SERIES MAINTENANCE MANUAL Page 3-7 P/N 190-00140-05 Rev. C I — 111 0 I-1 00 Figure 3-5. Processor Location (Main Board) 3.4 STATIC MESSAGES The unit informs the user of operational status using the messages listed in Table 3-5. These messages can help in isolating a faulty assembly. Table 3-5 also shows the recommended action for each message. […]
-
Page 34: Garmin GNS 430
Page 3-8 400 SERIES MAINTENANCE MANUAL Rev. C P/N 190-00140-05 Table 3-5. Static Messages MESSAGE RECOMMENDED ACTION Stored data was lost Replace Main Board (see paragraph 4.5.5) Main processor requires service Replace Main Board (see paragraph 4.5.5) Memory battery low Replace Memory Battery (see paragraph 4.7.1) No differential GPS position Repla[…]
-
Page 35: Garmin GNS 430
400 SERIES MAINTENANCE MANUAL Page 3-9 P/N 190-00140-05 Rev. C Table 3-5. Static Messages (continued) COM remote transfer key stuck Verify that Remote Transfer Key Line is not stuck before replacing COM Board Replace Com Board (see paragraph 4.5.4) Heading input failure Replace Main Board (see paragraph 4.5.5) CDI key stuck Replace Flex Cable (see […]
-
Page 36: Garmin GNS 430
Page 3-10 400 SERIES MAINTENANCE MANUAL Rev. C P/N 190-00140-05 3.5 TESTING FAILURES Another approach in troubleshooting is to perform testing on a unit according to the test procedures given in Section 5. To save time, only perform the minim um amount of testing in order to isolate the suspect board. Table 3-6 lists recommended actions based on fa[…]
-
Page 37: Garmin GNS 430
400 SERIES MAINTENANCE MANUAL Page 3-11 P/N 190-00140-05 Rev. C Table 3-6. Testing Failures Main Board (continued) TEST FAILURE TEST PARAGRAPH RECOMMENDED ACTION GPS Antenna Bias 5.7.6.10 Replace GPS Module (see paragraph 4.5.5) GPS Noise 5.7.6.11 Replace GPS Module (see paragraph 4.5.5) Replace Main Board (see paragraph 4.5.5) Satellite Tracki[…]
-
Page 38: Garmin GNS 430
Page 3-12 400 SERIES MAINTENANCE MANUAL Rev. C P/N 190-00140-05 Table 3-7. Testing Failures COM Board TEST FAILURE TEST PARAGRAPH RECOMMENDED ACTION Power Input Check 5.7.2.1 Replace Main Board (see paragraph 4.5.5) Replace Com Board (see paragraph 4.5.4) RF Power Out 5.7.2.2 Replace Com Board (see paragraph 4.5.4) Frequency Stability and Toler[…]
-
Page 39: Garmin GNS 430
400 SERIES MAINTENANCE MANUAL Page 3-13 P/N 190-00140-05 Rev. C Table 3-8. Testing Failures NAV Board TEST FAILURE TEST PARAGRAPH RECOMMENDED ACTION Localizer Course Deviation Test 5.7.4.1 Replace Nav Receiver Board (see paragraph 4.5.6) To/From Deflection Output Characteristic Test 5.7.4.2 Replace Nav Receiver Board (see paragraph 4.5.6) To/Fr[…]
-
Page 40: Garmin GNS 430
Page 3-14 400 SERIES MAINTENANCE MANUAL Rev. C P/N 190-00140-05 Table 3-10. Testing Failures NAV Receiver TEST FAILURE TEST PARAGRAPH RECOMMENDED ACTION Voice/Ident Audio Output Level 5.7.3.1 Replace Nav Receiver Board (see paragraph 4.5.6) Voice/Ident Audio Frequency Response 5.7.3.2 Replace Nav Receiver Board (see paragraph 4.5.6) Voice/Ident[…]
-
Page 41: Garmin GNS 430
400 SERIES MAINTENANCE MANUAL Page 3-15 P/N 190-00140-05 Rev. C 3.6 EXTERNAL CONNECTORS Figure 3-6 shows the external connectors and their corresponding pin numbers for each unit. 1 2 3 4 5 6 7 8 9 10 11 12 13 14 15 16 17 18 19 20 21 22 23 24 25 26 27 28 29 30 31 32 33 34 35 36 37 38 39 40 41 42 43 44 1 2 34 5 67 89 10 11 12 14 15 16 17 18 19 20 21[…]
-
Page 42: Garmin GNS 430
Page 3-16 400 SERIES MAINTENANCE MANUAL Rev. C P/N 190-00140-05 This page left intentionally blank.[…]
-
Page 43: Garmin GNS 430
400 SERIES MAINTENANCE MANUAL Page 3-17 (Page 3-18 blank) P/N 190-00140-05 Rev. C Figure 3-7. 400 Series Block Diagarm[…]
-
Page 44: Garmin GNS 430
400 SERIES MAINTENANCE MANUAL Page 4-1 P/N 190-00140-05 Rev. C SECTION 4 DISASSEMBLY AND ASSEMBLY 4.1 INTRODUCTION Repairing the unit is accomplished by removing and replacing defective boards. To help disassemble and reassemble the unit in order to access the boards, look at the assembly drawings in Section 7 and the parts lists in Section 6. Each[…]
-
Page 45: Garmin GNS 430
Page 4-2 400 SERIES MAINTENANCE MANUAL Rev. C P/N 190-00140-05 4.3 NAV DATA CARD REMOVAL AND INSERTION Before disassembly begins, remove the Jeppesen NavData® card supplied with the unit. The card can be installed or removed when the unit is on or off. Insert the card with the swing arm handle at the bottom and the label facing to the left (see Fi[…]
-
Page 46: Garmin GNS 430
400 SERIES MAINTENANCE MANUAL Page 4-3 P/N 190-00140-05 Rev. C 4.4 UNIT DESIGN Each unit consists of a Main and Nav Chassis, CDU Assembly, and a Top Cover. The Main Chassis has a Top and Underside Cavity which contains replaceable boards. The following is a typical order of disassembly: 1. Remove the Top Cover. 2. Remove the CDU Assembly. 3. Disass[…]
-
Page 47: Garmin GNS 430
Page 4-4 400 SERIES MAINTENANCE MANUAL Rev. C P/N 190-00140-05 4.5.2.1 Disassemble the CDU Assembly x Remove the Flex Assemblies (Figure 7-4) 1. Remove the VOL w/’C’ and VOL w/’V’ Knobs (18 and 19). 2. Remove the Push ‘CRSR’ and Push ‘C/V’ knobs (21, 22, 20, and 28). 3. Remove the Hex Nuts holding the Push ‘CRSR’ and Push ‘C/V[…]
-
Page 48: Garmin GNS 430
400 SERIES MAINTENANCE MANUAL Page 4-5 P/N 190-00140-05 Rev. C 4.5.4 Remove Faulty Boards from the Main Chassis Top Cavity Remove the Top Cover (see paragraph 4.5.1) to access the Main Chassis Top Sub-assemblies. x COM Board (Figure 7-2) Steps 5 and 6 apply to 28V/10W units only. 14/28V and 28V/16W units have no posistor, no brass spacers, and use […]
-
Page 49: Garmin GNS 430
Page 4-6 400 SERIES MAINTENANCE MANUAL Rev. C P/N 190-00140-05 x GPS Module (Figure 7-2) 1. Disconnect the Ribbon Cable from the GPS Module (011-00474-XX). 2. Remove screw (211-60234-11) attaching the Map Board (012-00296-00) to the Main Chassis (125-00034-01). Remove 3 of 5 screws (211-63234-10) attaching GPS Module (011-00474-XX) to the Main Chas[…]
-
Page 50: Garmin GNS 430
400 SERIES MAINTENANCE MANUAL Page 4-7 P/N 190-00140-05 Rev. C x Glideslope Board (Figure 7-3) 1. Remove the Glideslope Board Cover (115-00221-00). 2. Disconnect the Ribbon Cable (325-00063-01) from the Glideslope Board (012- 00212-XX). 3. Unsolder the connector wire from the Coax Connector (330-00070-03). 4. Remove the three screws (211-60234-04) […]
-
Page 51: Garmin GNS 430
Page 4-8 400 SERIES MAINTENANCE MANUAL Rev. C P/N 190-00140-05 1. Remove the Main Board (paragraph 4.5.5). 2. Remove all electrical grounds from the unit, so if using a grounded tip soldering iron, the battery will not be shorted upon removal. 3. Unsolder the battery leads from the bottom side of the Main Board. 4. Carefully remove the battery by p[…]
-
Page 52: Garmin GNS 430
400 SERIES MAINTENANCE MANUAL Page 5-1 P/N 190-00140-05 Rev. C SECTION 5 ALIGNMENT, CALIBRATION, AND TESTING 5.1 INTRODUCTION This section provides unit-level alignment, calibration, and testing information for the 400 Series units. The procedures in this section can be performed before troubleshooting begins to help identify a faulty board, or as […]
-
Page 53: Garmin GNS 430
Page 5-2 400 SERIES MAINTENANCE MANUAL Rev. C P/N 190-00140-05 Avionics Signal Generator IFR or Marconi 2030 w/options one and six. BF Goodrich Precision Track Selector Digital Voltmeter—HP 34401A GPS Antenna—GARMIN GA56 (P/N 010-10040-01) Power Supply capable of 10-33 Volts @ 10 Amps—HP 6267B Radio Test Set—HP 8[…]
-
Page 54: Garmin GNS 430
400 SERIES MAINTENANCE MANUAL Page 5-3 P/N 190-00140-05 Rev. C UNIT UNDER TEST BIRD WA TT M E T E R 30 dB 50 W A TT A TTENUA TOR 50 OHM LOAD RF INPUT AT T E N U AT E D RF OUTPUT NOTE 5 0 O H M L O A D IS N O T R E Q U IR E D I F 30 dB A T TE N U A TO R I S U S ED . THE 30 dB A TTE NU A TOR W I LL L OWE R T H E V S WR T O < 1 . 1 : 1 EVEN I F L E[…]
-
Page 55: Garmin GNS 430
Page 5-4 400 SERIES MAINTENANCE MANUAL Rev. C P/N 190-00140-05 5.4.1.2 Standard Signals COM RF Level Units All specifications given for the com transceiver are in HARD units. To arrive at these units adjust the RF generator to the level specified and insert a 6 dB pad at the output of the RF generator. Standard Mic Input Signal A 1000 Hz to[…]
-
Page 56: Garmin GNS 430
400 SERIES MAINTENANCE MANUAL Page 5-5 P/N 190-00140-05 Rev. C Standard Glideslope Centering Test Signal Standard Glideslope centering test signal is a standard Glideslope test signal in which the difference in depth of modulation of the 90 and 150 Hz signals is less than 0.002 ddm. Standard Glideslope Deviation Test Signal Standard Glidesl[…]
-
Page 57: Garmin GNS 430
Page 5-6 400 SERIES MAINTENANCE MANUAL Rev. C P/N 190-00140-05 G/S Super Flag Load (G/S SUPER FLAG OUT) One standard super flag load shall be 56 ohms connected between G/S SUPER FLAG OUT J6-38 and GND J6-41. ARINC 429 Transmitter Load (VLOC 429 OUTA/OUTB) The standard ARINC 429 transmitter load shall be 2.4K ohms resistance and 250 pF capac[…]
-
Page 58: Garmin GNS 430
400 SERIES MAINTENANCE MANUAL Page 5-7 P/N 190-00140-05 Rev. C Standard VOR Audio Test Signal Standard VOR audio test signal is a standard VOR test signal to which is added a 1000 Hz signal, amplitude modulating the carrier 30%. Standard Audio Test Signal Standard audio test signal is a RF carrier amplitude modulated 30% at 1000 Hz. The RF […]
-
Page 59: Garmin GNS 430
Page 5-8 400 SERIES MAINTENANCE MANUAL Rev. C P/N 190-00140-05 Standard Localizer Centering Test Signal Standard localizer centering test signal is a standard localizer test signal in which the difference in depth of modulation of the 90 and 150 Hz signals is less than 0.001. Standard Localizer Deviation Test Signal Standard localizer devia[…]
-
Page 60: Garmin GNS 430
400 SERIES MAINTENANCE MANUAL Page 5-9 P/N 190-00140-05 Rev. C 5.5 ALIGNMENT Board alignment is not recommended on any of the 400 Series units. Alignment is performed on individual boards at the factory before being shipped as replacement items. 5.6 CALIBRATION Calibration can be performed for the following: COM Frequency Frequency Spacing […]
-
Page 61: Garmin GNS 430
Page 5-10 400 SERIES MAINTENANCE MANUAL Rev. C P/N 190-00140-05 5.6.1 Com Setup Page Fields 5.6.1.1 Com Frequency The Com Frequency field selects a VHF communication frequency. For purposes of setting the squelch, sidetone levels and mic gain, only the frequencies 118.000, 127.000, and 136.975 MHz can be used. If any adjustment is made at one of th[…]
-
Page 62: Garmin GNS 430
400 SERIES MAINTENANCE MANUAL Page 5-11 P/N 190-00140-05 Rev. C 5.6.1.5 Sidetone The sidetone audio output level is independent of the COM volume knob on the unit. The SIDETN field sets the sidetone audio output level. The sidetone can be set to any value between zero and 63. The higher the number, the greater the sidetone volume. SIDETN ______[…]
-
Page 63: Garmin GNS 430
Page 5-12 400 SERIES MAINTENANCE MANUAL Rev. C P/N 190-00140-05 5.7 TEST PROCEDURES 5.7.1 Test Mode In order to perform certain tests in the following section, the GNS 430 must be put into test m ode, which allows access to the Test Pages (Figure 5-4). To put the unit in the test mode, ground Test Pin (J1-76) and turn the unit on. When in test mode[…]
-
Page 64: Garmin GNS 430
400 SERIES MAINTENANCE MANUAL Page 5-13 P/N 190-00140-05 Rev. C Figure 5-4. Test Pages[…]
-
Page 65: Garmin GNS 430
Page 5-14 400 SERIES MAINTENANCE MANUAL Rev. C P/N 190-00140-05 5.7.2 Com Testing Before starting com testing, note the following: 1. Disable the audio compressor unless otherwise specified. The compressor can be disabled for testing purposes by manually grounding the SQUELCH/COMPRESSOR TEST input at Pin 3 of J2 . 2. The 8.33 kHz channel mode uses […]
-
Page 66: Garmin GNS 430
400 SERIES MAINTENANCE MANUAL Page 5-15 P/N 190-00140-05 Rev. C 3. Transmit Mode: +14/+28 Volt Radios (J2-11 and 12): Voltage _________ (+ 13.75 V) Tolerance _________ ( r 0.2 V) Max Current Avg 1 _________ (6.0 A) 5.7.2.2 RF Power Out 1. Set input voltage to 27.5 VDC (10 W, 28V units only) in TX mode at Pins J2-11 and 12. 2. Connect a […]
-
Page 67: Garmin GNS 430
Page 5-16 400 SERIES MAINTENANCE MANUAL Rev. C P/N 190-00140-05 Figure 5-5. Modulation Measurement Figure 5-5 shows the output of the Narda Crystal Detector display ed on an oscilloscope. The oscilloscope must be DC coupled in order for the modulation signal to be displayed correctly. 5.7.2.3 Frequency Stability and Tolerance Verify the RF carrier […]
-
Page 68: Garmin GNS 430
400 SERIES MAINTENANCE MANUAL Page 5-17 P/N 190-00140-05 Rev. C 5.7.2.5 Carrier Noise Level 1. Apply a standard MIC input signal. 2. The demodulated noise on the transmitter output, without audio m odulation, shall be at least 45 dB below the demodulated audio level obtained when the transmitter is m odulated with a standard mic input signal. 1[…]
-
Page 69: Garmin GNS 430
Page 5-18 400 SERIES MAINTENANCE MANUAL Rev. C P/N 190-00140-05 5.7.2.8 Sidetone 1. Apply a standard mic input signal. Measure com audio out and while transmitting, verify sidetone level is 1.4 Vrms 0.2 Vrms. 118.50 MHz ______ Vrms 127.50 MHz ______ Vrms 136.50 MHz ______ Vrms 5.7.2.9 MIC Intercom Test 1. Remove RF input from the un[…]
-
Page 70: Garmin GNS 430
400 SERIES MAINTENANCE MANUAL Page 5-19 P/N 190-00140-05 Rev. C 5.7.2.11 TX Interlock 1. Apply an 10 P V, 30% modulated, 1000 Hz RF signal. 2. Measure SNR at rated audio ( a 7.07 Vrms). Sensitivity Reading 1______ 3. Enable TX interlock line. 4. Measure SNR again. Sensitivity Reading 2______ NLT 15dB difference between sensitivity readi[…]
-
Page 71: Garmin GNS 430
Page 5-20 400 SERIES MAINTENANCE MANUAL Rev. C P/N 190-00140-05 7. Adjust the RF level to 20 µV. 8. Verify the DMM reading is greater than the AGC reference voltage. DMM reading ________VDC (NLT AGC Reference Voltage) 9. Adjust the signal generator frequency to 127.008 MHz. 10. Verify the DMM reading is greater than the reference AGC voltage. […]
-
Page 72: Garmin GNS 430
400 SERIES MAINTENANCE MANUAL Page 5-21 P/N 190-00140-05 Rev. C 11. Verify the DMM reading is greater than the reference AGC voltage. 127.002778 MHz ______VDC (NLT AGC reference voltage) 126.997222 MHz ______VDC (NLT AGC reference voltage) 12. Adjust signal level to 10 mV. 127.00737 MHz ______VDC (NGT AGC reference voltage) 126.9926[…]
-
Page 73: Garmin GNS 430
Page 5-22 400 SERIES MAINTENANCE MANUAL Rev. C P/N 190-00140-05 5.7.2.17 Audio Frequency Response 1. With compression disabled, apply a 30% modulated, 1 mV signal to the unit. 2. Verify the audio output does not change more than 6 dB from 350 Hz to 2.5 kHz. 3. Verify the audio-frequency response above 2500 Hz decreases, and at all frequencies above[…]
-
Page 74: Garmin GNS 430
400 SERIES MAINTENANCE MANUAL Page 5-23 P/N 190-00140-05 Rev. C 5.7.2.19 Squelch Test Note: Opened squelch—Audio Closed Squelch—No Audio 1. Enable compressor (see Section 5.7.2). 2. Set the unit and the RF signal generator to 127.000 MHz, 30% modulated with a 1 kHz tone. 3. Turn the RF level down below 1µV. 4. Turn the power/volume control on […]
-
Page 75: Garmin GNS 430
Page 5-24 400 SERIES MAINTENANCE MANUAL Rev. C P/N 190-00140-05 5.7.2.20 Frequency Modulation FM deviation is to be measured with an average responding detector, which is RMS sine wave calibrated. The result is to be divided by 0.707 to yield the mathematical peak deviation. 1. Modulate the transmitter with a standard modulator input signal. 2. Ver[…]
-
Page 76: Garmin GNS 430
400 SERIES MAINTENANCE MANUAL Page 5-25 P/N 190-00140-05 Rev. C 5.7.3 Navigation Receiver Final Tests 5.7.3.1 Voice/Ident Audio Output Level 1. Apply a standard audio test signal having a RF level of -93 dBm. 2. Select maximum audio (volume control turned fully clockwise), and turn off the ident filter. 3. Measure 500 : VOR/ILS AUDIO HI J6-16 with […]
-
Page 77: Garmin GNS 430
Page 5-26 400 SERIES MAINTENANCE MANUAL Rev. C P/N 190-00140-05 5.7.3.3 Voice/Ident Audio Distortion 1. Apply an input level from the RF generator of -79 dBm. 2. Modulate a standard VOR audio test signal at 350 Hz, 1000 Hz, and 2500 Hz (must be in IDENT mode to pass 1000 Hz tone). 3. Measure 500 : VOR/ILS AUDIO HI J6-16 with respect to 500 : VOR/IL[…]
-
Page 78: Garmin GNS 430
400 SERIES MAINTENANCE MANUAL Page 5-27 P/N 190-00140-05 Rev. C 5.7.3.6 Receiver Quieting 1. Apply a -86 dBm RF level to the RF input. 2. Apply a Standard VOR Audio Test signal at 108.00 MHz. 3. Measure at the 500 : VOR/ILS AUDIO HI J6-16 and 500 : VOR/ILS AUDIO LO J6-17 outputs. 4. Verify the Audio SINAD or SNR is greater than 25 dB. Audio SIN[…]
-
Page 79: Garmin GNS 430
Page 5-28 400 SERIES MAINTENANCE MANUAL Rev. C P/N 190-00140-05 5.7.3.9 VOR Flag Sensitivity A VOR/LOC +FLAG output voltage of greater than 260 mV fully conceals the indicator flag (‘HIDE’) and a VOR/LOC +FLAG output voltage of less than 125 m V fully reveals the indicator flag (IN VIEW). This test requires a Precision Track Selector or similar[…]
-
Page 80: Garmin GNS 430
400 SERIES MAINTENANCE MANUAL Page 5-29 P/N 190-00140-05 Rev. C 5.7.3.12 VOR Course Deviation Sensitivity 1. Apply a standard VOR deviation signal at 108.00 MHz, –103.5 dBm RF level to the RF input. at a radial of 160 degrees ‘FROM’. 2. Apply a Precision Test Selector or similar device at 150 degrees in course angle. 3. Measure at the VOR/LOC[…]
-
Page 81: Garmin GNS 430
Page 5-30 400 SERIES MAINTENANCE MANUAL Rev. C P/N 190-00140-05 5.7.3.16 Course Deviation Accuracy Test Apply a standard localizer deviation test signal, 90 Hz greater than 150Hz. Verify the deviation measured at VOR/LOC +LEFT with respect to VOR/LOC +RIGHT (VOR/LOC COMMON) is 90 mV r 9 m V. _____OK 5.7.3.17 VOR OBS Bearing Accuracy 1. Apply a stan[…]
-
Page 82: Garmin GNS 430
400 SERIES MAINTENANCE MANUAL Page 5-31 P/N 190-00140-05 Rev. C 5.7.3.19 Spurious Response—VOR/LOC 1. Tune the VOR receiver to 117.95 MHz. 2. Verify the input signal level of an undesired image frequency of 77.15 MHz required to produce a detector-carrier (AGC) level obtained at the VOR/LOC IF AGC J6-7 output with a -93 dBm Standard VOR Audio Tes[…]
-
Page 83: Garmin GNS 430
Page 5-32 400 SERIES MAINTENANCE MANUAL Rev. C P/N 190-00140-05 5.7.4 Navigation Assembly I/O Tests 5.7.4.1 Localizer Course Deviation Test 1. Display the VOR/LOC/GS CDI Test Page (Figure 5-6). Figure 5-6. VOR/LOC/GS CDI Test Page 2. Display the following on the VOR/LOC/GS CDI Test Page and verify the following voltages, measuring across VOR/LOC +L[…]
-
Page 84: Garmin GNS 430
400 SERIES MAINTENANCE MANUAL Page 5-33 P/N 190-00140-05 Rev. C 6. Verify the following output: TO/FROM (VOR/LOC +TO) ______(-225 r 75 mV) 7. Display HIDE. 8. Measure VOR/LOC +TO (J6-1) with respect to VOR/LOC +FROM (J6-2). 9. Verify the following output: TO/FROM (VOR/LOC +TO) ______ mV (0 mV r 5 mV) 5.7.4.4 Course Deviation Flag Output Cha[…]
-
Page 85: Garmin GNS 430
Page 5-34 400 SERIES MAINTENANCE MANUAL Rev. C P/N 190-00140-05 5. Verify the VOR/LOC SUPER FLAG OUT output voltage with respect to ground is 0 r 250 mV (50 ohm load). VOR/LOC SUPER FLAG OUT ______ mV 5.7.4.7 NAV Input Lines Monitor the “VOR DISCRETE INPUTS” Test Page and verify that toggling the below listed inputs between their active and[…]
-
Page 86: Garmin GNS 430
400 SERIES MAINTENANCE MANUAL Page 5-35 P/N 190-00140-05 Rev. C 5.7.4.9 NAV Serial DME Outputs Monitor the “VOR DISCRETE OUTPUTS” Test Page and verify that toggling the below listed outputs between their active and inactive states causes the output voltage on the appropriate line to switch between low (<.01 V) and high (>8.0 V) states. ?[…]
-
Page 87: Garmin GNS 430
Page 5-36 400 SERIES MAINTENANCE MANUAL Rev. C P/N 190-00140-05 PAR DME 2 MHz Low____ High ____ (Input Switch must not be grounded for this test) PAR DME 4 MHz Low____ High ____ (Input Switch must not be grounded for this test) PAR DME 8 MHz Low____ High ____[…]
-
Page 88: Garmin GNS 430
400 SERIES MAINTENANCE MANUAL Page 5-37 P/N 190-00140-05 Rev. C 5.7.5 Glideslope Final Tests 5.7.5.1 Glideslope Course Deviation Output Characteristic Test 1. Apply a standard course deviation input signal to the unit. 2. Measure GLIDESLOPE +UP (J6-32) with respect to GLIDESLOPE +DOWN (J6-31). 3. Verify the deviation output voltages (GLIDESLOPE +UP[…]
-
Page 89: Garmin GNS 430
Page 5-38 400 SERIES MAINTENANCE MANUAL Rev. C P/N 190-00140-05 5.7.5.4 Glideslope Superflag Output Test 1. Select flag ‘HIDDEN’. 2. Verify GLIDESLOPE superflag output voltage is not less than PWR_IN minus 1.5 V. GLIDESLOPE Superflag Output ______ (NLT Power_IN minus 1.5 V) 3. Select Flag ‘IN VIEW’. 4. Verify GLIDESLOPE superflag output[…]
-
Page 90: Garmin GNS 430
400 SERIES MAINTENANCE MANUAL Page 5-39 P/N 190-00140-05 Rev. C 5.7.5.6 Centering Accuracy 1. Apply a standard glideslope test signal to the unit. 2. Measure GLIDESLOPE +UP (J6-32) with respect to GLIDESLOPE +DOWN (GLIDESLOPE Common) (J6-31). 3. Verify the centering accuracy is 0 mV r 7.8 mV. Centering Accuracy _________mV 5.7.5.7 AGC 1. Apply […]
-
Page 91: Garmin GNS 430
Page 5-40 400 SERIES MAINTENANCE MANUAL Rev. C P/N 190-00140-05 5.7.5.9 Nose Bandwidth 1. Apply standard glideslope test signal to the unit (-56dBm). 2. Find the AGC voltage and use it as a reference. 3. Vary the input signal frequency over the range of r 17 kHz from the assigned channel frequency. 4. Verify the input signal level needed to maintai[…]
-
Page 92: Garmin GNS 430
400 SERIES MAINTENANCE MANUAL Page 5-41 P/N 190-00140-05 Rev. C 5.7.5.12 Status Tests 1. The following status bits shall be good with or without a standard glideslope test signal: GLIDESLOPE ROM_______OK GLIDESLOPE EEPROM _____OK GLIDESLOPE Synthesizer Lock__________OK 2. The following status bits shall be good when a standard glideslop[…]
-
Page 93: Garmin GNS 430
Page 5-42 400 SERIES MAINTENANCE MANUAL Rev. C P/N 190-00140-05 5.7.6 Main Board Final Tests GNC 420 versions 011-00506-10 or 011-00506-30, and GNS 430 versions 011-00280-10 or 011-00280-30 m ust be verified operational with dual power switch in both positions (1 and 2). The “A” versions of the GNC 420 and the GNS 430 must be verified also. See[…]
-
Page 94: Garmin GNS 430
400 SERIES MAINTENANCE MANUAL Page 5-43 P/N 190-00140-05 Rev. C 5.7.6.4 Photocell 1. Turn the unit on in the test mode and verify brightness control is in photo mode, using the main lighting page. 2. With photocell uncovered, ensure display and keyboard backlight LED brightness is proper under normal conditions. _____OK 3. Cover the photocell and v[…]
-
Page 95: Garmin GNS 430
Page 5-44 400 SERIES MAINTENANCE MANUAL Rev. C P/N 190-00140-05 Figure 5-7. Main Lighting and Main Analog Test Pages B. Lighting Bus DC 1. Using the Main Lighting Test Page, change source to 14 VDC in both the DISPLAY and KEY fields. 2. Attach 12.0 VDC to unit pin J1-39. Ensure the power supply ground is connected to unit ground (J1-77, 78). 3. Mon[…]
-
Page 96: Garmin GNS 430
400 SERIES MAINTENANCE MANUAL Page 5-45 P/N 190-00140-05 Rev. C 5.7.6.7 Display Pattern Test Starting from the display pattern test page, use the “RNG” buttons to cycle through all of the display patterns to verify all pixels are driven and color contrast is acceptable. _____OK 5.7.6.8 Fan Test 1. Verify fan blade is not moving or air is not be[…]
-
Page 97: Garmin GNS 430
Page 5-46 400 SERIES MAINTENANCE MANUAL Rev. C P/N 190-00140-05 1. Put the unit into Test Mode. 2. Turn the small right knob (CRSR) until you see the GPS Test Page (Figure 5-7). 3. Terminate GPS receiver into a 50 ohm load. 4. The “sgnl” number represents the receiver noise level. Verify this number is within the range of 1450 to 1750. _____OK […]
-
Page 98: Garmin GNS 430
400 SERIES MAINTENANCE MANUAL Page 5-47 P/N 190-00140-05 Rev. C Figure 5-9. Main CDI/OBS Configuration Test Page 5.7.6.13 MAIN Lateral LEFT, RIGHT Outputs Measure J1-21 (output) relative to J1-22 (output) [Load—333 ohms (three 1000 ohm loads) across J1-21 and J1-22]. Note that full left/right ( r 150 m V) are also available selections but are not[…]
-
Page 99: Garmin GNS 430
Page 5-48 400 SERIES MAINTENANCE MANUAL Rev. C P/N 190-00140-05 5.7.6.16 MAIN Lateral Flag Output Measure J1-23 relative to J1-24. Load—333 ohms (Three 1000 ohm loads) across J1-23 and J1-24. ‘HIDE’______ (+375 r 80 mV) IN VIEW ______ (0 r 25 mV ) 5.7.6.17 MAIN Vertical Flag Output Measure J1-29 relative to J1-30. Load—333 ohms (Thr[…]
-
Page 100: Garmin GNS 430
400 SERIES MAINTENANCE MANUAL Page 5-49 P/N 190-00140-05 Rev. C 5.7.6.20 Annunciate Outputs Both the OBS and the AUTO outputs are switched by toggling the OBS selection on the Test Page. For: ANNUCIATOR PIN NAV (VLOC) (J1-1) GPS (J1-2) WAYPOINT (J1-3) TERMINAL (A) (J1-4) APPROACH (B) (J1-5) MESSAGE (J1-6) OBS (J1-7) AUTO (J1-8) INTEGRITY (C) (J1-9)[…]
-
Page 101: Garmin GNS 430
Page 5-50 400 SERIES MAINTENANCE MANUAL Rev. C P/N 190-00140-05 2. Measure at applicable pin. Load—Resistor to external voltage source such that it will source 275 mA when grounded. Note: applicable output will sink this current when active (18 ohms/2W when pulled up to 5V). ACTIVE______ (0.3 VDC max) INACTIVE ______ (NLT pull-up voltage […]
-
Page 102: Garmin GNS 430
400 SERIES MAINTENANCE MANUAL Page 5-51 P/N 190-00140-05 Rev. C 5.7.6.22 Discrete Switch and Altitude Inputs For: INPUT NAME PIN ALTITUDE C4 (J1-61) ALTITUDE C2 (J1-62) ALTITUDE C1 (J1-63) ALTITUDE B4 (J1-64) ALTITUDE B2 (J1-65) ALTITUDE B1 (J1-66) ALTITUDE A4 (J1-67) ALTITUDE A2 (J1-68) ALTITUDE A1 (J1-69) ALTITUDE D4 (J1-70) OBS MODE SELECT (J1-7[…]
-
Page 103: Garmin GNS 430
Page 5-52 400 SERIES MAINTENANCE MANUAL Rev. C P/N 190-00140-05 5.7.6.23 ARINC 429 Transmitter and Receivers Unit outputs both HIGH and LOW speed signals at the same time in test mode while on the Main Status/Loopback Test Page, thus both speeds are tested simultaneously. For: GPS ARINC 429 OUT A (J1-46). GPS ARINC 429 OUT B (J1-47). GPS ARINC 429 […]
-
Page 104: Garmin GNS 430
400 SERIES MAINTENANCE MANUAL Page 5-53 P/N 190-00140-05 Rev. C 5.7.6.24 RS232 Ports For: GPS RS232 OUT 1 (J1-56) GPS RS232 IN 1 (J1-57) GPS RS232 OUT 2 (J1-58) GPS RS232 IN 2 (J1-59) GPS RS232 OUT 3 (J1-41) GPS RS232 IN 3 (J1-42) GPS RS232 OUT 4 (J1-54) GPS RS232 IN 4 (J1-55) A. GPS RS232 1 1. Test both receiver and transmitter. 2. Connect the tra[…]
-
Page 105: Garmin GNS 430
Page 5-54 400 SERIES MAINTENANCE MANUAL Rev. C P/N 190-00140-05 5.7.6.25 OBS The load used in the OBS test consists of a calibrated OBS resolver, Precision Track Selector or equivalent, and must be connected to the GPS OBS inputs. The OBS bearing must be consistent to within r 2 degrees of the bearing setting. If this output requires an alignment, […]
-
Page 106: Garmin GNS 430
400 SERIES MAINTENANCE MANUAL Page 6-1 P/N 190-000140-05 Rev. C SECTION 6 PARTS AND ASSEMBLIES 6.1 INTRODUCTION This section lists major parts of the 400 Series. The part numbers listed in this section of the manual are given to aid in assembly and disassembly of the unit only, not for identifying orderable parts. For orderable part information, se[…]
-
Page 107: Garmin GNS 430
Page 6-2 400 SERIES MAINTENANCE MANUAL Rev. C P/N 190-00140-05 GNC420/420A Table Part Description Unit P/N Figure 6-15 Sub-Assy, GNC420, 28V, Black 011-00506-00 7-5 6-16 Sub-Assy, GNC420, 14/28V, Black 011-00506-10 7-5 6-17 Sub-Assy, GNC420, 14/28V, Gray 011-00506-30 7-5 6-18 Sub-Assy, GNC420A, 28V, Black 011-00837-00 7-8 6-19 Sub-Assy, GNC420A, 28[…]
-
Page 108: Garmin GNS 430
400 SERIES MAINTENANCE MANUAL Page 6-3 P/N 190-000140-05 Rev. C Miscellaneous Parts Part Part Description Unit P/N Figure F600 Fuse, Submini, Axial, 7 Amp 350-00003-15 3-2 F850 Fuse, SMT, Fast, 5 Amp 350-B0500-01 3-1 F853 Fuse, 1206, 0.75 Amp 350-B1075-00 3-1 F852 Fuse, 1206, 2 Amp 350-B1200-00 3-1 F851 Fuse, 1206, 3 Amp 350-B1300-00 3-1 R611 Resis[…]
-
Page 109: Garmin GNS 430
Page 6-4 400 SERIES MAINTENANCE MANUAL Rev. C P/N 190-00140-05 6.2.1 GNS 430/430A Tables Table 6-1. Sub-Assy, GNS 430, 28V, Black (Unit P/N 011-00280-00, Figure 7-1) Part Number Part Name Qty 011-00281-00 Sub-Assy,CDU,GNS430 1 011-00282-00 Sub-Assy,Nav Chassis,GNC400 1 011-00283-00 Sub-Assy,Main Chas,GNS430,28V 1 011-00460-40 Sub-Assy,Memory Card,D[…]
-
Page 110: Garmin GNS 430
400 SERIES MAINTENANCE MANUAL Page 6-5 P/N 190-000140-05 Rev. C Table 6-3. Sub-Assy, GNS 430, 14/28V, Gray (Unit P/N 011-00280-30, Figure 7-1) Part Number Part Name Qty 011-00281-04 Sub-Assy,CDU,GNS430,Gray 1 011-00282-00 Sub-Assy,Nav Chassis,GNC400 1 011-00283-30 Sub,Mn Chassis,GNS430,14/28V,DO 1 011-00460-40 Sub-Assy,Memory Card,Dummy 1 115-00218[…]
-
Page 111: Garmin GNS 430
Page 6-6 400 SERIES MAINTENANCE MANUAL Rev. C P/N 190-00140-05 Table 6-5. Sub-Assy GNS 430A, 28V, Gray (Unit P/N 011-00836-10, Figure 7-1) Part Number Part Name Qty 011-00281-04 Sub-Assy,CDU,GNS430,Gray 1 011-00282-00 Sub-Assy,Nav Chassis,GNC400 1 011-00283-20 Sub,Main Chassis,GNS430A 1 011-00460-40 Sub-Assy,Memory Card,Dummy 1 115-00218-00 SMP,Cov[…]
-
Page 112: Garmin GNS 430
400 SERIES MAINTENANCE MANUAL Page 6-7 P/N 190-000140-05 Rev. C Table 6-6. Main Chassis Assy, GNS 430, 14/28V (Unit P/N 011-00283-10, Figure 7-2) Part Number Part Name Qty 011-00474-01 Sub-Assy,GPS Module,GNC TSOII 1 012-00214-05 PCB Assy,Comm,10W 14/28V 1 012-00256-00 PCB Assy,GNC400 Inverter Bd 1 012-00296-00 PCB Assy,GNC400 Map Bd 1 012-00347-32[…]
-
Page 113: Garmin GNS 430
Page 6-8 400 SERIES MAINTENANCE MANUAL Rev. C P/N 190-00140-05 Table 6-7. Main Chassis Assy, GNS 430, 14/28V, DO (Unit P/N 011-00283-30, Fig. 7-2) Part Number Part Name Qty 011-00474-01 Sub-Assy,GPS Module,GNC TSOII 1 012-00214-05 PCB Assy,Comm,10W 14/28V 1 012-00256-00 PCB Assy,GNC400 Inverter Bd 1 012-00296-00 PCB Assy,GNC400 Map Bd 1 012-00347-3[…]
-
Page 114: Garmin GNS 430
400 SERIES MAINTENANCE MANUAL Page 6-9 P/N 190-000140-05 Rev. C Table 6-8. Main Chassis Assy, GNS 430, 28V (Unit P/N 011-00283-00, Fig. 7-2) Part Number Part Name Qty 011-00474-01 Sub-Assy,GPS Module,GNC TSOII 1 012-00214-03 PCB Assy,Comm,2.5ppm TCXO 1 012-00256-00 PCB Assy,GNC400 Inverter Bd 1 012-00296-00 PCB Assy,GNC400 Map Bd 1 012-00347-32 PCB[…]
-
Page 115: Garmin GNS 430
Page 6-10 400 SERIES MAINTENANCE MANUAL Rev. C P/N 190-00140-05 Table 6-9. Main Chassis Assy, GNS 430A, 28V (Unit P/N 011-00283-20, Figure 7-2) Part Number Part Name Qty 011-00474-01 Sub-Assy,GPS Module,GNC TSOII 1 012-00256-00 PCB Assy,GNC400 Inverter Bd 1 012-00296-00 PCB Assy,GNC400 Map Bd 1 012-00347-32 PCB Assy,GNS430 Main Bd,DO 1 012-00611-00[…]
-
Page 116: Garmin GNS 430
400 SERIES MAINTENANCE MANUAL Page 6-11 P/N 190-000140-05 Rev. C Table 6-10. Nav Chassis Sub-Assy, GNS 430/430A (Unit P/N 011-00282-00, Figure 7-3) Part Number Part Name Qty 012-00195-20 PCB Assy,Nav Rcvr,GNC400/500 1 012-00212-10 PCB Assy,GNC400 Glide Slope 1 115-00209-00 SMP,Cover,Cont,GNC400 Nav Bd 1 115-00213-00 SMP,Cover,RF,GNC400 Nav Bd 1 115[…]
-
Page 117: Garmin GNS 430
Page 6-12 400 SERIES MAINTENANCE MANUAL Rev. C P/N 190-00140-05 Table 6-11. Sub-Assy, CDU, GNS 430, Black (Unit P/N 011-00281-00, Figure 7-4) Bub Part Number Part Name Qty 1 011-00340-00 Sub-Assy,Inc Dec Push Switch 1 6 210-00021-00 Nut,Hex,Reduced 1 7 211-00030-00 Pivot Pin,Power Switch 1 8 117-00028-00 Shaft,Pot,Machined,GNC4XX 1 20 430-00013-01 […]
-
Page 118: Garmin GNS 430
400 SERIES MAINTENANCE MANUAL Page 6-13 P/N 190-000140-05 Rev. C Table 6-12. Sub-Assy, CDU, GNS 430, Gray (Unit P/N 011-00281-04, Figure 7-4) Bub Part Number Part Name Qty 1 011-00340-00 Sub-Assy,Inc Dec Push Switch 1 6 210-00021-00 Nut,Hex,Reduced 1 7 211-00030-00 Pivot Pin,Power Switch 1 8 117-00028-00 Shaft,Pot,Machined,GNC4XX 1 20 430-00013-01 […]
-
Page 119: Garmin GNS 430
Page 6-14 400 SERIES MAINTENANCE MANUAL Rev. C P/N 190-00140-05 Table 6-13. Sub-Assy, CDU, GNS 430A, Black (Unit P/N 011-00281-00, Figure 7-4) Bub Part Number Part Name Qty 1 011-00340-00 Sub-Assy,Inc Dec Push Switch 1 6 210-00021-00 Nut,Hex,Reduced 1 7 211-00030-00 Pivot Pin,Power Switch 1 8 117-00028-00 Shaft,Pot,Machined,GNC4XX 1 20 430-00013-01[…]
-
Page 120: Garmin GNS 430
400 SERIES MAINTENANCE MANUAL Page 6-15 P/N 190-000140-05 Rev. C Table 6-14. Sub-Assy, CDU, GNS 430A, Gray (Unit P/N 011-00281-04, Figure 7-4) Bub Part Number Part Name Qty 1 011-00340-00 Sub-Assy,Inc Dec Push Switch 1 6 210-00021-00 Nut,Hex,Reduced 1 7 211-00030-00 Pivot Pin,Power Switch 1 8 117-00028-00 Shaft,Pot,Machined,GNC4XX 1 20 430-00013-01[…]
-
Page 121: Garmin GNS 430
Page 6-16 400 SERIES MAINTENANCE MANUAL Rev. C P/N 190-00140-05 6.2.3 GNC 420/420A Tables Table 6-15. Sub-Assy, GNC 420, 28V, Black (Unit P/N 011-00506-00, Figure 7-5) Part Number Part Name Qty 011-00281-01 Sub-Assy,CDU,GNC420 1 011-00282-01 Sub-Assy,Nav Chassis,w/o Nav 1 011-00283-01 Sub-Assy,Main Chas,GNC420,28V 1 011-00460-40 Sub-Assy,Memory Car[…]
-
Page 122: Garmin GNS 430
400 SERIES MAINTENANCE MANUAL Page 6-17 P/N 190-000140-05 Rev. C Table 6-17. Sub-Assy, GNC 420, 14/28V, Gray (Unit P/N 011-00506-30, Figure 7-5) Part Number Part Name Qty 011-00281-05 Sub-Assy,CDU,GNC420,Gray 1 011-00282-01 Sub-Assy,Nav Chassis,w/o Nav 1 011-00283-31 Sub,Mn Chassis,GNC420,Gray,DO 1 011-00460-40 Sub-Assy,Memory Card,Dummy 1 115-0021[…]
-
Page 123: Garmin GNS 430
Page 6-18 400 SERIES MAINTENANCE MANUAL Rev. C P/N 190-00140-05 Table 6-19. Sub-Assy, GNC 420A, 28V Gray (Unit P/N 011-00837-10, Figure 7-8) Part Number Part Name Qty 011-00281-05 Sub-Assy,CDU,GNC420,Gray 1 011-00282-01 Sub-Assy,Nav Chassis,w/o Nav 1 011-00283-21 Sub,Main Chassis,GNC420A 1 011-00460-40 Sub-Assy,Memory Card,Dummy 1 115-00218-00 SMP,[…]
-
Page 124: Garmin GNS 430
400 SERIES MAINTENANCE MANUAL Page 6-19 P/N 190-000140-05 Rev. C Table 6-20. Main Chassis Assy, GNC 420, 28V (Unit P/N 011-00283-01, Figure 7-6) Part Number Part Name Qty 011-00474-01 Sub-Assy,GPS Module,GNC TSOII 1 012-00214-03 PCB Assy,Comm,2.5ppm TCXO 1 012-00256-00 PCB Assy,GNC400 Inverter Bd 1 012-00296-00 PCB Assy,GNC400 Map Bd 1 012-00347-22[…]
-
Page 125: Garmin GNS 430
Page 6-20 400 SERIES MAINTENANCE MANUAL Rev. C P/N 190-00140-05 Table 6-21. Main Chassis Assy, GNC 420, 14/28V (Unit P/N 011-00283-11, Fig. 7-6) Part Number Part Name Qty 011-00474-01 Sub-Assy,GPS Module,GNC TSOII 1 012-00214-05 PCB Assy,Comm,10W 14/28V 1 012-00256-00 PCB Assy,GNC400 Inverter Bd 1 012-00296-00 PCB Assy,GNC400 Map Bd 1 012-00347-22 […]
-
Page 126: Garmin GNS 430
400 SERIES MAINTENANCE MANUAL Page 6-21 P/N 190-000140-05 Rev. C Table 6-22. Main Chassis Assy, GNC 420, 14/28V, DO, (P/N 011-00283-31, Figure 7-6) Item Description Qty 011-00474-01 Sub-Assy,GPS Module,GNC TSOII 1 012-00214-05 PCB Assy,Comm,10W 14/28V 1 012-00256-00 PCB Assy,GNC400 Inverter Bd 1 012-00296-00 PCB Assy,GNC400 Map Bd 1 012-00347-22 PC[…]
-
Page 127: Garmin GNS 430
Page 6-22 400 SERIES MAINTENANCE MANUAL Rev. C P/N 190-00140-05 Table 6-23. Main Chassis Sub-Assy, GNC 420A, 28V (Unit P/N 011-00283-21, Figure 7-6) Part Number Part Name Qty 011-00474-01 Sub-Assy,GPS Module,GNC TSOII 1 012-00611-00 PCB Assy,Comm Xcvr,16 Watt 1 012-00256-00 PCB Assy,GNC400 Inverter Bd 1 012-00296-00 PCB Assy,GNC400 Map Bd 1 012-003[…]
-
Page 128: Garmin GNS 430
400 SERIES MAINTENANCE MANUAL Page 6-23 P/N 190-000140-05 Rev. C Table 6-25. Sub-Assy, CDU, GNC 420, Black (Unit P/N 011-00281-01, Figure 7-4) Bub Number Item Description Qty 32 011-00340-00 Sub-Assy,Inc Dec Push Switch 1 28 430-00013-01 Knob Assy,Outer,GNC400/500 1 20 430-00013-01 Knob Assy,Outer,GNC400/500 1 1 011-00340-00 Sub-Assy,Inc Dec Push S[…]
-
Page 129: Garmin GNS 430
Page 6-24 400 SERIES MAINTENANCE MANUAL Rev. C P/N 190-00140-05 Table 6-26. Sub-Assy, CDU, GNC 420, Gray (Unit 011-00281-05, Figure 7-4) Bub Number Part Number Part Name Qty 32 011-00340-00 Sub-Assy,Inc Dec Push Switch 1 28 430-00013-01 Knob Assy,Outer,GNC400/500 1 20 430-00013-01 Knob Assy,Outer,GNC400/500 1 1 011-00340-00 Sub-Assy,Inc Dec Push Sw[…]
-
Page 130: Garmin GNS 430
400 SERIES MAINTENANCE MANUAL Page 6-25 P/N 190-000140-05 Rev. C Table 6-27. Sub-Assy, CDU, GNC 420A, Black (Unit P/N 011-00281-01, Figure 7-4) Bub Number Item Description Qty 32 011-00340-00 Sub-Assy,Inc Dec Push Switch 1 28 430-00013-01 Knob Assy,Outer,GNC400/500 1 20 430-00013-01 Knob Assy,Outer,GNC400/500 1 1 011-00340-00 Sub-Assy,Inc Dec Push […]
-
Page 131: Garmin GNS 430
Page 6-26 400 SERIES MAINTENANCE MANUAL Rev. C P/N 190-00140-05 Table 6-28. Sub-Assy, CDU, GNC 420A, Gray (Unit 011-00281-05, Figure 7-4) Bub Number Part Number Part Name Qty 32 011-00340-00 Sub-Assy,Inc Dec Push Switch 1 28 430-00013-01 Knob Assy,Outer,GNC400/500 1 20 430-00013-01 Knob Assy,Outer,GNC400/500 1 1 011-00340-00 Sub-Assy,Inc Dec Push S[…]
-
Page 132: Garmin GNS 430
400 SERIES MAINTENANCE MANUAL Page 6-27 P/N 190-000140-05 Rev. C 6.2.4 GPS 400 Tables Table 6-29. Sub-Assy, GPS 400, 14/28V, Black (Unit P/N 011-00504-00, Figure 7-10) Part Number Part Name Qty 011-00281-03 Sub-Assy,CDU,GPS400 1 011-00282-01 Sub-Assy,Nav Chassis,w/o Nav 1 011-00283-33 Sub,Main Chassis,GPS400,DO 1 011-00460-40 Sub-Assy,Memory Card,D[…]
-
Page 133: Garmin GNS 430
Page 6-28 400 SERIES MAINTENANCE MANUAL Rev. C P/N 190-00140-05 Table 6-31. Main Chassis Assy, GPS 400 14/28V, (Unit P/N 011-00283-03, Figure 7-9) Part Number Part Name Qty 011-00474-01 Sub-Assy,GPS Module,GNC TSOII 1 012-00256-00 PCB Assy,GNC400 Inverter Bd 1 012-00296-00 PCB Assy,GNC400 Map Bd 1 012-00347-02 PCB Assy,GPS400 Main Bd,DO 1 115-00337[…]
-
Page 134: Garmin GNS 430
400 SERIES MAINTENANCE MANUAL Page 6-29 P/N 190-000140-05 Rev. C Table 6-34. Sub-Assembly, CDU, GPS 400, Black (Unit P/N 011-00281-03), Fig 7-4) Bub Part Number Part Name Qty 1 011-00340-00 Sub-Assy,Inc Dec Push Switch 1 2 211-60232-06 Screw,2-56x.187,PHP,SS/P,w/NYL 6 3 410-00012-01 Rtry Sw,Pot,w/Mom Push Sw, 1 5 012-00258-00 PCB Assy,GNC400 Interf[…]
-
Page 135: Garmin GNS 430
Page 6-30 400 SERIES MAINTENANCE MANUAL Rev. C P/N 190-00140-05 Table 6-35. Sub-Assembly, CDU, GPS 400, Gray (Unit P/N 011-00281-06, Fig 7-4) Bub Part Number Part Name Qty 1 011-00340-00 Sub-Assy,Inc Dec Push Switch 1 2 211-60232-06 Screw,2-56x.187,PHP,SS/P,w/NYL 6 3 410-00012-01 Rtry Sw,Pot,w/Mom Push Sw, 1 5 012-00258-00 PCB Assy,GNC400 Interface[…]
-
Page 136: Garmin GNS 430
400 SERIES MAINTENANCE MANUAL Page 7-1 P/N 190-00140-05 Rev. C SECTION 7 ASSEMBLY DRAWINGS 7.1 INTRODUCTION This section contains assembly drawings to aid in assembly and disassembly of the 400 Series units. Part numbers and drawing notes can be used as reference information during disassem bly and assembly. Note: The revision levels of the drawing[…]
-
Page 137: Garmin GNS 430
Page 7-2 400 SERIES MAINTENANCE MANUAL Rev. C P/N 190-00140-05 GPS 400: x GPS 400 Assy Drawing (Dwg. No. 015-00504-XX, Rev. G, Figure 7-10) x Figure 7-9—Main Chassis Assembly, GPS 400 (Dwg. No. 015-00283-03, Rev. J) x GPS 400 Sub-Assy, Nav Chassis, W/O Nav (Use Figure 7-7) x GPS 400 CDU Assembly Drawing (Use Figure 7-4)[…]
-
Page 138: Garmin GNS 430
400 SERIES MAINTENANCE MANUAL Page 7-3 (page 7-4 blank) P/N 190-00140-05 Rev. C Figure 7-1. Sub-Assy, GNS 430 (Dwg. No. 015-00280-XX, Rev. P)[…]
-
Page 139: Garmin GNS 430
400 SERIES MAINTENANCE MANUAL Page 7-5 (page 7-6 blank) P/N 190-00140-05 Rev. C Figure 7-2. Main Chassis Assy, GNS 430(A) (Dwg. No. 015-00283-00, Rev. R)[…]
-
Page 140: Garmin GNS 430
400 SERIES MAINTENANCE MANUAL Page 7-7 (page 7-8 blank) P/N 190-00140-05 Rev. C Figure 7-3. Nav Chassis Assy, GNC 400 (Dwg. No. 015-00282-00, Rev. K)[…]
-
Page 141: Garmin GNS 430
400 SERIES MAINTENANCE MANUAL Page 7-9 (Page 7-10 blank) P/N 190-00140-05 Rev. C Figure 7-4. GNC 4XX CDU Assy (Sheet 1 of 2) (Dwg. No. 015-00281-XX, Rev. F )[…]
-
Page 142: Garmin GNS 430
400 SERIES MAINTENANCE MANUAL Page 7-11 (Page 7-12 blank) P/N 190-00140-05 Rev. C Figure 7-4. GNC 4XX CDU Assy (Sheet 2 of 2) (Dwg. No. 015-00281-XX, Rev. F )[…]
-
Page 143: Garmin GNS 430
400 SERIES MAINTENANCE MANUAL Page 7-13 (page 7-14 blank) P/N 190-00140-05 Rev. C Figure 7-5. Sub-Assy, GNC 420 (Dwg. No. 015-00506-XX, Rev. N)[…]
-
Page 144: Garmin GNS 430
400 SERIES MAINTENANCE MANUAL Page 7-15 (page 7-16 blank) P/N 190-00140-05 Rev. C Figure 7-6. Main Chassis Assy, GNC 420(A) (Dwg. No. 015-00283-01, Rev. K)[…]
-
Page 145: Garmin GNS 430
400 SERIES MAINTENANCE MANUAL Page 7-17 (page 7-18 blank) P/N 190-00140-05 Rev. C Figure 7-7. Nav Chassis Assy, W/O Nav (Dwg. No. 015-00282-01, Rev. E)[…]
-
Page 146: Garmin GNS 430
400 SERIES MAINTENANCE MANUAL Page 7-19 (page 7-20 blank) P/N 190-00140-05 Rev. C Figure 7-8. Sub-Assy, GNC 420A (Dwg. No. 015-00837-XX, Rev. A)[…]
-
Page 147: Garmin GNS 430
400 SERIES MAINTENANCE MANUAL Page 7-21 (page 7-22 blank) P/N 190-00140-05 Rev. C Figure 7-9. Main Chassis Assy, GPS 400 (Dwg. No. 015-00283-03, Rev. J)[…]
-
Page 148: Garmin GNS 430
400 SERIES MAINTENANCE MANUAL Page 7-23 (Page 7-24 blank) P/N 190-00140-05 Rev. C Figure 7-10. Assy Dwg, GPS 400 (Dwg. No. 015-00504-XX, Rev. G)[…]
-
Page 149: Garmin GNS 430
400 SERIES MAINTENANCE MANUAL Page A-1 P/N 190-00140-05 Rev. C APPENDIX A GNC 420A AND GNS 430A A.1 DESCRIPTION This appendix describes version A of the GNC 420 and the GNS 430. The ‘A’ versions contain a 16 watt VHF Com Transmitter as opposed to a 10 watt transm itter. There is one Com Board part number for the GNC 420 and GNS 430 ‘A’ vers[…]
-
Page 150: Garmin GNS 430
Page A-2 400 SERIES MAINTENANCE MANUAL Rev. C P/N 190-00140-05 The Com Voltage and Current requirements for the GNS 420A and GNS 430A are listed in Table A-2. Table A-2. Voltage and Current Supply Requirements Connector / Pin DC Voltage Tolerance(V) Max Current (DC) Conditions J2, Pins 11 & 12 +27.5 r .4 3.0 A Transmit Mode A.4 DISASSEMBLY AND […]
-
Page 151: Garmin GNS 430
400 SERIES MAINTENANCE MANUAL Page B-1 P/N 190-00140-05 Rev. C APPENDIX B CONNECTOR I/O DESCRIPTIONS B.1 I/O DESCRIPTION This appendix contains tables describing various I/O information used in the 400 Series. Table B-1. I/O Descriptions IO Code Description I INPUT O OUTPUT B BI-DIRECTIONAL B.2 INTERNAL AND EXTERNAL CONNECTORS Table B-2. Internal a[…]
-
Page 152: Garmin GNS 430
Page B-2 400 SERIES MAINTENANCE MANUAL Rev. C P/N 190-00140-05 Table B-2. Internal and External Connections (continued) INVERTER BOARD J13 Main Board J26 Display Module CCTF J27 Display Module Heater GPS MODULE ( ALL UNITS) J101 J3 Main Board Antenna In INTERFACE BOARD J19 Data Card Flex J20 Left Data Card J21 Right Data Card DISPLAY MODULE J22 LCD[…]
-
Page 153: Garmin GNS 430
400 SERIES MAINTENANCE MANUAL Page B-3 P/N 190-00140-05 Rev. C Table B-3. J1 Descriptions (continued) AIRCRAFT POWER 20 I MAIN +LEFT 21 O MAIN +RIGHT (2.5V Common) 22 O MAIN LATERAL +FLAG 23 O MAIN LATERAL -FLAG (2.5V Common) 24 O MAIN +TO 25 O MAIN +FROM (2.5V Common) 26 O MAIN +UP 27 O MAIN +DOWN (2.5V Common ) 28 O MAIN VERTICAL +FLAG 29 O MAIN […]
-
Page 154: Garmin GNS 430
Page B-4 400 SERIES MAINTENANCE MANUAL Rev. C P/N 190-00140-05 Table B-3. J1 Descriptions (continued) GPS RS232 IN4 55 I GPS RS232 OUT1 56 O GPS RS232 IN1 57 I GPS RS232 OUT2 58 O GPS RS232 IN2 59 I ALTITUDE COMMON (Ground) 60 O ALTITUDE C4 61 I ALTITUDE C2 62 I ALTITUDE C1 63 I ALTITUDE B4 64 I ALTITUDE B2 65 I ALTITUDE B1 66 I ALTITUDE A4 67 I AL[…]
-
Page 155: Garmin GNS 430
400 SERIES MAINTENANCE MANUAL Page B-5 P/N 190-00140-05 Rev. C B.3.3 J9 Table B-5. J9 Descriptions Pin Name Pin # I/O Description 12V 1 O 12 volt Supply to NAV board and G/S board from Main CPU board. 5V_NAV 2 O +5 volt Supply to NAV board and G/S board from Main CPU board. GND 3 O Ground. -12V 4 O -12 volt Supply to NAV board and G/S board from Ma[…]
-
Page 156: Garmin GNS 430
Page B-6 400 SERIES MAINTENANCE MANUAL Rev. C P/N 190-00140-05 B.3.5 J12 Table B-7. J12 Descriptions Pin Name Pin # I/O Description LD1 through LD8 46-50 3-5 O LOWER half display DATA output. CLK_ROW 6 O Pulse high for typically 310 ns at a period of 33.236 us (30.088 kHz). This line loads the next row of data in the display drivers. There are 66 C[…]
-
Page 157: Garmin GNS 430
400 SERIES MAINTENANCE MANUAL Page B-7 P/N 190-00140-05 Rev. C Table B-7. J12 Descriptions (continued) NOT USED 25 ROT_R_LRGA ROT_R_LRGB ROT_R_LRGC 64 26 27 I I I Rotor Right Large A to C are the contacts of a single pole triple throw switch. The common of the switch is ground. Only one of the 3 is low at a time. ROT_R_SMLA ROT_R_SMLB ROT_R_SMLC 61[…]
-
Page 158: Garmin GNS 430
Page B-8 400 SERIES MAINTENANCE MANUAL Rev. C P/N 190-00140-05 Table B-8. J14 Descriptions (continued) 36 37 38 ROT_L_SMLC ROT_L_SMLB ROT_L_SMLA I I I Rotor Left Small A to C are the contacts of a single pole triple throw switch. The common of the switch is ground. Only one of the 3 is low at a time. 39 ROT_L_SW I Push switch on left rotary. Active[…]
-
Page 159: Garmin GNS 430
400 SERIES MAINTENANCE MANUAL Page B-9 P/N 190-00140-05 Rev. C B.3.7 J16 Table B-9. J16 Descriptions Pin Name Pin # I/O Description CS_MAPN 1 O Chip Select Map Not. Output pulses low ty pically for 240 ns when map is accessed. RDN 2 O Read Not. Output pulses low for typical times of 90, 150, and 210 ns, depending on wait states. WRN 3 O Write Not. […]
-
Page 160: Garmin GNS 430
Page B-10 400 SERIES MAINTENANCE MANUAL Rev. C P/N 190-00140-05 B.3.8 J17 Table B-10. J17 Descriptions Pin Name Pin # I/O Description FAN_HI 1 O Approx. 5 V. FAN_LO 2 O Used to switch fan off and on. B.3.9 P13 Table B-11. P13 Descriptions Pin Name Pin # I/O Description 12V 1 O 12 V dc output. CCFT_TA_NOT 2 O Cold Cathode Transmit A Not logic level […]
-
Page 161: Garmin GNS 430
400 SERIES MAINTENANCE MANUAL Page B-11 P/N 190-00140-05 Rev. C B.4 COM BOARD CONNECTORS B.4.1 J2 Table B-12. J2 Descriptions Pin # Name I/O 1 RESERVED 2 COM IF AGC TEST O 3 SQUELCH / COMPRESSOR TEST I 4 COM MIC KEY I 5 INTERCOM MIC HI I 6 COM MIC AUDIO HI I 7 500 : COM AUDIO HI O 8 RESERVED I 9 RESERVED I 10 RESERVED I 11 AIRCRAFT POWER I 12 AIRCR[…]
-
Page 162: Garmin GNS 430
Page B-12 400 SERIES MAINTENANCE MANUAL Rev. C P/N 190-00140-05 B.4.2 J26 Table B-13. J26 Descriptions Pin # Pin Name I/O Description 1 +12 VDC I 2 -12 VDC I 3 + 5 VDC I 4 SERIAL_IN I Asynchronous serial input. 5 SERIAL_OUT O Asy nchronous serial output. 6 DC_VOL_CONT I High impedance A/D input. In the unit it is fed by the center tap of a 20K pot […]
-
Page 163: Garmin GNS 430
400 SERIES MAINTENANCE MANUAL Page B-13 P/N 190-00140-05 Rev. C Table B-14. J6 Descriptions (continued) 16 500 : VOR/ILS AUDIO HI O 17 500 : VOR/ILS AUDIO LO (GND) O 18 SERIAL DME CLOCK O 19 SERIAL DME DATA O 20 SER DME — CHAN REQ /PAR DME — 4MHZ I/O 21 SER DME — RNAV MODE /PAR DME — 2MHZ I/O 22 VOR/ILS DME COMMON I 23 VOR/ILS 429 OUTB O 24 VOR/ILS[…]
-
Page 164: Garmin GNS 430
Page B-14 400 SERIES MAINTENANCE MANUAL Rev. C P/N 190-00140-05 B.5.2 J10 Table B-15. J10 Descriptions Pin # Pin Name I/O Description 1 +12VDC I 2 +5VDC I 3 GND I 4 -12VDC I 5 VLOC SERIAL IN I Serial input from the Main CPU board to the NAV Board. 6 KEY — This pin is not used. 7 G/S SERIAL IN I Serial input from the Main CPU board to the G/S board.[…]
-
Page 165: Garmin GNS 430
400 SERIES MAINTENANCE MANUAL Page B-15 P/N 190-00140-05 Rev. C B.6 GLIDESLOPE BOARD CONNECTORS B.6.1 J25 Table B-17. J25 Descriptions Pin # Pin Name I/O DESCRIPTION 1 +12VDC I 2 +5VDC I 3 GND I Ground. 4 -12VDC I 5 G/S IF AGC O The IF AGC output. 10K output impedance. 6 G/S Composite O Not Used. 7 G/S SERIAL_IN I Serial input from Main Board. 8 G/[…]
-
Page 166: Garmin GNS 430
Page B-16 400 SERIES MAINTENANCE MANUAL Rev. C P/N 190-00140-05 B.8 INVERTER BOARD CONNECTORS B.8.1 J13 Table B-18. J13 Description Pin # Pin Name I/O Description 1 12V I 11 to 14 V dc. 2 CCFT_TA_NOT I Cold Cathode Transmit A Not input. Occurs at 58.5 kHz and is active low. Inverter is capacitor coupled. 3 CCFT_TB_NOT I Cold Cathode Transmit B Not […]
-
Page 167: Garmin GNS 430
400 SERIES MAINTENANCE MANUAL Page B-17 P/N 190-00140-05 Rev. C B.8.3 J27 Table B-20. J27 Description Pin # Pin Name I/O DESCRIPTION 1 HEATER VIN O Heater high. The heater typical resistance is 16 ohms. 2 HEATER GND I Heater low. B.9 GPS MODULE CONNECTORS B.9.1 J101 Table B-21. J101 Descriptions Pin # Pin Name I/O DESCRIPTION TRAP 1 I 0 to 12 V dc […]
-
Page 168: Garmin GNS 430
Page B-18 400 SERIES MAINTENANCE MANUAL Rev. C P/N 190-00140-05 B.11 DISPLAY MODULE CONNECTORS B.11.1 J22 See LCD Flex description (J12). B.12 DATA BASE CARD CONNECTORS J20 and J21 are the Data Base Card Connectors. B.13 MAP BOARD CONNECTORS B.13.1 P16 Table B-22. P16 Descriptions Pin Name Pin # I/O DESCRIPTION CS_MAPN 1 O Chip Select Map Not. Outp[…]
Перейти к контенту
-
Contents
-
Table of Contents
-
Bookmarks
Quick Links
FriendlyPanels Software
WARNING
This operating manual has been writen following the original GARMIN GNS 430/430A
Pilot’s Guide and Reference, but it’s not intended to be valid for training purposes other
®
than its use with Microsoft
Flight Simulator 2004. We consider very interesting to read
the original GARMIN GNS 430/430A Pilot’s Guide and Reference in order to know this
wonderful GPS better.
FriendlyPanels
www.friendlypanels.net
fpanels@friendlypanels.net
Summary of Contents for Garmin GNS 430
This manual is also suitable for:
Gns 430a
Предложите, как улучшить StudyLib
(Для жалоб на нарушения авторских прав, используйте
другую форму
)
Ваш е-мэйл
Заполните, если хотите получить ответ
Оцените наш проект
1
2
3
4
5
Общая теория, руководства, матчасть
1
Посты
1
Пользователи
0
Likes
5,192
Просмотры

(@md67)
Завхоз Admin
Присоединился: 6 лет назад
Сообщения: 791

Topic starter
12.09.2017 10:55
Данное руководство охватывает функционирование приборов GPS 400W, GNC 420W, GNC 420AW, GNS 430W и GNS 430AW. Как правило, все модели упоминаются как серии 400W, за исключением тех, в которых встречаются аппаратные и функциональные различия.
Испытай один раз полет и твои глаза навечно будут устремлены в небо. Однажды там побывав, на всю жизнь ты обречен тосковать о нем.
Леонардо Да Винчи.


17 часов назад, vladk пишет:
Может и нет. Я пытался посмотреть какие-нибудь обучающие видео что-бы разобраться понять как это всё работает в FS2020 (симулятора, разумеется, у меня нет). Пока только выяснил что дефолтный автопилот в Cessna 172 похож на KAP140, но работает слегка не так, как настоящий. GNS тоже, по-моему, не на 100% смоделирована. Возможны глюки… Но «в реале» обычное дело, что в режиме HDG держат самолёт на «малиновой линии» на GPS. Так что используя только HDG Вы недалеки от истинны.
Спасибо, Влад, за всегда интересную инфу! Если Вам интересно, отвечу как я слетал повторно. Я вылетел их LOWZ визуально по стандартной схеме, вручную и потом по HDG, соблюдая направления и высоты. Набрав 8700′, переключил на GPS и ЛА взял курс на NANIT по плану и на высоту 9500′. На GNS показывало зелёным GPS и route. Недолетая до NANIT я выбрал и активировал схему approach R26 transition RTT. ЛА, долетев до NANIT, полетел дальше на RTT по белой линии маршрута, которая обозначила схему от RTT дальше. Долетев до RTT, ЛА развернулся и полетел обратно на NANIT, причём, удаляясь от RTT, расстояние от RTT на GNS уменьшалось, но на GNS показывало лег USER –> RTT. Недалеко отлетев от RTT, я снова активировал схему – ЛА развернулся и полетел снова на RTT. Долетев до RTT, ЛА снова, развернувшись, упорно полетел на NANIT по малиновой линии от RTT, которая не доходила до NANIT 4-5 миль. Долетев до NANIT, ЛА развернулся и полетел снова на RTT. После того, как я второй раз активировал схему, я не вмешивался в управление, наблюдая за поведением ЛА. Долетев до RTT, ЛА повернул по схеме и дальше летел правильно по схеме R26 transition RTT. Когда GNS захватил LOC и глиссаду, я переключил на CDI и нажал на кнопку APR – ЛА летел по LOC и снижался по глиссаде. Правда, к створу полосы ЛА подошёл под углом около 25-30 градусов. То ли там такой заход, то ли это глюк самолёта или сценария. Я отключил АП и, выровнявшись, сел.
Из описанного я сделал вывод, что схему надо активировать после прохождения последней путевой точки маршрута перед первой точкой схемы, которой в этом направлении является RTT. Учусь. 
PS На курсах в КЛА НАУ по радионавигации, которая меня интересовала больше всего из учебного материала, у нас было, кажется, две пары и никто ничего не понял, во всяком случае новички, каким был и я. А здесь, в Симе, и общаясь со знатоками, методом проб и ошибок, на практике видно как всё происходит.

Edited February 21, 2021 by Zallex
Модераторы: 502, smixer, lt.ak, vova_k
-
borgulev
- Новичок
- Сообщения: 3
- Зарегистрирован: 29 янв 2011, 16:31
- Member of AOPA: No
Garmin 430 на русском
#1
Сообщение
borgulev » 29 янв 2011, 16:34
есть ли у кого-нибудь на русском инструкция для garmin 430
-
lt.ak
- Не Гуру
- Сообщения: 6573
- Зарегистрирован: 19 авг 2008, 02:29
Re: Garmin 430 на русском
#2
Сообщение
lt.ak » 29 янв 2011, 17:09
borgulev писал(а):есть ли у кого-нибудь на русском инструкция для garmin 430
на reaa же уже Лодочник выложил ссылку …
AIM 4-1-9 (g)(1) … «Traffic in the area, please advise» is not a recognized Self-Announce Position and/or Intention phrase and should not be used under any condition.
Failure to comply with this warning will result in future warnings.
-
ЛОДОЧНИК
- Почетный SAONовец
- Сообщения: 4011
- Зарегистрирован: 12 окт 2008, 00:11
- Member of AOPA: Yes
- Откуда: деревня Ватулино
Re: Garmin 430 на русском
#3
Сообщение
ЛОДОЧНИК » 29 янв 2011, 17:11
Есть, а что?))
Я все хочу, мне все здесь надо!
В этой жизни есть простое правило, пусть лучше будет маленький, но свой!
-
lt.ak
- Не Гуру
- Сообщения: 6573
- Зарегистрирован: 19 авг 2008, 02:29
Re: Garmin 430 на русском
#4
Сообщение
lt.ak » 29 янв 2011, 17:18
ЛОДОЧНИК писал(а):Есть, а что?))
он же и на reaa спросил … прямо в той ветке где ты выложил … а ещё говорят что мы недобрые …
AIM 4-1-9 (g)(1) … «Traffic in the area, please advise» is not a recognized Self-Announce Position and/or Intention phrase and should not be used under any condition.
Failure to comply with this warning will result in future warnings.
-
ЛОДОЧНИК
- Почетный SAONовец
- Сообщения: 4011
- Зарегистрирован: 12 окт 2008, 00:11
- Member of AOPA: Yes
- Откуда: деревня Ватулино
Re: Garmin 430 на русском
#5
Сообщение
ЛОДОЧНИК » 29 янв 2011, 17:35
lt.ak писал(а):
ЛОДОЧНИК писал(а):Есть, а что?))
он же и на reaa спросил … прямо в той ветке где ты выложил … а ещё говорят что мы недобрые …
Эта…, в общем…., ну да ладно…… ![]()
Я все хочу, мне все здесь надо!
В этой жизни есть простое правило, пусть лучше будет маленький, но свой!
-
VK68
- PA23 Aztec; R44
- Сообщения: 3704
- Зарегистрирован: 29 мар 2008, 21:09
- Member of AOPA: Yes
Re: Garmin 430 на русском
#6
Сообщение
VK68 » 29 янв 2011, 19:58
Попробовал скачать ,ничего не выходит…можно здесь еще раз выложить?
-
ЛОДОЧНИК
- Почетный SAONовец
- Сообщения: 4011
- Зарегистрирован: 12 окт 2008, 00:11
- Member of AOPA: Yes
- Откуда: деревня Ватулино
Re: Garmin 430 на русском
#7
Сообщение
ЛОДОЧНИК » 29 янв 2011, 22:07
Вот эта ссылка разве не работает? http://rghost.ru/4019922
И ссылка на Як-18 тоже может пригодится. Там в разделе 8.7 практически описание радиооборудования моего Твина стоящего на многих импортных машинах http://files.mail.ru/HAT7Q8
Можно ли закачать сюда, я честно говоря не знаю.
Я все хочу, мне все здесь надо!
В этой жизни есть простое правило, пусть лучше будет маленький, но свой!
-
VK68
- PA23 Aztec; R44
- Сообщения: 3704
- Зарегистрирован: 29 мар 2008, 21:09
- Member of AOPA: Yes
Re: Garmin 430 на русском
#8
Сообщение
VK68 » 29 янв 2011, 22:32
Все получилось, спасибо.
-
lt.ak
- Не Гуру
- Сообщения: 6573
- Зарегистрирован: 19 авг 2008, 02:29
Re: Garmin 430 на русском
#9
Сообщение
lt.ak » 29 янв 2011, 22:43
на случай если потеряются на файлобмениках ![]()
AIM 4-1-9 (g)(1) … «Traffic in the area, please advise» is not a recognized Self-Announce Position and/or Intention phrase and should not be used under any condition.
Failure to comply with this warning will result in future warnings.
-
shura-ag
- Гуру
- Сообщения: 2318
- Зарегистрирован: 30 дек 2008, 12:07
- Member of AOPA: Yes
- Откуда: Москва
- Летаю на:: С152, С172, P2002
Re: Garmin 430 на русском
#11
Сообщение
shura-ag » 31 янв 2011, 09:41
К стати с сайта Garmin можно скачать симулятор для GNS очень удобно осваивать на нем, не нужно в самолет залезать и питание подключать.
http://www8.garmin.com/software/400Seri … or_501.exe
Я уверен, не случайно дерьмо и шоколад примерно одинакового цвета. Тут явно какой-то многозначительный намек. Что-нибудь относительно единства противоположностей. (c)
-
Beer100
- SAONовец со стажем
- Сообщения: 150
- Зарегистрирован: 24 ноя 2018, 14:56
- Member of AOPA: No
- Летаю на:: Diamond
Garmin 430 на русском
#12
Сообщение
Beer100 » 11 май 2019, 21:16
Похоже, на борту окажется GNS-430…
Подскажите, этот аппарат еще имеет право эксплуатироваться в «наших местностях», за исключением как радиостанцией?
Как я бегло ознакомился, в него не зальешь ни актуальную информацию, ни забьешь вручную маршрутик.
Это так?
Опровергните, плиз!
-
shura-ag
- Гуру
- Сообщения: 2318
- Зарегистрирован: 30 дек 2008, 12:07
- Member of AOPA: Yes
- Откуда: Москва
- Летаю на:: С152, С172, P2002
Garmin 430 на русском
#13
Сообщение
shura-ag » 11 май 2019, 21:25
По-моему брифинг плюс заливает актуальную информацию в него, включая аон рф. Обратитесь к ним.
Да и с забитием в ручную маршрута никаких проблем. Хоть точками из базы, хоть пользовательсими. Это правда не очень быстро, но вполне реально.
Я уверен, не случайно дерьмо и шоколад примерно одинакового цвета. Тут явно какой-то многозначительный намек. Что-нибудь относительно единства противоположностей. (c)
-
Beer100
- SAONовец со стажем
- Сообщения: 150
- Зарегистрирован: 24 ноя 2018, 14:56
- Member of AOPA: No
- Летаю на:: Diamond
Garmin 430 на русском
#14
Сообщение
Beer100 » 11 май 2019, 21:30
shura-ag писал(а): ↑11 май 2019, 21:25
Это правда не очень быстро, но вполне реально.
О! Хорошая информация! Торопиться не куда, главное можно. Мы же не на боевые вылеты по тревоге…. ![]()
А сохранять их можно?
PS
в брифинг плюс можно носом ткнуть?
-
shura-ag
- Гуру
- Сообщения: 2318
- Зарегистрирован: 30 дек 2008, 12:07
- Member of AOPA: Yes
- Откуда: Москва
- Летаю на:: С152, С172, P2002
Garmin 430 на русском
#15
Сообщение
shura-ag » 11 май 2019, 21:32
http://navdata.ru
Все созданные планы сохраняются. Там есть ограничение по количеству, не помню точно сейчас.
Я уверен, не случайно дерьмо и шоколад примерно одинакового цвета. Тут явно какой-то многозначительный намек. Что-нибудь относительно единства противоположностей. (c)
Вернуться в «Авионика, Тюнинг, Примочки, Доп. баки, Спас. системы»
Перейти
- Самолетный раздел
- ↳ Общие правила форума и FAQи
- ↳ Исторические FAQ
- ↳ Самолет — выбор, покупка, эксплуатация
- ↳ Общие вопросы выбора и покупки
- ↳ Cessna Aircraft
- ↳ Cirrus
- ↳ Diamond
- ↳ Пилотажники: Extra, Pitts, Giles, Edge
- ↳ HUSKY, Maule
- ↳ L-29, L-39, L-410, Morava
- ↳ Pilatus
- ↳ Piper
- ↳ Tecnam
- ↳ Представители LSA (Light-Sport Aircraft)
- ↳ Як-18Т
- ↳ Як-5Х
- ↳ Остальные отечественные самолёты
- ↳ Деловая (бизнес) авиация
- ↳ Остальные иностранные самолеты
- ↳ KIT — самолёты, РЕТРО-самолеты
- ↳ Гидроавиация
- ↳ Арендуем самолёт
- Вертолетный раздел
- ↳ Вертолет — учимся летать
- ↳ Вертолет — выбор, покупка, эксплуатация
- ↳ Сравнение вертолетов, общие вопросы, советы по покупке и таможне
- ↳ Robinson
- ↳ Eurocopter
- ↳ Bell Helicopter
- ↳ AgustaWestland
- ↳ MD
- ↳ Schweizer
- ↳ Миль
- ↳ Камов
- ↳ Enstorm
- ↳ Другие вертолеты
- ↳ Аренда вертолета, Вертолет и горы
- Учимся летать
- ↳ Class Room, Учимся летать, Техника пилотирования, Погода, Вопросы безопасности полетов
- ↳ Дневники обучения и самостоятельных полетов
- ↳ Обучение за границей
- ↳ U.S.A.
- ↳ Europe
- ↳ Canada
- ↳ СНГ
- ↳ Летная медицина
- ↳ Аэроклубы РФ (Лётные школы)
- ↳ Самолетный и вертолетный спорт, Планеры, Шары
- Владельцам ВС
- ↳ Вертодромы (вертолетные клубы, вертолетные площадки)
- ↳ Аэродромы и посадочные площадки РФ
- ↳ Регистрация воздушного судна, Таможня, Страхование
- ↳ Тех. обслуживание и ремонт самолёта
- ↳ Техническое обслуживание самолетов Cessna
- ↳ Двигатели Continental и Lycoming
- ↳ Двигатель М-14П и самолеты Як-52, Як-18Т
- ↳ Покраска самолетов
- ↳ Куда летим?
- ↳ Ссылки на отчеты
- ↳ Строительство аэродрома, организация аэроклуба, АУЦ, земельные вопросы, регистрация посадочных площадок
- ↳ Организация аэроклуба (создание предприятия)
- ↳ Строительство аэродрома, земельные вопросы, ангары, рулежки…
- ↳ Оборудование и техника для аэродрома
- ↳ Создание и сертификация АУЦ
- ↳ Авиадеревня. Обзоры. Строительство.
- ↳ ГСМ
- ↳ Авионика, Тюнинг, Примочки, Доп. баки, Спас. системы
- ↳ Коммерческая эксплуатация ВС, CPL, APTL, Перегоны, инструктора, предложения, помощь
- ↳ Гарнитуры и шлемы, Одежда и снаряжение для пилотов, Сувениры, полезные мелочи
- Новости АОН, события
- ↳ Новости АОН
- ↳ PilotTV
- ↳ Подготовка программ PilotTV
- ↳ Российские шоу, слёты, конференции
- ↳ Зарубежные
- ↳ Авиационные происшествия
- ↳ Пресс-релизы, пресса, журналисты
- ↳ Журналажа
- ↳ Соревнования
- Сообщество SAON.ru
- ↳ Фотоальбомы, видео, отчёты
- ↳ Фильмотека SAON (фильмы об авиации)
- ↳ Кунсткамера
- ↳ Белый список
- ↳ Библиотека. Файлы. Диски, книги… Лётные карты, сборники, диски с картами
- ↳ Наш портал. Наша курилка. Участники, ассоциации. Вопросы, обсуждения
- ↳ Записки на карте МВЗ
- ↳ Дни рождения
- ↳ Авиационный флуд, флейм, юмор
- Объявления о продаже самолетов, вертолетов, запасных частей
- ↳ Продам самолет
- ↳ Продам вертолет
- ↳ Продажа авиационных запчастей и аксессуаров для пилотов
- ↳ Услуги в области АОН
- ↳ Куплю. Авиатехника, запчасти, услуги…
- ↳ Работу ищу. Работу предлагаю. АОН
- ↳ Работу ищу
- ↳ Работу предлагаю