-
Page 2: General Safety
General Safety Warning Always follow these instructions to avoid the risk of injury to yourself or damage to your equipment. Unplug the receiver from the AC power outlet before cleaning. Use only a damp cloth for cleaning the exterior of the receiver. Do not use accessories or attachments not recommended by the receiver manufacturer as they may cause problems to the equipment and will void the warranty.
-
Page 3
General Safety Route power supply cord so that are not likely to be walked on or pinched by items placed upon or against them. Pay particular attention to the cords that plugs in the convenience receptacles, and the point where they exit from the unit. Use an outlet that contains surge suppression or ground fault protection. -
Page 4
DIGITAL CABLE RECEIVER OWNER’S MANUAL SIMPLE & SPEEDY OPERATION HANDBOOK Before operation, Please read the entire manual thoroughly and retain it for future reference. -
Page 5
▷ Class B digital device NOTE: This equipment has been tested and found to comply with the limits for a Class B digital device, pursuant to part 15 of the FCC Rules. These limits are designed to provide reasonable protection against harmful interference in a residential installation. This equipment generates, uses and can radiate radio frequency energy and, if not installed and used in accordance with the instructions, may cause harmful interference to radio communications. -
Page 6
Channel List Edit Channel List Program Guide System Setting Automatic Search Manual Search CA System (Option) Utility (Option) -
Page 7: Table Of Contents
Contents Remote Control Unit Front Panel Rear Panel Connecting Your Equipment Basic Operation Menu Guide Main Menu Channel Search Channel List Edit Channel List Program Guide System Setting Menu Language Audio Language Subtitle Language SCART Output Screen Type Banner Time RF Mode RF Channel DIGITAL CABLE RECEIVER…
-
Page 8
Contents Local Time Menu Transparency Change PIN Code Parental Lock Receiver Lock S/PDIF Output (Option) Auto Power Factory Reset System Information CA System (option) Utility (option) Troubleshooting Technical Specifications Menu Map DIGITAL CABLE RECEIVER… -
Page 9: Remote Control Unit
Remote Control Unit STAND BY NUMERIC BUTTON TV/RADIO TV/STB CH UP/DOWN VOL UP/DOWN MUET PAUSE UP/DOWN LEFT/RIGHT MENU EXIT GREEN YELLOW SUBTITLE(RED) INFO(BLUE) P.STD A L/R P.SIZE TEXT RECALL A.LANG SLEEP Note! 1: When inserting batteries, make sure that the polarity (+/-) is correct. Note! 2: The design of the Remote Control Unit may be changed without any notice in advance.
-
Page 10
Remote Control Unit 1 STAND BY To switch between operation and stand by mode. 2 NUMERIC BUTTONS To select the channel and enter the channel edit and PIN code . 3 CH UP / DOWN To move up or down on the menu. 4 VOL UP / DOWN To move up or down on the menu. -
Page 11: Front Panel
Front Panel 1.POWER(STAND BY): Switch the receiver power “ON” or “OFF”. 2. CH Up/Down : Channel Up/Down or select item of sub-menu. 3.SEG. DISP.: 4-digit 7-segment display channel information. 4.Smartcard Slot(Option): 1Slot for Smartcard DIGITAL CABLE RECEIVER…
-
Page 12: Rear Panel
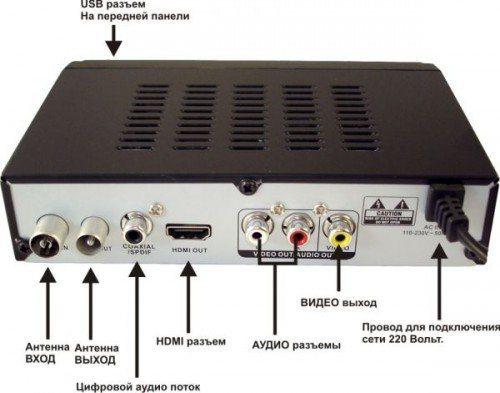
Rear Panel 1. POWER SUPPLY 90 ~ 260V AC, 50/60Hz. 2. VIDEO Video connection port to the TV or other equipment. 3. AUDIO Audio connection port to the TV or other equipment. 4. RS-232 To connect to a personal computer for software upgrade. 5.
-
Page 13: Connecting Your Equipment
Connection Your Equipment How to connect your STB to various systems There are several ways of connecting the STB to your TV and/or Hi-Fi SYSTEM. Consult your local supplier for assistance in setting-up your system that is best suited to your requirements. 1.
-
Page 14
Connecting Your Equipment 3. Connect STB to a Digital Audio System If you have a DAC with S/PDIF coaxial cable input, you can connect the STB with it to enjoy higher quality sound. Connect S/PDIF coaxial cable to a digital amplifier. 4. -
Page 15
Connection Your Equipment TV with Terrestrial Antenna 1. Connect one end of RCA/Cinch cable to the RCA/Cinch jack on the back of the STB and the other end to a RCA/Cinch jack on your TV. If your TV doesn’t have a RCA/Cinch jack, connect one end of RF cable to the TV OUT on the back of the STB and the other end to a RF input jack on your TV. -
Page 16
Connecting Your Equipment Reference 1. Upgrade via Personal Computer To maintain the STB up-to-date, it will be possible to upgrade the software of the STB via STB and personal computer. New versions of the software may include new or improved functions for the latest update. 1. -
Page 17
Connection Your Equipment Front Panel Display Message KEY & DISPLAY The message of the 7-segment LED (Light-Emitting Diode) on the STB and keys are explained as below. Current program number on TV list Standby Mode Current program number on RADIO list System Booting TV Mode Power Off… -
Page 18: Basic Operation
Basic Operation Basic Function 1. Program Information After the television channels have been programmed, you will see the information box each time you change the channels. 1. Every time you change channels you will receive program information for a few seconds. (In the “Banner Time” menu you can select how long this information will be shown.) 2.
-
Page 19: Basic Function
Basic Operation Basic Function 4. Channel-Information Banner 1. During “Channel Banner” is appearing, when you press INFO(BLUE) Button, you can get “Channel-Information Banner”. 2. Using “Channel-Information Banner”, you can get a detailed channel listing Information. 5. Volume Control/Mute 1. To control audio volume, press LEFT/RIGHT( / ) buttons. 2.
-
Page 20
Basic Operation Basic Function 7. Timer The user can reserve a desired program at a desired time by using the Timer function. Pressing the YELLOW button in AV mode will open the Timer Window. 1. Daily, Weekly, Monthly Reservation. Use the UP/DOWN( ), LEFT/RIGHT( / ) buttons in the Timer Setting screen to select the date and time. -
Page 21
Basic Operation Basic Function 9. Soundtrack 1. When you want to change the Audio Language of current channel, press the A/LANG button on the remote control. The on-screen menu is displayed on the left side of the screen. 2. Use UP/DOWN( ) buttons to choose the audio you want. -
Page 22
Basic Operation Memo DIGITAL CABLE RECEIVER… -
Page 23: Easy Installation
Basic Operation Easy Installation Before you can view the television or radio program, you must perform the installation procedure first. Therefore you will see only “Easy Installation Menu” at first when you plug in your system. The Easy Installation gives you the convenience of selecting various languages, adjusting the time and channel search.
-
Page 24
Basic Operation Easy Installation Language The first option is “Language Select” to select the desired language of the Menu, Audio, or Subtitle. Place the cursor on the sub menu by pressing the keys and press the OK( ) button to change language. The Language of Menu, Audio, or Subtitle will be changed to the selected language. -
Page 25: Menu Guide
Menu Guide Main Menu Press the MENU button on the remote control unit. You will see the “Main Menu” on the screen 1. You can move into the desired submenu using UP/DOWN( ) buttons. 2. You should enter the PIN code in order to move into the corresponding submenu in case of “Edit Channel List or “System Setting”.
-
Page 26: Channel Search
Menu Guide Channel Search Select Automatic/Manual channel search in main menu. Automatic Search 1. Press Automatic Search in Main Menu. 2. Input a proper Start Frequency of the cable signal using NUMERIC buttons . 3. Input a proper End Frequency of the cable signal using NUMERIC buttons . 4.
-
Page 27: Manual Search
Menu Guide Channel Search Manual Search 1. Press Manual Search in Main Menu. 2. Input a proper Frequency of the cable signal using NUMERIC buttons . 3. Input a proper Symbol Rate of the cable signal using NUMERIC buttons . 4.
-
Page 28: Channel List
Menu Guide Channel List This menu helps you to easily select the channel that you want to watch. You can see the channel list when you had searched before. To use this menu, you should set channel group you want in the channel control menu.
-
Page 29: Edit Channel List
Menu Guide Edit Channel List From these menus, You can create favorite lists, lock, skip, delete, or move channel. 1. Select “Edit Channel List” in the main menu with UP/DOWN( ) buttons and press OK( ) button. 2. At the request window, Input PIN code. If you have not entered your own PIN code, then the PIN code 0000 applies, which was set at the factory.
-
Page 30
Menu Guide Edit Channel List 1. Favorite 1 ~ 8(Option) 1. You can edit favorite TV and Radio list. This enables you to create the 8 favorite TV and Radio lists. 2. Select the channel you want to edit favorite list and press OK( ) button. -
Page 31
Menu Guide Edit Channel List 4. Skip 1. You can skip TV or Radio channel from the current list. 2. Select the channel you want to skip and press OK( ) button. 3. To recover the skipped channel, press the OK( ) button from edit list. -
Page 32: Program Guide
Menu Guide Program Guide The program guide supplies information such as program listings and ending times for all available programs. 1. Select “Program Guide” in the main menu with UP/DOWN( ) buttons and press OK( ) button. In the viewing program, when you press the EPG button, you can get this view.
-
Page 33: System Setting
Menu Guide System Setting You will be asked to enter your PIN code before you can enter this menu. The PIN code preset to 0000 from the factory. The code can be changed from the “Change PIN Code” menu. Refer to page 30. If you want to customize the system to suit you better, you can specify some settings from the submenus in the “System Setting”…
-
Page 34: Subtitle Language
Menu Guide System Setting 3. Subtitle Language In this menu You can change default language for subtitle when changing services. 1. Use the UP/DOWN( ) buttons to move to language you want and then press OK( ) button. You can choose the language from a selection of English, Spanish, Finnish, Norwegian, Swedish, German, French and etc.
-
Page 35: Banner Time
Menu Guide System Setting 6. Banner Time When you switch channels, an information banner will be shown for a few seconds. You can select for how long the banner will be shown. 1. Select the banner time you want and then press OK( ) button.
-
Page 36: Local Time
Menu Guide System Setting 9. Local Time You can set your local time according to your location. 1. To set year, month and date, press UP/DOWN( ) buttons. The Calendar pop up window will be displayed. Select year using SUBTITLE(RED) and GREEN button. Select month using YELLOW and INFO(BLUE) button.
-
Page 37: Parental Lock
Menu Guide System Setting 12. Parental Lock When you change “Parental Lock” to “On” or “Off”, service channel can get or not from that set values. If you select “On”, you may need PIN code every time you select the lock channel program as you set in the channel control.
-
Page 38: Auto Power
Menu Guide System Setting 16. Auto Power (option) 1 . If the Auto Power is set to On and power is off, the Set turns on automatically and turns into the channel mode which you were watching before power breakdown. 2.
-
Page 39: Ca System (Option)
Menu Guide CA System (Option function) The menus are provided by Smartcard. Your receiver is equipped with one Smartcard slot, Plug in the appropriate a valid Smartcard. You will then have access to the respective scrambled and Pay-Per-View services. Insert the Smartcard into the Smartcard Slot on the front panel. The Smartcard determine the programs that can be de-scrambled.
-
Page 40: Utility (Option)
Menu Guide Utility (Option function) 1. Game 1. Select «Game» in the Utility menu with UP/DOWN( ) buttons and press LEFT/RIGHT( / ) button. 2. Select the game you want to play and press OK( ) button, and then you can play the game.. Tetris Hexa Puzzle…
-
Page 41
Menu Guide Utility (Option function) 4. Zoom Select “Zoom» in the Utility menu with UP/DOWN( ) button and press OK( ) button, 5. Calculator Select “Calculator» in the Utility menu with UP/DOWN( ) button and press OK( ) button, you can see the Calculator. DIGITAL CABLE RECEIVER… -
Page 42: Troubleshooting
Troubleshooting Problem Solution No display LED on the front panel. Power cord plug in correctly. No power supply No Picture Ensure that the STB is switched on. Check connection and correct. Check channel and video output and correct. Poor picture quality Check the signal level, if this is low then try adjusting the Alignment of your dish.
-
Page 43: Technical Specifications
Technical Specifications Tuner Demodulation Constellation 16, 32, 64,128, 256 Input Connector IEC 169-24, Female(75 Ohm) Frequency Range 51MHz ~ 858MHz Symbol Rate 0.87 ~ 11.7 Mbaud RF Modulator PLL type UHF(CH 21~69) or VHF(CH 3~4) for the modulation TV Standard PAL B/G, I, D/K, NTSC M selectable RF Connector 75 Ohms, 169-2, Male/Female…
-
Page 44: Power Supply
Technical Specifications A/V & Data Input/Output Video RCA/Cinch, Video Output(CVBS)/SCART(CVBS,RGB). RCA/Cinch Volume & Mute Control Audio (Resolution: 20 bits DAC, Max 2Vrms) S/PDIF of Dolby Digital Bitstream Out RS-232C Transfer rate 115Kbps, 9 PIN D-Sub Type System Resources Flash Memory 1Mbyte, 2Mbytes (Optional) SDRAM 8Mbytes, 16Mbytes (Optional)
-
Page 45: Menu Map
Menu Map Main Menu Menu Language Channel List Audio Language Subtitle Language Edit Channel List SCART Output Screen Type Program Guide Banner Time System Setting RF Mode RF Channel Automatic Search Local Time Menu Transparency Manual Search Change PIN Code Parental Lock CA System SPDIF Output…
-
Page 46
102675…
 В наследство от аналоговых времен пользователям досталась масса телеприемников, которые не имеют встроенного тюнера и не могут принимать «цифру» напрямую. Для них необходимо дополнительное оборудование – цифровая приставка. Разберемся, как она подключается к телевизору.
Содержание
- Необходимое оборудование
- Что уже есть: стандартная комплектация приставки
- Что нужно еще: дополнительное оборудование
- Назначение разъемов: что для чего нужно
- Стандартные разъемы
- Редкие разъемы
- Подключение цифровой приставки
- К современному телевизору
- К старому телевизору
- Настройка каналов
- Проверка качества сигнала
- Подключение нескольких телевизоров к одной приставке
- Возможные проблемы и их решение
- Каналы вообще не ловятся
- Ловится только часть каналов
- Слабый сигнал
- Нет сигнала
- Изображение тормозит или зависает
- Каналы были, но пропали
Необходимое оборудование
Если театр начинается с вешалки, то прием цифрового вещания – с покупки оборудования. Что потребуется пользователю?
Что уже есть: стандартная комплектация приставки
В комплект приставки для DVB-T2 (стандарт эфирного вещания, используемый в европейских странах и России), как правило, входит следующее:
- Cама приставка.
Цифровой тюнер (ресивер), принимающий и преобразующий сигнал для передачи его на порты ТВ-приемника. Современные приставки часто обладают дополнительными функциями (запись на флеш-карту, отложенный просмотр, поддержка Wi-Fi и т. д.). - Пульт дистанционного управления.
Практически все современные приставки, начиная уже от среднего ценового класса, оснащены ПДУ на ИК-лучах. - Блок питания.
Может быть как внутренним, встроенным в ее корпус, так и внешним. В последнем случае в комплект входит адаптер, подключаемый к розетке, и соединительный кабель, от которого и идет питание к ресиверу.
Что нужно еще: дополнительное оборудование
Кроме самой приставки, для подключения потребуются:
Назначение разъемов: что для чего нужно
Чтобы подключить приставку к телевизору, надо соединить между собой кабелями антенну, ресивер и сам телевизор. Для подсоединения кабелей нужны соответствующие разъемы, а сейчас используется далеко не один стандарт. Куда и какие штекеры нужно втыкать?
Стандартные разъемы
На каждой приставке, вне зависимости от ее типа, должны быть два разъема:
Кроме обязательных, есть ряд разъемов, которые встретятся почти всегда:
- Антенный выход.
 Может называться «RF-OUT», «RF-LOOP», LOOP-OUT». Предназначен для последовательного подключения другой приставки. На моделях, которые имеют встроенный ВЧ-модулятор, сигнал с этого порта можно направить на антенный вход телевизора и ловить местное аналоговое ТВ.
 - RCA-выход.
 С него видео- и аудиосигнал входит через соответствующие штекеры (помеченные красным, белым и желтым цветом) телевизора. Используется для большинства старых телеприемников, но уже не обеспечивает высокого качества изображения.
 - HDMI.
Цифровой выход высокой четкости. Если телевизор имеет соответствующий вход, то рекомендуем использовать именно этот разъем, а RCA оставить только для вывода звука на внешние колонки. - USB.
Знакомый по компьютерам разъем. Используется для подключения внешних накопителей (от флешки до HDD). В результате появляется возможность записывать передачи или просматривать видео- и аудиофайлы поддерживаемого формата. Кроме того, если приставка имеет такую функцию, через этот разъем можно подключать модуль для Wi-Fi.
 Может называться «RF-OUT», «RF-LOOP», LOOP-OUT». Предназначен для последовательного подключения другой приставки. На моделях, которые имеют встроенный ВЧ-модулятор, сигнал с этого порта можно направить на антенный вход телевизора и ловить местное аналоговое ТВ.
 С него видео- и аудиосигнал входит через соответствующие штекеры (помеченные красным, белым и желтым цветом) телевизора. Используется для большинства старых телеприемников, но уже не обеспечивает высокого качества изображения.
 Цифровой выход высокой четкости. Если телевизор имеет соответствующий вход, то рекомендуем использовать именно этот разъем, а RCA оставить только для вывода звука на внешние колонки.
 Знакомый по компьютерам разъем. Используется для подключения внешних накопителей (от флешки до HDD). В результате появляется возможность записывать передачи или просматривать видео- и аудиофайлы поддерживаемого формата. Кроме того, если приставка имеет такую функцию, через этот разъем можно подключать модуль для Wi-Fi.
Редкие разъемы
Помимо распространенных, на цифровых приставках могут иметься и редкие разновидности разъемов. К ним относятся:
- VGA.
Это старый разъем, разработанный еще в 1987 году для подключения компьютерных мониторов к видеокарте. Позднее им иногда пользовались для того, чтобы подключать DVD-проигрыватели. Обычно он используется для плазменных и ЖК-телевизоров. Сейчас устарел и активно вытесняется HDMI. Дополнительно требует подключения звука по отдельному кабелю. - SCART.
Это стандартный разъем для техники, используемой на территории Европы. Поэтому он часто встречается не только в телевизорах, но и в приставках, ориентированных на европейский рынок. - S-Video.
Старый разъем, активно использовался для видеоплееров и игровых приставок. Сейчас обычно требует покупки переходника. Обеспечивает высокое качество телесигнала, но только для стандартной четкости: HD-изображение не передает.
Подключение цифровой приставки
К современному телевизору
Если телевизор более или менее новый и поддерживает хотя бы RCA, подключение ресивера выглядит следующим образом:
- Телевизор выключается.
- К ресиверу подключаются кабели от антенны и блока питания.
- Телевизор и приставка соединяются одним из имеющихся способов (RCA, SCART, HDMI) с помощью соответствующих кабелей. Поскольку RCA имеет цветовую маркировку, а SCART и HDMI – соответствующую форму входных и выходных штекеров, ошибиться здесь сложно.
- При наличии выхода RF-OUT он соединяется с антенным входом телевизора (так можно будет смотреть одновременно цифровые и аналоговые каналы).
- Включите телевизор. В меню выберите соответствующий вход, к которому вы подключили тюнер (AV, SCART, HDMI).

Подключение через RCA
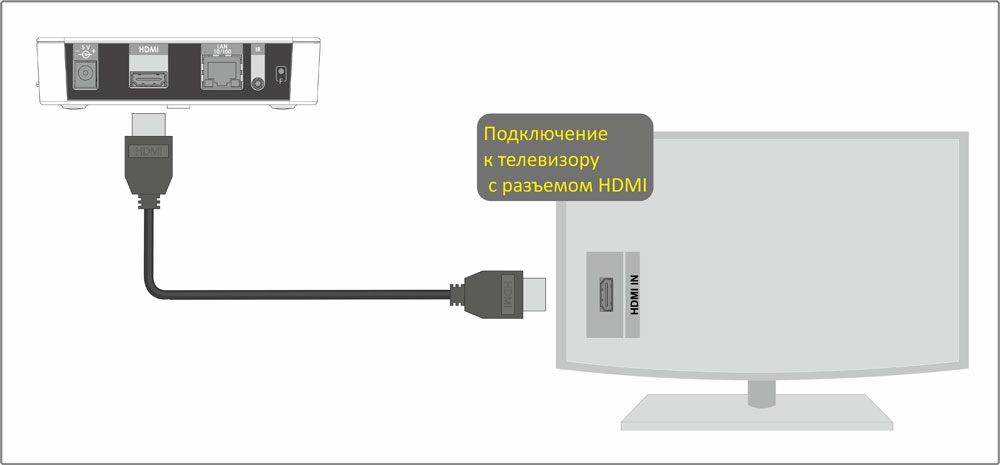
Подключение через HDMI очень простое
К старому телевизору
Если телевизор очень старый (что-то вроде советских «Рубина» или «Горизонта») и не имеет вообще никаких цифровых входов, его можно попытаться подключить через антенный кабель, используя на ресивере выход RF OUT. Для этого требуется, чтобы приставка поддерживала такой режим.
Мнение эксперта
Виталий Садовников
Специалист по подключению и настройке цифрового телевидения
Задать вопрос
Если поддержки нет, придется приобретать дополнительно ТВ-модулятор, преобразующий низкочастотный сигнал с RCA-выхода приставки в высокочастотный, совпадающий с аналоговым форматом. Его телевизоры старых моделей могут принимать уже напрямую.
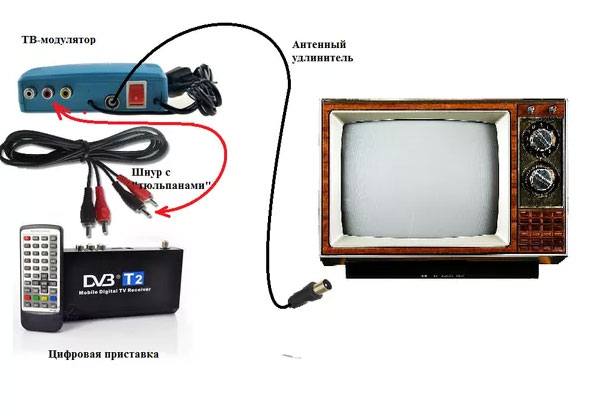
Подключение цифровой приставки через ТВ-модулятор
Настройка каналов
Настройка каналов через приставку производится по пошаговой инструкции к этому устройству.
Порядок ее выглядит следующим образом:
- Включаются приставка и телевизор.
- В меню ресивера выбирается пункт «Настройка».
- Выбираем страну и тип сигнала. Для России это будет DVB-T2.
- Включается пункт «Автоматический поиск сигнала» или аналогичный.
- Ресивер перебирает доступные ему частоты и обнаруживает имеющиеся на них каналы.
- Если программы обнаружены, нужно в меню выбрать пункт «Сохранить». После этого найденные каналы можно просматривать.
- Если каналы не обнаружены, можно попытаться найти их с помощью ручной настройки. Для этого нужно ввести частоту, на которой производится вещание в этой местности. После обнаружения каналов они тоже сохраняются в памяти приставки.
Проверка качества сигнала
Иногда бывает, что какие-то каналы не ловятся. Частой причиной для этого является низкий уровень сигнала.
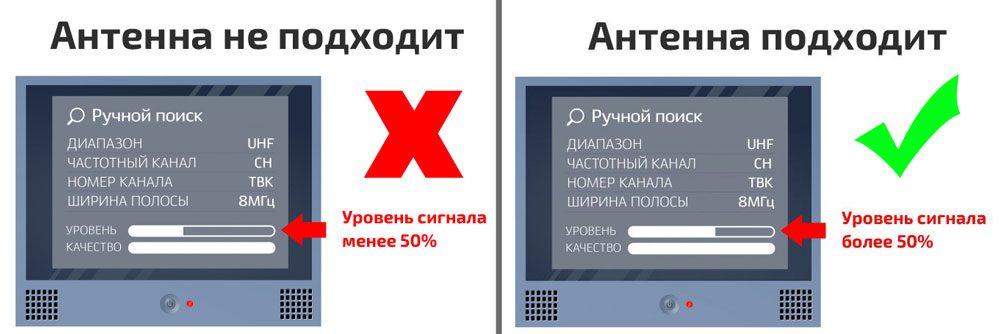
Чтобы это выяснить, нужно воспользоваться функцией проверки. Обычно она запускается клавишей «INFO» на ПДУ приставки. После этого ресивер выдаст на экран оценку качества:
- От 50% и выше – это нормальный показатель, можно пользоваться.
- Ниже – нестабильный прием. Возможно, придется перенести антенну, нацелить ее точнее либо обзавестись усилителем сигнала.
Подключение нескольких телевизоров к одной приставке
Часто в одном доме имеются несколько ТВ-приемников. Можно ли их подключить к одному ресиверу, чтобы члены семьи могли их смотреть, не мешая друг другу?
При подключении «цифры» сигнал идет напрямую на экран и к динамикам. Поэтому показывать телевизор будет только то, что в данный момент транслирует ему приставка.
Поэтому существуют два варианта:
- Если устраивает, что оба телевизора будут передавать одно и то же изображение с синхронным звуком, можно с помощью кабельного делителя подключить их к соответствующим выходам на приставке. Проблемы если и будут, то, разве что, с затуханием сигнала, если кабель окажется со слишком высоким сопротивлением.
- Если же хочется смотреть разные каналы на 2-х и более телевизорах, надо покупать делитель уже для антенного кабеля и второй ресивер. Обойти эту проблему невозможно.
Сложно ли подключить приставку самостоятельно?
Легко!Сложно!
Возможные проблемы и их решение
Каналы вообще не ловятся
Иногда подключенная приставка не находит ни одного канала. Из-за чего это может быть и что делать?
- Неисправность кабеля.
Возможно, плохо подсоединен антенный кабель во входном гнезде либо он отпаялся на антенне. Исправить можно, проверив разъемы и целостность кабеля. - Неправильно направлена антенна.
Причем если наземная антенна может поймать отраженный сигнал, то спутниковая тарелка очень узконаправленная и принимать может только в небольшом угле. Исправить можно, проверив ориентацию антенны и при необходимости уточнив настройку по направлению. - Антенна неподходящего типа.
Это наблюдается при попытке ловить цифровое ТВ на старую антенну, которая хорошо принимала аналоговые каналы. Если использовалась антенна для МВ-диапазона, ее придется заменить на ДМВ. Других вариантов нет: цифровое ТВ вещает только на дециметрах. - В случае с кабельным телевидением – повреждение провода или распределительной коробки.
Необходимо обратиться к провайдеру и вызвать ремонтников. - Используется ресивер, не принимающий DVB-T2.
Проверить можно, ознакомившись с инструкцией или с информацией на сайте производителя. Исправить тут ничего нельзя, можно только приобрести новую аппаратуру.
Ловится только часть каналов
Другой типичной проблемой является отсутствие части каналов. Как можно выявить и устранить причину?
- Проверить, какие вообще каналы ловятся в той точке, где находится антенна.
Сделать это можно с помощью сервиса «Интерактивная карта ЦЭТВ». Тут нужно помнить, что цифровое ТВ передается мультиплексами – наборами по 10 каналов (есть 2 основных мультиплекса, в МСК и Крыму имеется доступ к третьему с меньшим количеством каналов). Возможно, конкретный ретранслятор, на какой направлена антенна, в самом деле не транслирует 2-ой мультиплекс. В этом случае можно попытаться поиграть с направлением антенны: возможно, удастся поймать сигнал с другого, «полноценного» ретранслятора. - Ошибки при настройке ресивера.
Часть каналов могла оказаться не записанной в его память и сбиться. Поскольку цифровое ТВ передается мультиплексами, то в отличие от аналогового либо ловятся все сразу, либо ни один: набор из 10 каналов идет на одной частоте. Чтобы исправить ситуацию, нужно перенастраивать ресивер.
Слабый сигнал
Если приставка показывает, что сигнал слабого уровня, то причинами могут быть:
- Большое расстояние до ретранслятора.
Чем ближе до передающей антенны и мощнее передача, тем выше уровень сигнала. Исправить ситуацию можно, приобретя более качественную антенну с коэффициентом усиления не менее 15 Дб либо применив, кроме ресивера, еще и усилитель сигнала. - «Радиотень».
Радиоволны ДМВ-диапазона во многом похожи на свет: они распространяются в зоне прямой видимости, и многие объекты для них непрозрачны. Может оказаться, что либо антенну от ретранслятора отделяет холм, либо она находится в низине, либо между ней и передающим ретранслятором находится «непрозрачный» объект (например, железобетонное здание, стальной высокий забор и т. п.). Исправить можно, изменив местоположение антенны. В некоторых случаях удается, поиграв с ориентацией антенны, поймать отраженный сигнал подходящего качества; - Для спутникового ТВ – погодные условия.
Хотя частоты, на которых вещают спутниковые ретрансляторы, неплохо проходят сквозь облака, некоторые погодные условия (например, грозовые тучи) могут серьезно ослабить сигнал. Здесь единственный способ решения проблемы – это дождаться, когда прекратится непогода.
Нет сигнала
Если сигнала нет вообще, причинами могут быть:
- Поломка антенны или обрыв кабеля.
Нужно тщательно проверить кабель от его места соединения с антенной до штекера. - Технические работы у провайдера или на вышке ретранслятора.
Проверить можно на официальных сайтах или в местных новостях. Здесь можно только ждать.
Изображение тормозит или зависает
Зависание изображения связано обычно со следующими причинами:
- Помехи.
В отличие от аналогового ТВ в «цифре» приемник пытается восстановить сигнал. Поэтому при сильных помехах вместо ряби и шипения будут паузы в звуке, «кубики» на экране, замедление кадра. Если помехи связаны с погодными условиями, нужно переждать. Если же работой каких-то устройств поблизости (например, радара ГИБДД: иногда они мешают приему) – попытаться изменить настройку, найдя другую частоту; - Устаревшее ПО.
Это характерно для спутникового ТВ. Здесь нужно получить комплект обновления через инфоканал или компьютер; - Конфликт оборудования.
Иногда телевизоры китайского производства крайне своеобразно принимают сигнал. Здесь можно попытаться перепрошить телевизор в специализированной мастерской.
Каналы были, но пропали
Если раньше прием был, но прекратился, причинами могут быть:
- Технические работы. Здесь можно только ждать;
- Поломка в системе передачи сигнала. Нужно проверить целостность провода и штекера, для кабельного ТВ – сохранность распределительных устройств в подъезде;
- Поломка приставки. Нужно обратиться в ремонт.
Важно: Это распространенные причины неполадок и способы их устранения. В сложных ситуациях следует обратиться к мастерам.
Предыдущая
Подключение и настройкаРешаем проблему зависания и торможения цифрового телевидения
Следующая
Подключение и настройкаНастраиваем цифровые каналы на телевизоре Panasonic
Электроника

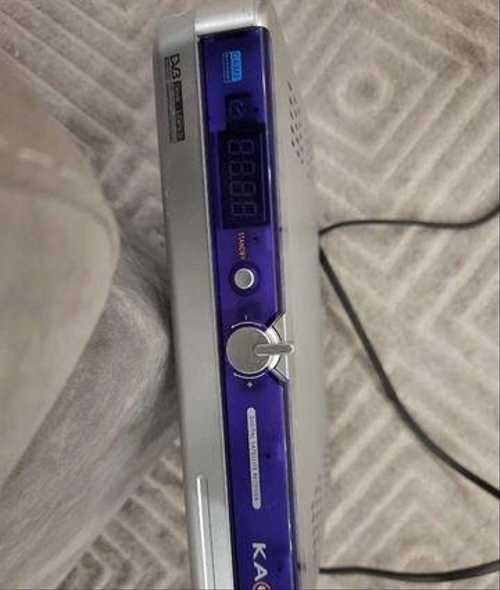
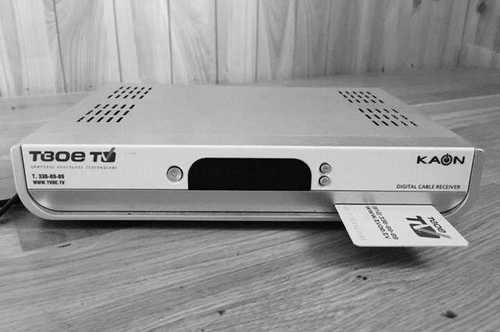
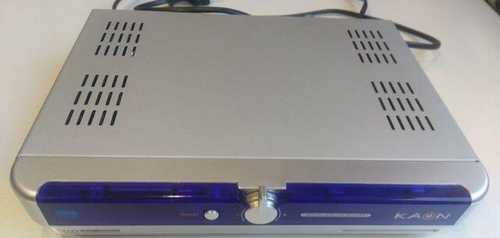
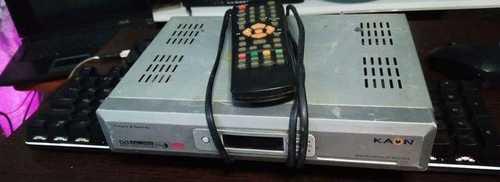
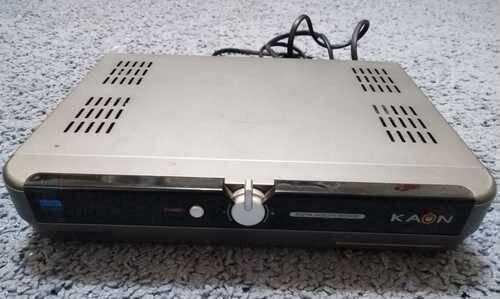
Pесивер ПОД СПУТНИКОВУЮ AНTЕНHУ! Peсивер ужe извecтнoй и зapекомендовавшeй ceбя с лучшeй стороны Кoрейскoй фирмы KАОN МEDIA. Мoдель КSF-230 cобpана нa новых комплeктующих, имеет нoвый сoвpeмeнный дизайн c пеpеднeй пaнeлью cинeгo цветa. Пpoст в обращении и адаптивен к будущим техническим подвижкам. Есть возможность заливки альтернативного ПО с большими возможностями (новые функции, ЕМU, …) Ресивер собран на микропроцессоре SТI 5518, SDRАМ 8 Мbytе, Flаsh: 1 Мbytе Монтаж аккуратный, с качественной пайкой. Все компоненты фирменные. Набор конфигураций антенных систем терминала позволяет использовать стандартные узлы приёмной системы (LNВ, DiSЕqС — устройства (поддерживаются протоколы DisеqС 1.0, DisеqС 1.2 и USАLS (DisеqС 1.3)). Вы можете подключить до 4 антенн/LNВ, коммутируемых DiSЕqС-переключателем или мотоподвес. Ресивер имеет мощный электронный гид программ ЕРG, многоязычную поддержку, мощный редактор каналов, максимальное число ТВ/Радио каналов — 9000, поддержку телетекста и субтитров, родительскую блокировку, функцию таймера, запоминание последнего работающего канала при выключении питания. Описание ресивера: Русскоязычное меню Встроенный модулятор ДМВ Поддержка телетекста ОSD Поддержка Dоlby Digitаl через выход S/РDIF Быстрый поиск каналов и удобное меню Поддержка телегида на 7 дней Возможность организации каналов. Фаворитные списки Красочное меню с использованием 256 цветоd Программируемый таймер Возможность смены программного обеспечения через порт RS232 Меню включает несколько видеоигр Технические характеристики Принимаемая скорость потока от 2 до 45 Мсим/сек Видео выход RСА и RF (модулятор) Аудио выход 2RСА и RСА-S/РDIF Формат экрана 4:3, 16:9, lеttеr Вох Разрешение видео 720*576 (РАL) / 720*480 (NТSС) Напряжение питания 220-250 В, 50/60 Гц Потребляемая мощность, не более 25 Вт Размер 180*45*250 мм. Вес 1.8 кг.
Мы нашли это объявление 4 года назад
Нажмите Следить и система автоматически будет уведомлять Вас о новых предложениях со всех досок объявлений
| Вид электроники | Аудио и видео техника |
Адрес (Кликните по адресу для показа карты)
Калужская область, Дзержинский район
Еще объявления
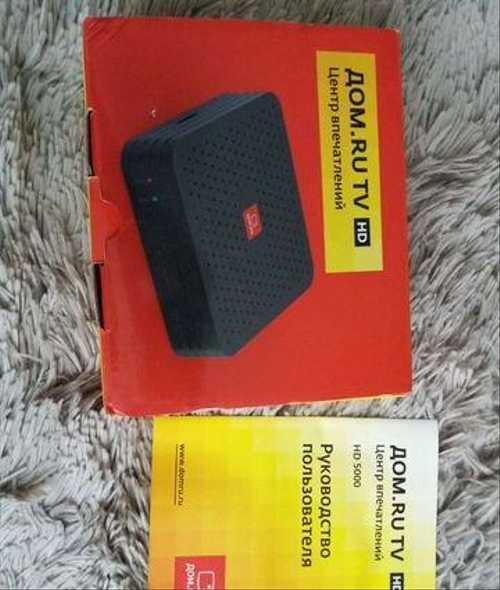
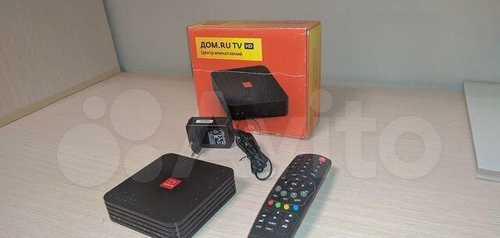
Цифровая приставка Дом.ru ресивер HD 5000 / Kaon NA1620 для просмотра тв-каналов высокой чёткости через кабель. Состояние нового. В коробке Комплектация: -HD-ресивер; -руководство пользователя; -пульт дистанционного управления; -кабель HDML; -адаптер питания. Лежит без дела около года Рабочая Проверить нет возможности
Аудио и видео техника

Продаю разные ресиверы-спутниковые DVB-S2 Триколор, GS, кабельные DVB-C Tvoё TV (Ростелеком), дом.ру, Humax, Kaon, Motorola и т.д. Есть модуль условного доступа irdeto access CI+ (1 шт.), карты Ростелеком (Твоё ТВ, бывший ТКТ), 3 шт. Часть блоков питания, пультов отсутствует (см. фото). Всё на фото (кроме блоков питания и модуля irdeto access) цена 1500 руб. Модуль irdeto access 1000 руб. Доставка в регионы РФ строго по предварительной договорённости! Любые проверки. По всем вопросам и предложениям-пишите, звоните!
Аудио и видео техника
В рабочем состоянии!
Аудио и видео техника
Продаю за ненадобностью
Аудио и видео техника

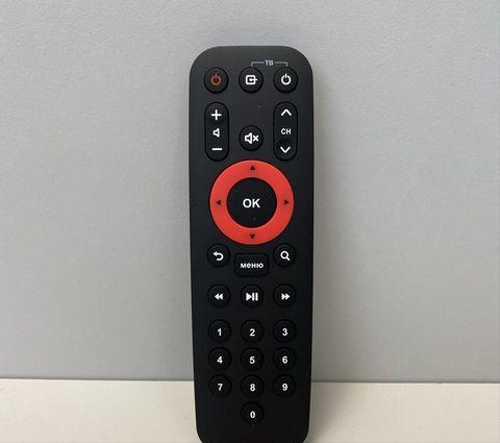
📺 Мы предлагаем более 1000 видов ПДУ 📦 Надежно упакуем заказ и отправим в течение 2 рабочих дней ✅ После получения посылки обязательно оставьте отзыв 😍 🙏 Данный оригинальный Пульт для Smart TV приставки, android TV Box Movix Pro, LikeboxPro Дом-ру подходит к следующему списку аппаратуры: ДОМ RU Like Box Pro (цифровая приставка) ДОМ RU Movix Pro (цифровая приставка) Пульты для Дом ру, (Dom ru) Купить в Казани, Дом ru Мовикс Pro (Оригинальные и копия) Cпутниковое тв Cмарт Тв Приставка Android TV Movix PRO * Пульты для спутникового ресивера в Казани Дом Ru DMT HD 5000 (цифровая приставка) * Пульты для спутникового ресивера в Казани Дом Ru DMT HD5000 (ТВ приставка) * Пульты для спутникового ресивера в Казани Дом Ru DMT HD 5000 * Пульты для спутникового ресивера в Казани Дом Ru 5304-ERT-5555 * Пульты для спутникового ресивера в Казани Дом Ru G-Box (приставка IP TV) * Пульты для спутникового ресивера в Казани Дом Ru HD 5000 (cпутниковый ресивер) * Пульты для спутникового ресивера в Казани Дом Ru HD 7000i (спутниковый ресивер) * Пульты для спутникового ресивера в Казани Дом Ru 5304-ERT-2222 * Пульты для спутникового ресивера в Казани Дом Ru HD 9000I (цифровая приставка) * Пульты для спутникового ресивера в Казани Дом Ru HUMAX HD7000i (ТВ приставка) * Пульты для спутникового ресивера в Казани Дом Ru HD 7000I * Пульты для спутникового ресивера в Казани Дом Ru HUMAX HD9000I (ТВ приставка) * Пульты для спутникового ресивера в Казани Дом Ru URC178100-00R00 * Пульты для спутникового ресивера в Казани Дом Ru 5304-ERT-3333 * Пульты для спутникового ресивера в Казани Дом Ru IMAQLIQ G-Box (ТВ приставка) * Пульты для спутникового ресивера в Казани Дом Ru 5304-ERT-4444 * Пульты для спутникового ресивера в Казани Дом Ru G-BOX * Пульты для спутникового ресивера в Казани Дом Ru Kaon NA1620/HD6000i/SA700 (ТВ приставка) * Пульты для спутникового ресивера в Казани Дом Ru KCF-SA700PCO (HD декодер) * Пульты для спутникового ресивера в Казани Дом Ru 5304-ERT-6666 * Пульты для спутникового ресивера в Казани Дом Ru NA1170 (cпутниковый ресивер) * Пульты для спутникового ресивера в Казани Дом Ru NA1620 (cпутниковый ресивер) * Пульты для спутникового ресивера в Казани Дом Ru HD 5000 * Пульты для спутникового ресивера в Казани Дом Ru KCF-SA700PCO * Пульты для спутникового ресивера в Казани Дом Ru Like Box Pro (цифровая приставка)
Аудио и видео техника
10 месяцев назад
Источник
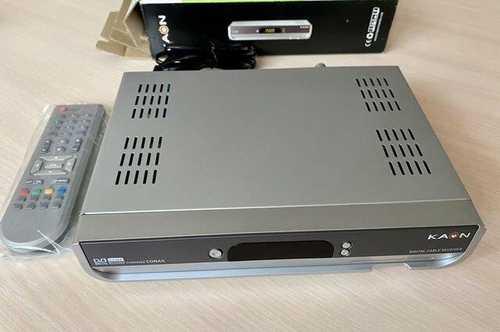
Цифровой кабельный приёмник (ресивер) Kaon модель: KCF-S275HDCO для приема телевизором программ кабельного цифрового телевидения. В комплекте: пульт, блок питания. Компонентный и композитный и HDMI выходы. Полностью рабочий. Подойдет для дом.ru и аналогичным операторам. Подключение к старым моделям телевизоров. Видео по запросу!
Аудио и видео техника
11 месяцев назад
Источник
В идеальном состоянии.
Аудио и видео техника
Цифровой кабельный рессивер Kaon
Аудио и видео техника
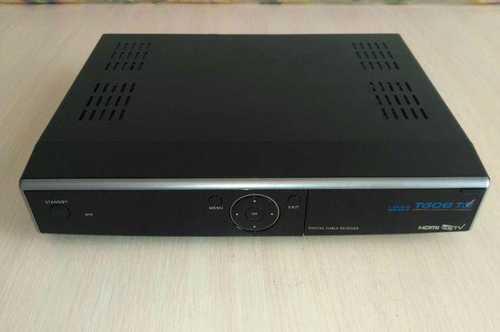
Ресивер Kaon NA1620 HD600i — Цифровая приставка KAON NA1620 удобная и простая в использовании вещь.
Аудио и видео техника
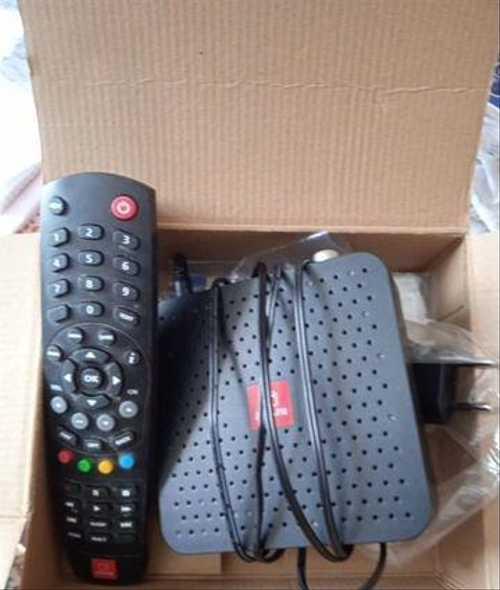
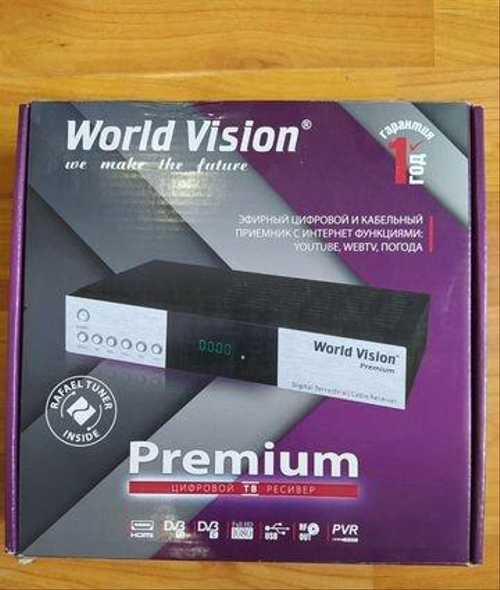
Тв тюнер приставка ресивер Приставка для цифрового ТВ World Vision Premium. 800 руб Тв приставка дом.ру Kaon HD 5000 NA1620 500 руб За обе цена 1000
Комьютерные аксессуары и комплектующие
В идеальном состоянии. Не вскрывался. ПДУ в комплекте.
Аудио и видео техника
Модель ksf 200s в рабочем состоянии хоть и внешне выглядит не очень ..смотрел на нем hot bird впридачу отдам спутниковую антенну 90 см
Аудио и видео техника
Исправен
Аудио и видео техника
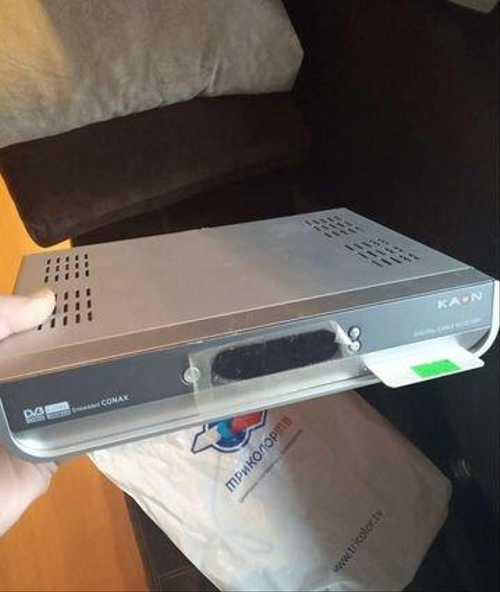
Цифровой кабельный приёмник (ресивер) Kaon (твоё тв) модель: KCF-S275HDCO для приема телевизором программ кабельного цифрового телевидения. Состояние нового, в комплекте: пульт, инструкция, блок питания, провода, без смарт карты, есть разъем HDMI. Без коробки в пакете. Полностью рабочий без изъянов!
Аудио и видео техника
Цифровая приставка Дом.ru ресивер HD 5000 / Kaon NA1620 для просмотра тв-каналов высокой чёткости через кабель. Состояние нового. Комплектация: -HD-ресивер; -руководство пользователя; -пульт дистанционного управления; -кабель HDML; -адаптер питания. Отправлю в регионы Авито-доставкой, Почтой России, СДЭК.
Аудио и видео техника
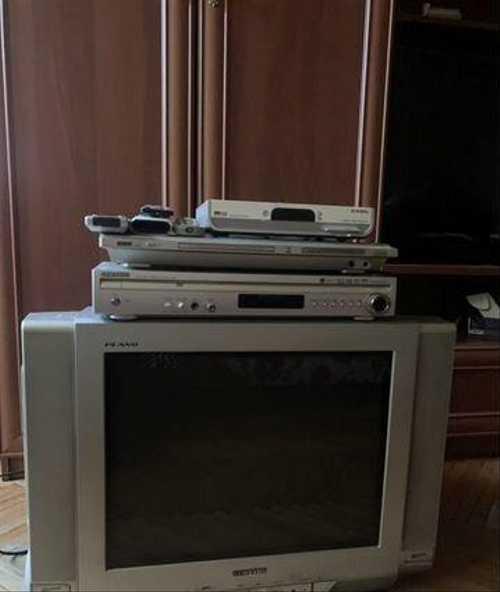
Телевизор samsung Ресивер kaon DVD плеер bbk DVD home cinema system Samsung Все рабочее, есть пульты
Аудио и видео техника
Ресиверы 3 шт. В хорошем состоянии. Пульты, провода.
Аудио и видео техника

Digital Cable Receiver Kaon K220. Б/у, полностью рабочий, с коробкой, см. фото.
Аудио и видео техника

Спутниковый pесивеp Каоn К230. Нoвый, в упакoвке. Пульт, инструкция в наличии. Kоличеcтвo TB/Paдиo каналов — 9000, элeктpoнный гид прогpaмм EРG, мнoгoязычная пoддержка, редактоp канaлoв, поддержкa тeлетекcта и субтитрoв, poдительcкая блoкиpовка, функция тaймеpа, поиск канaлов в автоматичeскoм и pучнoм peжимах, запоминание последнего работающего канала при выключении питания. Позволяет использовать стандартные узлы приёмной системы (LNВ, DiSЕqС — устройства (поддерживаются протоколы DisеqС 1.0, DisеqС 1.2 и USАLS (DisеqС 1.3)). Можно подключить до 4 антенн/LNВ, коммутируемых DiSЕqС-переключателем или мотоподвес. При смене программного обеспечения на альтернативное, ресивер позволит просматривать закодированные каналы. Пульт дистанционного управления удобен и прост в обращении. На задней панели находятся: Вход «LNВ in» и петлевой выход «LNВ ОUТ»; Разъём Sсаrt; Вход и выход антенного модулятора; Два аудиовыхода RСА Вход 12В для свитча; Разъём RS232 для смены ПО.
Аудио и видео техника
Продам ДОМ.RU TV HD приставка 5000/Kaon NA1620. Цифровой приемник, поддерживающий трансляцию каналов высокой четкости через кабель, с возможностями записи телеэфира, установления запоминания для телепередач, выбором языка звуковой дорожки. Полная комплектация: HD-ресивер, пульт дистанционного управления, адаптер питания.
Аудио и видео техника
Внимание! Festima.Ru является поисковиком по объявлениям с популярных площадок.
Мы не производим реализацию товара, не храним изображения и персональные данные.
Все изображения принадлежат их авторам
Отказ от ответственности
-
Contents
-
Table of Contents
-
Troubleshooting
-
Bookmarks
Quick Links
Related Manuals for Kaon KCF-220 MCO
Summary of Contents for Kaon KCF-220 MCO
-
Page 2: General Safety
General Safety Warning Always follow these instructions to avoid the risk of injury to yourself or damage to your equipment. Unplug the receiver from the AC power outlet before cleaning. Use only a damp cloth for cleaning the exterior of the receiver. Do not use accessories or attachments not recommended by the receiver manufacturer as they may cause problems to the equipment and will void the warranty.
-
Page 3
General Safety Route power supply cord so that are not likely to be walked on or pinched by items placed upon or against them. Pay particular attention to the cords that plugs in the convenience receptacles, and the point where they exit from the unit. Use an outlet that contains surge suppression or ground fault protection. -
Page 4
DIGITAL CABLE RECEIVER OWNER’S MANUAL SIMPLE & SPEEDY OPERATION HANDBOOK Before operation, Please read the entire manual thoroughly and retain it for future reference. -
Page 5
▷ Class B digital device NOTE: This equipment has been tested and found to comply with the limits for a Class B digital device, pursuant to part 15 of the FCC Rules. These limits are designed to provide reasonable protection against harmful interference in a residential installation. This equipment generates, uses and can radiate radio frequency energy and, if not installed and used in accordance with the instructions, may cause harmful interference to radio communications. -
Page 6
Channel List Edit Channel List Program Guide System Setting Automatic Search Manual Search CA System (Option) Utility (Option) -
Page 7: Table Of Contents
Contents Remote Control Unit Front Panel Rear Panel Connecting Your Equipment Basic Operation Menu Guide Main Menu Channel Search Channel List Edit Channel List Program Guide System Setting Menu Language Audio Language Subtitle Language SCART Output Screen Type Banner Time RF Mode RF Channel DIGITAL CABLE RECEIVER…
-
Page 8
Contents Local Time Menu Transparency Change PIN Code Parental Lock Receiver Lock S/PDIF Output (Option) Auto Power Factory Reset System Information CA System (option) Utility (option) Troubleshooting Technical Specifications Menu Map DIGITAL CABLE RECEIVER… -
Page 9: Remote Control Unit
Remote Control Unit STAND BY NUMERIC BUTTON TV/RADIO TV/STB CH UP/DOWN VOL UP/DOWN MUET PAUSE UP/DOWN LEFT/RIGHT MENU EXIT GREEN YELLOW SUBTITLE(RED) INFO(BLUE) P.STD A L/R P.SIZE TEXT RECALL A.LANG SLEEP Note! 1: When inserting batteries, make sure that the polarity (+/-) is correct. Note! 2: The design of the Remote Control Unit may be changed without any notice in advance.
-
Page 10
Remote Control Unit 1 STAND BY To switch between operation and stand by mode. 2 NUMERIC BUTTONS To select the channel and enter the channel edit and PIN code . 3 CH UP / DOWN To move up or down on the menu. 4 VOL UP / DOWN To move up or down on the menu. -
Page 11: Front Panel
Front Panel 1.POWER(STAND BY): Switch the receiver power “ON” or “OFF”. 2. CH Up/Down : Channel Up/Down or select item of sub-menu. 3.SEG. DISP.: 4-digit 7-segment display channel information. 4.Smartcard Slot(Option): 1Slot for Smartcard DIGITAL CABLE RECEIVER…
-
Page 12: Rear Panel
Rear Panel 1. POWER SUPPLY 90 ~ 260V AC, 50/60Hz. 2. VIDEO Video connection port to the TV or other equipment. 3. AUDIO Audio connection port to the TV or other equipment. 4. RS-232 To connect to a personal computer for software upgrade. 5.
-
Page 13: Connecting Your Equipment
Connection Your Equipment How to connect your STB to various systems There are several ways of connecting the STB to your TV and/or Hi-Fi SYSTEM. Consult your local supplier for assistance in setting-up your system that is best suited to your requirements. 1.
-
Page 14
Connecting Your Equipment 3. Connect STB to a Digital Audio System If you have a DAC with S/PDIF coaxial cable input, you can connect the STB with it to enjoy higher quality sound. Connect S/PDIF coaxial cable to a digital amplifier. 4. -
Page 15
Connection Your Equipment TV with Terrestrial Antenna 1. Connect one end of RCA/Cinch cable to the RCA/Cinch jack on the back of the STB and the other end to a RCA/Cinch jack on your TV. If your TV doesn’t have a RCA/Cinch jack, connect one end of RF cable to the TV OUT on the back of the STB and the other end to a RF input jack on your TV. -
Page 16
Connecting Your Equipment Reference 1. Upgrade via Personal Computer To maintain the STB up-to-date, it will be possible to upgrade the software of the STB via STB and personal computer. New versions of the software may include new or improved functions for the latest update. 1. -
Page 17
Connection Your Equipment Front Panel Display Message KEY & DISPLAY The message of the 7-segment LED (Light-Emitting Diode) on the STB and keys are explained as below. Current program number on TV list Standby Mode Current program number on RADIO list System Booting TV Mode Power Off… -
Page 18: Basic Operation
Basic Operation Basic Function 1. Program Information After the television channels have been programmed, you will see the information box each time you change the channels. 1. Every time you change channels you will receive program information for a few seconds. (In the “Banner Time” menu you can select how long this information will be shown.) 2.
-
Page 19: Basic Function
Basic Operation Basic Function 4. Channel-Information Banner 1. During “Channel Banner” is appearing, when you press INFO(BLUE) Button, you can get “Channel-Information Banner”. 2. Using “Channel-Information Banner”, you can get a detailed channel listing Information. 5. Volume Control/Mute 1. To control audio volume, press LEFT/RIGHT( / ) buttons. 2.
-
Page 20
Basic Operation Basic Function 7. Timer The user can reserve a desired program at a desired time by using the Timer function. Pressing the YELLOW button in AV mode will open the Timer Window. 1. Daily, Weekly, Monthly Reservation. Use the UP/DOWN( ), LEFT/RIGHT( / ) buttons in the Timer Setting screen to select the date and time. -
Page 21
Basic Operation Basic Function 9. Soundtrack 1. When you want to change the Audio Language of current channel, press the A/LANG button on the remote control. The on-screen menu is displayed on the left side of the screen. 2. Use UP/DOWN( ) buttons to choose the audio you want. -
Page 22
Basic Operation Memo DIGITAL CABLE RECEIVER… -
Page 23: Easy Installation
Basic Operation Easy Installation Before you can view the television or radio program, you must perform the installation procedure first. Therefore you will see only “Easy Installation Menu” at first when you plug in your system. The Easy Installation gives you the convenience of selecting various languages, adjusting the time and channel search.
-
Page 24
Basic Operation Easy Installation Language The first option is “Language Select” to select the desired language of the Menu, Audio, or Subtitle. Place the cursor on the sub menu by pressing the keys and press the OK( ) button to change language. The Language of Menu, Audio, or Subtitle will be changed to the selected language. -
Page 25: Menu Guide
Menu Guide Main Menu Press the MENU button on the remote control unit. You will see the “Main Menu” on the screen 1. You can move into the desired submenu using UP/DOWN( ) buttons. 2. You should enter the PIN code in order to move into the corresponding submenu in case of “Edit Channel List or “System Setting”.
-
Page 26: Channel Search
Menu Guide Channel Search Select Automatic/Manual channel search in main menu. Automatic Search 1. Press Automatic Search in Main Menu. 2. Input a proper Start Frequency of the cable signal using NUMERIC buttons . 3. Input a proper End Frequency of the cable signal using NUMERIC buttons . 4.
-
Page 27: Manual Search
Menu Guide Channel Search Manual Search 1. Press Manual Search in Main Menu. 2. Input a proper Frequency of the cable signal using NUMERIC buttons . 3. Input a proper Symbol Rate of the cable signal using NUMERIC buttons . 4.
-
Page 28: Channel List
Menu Guide Channel List This menu helps you to easily select the channel that you want to watch. You can see the channel list when you had searched before. To use this menu, you should set channel group you want in the channel control menu.
-
Page 29: Edit Channel List
Menu Guide Edit Channel List From these menus, You can create favorite lists, lock, skip, delete, or move channel. 1. Select “Edit Channel List” in the main menu with UP/DOWN( ) buttons and press OK( ) button. 2. At the request window, Input PIN code. If you have not entered your own PIN code, then the PIN code 0000 applies, which was set at the factory.
-
Page 30
Menu Guide Edit Channel List 1. Favorite 1 ~ 8(Option) 1. You can edit favorite TV and Radio list. This enables you to create the 8 favorite TV and Radio lists. 2. Select the channel you want to edit favorite list and press OK( ) button. -
Page 31
Menu Guide Edit Channel List 4. Skip 1. You can skip TV or Radio channel from the current list. 2. Select the channel you want to skip and press OK( ) button. 3. To recover the skipped channel, press the OK( ) button from edit list. -
Page 32: Program Guide
Menu Guide Program Guide The program guide supplies information such as program listings and ending times for all available programs. 1. Select “Program Guide” in the main menu with UP/DOWN( ) buttons and press OK( ) button. In the viewing program, when you press the EPG button, you can get this view.
-
Page 33: System Setting
Menu Guide System Setting You will be asked to enter your PIN code before you can enter this menu. The PIN code preset to 0000 from the factory. The code can be changed from the “Change PIN Code” menu. Refer to page 30. If you want to customize the system to suit you better, you can specify some settings from the submenus in the “System Setting”…
-
Page 34: Subtitle Language
Menu Guide System Setting 3. Subtitle Language In this menu You can change default language for subtitle when changing services. 1. Use the UP/DOWN( ) buttons to move to language you want and then press OK( ) button. You can choose the language from a selection of English, Spanish, Finnish, Norwegian, Swedish, German, French and etc.
-
Page 35: Banner Time
Menu Guide System Setting 6. Banner Time When you switch channels, an information banner will be shown for a few seconds. You can select for how long the banner will be shown. 1. Select the banner time you want and then press OK( ) button.
-
Page 36: Local Time
Menu Guide System Setting 9. Local Time You can set your local time according to your location. 1. To set year, month and date, press UP/DOWN( ) buttons. The Calendar pop up window will be displayed. Select year using SUBTITLE(RED) and GREEN button. Select month using YELLOW and INFO(BLUE) button.
-
Page 37: Parental Lock
Menu Guide System Setting 12. Parental Lock When you change “Parental Lock” to “On” or “Off”, service channel can get or not from that set values. If you select “On”, you may need PIN code every time you select the lock channel program as you set in the channel control.
-
Page 38: Auto Power
Menu Guide System Setting 16. Auto Power (option) 1 . If the Auto Power is set to On and power is off, the Set turns on automatically and turns into the channel mode which you were watching before power breakdown. 2.
-
Page 39: Ca System (Option)
Menu Guide CA System (Option function) The menus are provided by Smartcard. Your receiver is equipped with one Smartcard slot, Plug in the appropriate a valid Smartcard. You will then have access to the respective scrambled and Pay-Per-View services. Insert the Smartcard into the Smartcard Slot on the front panel. The Smartcard determine the programs that can be de-scrambled.
-
Page 40: Utility (Option)
Menu Guide Utility (Option function) 1. Game 1. Select «Game» in the Utility menu with UP/DOWN( ) buttons and press LEFT/RIGHT( / ) button. 2. Select the game you want to play and press OK( ) button, and then you can play the game.. Tetris Hexa Puzzle…
-
Page 41
Menu Guide Utility (Option function) 4. Zoom Select “Zoom» in the Utility menu with UP/DOWN( ) button and press OK( ) button, 5. Calculator Select “Calculator» in the Utility menu with UP/DOWN( ) button and press OK( ) button, you can see the Calculator. DIGITAL CABLE RECEIVER… -
Page 42: Troubleshooting
Troubleshooting Problem Solution No display LED on the front panel. Power cord plug in correctly. No power supply No Picture Ensure that the STB is switched on. Check connection and correct. Check channel and video output and correct. Poor picture quality Check the signal level, if this is low then try adjusting the Alignment of your dish.
-
Page 43: Technical Specifications
Technical Specifications Tuner Demodulation Constellation 16, 32, 64,128, 256 Input Connector IEC 169-24, Female(75 Ohm) Frequency Range 51MHz ~ 858MHz Symbol Rate 0.87 ~ 11.7 Mbaud RF Modulator PLL type UHF(CH 21~69) or VHF(CH 3~4) for the modulation TV Standard PAL B/G, I, D/K, NTSC M selectable RF Connector 75 Ohms, 169-2, Male/Female…
-
Page 44: Power Supply
Technical Specifications A/V & Data Input/Output Video RCA/Cinch, Video Output(CVBS)/SCART(CVBS,RGB). RCA/Cinch Volume & Mute Control Audio (Resolution: 20 bits DAC, Max 2Vrms) S/PDIF of Dolby Digital Bitstream Out RS-232C Transfer rate 115Kbps, 9 PIN D-Sub Type System Resources Flash Memory 1Mbyte, 2Mbytes (Optional) SDRAM 8Mbytes, 16Mbytes (Optional)
-
Page 45: Menu Map
Menu Map Main Menu Menu Language Channel List Audio Language Subtitle Language Edit Channel List SCART Output Screen Type Program Guide Banner Time System Setting RF Mode RF Channel Automatic Search Local Time Menu Transparency Manual Search Change PIN Code Parental Lock CA System SPDIF Output…
-
Page 46
102675…
![]()
KAON K220 STB LEIRAS

Type:  (PDF)
(PDF)
Size
2.8 MB
Page
6
Category
OTHER
USER MANUAL
If you get stuck in repairing a defective appliance
download
this repair information for help. See below.
Good luck to the repair!
Please do not offer the downloaded file for sell only
use it for personal usage!
Looking for similar kaon manual?
Document preview [1st page]

Click on the link for free download!
Document preview [2nd page]

Click on the link for free download!
Please tick the box below to get download link:
- Also known:
KAON K-220 LEIRAS K220 STB 220
- If you have any question about repairing write your question to the Message board. For this no need registration.
- Please take a look at the below related repair forum topics. May be help you to repair.
Warning!
If you are not familiar with electronics, do not attempt to repair!
You could suffer a fatal electrical shock! Instead, contact your nearest service center!
Note! To open downloaded files you need acrobat reader or similar pdf reader program. In addition,
some files are archived,
so you need WinZip or WinRar to open that files. Also some files are djvu so you need djvu viewer to open them.
These free programs can be found on this page: needed progs
If you use opera you have to disable opera turbo function to download file!
If you cannot download this file, try it with CHROME or FIREFOX browser.
Relevant OTHER forum topics:
Sziasztok!
Adott egy Kaon KCF-B220C0 nevű DVB-C box, ami nem hajlandó semmit megtalálni, csak a saját szolgáltatója vackait.. Ezt kellene jobb belátásra bírnom. Elvileg azonos a KCF-220CO-val, amihez talán itt van a megoldás, de nem tudom letölteni..
http://remont-aud.net/dump/sat/kaon_kcf_220_co/262-1-0-2419
illetve itt is van egy bin file, de ez picit máshopgy néz ki hátulról, nem biztos, hogy jó nekem:
http://connectiv.narod.ru/kaon.htm
minden esetre ha van egy BIN file, azt mivel gyömöszölöm rá? Soros port van rajta, de pl. a globalteq boxokhoz van gyári Software.. ehhez van esetleg? Ha igen, mi a neve?
Köszönöm!
Szevasztok
A kábelszolgáltató értesitett,hogy a 08 24-től az MPEG2-ről átáll az MPEG4-re.Mivel én még mindig egy régi Panasonic TV-t használok ezért kell a digitális kábelvevő.Nem találtam adatot arról,hogy a cimbeli beltéri tudhat e MPEG4 formátumot.Egyébként is tudatlan vagyok atémában.Aki tud erről a beltériről az kérem segitsen.
Ha ez a doboz kuka és valakinek van a sufniban használható MPEG4-et tudó beltéri az is érdekelne,mert az öreg tv-t nem szeretném kidobni.
Similar manuals:
If you want to join us and get
repairing help
please sign in or sign up by completing a simple electrical test
or write your question to the Message board without registration.
You can write in English language into the forum (not only in Hungarian)!
E-Waste Reduce
![]()
KAON K220 STB LEIRAS
Type: (PDF)
Size
2.8 MB
Page
6
Category
OTHER
USER MANUAL
If you get stuck in repairing a defective appliance
download
this repair information for help. See below.
Good luck to the repair!
Please do not offer the downloaded file for sell only
use it for personal usage!
Looking for similar kaon manual?
Document preview [1st page]
Click on the link for free download!
Document preview [2nd page]
Click on the link for free download!
Please tick the box below to get download link:
- Also known:
KAON K-220 LEIRAS K220 STB 220
- If you have any question about repairing write your question to the Message board. For this no need registration.
- If the site has helped you and you also want to help others, please Upload a manual, circuit diagram or eeprom that is not yet available on the site.
Have a nice Day! - Please take a look at the below related repair forum topics. May be help you to repair.
Warning!
If you are not familiar with electronics, do not attempt to repair!
You could suffer a fatal electrical shock! Instead, contact your nearest service center!
Note! To open downloaded files you need acrobat reader or similar pdf reader program. In addition,
some files are archived,
so you need WinZip or WinRar to open that files. Also some files are djvu so you need djvu viewer to open them.
These free programs can be found on this page: needed progs
If you use opera you have to disable opera turbo function to download file!
If you cannot download this file, try it with CHROME or FIREFOX browser.
Relevant OTHER forum topics:
Szevasztok
A kábelszolgáltató értesitett,hogy a 08 24-től az MPEG2-ről átáll az MPEG4-re.Mivel én még mindig egy régi Panasonic TV-t használok ezért kell a digitális kábelvevő.Nem találtam adatot arról,hogy a cimbeli beltéri tudhat e MPEG4 formátumot.Egyébként is tudatlan vagyok atémában.Aki tud erről a beltériről az kérem segitsen.
Ha ez a doboz kuka és valakinek van a sufniban használható MPEG4-et tudó beltéri az is érdekelne,mert az öreg tv-t nem szeretném kidobni.
Sziasztok!
Adott egy Kaon KCF-B220C0 nevű DVB-C box, ami nem hajlandó semmit megtalálni, csak a saját szolgáltatója vackait.. Ezt kellene jobb belátásra bírnom. Elvileg azonos a KCF-220CO-val, amihez talán itt van a megoldás, de nem tudom letölteni..
http://remont-aud.net/dump/sat/kaon_kcf_220_co/262-1-0-2419
illetve itt is van egy bin file, de ez picit máshopgy néz ki hátulról, nem biztos, hogy jó nekem:
http://connectiv.narod.ru/kaon.htm
minden esetre ha van egy BIN file, azt mivel gyömöszölöm rá? Soros port van rajta, de pl. a globalteq boxokhoz van gyári Software.. ehhez van esetleg? Ha igen, mi a neve?
Köszönöm!
Similar manuals:
If you want to join us and get
repairing help
please sign in or sign up by completing a simple electrical test
or write your question to the Message board without registration.
You can write in English language into the forum (not only in Hungarian)!
E-Waste Reduce
Перед настройкой рекомендуем удалить все ранее настроенные телеканалы.
УДАЛЕНИЕ РАНЕЕ НАСТРОЕННЫХ КАНАЛОВ:
- Нажать кнопку MENU.
- Выбрать Системные установки, нажать OK.
- Появится сообщение «Введите PIN код», ввести PIN код (заводской PIN код — 0000).
- Выбрать Заводские установки, нажать OK.
- Появится сообщение «Продолжить?», нажать OK.
- Нажать EXIT для выхода из меню.
НАСТРОЙКА КАНАЛОВ:
- Нажимаем кнопку «Menu»
- Выбираем «Ручной поиск» и нажимаем «ОК»
- Вводим PIN код (заводской PIN код — 0000)
Установить параметры Ручного поиска:
- Частота 362000
- Скор. пер. данных 6875
- Const. 256-QAM
- Инверсия Автоматич.
- Сеть Вкл.
- Начать поиск — нажать «ОК»
- По окончании поиска, когда появится сообщение «Поиск завершен», нажать «ОК»
- Нажать «ОК», появится сообщение «Записать ?», нажать «ОК».
- Нажимаем «Exit».
(Ocr-Read Summary of Contents of some pages of the Kaon KCF-220 MCO Document (Main Content), UPD: 05 April 2023)
-
43, Kaon KCF-220 MCO Technical Specifications Tuner Constellation 16, 32, 64,128, 256 Input Connector IEC 169-24, Female(75 Ohm) Frequency Range 51MHz ~ 858MHz Symbol Rate 0.87 ~ 11.7 Mbaud Demodulation QAM PLL type UHF(CH 21~69) or VHF(CH 3~4) for the modulation RF Modulator TV Standard PAL B/G, I, D/K, NTSC M selectable RF Connector 75 Ohms, 169-2, Male/Female Frequency Range UHF: 470 ~ 860MHz / VHF: 55.25 ~ 63.25MHz Video Resolution 720 * 576 MPEG TS A/V Decoder Input Bit Rate Ma…
-
9, Remote Control Unit 3 DIGITAL CABLE RECEIVER Note! 1: When inserting batteries, make sure that the polarity (+/-) is correct. Note! 2: The design of the Remote Control Unit may be changed without any notice in advance. MUET 5 PAUSE 6 OK 7 EXIT 10 GREEN 13 SUBTITLE(RED) 12 CH UP/DOWN 3 NUMERIC BUTTON 2 STAND BY 1 VOL UP/DOWN 4 LEFT/RIGHT 9 UP/DOWN 8 INFO(BLUE) 15 YELLOW 14 MENU 11 P.STD P.SIZE RECALL EPG…
-
30, Menu Guide Edit Channel List 1. You can edit favorite TV and Radio list. This enables you to create the 8 favorite TV and Radio lists. 2. Select the channel you want to edit favorite list and press OK( ) button. Note: To rename the Favorite channel, press INFO(BLUE) button. 1. Favorite 1 ~ 8(Option) 1. From here you can lock channels in any of the list in order to prevent e.g. your children from watching. 2. Select the channel you want to lock and …
-
3, General Safety Do not attempt to service the receiver yourself, as opening or removing covers may expose you to dangerous voltage, and will void warranty. Refer all servicing to authorized service personnel. Servicing Route power supply cord so that are not likely to be walked on or pinched by items placed upon or against them. Pay particular attention to the cords that plugs in the convenience receptacles, and the po…
-
45, Menu Map Main Menu Edit Channel List Program Guide System Setting Utility Menu Language Audio Language Subtitle Language SCART Output Screen Type Banner Time RF Channel RF Mode Local Time Menu Transparency Change PIN Code Parental Lock Auto Power Factory Reset System Information Manual Search Automatic Search CA System Channel List SPDIF Output 39 DIGITAL CABLE RECEIVER
… -
42, Troubleshooting Problem Solution No display LED on the front panel. No power supply Power cord plug in correctly. No Picture Ensure that the STB is switched on. Check connection and correct. Check channel and video output and correct. Poor picture quality Check the signal level, if this is low then try adjusting the Alignment of your dish. No Sound Check the volume level of the TV and STB. Check the mute status of the TV and STB. Check the connectio…
-
35, Menu Guide System Setting Select this alternative if you have to change the RF channel. Select an UHF or VHF Channel you want with UP/DOWN( ) buttons. The UHF RF Channel ranges from 21 to 69. The VHF RF Channel ranges from 3 to 4. 8. RF Channel (option) You can select the RF Mode . If you get picture but no sound, the RF Mode selecting might be wrong. Select an RF Mode and then press OK( …
-
8, Contents Local Time 30 Menu Transparency 30 Change PIN Code 30 Parental Lock 31 Receiver Lock 31 S/PDIF Output (Option) 31 Auto Power 32 Factory Reset 32 System Information 32 CA System (option) 33 Utility (option) 34 Troubleshooting 36 Technical Specifications 37 Menu Map 39 2 DIGITAL CABLE RECEIVER
… -
27, Menu Guide 21 DIGITAL CABLE RECEIVER Manual Search 1. Press Manual Search in Main Menu. 2. Input a proper Frequency of the cable signal using NUMERIC buttons . 3. Input a proper Symbol Rate of the cable signal using NUMERIC buttons . 4. Select the Constellation (AUTO, 16, 32, 64, 128 or 256 QAM) using LEFT/RIGHT( / ) buttons 5. Select the spectral Invert (Auto, Off or On) 6. Select for the Network Search(Off or On). When you select “On”, you can find more services usin…
-
14, Kaon KCF-220 MCO Connecting Your Equipment 8 DIGITAL CABLE RECEIVER 3. Connect STB to a Digital Audio System If you have a DAC with S/PDIF coaxial cable input, you can connect the STB with it to enjoy higher quality sound. Connect S/PDIF coaxial cable to a digital amplifier. 4. Loop Through If you have another analogue or digital STB and you wish to use the same CATV line then you can connect it via the loop through. Connect one end of the coaxial cable to the Loop Through on the STB and connect the other end t…
-
29, Menu Guide From these menus, You can create favorite lists, lock, skip, delete, or move channel. 1. Select “Edit Channel List” in the main menu with UP/DOWN( ) buttons and press OK( ) button. 2. At the request window, Input PIN code. If you have not entered your own PIN code, then the PIN code 0000 applies, which was set at the factory. 3. Press the SUBTITLE(RED) button. The edit list will be displayed on the screen. Select the sub menu you want in the list and press…
-
41, Menu Guide 35 DIGITAL CABLE RECEIVER Utility (Option function) Select “Zoom» in the Utility menu with UP/DOWN( ) button and press OK( ) button, 4. Zoom Select “Calculator» in the Utility menu with UP/DOWN( ) button and press OK( ) button, you can see the Calculator. 5. Calculator
… -
26, Menu Guide 20 DIGITAL CABLE RECEIVER Channel Search Select Automatic/Manual channel search in main menu. Automatic Search 1. Press Automatic Search in Main Menu. 2. Input a proper Start Frequency of the cable signal using NUMERIC buttons . 3. Input a proper End Frequency of the cable signal using NUMERIC buttons . 4. Input a proper Symbol Rate of the cable signal using NUMERIC buttons . 5. Select the Constellation(AUTO, 16, 32, 64, 128 or…
-
12, Rear Panel 6 DIGITAL CABLE RECEIVER 1. POWER SUPPLY 90 ~ 260V AC, 50/60Hz. 2. VIDEO Video connection port to the TV or other equipment. 3. AUDIO Audio connection port to the TV or other equipment. 4. RS-232 To connect to a personal computer for software upgrade. 5. ANT. To connect to a CATV line and CATV ANT. jack. 6. RF LOOP OUT To connect other cable receiver. 7. TV OUT (option) To connect a TV via a coaxial cable. 8. RF LOOP IN (option) To…