Remote Mounting of LCP
®
VLT
HVAC Drive FC 102
Items Supplied
•
LCP cables with 2 M12 connectors (90° male connector and straight female connector). Cable lengths: 3 m, 5 m, and 10 m
(10 ft, 16 ft, 33 ft). See also Table 1.1.
•
Blind cover with M12 female connector.
•
Base plate with D-sub connector and M12 male connector.
•
Two gaskets and 1 nut for the D-sub connector.
•
Intermediate cover with the front cover.
•
Disassembly tool.
Length [m (ft)]
3 (10)
5 (16)
10 (33)
Table 1.1 Cable Ordering Numbers
More Items Required
•
Local control panel (LCP).
•
Four M4 self-tapping screws for mounting.
This instruction is valid for frequency converters that were ordered with the LCP. Front covers of frequency converters that
were ordered without LCPs do not have holes for mounting the blind covers.
Safety Instructions
For important information about safety precautions for installation, refer to the product-specific operating guide.
WARNING
DISCHARGE TIME
The frequency converter contains DC-link capacitors, which can remain charged even when the frequency converter is not
powered. High voltage can be present even when the warning LED indicator lights are off. Failure to wait the specified time
after power has been removed before performing service or repair work can result in death or serious injury.
•
Stop the motor.
•
Disconnect AC mains and remote DC-link power supplies, including battery back-ups, UPS, and DC-link connections to
other frequency converters.
•
Disconnect or lock PM motor.
•
Wait for the capacitors to discharge fully. The minimum duration of waiting time is specified in .
•
Before performing any service or repair work, use an appropriate voltage measuring device to make sure that the
capacitors are fully discharged.
Ordering number
134B5223
134B5224
134B5225
Danfoss A/S © 11/2017 All rights reserved.
MI05A202
-
Contents
-
Table of Contents
-
Bookmarks
Quick Links
T M
I N
P U
L E
T
V E
L
O U
T P
L E
U T
V E
L
B 04/2006
T R
I M
P A
S
P
C D
A D
P
D R
E S
K E
S
Y
L C
P —
1 0
2
™
Related Manuals for RTS LCP-102
Summary of Contents for RTS LCP-102
-
Page 1
B 04/2006 ™… -
Page 2
ROPRIETARY OTICE The product information and design disclosed herein were originated by and are the property of Telex Communications, Inc. Telex reserves all patent, proprietary design, manufactur- ing, reproduction, use and sales rights thereto, and to any arti- cle dislcosed therein, except to the extent rights are expressly granted to others. -
Page 3: Table Of Contents
Figure 8. Cable to connect a UIO-256 to the LCP-102 (All intercom systems)……
-
Page 4: Introduction
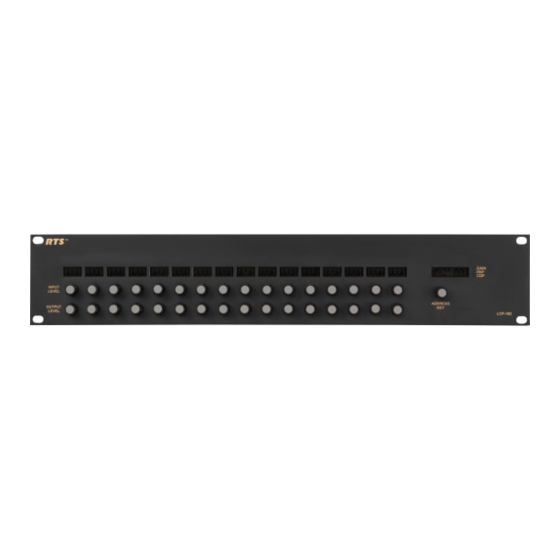
INTRODUCTION These instructions describe the installation and operation of the LCP-102 Level Control Panel, Version 1.0, in an ADAM™, ADAM™ CS, or Zeus™ Intercom System. Note that the LCP-102 is not compatible with the CS9000 Series Intercom Systems. To complete the…
-
Page 5: Package Contents
UIO-256 Frame along with the LCP-102, you have a choice of two methods: either using the LOOP connector of the LCP-102, or using a «Y» cable. If you have several LCP-102’s connected in a chain, you can connect the UIO-256 to the LOOP connector of the last LCP-102 in the chain, or you can insert it anywhere in the chain with a «Y»…
-
Page 6: Adjusting The Dimmer
OPERATION 6.1. Panel Mode Selection The LCP-102 has three panel modes: TRIMS, PAP and CDP. Select the panel mode as follows: 1. Rotate the ADDRESS KEY to display SERVICE then click. 2. Rotate the ADDRESS KEY to display SET MODE then click.
-
Page 7: Cdp Mode Assignments And Operation
For each IFB, you can define or change the input port either from the intercom system configuration software or from the LCP-102, but you must always define the output port first using the intercom system configuration software. 2. Place the LCP-102 in PAP mode as previously described.
-
Page 8: Saving Configuration Changes
6.6. Saving Configuration Changes The settings for address, current panel mode and current setup page are saved in the LCP-102 and will be retained if the power is turned off. All display assignments and level settings are uploaded to the intercom system and become part of the on-line configuration.
-
Page 9: Figure 2. Typical Connection Methods For The Lcp-102
XCP-ADAM-MC J3 (ADAM) DATA LCP-102 LOOP TWO METHODS FOR CONNECTING A UIO-256 WITH THE LCP-102 UP TO THREE MORE UIO-256 FRAMES MAY BE CONNECTED TO THE FIRST UIO-256 IN A RING CONFIGURATION AS ILLUSTRATED IN THE UIO-256 MANUAL ZEUS J26…
-
Page 10: Figure 3. Interconnect Cable From A Zeus Or Adam Intercom System To The Lcp-102
DE-9P (Male) ZEUS J26 XPC-ADAM-MC J3 (ADAM) DE-9P (Male) ZEUS J26 XPC-ADAM-MC J3 (ADAM) DE-9P (Male) TO FIRST LCP-102 TO SECOND LCP-102 LOOP DE-9S DE-9S (Female) (Female) TO ADAM CS TO LCP-102 J902 DATA DE-9P DE-9S (Male) (Female) TO ADAM CS…
This manual is also suitable for:
Zeus
LCP 102 Графическая локальная панель управления
- Мультиязычный дисплей
- Сообщения о статусе
- Быстрое меню для лёгкого ввода в действие
- Установка параметров и объяснение функционирования параметров
- Регулировка параметров
- Полная поддержка параметров и функция копирования
- Запись сообщений с предуреждениями
- Кнопка “Информация” – объясняет функцию выбранной позиции на дисплее
- Выбор функции пуска/останова вручную или автоматического режима
- Заказной номер
- Функция сброса
- График тенденций
|
Заказной номер |
VLT® HVAC Drive | VLT® AQUA Drive | VLT® AutomationDrive | |
| FC 102 | FC 202 | FC 301 | FC 302 | |
|
130B1107 |
X | X | X | X |
Для покупки товара в нашем интернет-магазине выберите понравившийся товар и добавьте его в корзину. Далее перейдите в Корзину и нажмите на «Оформить заказ» или «Быстрый заказ».
Когда оформляете быстрый заказ, напишите ФИО, телефон и e-mail. Вам перезвонит менеджер и уточнит условия заказа. По результатам разговора вам придет подтверждение оформления товара на почту или через СМС. Теперь останется только ждать доставки и радоваться новой покупке.
Оформление заказа в стандартном режиме выглядит следующим образом. Заполняете полностью форму по последовательным этапам: адрес, способ доставки, оплаты, данные о себе. Советуем в комментарии к заказу написать информацию, которая поможет курьеру вас найти. Нажмите кнопку «Оформить заказ».
Оплачивайте покупки удобным способом. В интернет-магазине доступно 3 варианта оплаты:
- Наличные при самовывозе или доставке курьером. Специалист свяжется с вами в день доставки, чтобы уточнить время и заранее подготовить сдачу с любой купюры. Вы подписываете товаросопроводительные документы, вносите денежные средства, получаете товар и чек.
- Безналичный расчет при самовывозе или оформлении в интернет-магазине: карты Visa и MasterCard. Чтобы оплатить покупку, система перенаправит вас на сервер системы ASSIST. Здесь нужно ввести номер карты, срок действия и имя держателя.
- Электронные системы при онлайн-заказе: PayPal, WebMoney и Яндекс.Деньги. Для совершения покупки система перенаправит вас на страницу платежного сервиса. Здесь необходимо заполнить форму по инструкции.
Экономьте время на получении заказа. В интернет-магазине доступно 4 варианта доставки:
- Курьерская доставка работает с 9.00 до 19.00. Когда товар поступит на склад, курьерская служба свяжется для уточнения деталей. Специалист предложит выбрать удобное время доставки и уточнит адрес. Осмотрите упаковку на целостность и соответствие указанной комплектации.
- Самовывоз из магазина. Список торговых точек для выбора появится в корзине. Когда заказ поступит на склад, вам придет уведомление. Для получения заказа обратитесь к сотруднику в кассовой зоне и назовите номер.
- Постамат. Когда заказ поступит на точку, на ваш телефон или e-mail придет уникальный код. Заказ нужно оплатить в терминале постамата. Срок хранения — 3 дня.
- Почтовая доставка через почту России. Когда заказ придет в отделение, на ваш адрес придет извещение о посылке. Перед оплатой вы можете оценить состояние коробки: вес, целостность. Вскрывать коробку самостоятельно вы можете только после оплаты заказа. Один заказ может содержать не больше 10 позиций и его стоимость не должна превышать 100 000 р.
Дополнительная вкладка, для размещения информации о магазине, доставке или любого другого важного контента. Поможет вам ответить на интересующие покупателя вопросы и развеять его сомнения в покупке. Используйте её по своему усмотрению.
Вы можете убрать её или вернуть обратно, изменив одну галочку в настройках компонента. Очень удобно.
Switch site
If you continue, you will be logged in and forwarded to your default Danfoss store.
You are now leaving your store
If you continue, you will be logged-out of your Danfoss Store and directed to the Store you have selected.
You are being logged-out as you do not have credentials to purchase in the selected country.

Change store
You are at the {0} store.
- Home
- Accessories FCM 106
- 130B1107

VLT® Control Panel LCP 102
130B1107
Graphic operating unit LCP102 Illuminated graphic display with plain
text. Supports all languages and characters. Quick menu for brief
commissioning.Saving and copying parameter sets.Online help for each
function
Product details
| Gross weight | 0.173 kg |
| Net weight | 0.161 kg |
| Volume | 0.939 l |
| EAN | 5702427150782 |
Options
| Options | Local Control Panel, Graphic |
SPARE PARTS FC 100 SERIES
| /LCP | (G) Graphical Loc. Cont. Panel |
SPARE PARTS FC 200 SERIES
| /LCP | (G) Graphical Loc. Cont. Panel |
SPARE PARTS FC 300 SERIES
| /LCP | (G) Graphical Loc. Cont. Panel |
SPARE PARTS FC 103 SERIES
| /LCP | (G) Graphical Loc. Cont. Panel |
| DrivePro category |
Recommended spare part Self-service spare part Spare Part |
SPAREPARTS for FC-321
| /Enclosure |
IP20 / Chassis IP20 / Chassis Backplate |
| /LCP | Graphical Local Control Panel |
ACCESSORIES for FC-321
ACCESSORIES DriveMotor FCM 106
| Power Rating |
18.5 kW /25 HP 5.5 kW /7.5 HP 7.5 kW /10 HP 7.5 KW / 10 HP 1.5 kW /2.0 HP 11 kW /15 HP 22 kW /30 HP 1.1 kW /1.5 HP 15 kW /20 HP 3.0 kW /4.0 HP 2.2 kW /3.0 HP 4.0 kW /5.5 HP |
| Product Group | (FCM) FCM series |
| Series | (106) VLT DriveMotor |
ACCESSORIES FC 100 SERIES
| /LCP |
(X) No Loc. Cont. Panel (N) Numerical Loc. Cont. Panel |
ACCESSORIES FC 103 SERIES
| /LCP |
(X) No Loc. Cont. Panel (N) Numerical Loc. Cont. Panel |
ACCESSORIES FC 280 SERIES
| Product Group | VLT® Midi Drive FC- |
| Series | 280 |
ACCESSORIES VLT® DRIVEMOTOR FCP SERIES
| Power Size |
1.5 kW /2.0 HP 1.1 kW /1.5 HP 3.0 kW /4.0 HP 2.2 kW /3.0 HP 4.0 kW /5.5 HP 18.5 kW /25 HP 5.5 kW /7.5 HP 7.5 kW /10 HP 7.5 KW / 10 HP 0.55 kW /0.75 HP 11 kW /15 HP 22 kW /30 HP 15 kW /20 HP 0.75 kW /1.0 HP |
| Series | (106) 106 |