На чтение 13 мин Просмотров 29.1к.

Максим aka WisH
Высшее образование по специальности «Информационные системы». Опыт работы системным администратором — 5 лет.
Задать вопрос
Cisco AnyConnect – это VPN клиент от известной компании Cisco, которая занимается поставками сетевого оборудования. Их устройства дороги и сложны в настройке, но достаточно надежны и приспосабливаются под любую сеть. Настройкой оборудования занимаются или сторонние специалисты, или свои сотрудники, имеющие нужные сертификаты.
Обычный работник имеет возможность столкнуться с настройкой и использование программ от этой фирмы только в случае небольших бесплатных программ, которые они предоставляют. Cisco AnyConnect – это одна из таких программ, которые могут быть установлены на компьютере обычного работника.
Содержание
- Зачем использовать Cisco AnyConnect
- Установка и настройка Cisco AnyConnect Client на ПК
- Где скачать Cisco AnyConnect Secure?
- На Windows 10
- На MacOS
- На Linux Ubuntu
- Запуск и первые шаги Cisco AnyConnect Mobility для смартфонов
- На Android
- На iOS
- Возможные проблемы
- Нет соединения
- Ошибка инициализации
- Как удалить клиент
- Аналоги Cisco VPN Client
Зачем использовать Cisco AnyConnect
Стоит сразу сказать, несмотря на то, что Cisco AnyConnect является бесплатным приложением для использования VPN, он не предоставляет доступа ни к каким платным или бесплатным серверам. Cisco Anyconnect используется для подключения к существующим виртуальным частным сетям или VPN.
Программа является клиентом, так что в ней осуществляется только настройка подключения к самой сети. Все настройки VPN задаются на сервере или на том оборудовании Cisco, что служит шлюзом между интернетом и корпоративной сетью.
Разберем несколько особенностей, которые позволяют предоставлять удаленный доступ через это приложение:
- Возможность получения настроек со шлюза или сервера. Если человек работает через свое оборудование и нет возможности отдать его на установку и настройку техническим специалистам, то AnyConnect может получить настройки с сервера при первом подключении.
- Безопасность конечного устройства. Присутствует возможность настройки проверки компьютера или телефона, на котором установлено. Если устройство не соответствует заданным параметрам безопасности, то подключение не произойдет.
- «Тихая» работа. Можно сделать так, чтобы приложение не отображалось в активных, а значка в трее не было.
- Настройка приложения таким образом, чтобы при работе внутри корпоративной сети, не работал интернет. Это повышает безопасность корпоративной сети от взлома или занесения вредоносных программ.
К сожалению, все это задается в конфиге оборудования Cisco или на серверах компании. В самом клиенте настраивается подключение, производится ввод логина и пароля, а также задаются некоторые параметры установки соединения.
Всем остальным занимается администратор сети внутри компании. Так что вам столкнуться с этим не придется, ведь для работы с цисками требуется довольно долгое обучение и наличие некоторых сертификатов его подтверждающих.
Установка и настройка Cisco AnyConnect Client на ПК
Про места для скачивания поговорим чуть ниже, так что стоит остановиться на самой установке и настройке. Опять же, для каждой системы конкретные действия будут разными, но общий алгоритм такой: распаковать скачанный архив, запустить оттуда установочный файл. Дождаться окончания установки и запустить саму программу.
В некоторых случаях потребуется добавить программу в исключения своего антивируса и брандмауэра, но сначала попробуйте запустить её без этого. Теперь можно переходить к настройке.

Где скачать Cisco AnyConnect Secure?
Скачать программу можно всего с нескольких ресурсов. Основным является официальный сайт производителя.
Текущая версия находится по адресу: https://software.cisco.com/download/home/286281283/type/282364313/release/4.10.05095 , если соединится не получается, что удалите все до последнего слэша, должно перекинуть на последнюю версию. Здесь представлен полный список программ для Линукса, MacOS и Windows. Скачивайте и устанавливайте, для винды рекомендуется брать AnyConnect Pre-Deployment Package.
Проблема в том, что как только вы нажмете на скачивание, выскочит окно с предупреждением. Посторонние люди не могут загружать программы, так что войдите в свой аккаунт, в котором активен сервисный договор с компанией. Если такого нет, то обратитесь к своему дилеру, чтобы он предоставил вам копию программы.
У Microsoft есть свой официальный магазин, работающий с последними операционными системами. Зайдите туда и найдите нужное приложение, можете перейти по ссылке https://apps.microsoft.com/store/detail/anyconnect/9WZDNCRDJ8LH?hl=ru-ru&gl=RU. Нажмите на «Установить» и дождитесь окончания процесса. Это работает только для десятки, для Windows 7 и других ранних версий потребуется воспользоваться первым способом.
На Windows 10

После загрузки из официального магазина, программа станет доступна в списке установленных. Найдите её по ярлыку или через меню пуск и запустите. Нажмите на «Manage VPN», вас перебросит в стандартное окно с ВПН на десятке.
Здесь нужно установить, когда можно использовать ВПН, использовать ли его при роуминге и т.д. После выбора этих опций нажмите на «Add a VPN Connection», на русском будет «Добавить ВПН-соединение».

В открывшемся окне производятся все настройки. Главное, в верхней строке выберите создание соединения через AnyConnect. Дальше введите имя соединения, адрес сервера, а также логин и пароль, если они требуются для входа. Сохраните настройки. Теперь, для запуска соединения, вам нужно снова открыть окно с настройками ВПН и кликнуть там по нужному соединению.

В некоторых случаях может потребоваться настройка самой программы. Тогда из пуска снова запустите её и перейдите в раздел «Settings», здесь найдите настройку «Block Untrusted Servers», часто её требуется отключить для установки соединения. В разделе Diagnostic есть параметр Сertificate, здесь будут храниться сертификаты серверов, сюда же может потребоваться установить выданный вам сертификат, если подключение происходит по нему.

На MacOS
Загрузите программу из указанного источника, а потом дважды кликните на файл для начала установки. В первом окне нажмите «Continue», это просто приветствие, во втором окне выберите место, в которое хотите установить программу. Дальше все понятно, просто введите пароль и дождитесь окончания установки.

Теперь перейдите в раздел с приложениями и найдите там Cisco > Cisco AnyConnect Secure Mobility Client.app. Запустите его, в первом окне укажите точный адрес, выданный вам для подключения к VPN и нажмите на Connect. Появится еще одно окно, в верхней строке выберите группу, а ниже введите логин и пароль.

Теперь вы подключены. Для отключения снова нажмите на приложение, откроется окно с адресом сервера. Нажмите здесь на Disconnect, это позволит отключить соединение.

На Linux Ubuntu
Алгоритм будет одинаковым на всех линуксах, в том числе и на Debian, и Fedora. Скачайте архив из указанных источников. Распакуйте его и перейдите в новый каталог. Откройте и запустите установочный файл. В некоторых случаях все это можно проделать и через графический интерфейс, но можно работать и через консоль.
Запустите программу. На картинке вы видите интерфейс подключения, он выскочит после первого запуска программы. Введите адрес, а через двоеточие порт, если он нужен. Вводите его с точностью до каждого знака такой же, как вам выдали на работе. Потом нажмите на «Connect».

Откроется окно с предупреждениями. Нажмите здесь на «Change Settings», если вы нажмете по второй кнопке, то точно никуда не подключитесь.

Откроется окно с настройками. Вам нужно снять галочку с последнего пункта «Block connections to untrusted servers». Остальные галки расставьте так, как рекомендовали вам в инструкции на работе.

В следующем окне кликните по кнопке «Connect Anyway», а потом введите логин и пароль. Теперь можно пользоваться программой.
Запуск и первые шаги Cisco AnyConnect Mobility для смартфонов
Сильных отличий в работе приложений друг от друга нет. Меню выглядят похоже и алгоритм действий почти не меняется. Вот и получается, что если один раз настроить полностью работу впн, то и в другой раз проблем не будет. Особенно это характерно для телефонов. Здесь расскажем способы настройки приложений на разных аппаратах.
На Android
На андроиде загрузите приложение из официального магазина. После загрузке запустите его и попадете в первое меню. Здесь кликните по «Подключения», в новом окне на «Добавить новое подключение».

Появится стандартное окно для ввода данных. Введите туда информацию, которая предоставили вам для подключения. Теперь нажмите на три точки вверху и выберите «Settings» и снимите галку с «Блокировать недоверенные серверы».

Нажмите на три точки сверху и перейдите на вкладку «Diagnostics», откройте «Управление сертификатом». Снова нажав на три точки вверху выберите «Импортировать», здесь укажите путь до сертификата. Это потребуется, если подключение осуществляется по нему.
На iOS
На iPhone алгоритм ничем не отличается от Андроида. Скачайте и установите приложение из официального магазина. Откройте его. Щелкните по строке Connections, потом кликните по Add VPN Connection. В появившемся окне введите логин и пароль, а также остальные данные для подключения.

Для включения и отключения используйте рычажок, находящийся в верхней строке. Настройки находятся в разделе «Settings», а управление сертификатами в «Diagnostics».
Возможные проблемы
Сама программа проста, потому что представляет собой клиентскую часть программного решения. То есть, все основные действия и настройки происходят где-то далеко, на серверах и оборудовании Cisco, а Cisco AnyConnect представляет собой небольшую программу для подключения ко всей этой конструкции. Тем не менее разработчики сюда заложили и проверку клиентских устройств и ограничение на работу в интернете, так что проблемы возникают с завидным постоянством.
Нет соединения
Если не устанавливается соединение, то причин несколько:
- Включилось ограничение на связь, вшитое в установку программы, так что во время работы не получится соединиться с интернетом.
- Неправильно введены данные сервера, так что приложение не может к нему подключится.
- Несовпадение версий. Эту проблему отметила компания Майрософт, что при включении ВПН от циско, на некотором оборудовании перестает подключаться беспроводной интернет. Тут только ждать обновлений от обеих компаний.
Проблема глобальная, так что стоит сначала уточнить у тех, кто делал настройки на сервере, какие параметры выставлены. Тогда вы не будете удивляться ограничениям.
При отпадании интернета вообще при включении программы, рекомендуется почистить кэш интернет-соединения.
Ошибка инициализации
При запуске программы выскакивает ошибка «failed to initialize connection subsystem». Ошибка возникала на старых версиях программы, но нет гарантий, что она решена.
Есть два способа решения проблемы:
- Найдите исполняемый файл программы. Щелкните по ярлыку правой кнопкой мыши, а потом нажмите на «Расположение файла». Обычно это C:\Program Files (x86)\Cisco\Cisco AnyConnect Secure Mobility Client.
По найденному файлу кликните правой кнопкой мыши и выберите «Исправление неполадок». Дождитесь окончания работы.
Нажмите на компьютер правой кнопкой, перейдите в управление, потом в службы, найдите Cisco AnyConnect Secure Mobility Agent остановите его и потом снова запустите.

- Нажмите Win+R и введите в открывшемся окне regedit. Пройдите по пути HKEY_CURRENT_USER\Software\Microsoft\Windows\CurrentVersion\Internet Settings и создайте переменную DWORD с именем GlobalUserOffline и значением 0. Перезагрузите компьютер.

Проблема возникает из-за установки некоторых обновлений, так что можете удалить последние обновления и проблема решится. Или установите обновление MS15-018, оно решает эту проблему.
Как удалить клиент
С удалением возникают проблемы. Иногда удаляется не полностью, из-за чего возникают сбои при повторной установке. Так что тут совет один: заходите в папку с установленной программой и запускайте деинсталлятор оттуда. Если этого не сделали, то придется работать с командной строкой.
Для мака введите в терминал следующие команды:
- sudo /opt/cisco/anyconnect/bin/websecurity_uninstall.sh
- sudo /opt/cisco/anyconnect/bin/dart_uninstall.sh
- sudo /opt/cisco/anyconnect/bin/nvm_uninstall.sh
- sudo /opt/cisco/anyconnect/bin/umbrella_uninstall.sh
- sudo /opt/cisco/anyconnect/bin/amp_uninstall.sh
Если вы запороли удаление на виндовс, то попробуйте воспользоваться одной из программ, что чистят реестр. Если она не поможет, то остается только откат на точку восстановления или переустановка системы. Так что лучше сразу зайдите в папку с установленным приложением и используйте деинсталлятор оттуда.
Аналоги Cisco VPN Client
Есть и бесплатные аналоги этой программы, которые не предъявляют требований к договорам и остальному. Так что можете использовать их для создания туннелей, виртуальных сетей и организации удаленного доступа.
Однако, я не рекомендую использовать бесплатные решения для чего-то серьезного. Они редко хорошо защищены, да и следят за их безопасностью не очень пристально. Лучше приобрести какое-то корпоративное решение.
Аналоги:
- OpenConnect GUI — это графический клиент OpenConnect для систем Microsoft Windows, бесплатный и с открытым исходным кодом.
- OpenVPN — это полнофункциональное решение SSL VPN с открытым исходным кодом. Это рабочая лошадка большинства предприятия на данный момент. Обеспечивает неплохой уровень безопасности и позволяет задавать много параметров.
- ShrewSoft VPN Client работает через IPsec на Windows 2000, XP, Vista. Можете применять в тех местах, где не подойдут современные программы.
Cisco Anyconnect – это программа для тех организаций, что используют у себя их оборудование. Поэтому проблем с настройкой возникать не должно. Параметры сервера задает специалист, он же выдаст точную инструкцию по подключению.
Программу можно использовать и с другими видами серверов, как простой ВПН-клиент, но полные возможности раскроются только при использовании вместе с сервером от того же производителя. В других случаях стоит поискать аналогичные программы для организации безопасного удаленного доступа в свою корпоративную сеть или для подключения к какому-то оборудованию – применений для VPN много.
Deploy AnyConnect
Before You Begin
Deployment
If you are deploying the Umbrella Roaming Security module, any existing installation of the Umbrella Roaming Client will be
detected and removed automatically to prevent conflicts. If the existing installation of the Umbrella Roaming Client is associated
with an Umbrella service subscription, it will automatically be migrated to the Umbrella Roaming Security module unless an OrgInfo.json file is co-located with the AnyConnect installer, configured for web deployment or predeployed in the Umbrella
module’s directory. You may wish to manually uninstall the Umbrella Roaming Client prior to deploying the Umbrella Roaming
Security module.
You must
additionally complete the following prerequisites if using the Umbrella Roaming
Security module:
-
Obtain Umbrella Roaming Account. The Umbrella dashboard http://dashboard.umbrella.com is the login page where you obtain necessary information for the operation of the AnyConnect Umbrella Roaming Security Module.
You also use this site to manage reporting for the roaming client activity. -
Download the OrgInfo File from the Dashboard. To prepare for deploying the AnyConnect Umbrella Roaming Security Module, obtain the OrgInfo.json file from the Umbrella
dashboard. Click on Roaming Computer in the Identities menu structure and then click the + sign in the upper-left corner of the page. Scroll down to AnyConnect Umbrella Roaming Security Module and click Module Profile.The OrgInfo.json file contains specific information about your Umbrella service subscription that lets the Roaming Security
module know where to report and which policies to enforce.
AnyConnect
Deployment Overview
Deploying AnyConnect refers to installing, configuring, and
upgrading the AnyConnect client and its related files.
The
Cisco AnyConnect Secure
Mobility Client
can be deployed to remote users by the following methods:
-
Predeploy—New installations and upgrades are done either by the end user, or by using an enterprise software management system
(SMS). -
Web Deploy—The AnyConnect package is loaded on the headend, which is either an ASA or FTD firewall, or an ISE server. When
the user connects to a firewall or to ISE, AnyConnect is deployed to the client.-
For new installations, the user connects to a headend to download the
AnyConnect client. The client is either installed manually or
automatically (web-launch). -
Updates are done by AnyConnect running on a system where
AnyConnect is already installed, or by directing the user to the ASA clientless
portal.
-
-
Cloud Update—After
the Umbrella Roaming Security module is deployed, you can update any AnyConnect
modules using one of the above methods, as well as Cloud Update. With Cloud
Update, the software upgrades are obtained automatically from the Umbrella
cloud infrastructure, and the update track is dependent upon that and not any
action of the administrator. By default, automatic updates from Cloud Update
are disabled.
Note
Consider the
following regarding Cloud Update:-
Only the
software modules that are currently installed are updated. -
Customizations, localizations, and any other deployment types
are not supported. -
The
updates occur only when logged in to a desktop and will not happen if a VPN is
established. -
With
updates disabled, the latest software features and updates will not be
available. -
Disabling Cloud Update has no effect on other update mechanisms or settings (such as web deploy, deferred updates, and so
on). -
Cloud
Update ignores having newer, unreleased versions of AnyConnect (such as interim
releases and patched versions).
-
When you deploy AnyConnect, you can include optional modules
that enable extra features, and client profiles that configure the VPN and
optional features.
Refer to the AnyConnect release notes for system, management, and endpoint requirements for ASA, IOS, Microsoft Windows, Linux, and macOS.
 Note |
Some third-party applications and operating systems may restrict the ISE posture agent and |
Decide How to
Install AnyConnect
AnyConnect can be web deployed by ISE 2.0 (or later) and ASA headends or predeployed. To
install AnyConnect initially requires administrative privileges.
To upgrade AnyConnect or install additional modules using web deploy (from
ASA/ISE/Umbrella cloud with Downloader), you do not need administrative
privileges.
- Web Deploying from an ASA or FTD device—User connects to the AnyConnect clientless portal on the headend device, and selects
to download AnyConnect. The ASA downloads the AnyConnect Downloader. The AnyConnect Downloader downloads the client, installs
the client, and starts a VPN connection. - Web Deploying from ISE—User
connects to the Network Access Device (NAD), such as an ASA, wireless
controller, or switch. The NAD authorizes the user, and redirects the user to
the ISE portal. The AnyConnect Downloader is installed on the client to manage
the package extraction and installation, but does not start a VPN connection.
To upgrade AnyConnect or install additional modules using predeploy (out of band
deployment, either manually or using SCCM and so on), you need administrative
privileges.
-
Using an Enterprise software management system (SMS).
-
Manually distributing an AnyConnect file archive, with instructions for the user about how
to install. File archive formats are zip for Windows, DMG for macOS, and
gzip for Linux.
For system requirements and licensing dependencies, refer to the AnyConnect Secure Mobility Client Features, License, and OS Guide.
Note |
If you are using AnyConnect Posture (HostScan) to perform root privilege activities on a |
Determine The
Resources You Need to Install AnyConnect
Several types of files make up an AnyConnect deployment:
-
AnyConnect core client, which is included in the AnyConnect
package. -
Modules that support extra features, which are included in the
AnyConnect package. -
Client profiles that configure AnyConnect and the extra
features, which you create. -
Language files, images, scripts, and help files, if you wish to
customize or localize your deployment. -
AnyConnect ISE
Posture, and the compliance module (OPSWAT).
Preparing the Endpoint for AnyConnect
Using Mobile
Broadband Cards with AnyConnect
Some 3G cards require configuration steps before using
AnyConnect. For example, the VZAccess Manager has three settings:
-
modem manually connects
-
modem auto connect except when roaming
-
LAN adapter auto connect
If you choose
LAN adapter auto connect, set the preference to NDIS mode.
NDIS is an always on connection where you can stay connected even when the
VZAccess Manager is closed. The VZAccess Manager shows an autoconnect LAN
adapter as the device connection preference when it is ready for AnyConnect
installation. When an AnyConnect interface is detected, the 3G manager drops
the interface and allows the AnyConnect connection.
When you move to a higher priority connection—wired networks are
the highest priority, followed by WiFi, and then mobile broadband—AnyConnect
makes the new connection before breaking the old one.
Add the ASA to the
List of Internet Explorer Trusted Sites on Windows
An Active Directory administrator can use a group policy to add
the ASA to the list of trusted sites in Internet Explorer. This procedure is
different from the way a local user adds trusted sites in Internet Explorer.
Procedure
| Step 1 |
On the Windows Domain server, log in as a member of the Domain |
| Step 2 |
Open the Active Directory Users and Computers MMC snap-in. |
| Step 3 |
Right-click the Domain or Organizational Unit where you want to |
| Step 4 |
Select the |
| Step 5 |
Type a name for the new Group Policy Object and press |
| Step 6 |
To prevent this new policy from being applied to some users or prevent from having this policy, and then clear the |
| Step 7 |
Click |
| Step 8 |
Right-click |
| Step 9 |
Select |
| Step 10 |
Click |
| Step 11 |
Type the URL for the Security Appliance that you want to add to |
| Step 12 |
Click |
| Step 13 |
Allow sufficient time for the policy to propagate throughout the |
| Step 14 |
Click |
Block Proxy Changes
in Internet Explorer
Under certain conditions, AnyConnect hides (locks down) the Internet Explorer Tools > Internet Options > Connections tab.
When exposed, this tab lets the user set proxy information. Hiding this tab prevents the user from intentionally or unintentionally
circumventing the tunnel. The tab lockdown setting is reversed upon disconnect. Tab lockdown is overridden by any administrator-defined
policies applied to that tab. The lockdown is applied when:
-
The ASA configuration specifies Connections tab lockdown
-
The ASA configuration specifies a private-side proxy
-
A Windows group policy previously locked down the Connections tab (overriding the no lockdown ASA group policy setting)
For Windows 10 version 1703 (or later), in addition to hiding the Connections Tab in Internet Explorer, AnyConnect hides (locks
down) the system proxy tab in the Settings app to prevent the user from intentionally or unintentionally circumventing the
tunnel. This lockdown is reversed upon disconnect.
Procedure
| Step 1 |
In ASDM go to |
| Step 2 |
Select a group policy and click |
| Step 3 |
In the navigation pane, go to |
| Step 4 |
Click |
| Step 5 |
Uncheck
|
| Step 6 |
Click |
| Step 7 |
Click |
Configure How
AnyConnect Treats Windows RDP Sessions
You can configure AnyConnect to allow VPN connections from Windows RDP
sessions. By default, users connected to a computer by RDP are not able to start a VPN
connection with the Cisco AnyConnect Secure Mobility Client. The following table shows
the logon and logout options for a VPN connection from an RDP session. These preferences
are configured in the VPN client profile:
Windows Logon Enforcement—Available in SBL mode
-
Single Local Logon (Default)—Allows only one local user to
be logged on during the entire VPN connection. Also, a local user can establish
a VPN connection while one or more remote users are logged on to the client PC.
This setting has no effect on remote user logons from the enterprise network
over the VPN connection.
Note
If the VPN connection is configured for all-or-nothing
tunneling, then the remote logon is disconnected because of the resulting
modifications of the client PC routing table for the VPN connection. If the
VPN connection is configured for split-tunneling, the remote logon might or
might not be disconnected, depending on the routing configuration for the
VPN connection.
-
Single Logon—Allows only one user to be logged on during
the entire VPN connection. If more than one user is logged on, either locally or
remotely, when the VPN connection is being established, the connection is not
allowed. If a second user logs on, either locally or remotely, during the VPN
connection, the VPN connection terminates. No additional logons are allowed
during the VPN connection, so a remote logon over the VPN connection is not
possible.
Note
Multiple simultaneous logons are not supported.
Windows VPN Establishment—Not Available in SBL Mode
-
Local Users Only (Default)—Prevents a remotely logged-on
user from establishing a VPN connection. This is the same functionality as in
prior versions of AnyConnect. -
Allow Remote Users—Allows remote users to establish a VPN
connection. However, if the configured VPN connection routing causes the remote
user to become disconnected, the VPN connection terminates to allow the remote
user to regain access to the client PC. Remote users must wait 90 seconds after
VPN establishment if they want to disconnect their remote login session without
causing the VPN connection to be terminated.
See
AnyConnect VPN Connectivity
Options for additional VPN session connectivity options.
Configure How AnyConnect Treats Linux SSH Sessions
You can configure AnyConect to allow VPN connections from Linux SSH sessions. By default, users connected to a computer by
SSH are not able to start a VPN connection with the Cisco AnyConnect Secure Mobility Client. The following table shows the
logon and logout options for a VPN connection from an SSH session. These options are configured in the VPN client profile.
user can establish a VPN connection while one or more remote users are logged on to the client PC. This setting has no effect
on remote user logons from the enterprise network over the VPN connection.
Note |
If the VPN connection is configured for all-or-nothing tunneling, then the remote logon is disconnected because of the resulting |
Single Logon—Allows only one user to be logged on during the entire VPN connection. If more than one user is logged on (either locally
or remotely) when the VPN connection is being established, the connection is not allowed. If a second user logs on (either
locally or remotely) during the VPN connection, the VPN connection terminates. No additional logons are allowed during the
VPN connection, so a remote logon over the VPN connection is not possible.
-
Local Users Only (Default)—Prevents a remotely logged-on user from establishing a VPN connection.
-
Allow Remote Users—Allows remote users to establish a VPN connection.
See AnyConnect VPN Connectivity Options for additional VPN session connectivity options.
DES-Only SSL
Encryption on Windows
By default, Windows does not support DES SSL encryption. If you
configure DES-only on the ASA, the AnyConnect connection fails. Because
configuring these operating systems for DES is difficult, we do not recommend
that you configure the ASA for DES-only SSL encryption.
Using NVM on Linux
Before using NVM on Linux, you must set up a kernel driver framework (KDF). You can choose to prebuild an AnyConnect Kernel
Module or build the driver on target. If you choose to build on target, no action is required; the build is handled automatically
during deployment or during reboot.
Prerequisites to Build the AnyConnect Kernel Module
Prepare the target device:
-
Make sure that the GNU Make Utility is installed.
-
Install the kernel header package:
-
For RHEL, install the package kernel-devel-$(uname -r), such as kernel-devel-2.6.32-642.13.1.el6.x86_64.
-
For Ubuntu, install the package linux-headers-$(uname -r), such as linux-headers-4.2.0-27-generic.
-
-
Make sure that the GCC compiler is installed. The major.minor version of the installed GCC compiler should match the GCC version with which the kernel was built. You can verify this in
the /proc/version file.
Package NVM with Prebuilt AnyConnect Linux Kernel Module
Before you begin
Complete the prerequisites in Prerequisites to Build the AnyConnect Kernel Module.
Note |
NVM is not supported on devices with secure boot enabled. |
The AnyConnect NVM can be packaged with a pre-built
AnyConnect Linux Kernel Module so that you do not need to build it on every target
device, especially when the target devices have the same OS kernel version. If you
decide to not use the pre-built option, you can use on target, which happens
automatically during deployment or reboot without administrator input.
Alternatively, if your deployment doesn’t have the kernel prerequisites on all
endpoints, you could use the pre-built option.
Note |
Web deployment is not supported with the pre-built AnyConnect Linux Kernel |
Procedure
| Step 1 |
Extract the AnyConnect predeploy package: |
| Step 2 |
Navigate to the nvm directory. |
| Step 3 |
Invoke the script $sudo |
anyconnect-linux64-<version>-ac_kdf_ko-k9.tar.gz gets created,
which includes the AnyConnect Linux Kernel Module build. On Secure Boot enabled systems,
sign the module with a private key allowed by Secure Boot. This file can only be used
for predeploy.
What to do next
When the target device’s OS kernel is upgraded, you must re-deploy the AnyConnect NVM
with the updated Linux Kernel Module.
Predeploying AnyConnect
AnyConnect can be predeployed by using an SMS, manually by distributing files for end users to install, or making an AnyConnect
file archive available for users to connect to.
When you create a
file archive to install AnyConnect, the directory structure of the archive must
match the directory structure of the files installed on the client, as
described in
Locations to Predeploy the AnyConnect Profiles
Before you begin
-
If you
manually deploy the VPN profile, you must also upload the profile to the
headends. When the client system connects, AnyConnect verifies that the profile
on the client matches the profile on the headend. If you have disabled profile
updates, and the profile on the headend is different from the client, then the
manually deployed profile will not work. -
If you
manually deploy the AnyConnect ISE Posture profile, you must also upload that
file to ISE. -
If you are using a cloned VM, refer to Guidelines for Cloning VMs With AnyConnect (Windows Only).
Procedure
| Step 1 |
Download the AnyConnect Predeployment Package. The AnyConnect files for predeployment are available on cisco.com.
The Umbrella Roaming Security Module is not available in the Linux operating system. |
||||||||
| Step 2 |
Create client profiles: some modules and features require a The following modules require a client profile:
The following modules do not require an AnyConnect client
You can create client profiles in ASDM, and copy those files to your |
||||||||
| Step 3 |
Optionally, |
||||||||
| Step 4 |
Prepare the |
||||||||
| Step 5 |
After you have |
AnyConnect Module Executables for Predeploy and Web Deploy
The following table shows the filenames on the endpoint computer when
you predeploy or web deploy the Umbrella Roaming Security Module, Network Access
Manager, AMP Enabler, ISE Posture, and Network Visibility Module clients to a
Windows computer.
|
Module |
Web-Deploy Installer (Downloaded) |
Predeploy Installer |
|---|---|---|
| Network Access Manager |
anyconnect-win-version-nam-webdeploy-k9.msi |
anyconnect-win-version-nam-predeploy-k9.msi |
|
ISE Posture |
anyconnect-win-version-iseposture-webdeploy-k9.msi |
anyconnect-win-version-iseposture-predeploy-k9.msi |
|
AMP Enabler |
anyconnect-win-version-amp-webdeploy-k9.msi |
anyconnect-win-version-amp-predeploy-k9.exe |
|
Network Visibility Module |
anyconnect-win-version-nvm-webdeploy-k9.exe |
anyconnect-win-version-nvm-predeploy-k9.msi |
|
Umbrella Roaming Security Module |
anyconnect-win-version-umbrella-webdeploy-k9.exe |
anyconnect-win-version-umbrella-predeploy-k9.msi |
AnyConnect 4.3 (and later) has moved to the Visual Studio 2015
build environment and requires VS redistributable files for its Network Access
Manager Module functionality. These files are installed as part of the install
package. You can use the .msi files to upgrade the Network Access Manager
Module to 4.3 (or later), but the AnyConnect Secure Mobility Client must be
upgraded first and running release 4.3 (or later).
Note |
If you have a Windows server OS, you may experience installation errors when attempting to install AnyConnect Network Access |
Locations to Predeploy the AnyConnect Profiles
If you are copying the files to the client system, the following
tables show where you must place the files.
|
File |
Description |
|---|---|
|
anyfilename.xml |
AnyConnect profile. This file specifies the features and attribute values configured for a particular user type. |
|
AnyConnectProfile.xsd |
Defines the XML schema format. AnyConnect uses this file to validate the profile. |
|
Operating System |
Module |
Location |
|
|---|---|---|---|
|
Windows |
Core client with VPN |
%ProgramData%\Cisco\Cisco AnyConnect Secure Mobility Client\Profile |
|
|
Network Access Manager |
%ProgramData%\Cisco\ Cisco AnyConnect Secure Mobility Client\Network Access Manager\newConfigFiles |
||
|
Customer Experience Feedback |
%ProgramData%\Cisco\ Cisco AnyConnect Secure Mobility Client\CustomerExperienceFeedback |
||
|
OPSWAT |
%PROGRAMFILES%\Cisco\Cisco AnyConnect Secure Mobility Client\opswat |
||
|
ISE Posture |
%ProgramData%\Cisco\Cisco AnyConnect Secure Mobility Client\ISE Posture |
||
|
AMP Enabler |
%ProgramData%\Cisco\Cisco AnyConnect Secure Mobility Client\AMP |
||
|
Network Visibility Module |
%ProgramData%\Cisco\Cisco AnyConnect Secure Mobility Client\NVM |
||
|
Umbrella Roaming Security Module |
%ProgramData%\Cisco\Cisco AnyConnect Secure Mobility Client\Umbrella
|
||
|
macOS |
All other modules |
/opt/cisco/anyconnect/profile |
|
|
Customer Experience Feedback |
/opt/cisco/anyconnect/CustomerExperienceFeedback |
||
|
Binaries |
/opt/cisco/anyconnect/bin |
||
|
OPSWAT |
/opt/cisco/anyconnect/lib/opswat |
||
|
Libraries |
/opt/cisco/anyconnect/lib |
||
|
UI Resources |
/Applications/Cisco/Cisco AnyConnect Secure Mobility Client.app/Contents/Resources/ |
||
|
ISE Posture |
/opt/cisco/anyconnect/iseposture/ |
||
|
AMP Enabler |
/opt/cisco/anyconnect/ampenabler/ |
||
|
Network Visibility Module |
/opt/cisco/anyconnect/NVM/ |
||
|
Umbrella Roaming Security Module |
/opt/cisco/anyconnect/umbrella
|
||
|
Linux |
NVM |
/opt/cisco/anyconnect/NVM |
|
|
All other modules |
/opt/cisco/anyconnect/profile |
Guidelines for Cloning VMs With AnyConnect (Windows Only)
AnyConnect endpoints are uniquely identified by a Universal Device Identifier (UDID), which all modules of AnyConnect use.
When a Windows VM is cloned, the UDID remains the same for all the clones from a source. To avoid any potential issues with
cloned VMs, follow this action before using AnyConnect:
-
Navigate to C:\Program Files\Cisco\Cisco AnyConnect Secure Mobility Client and run dartcli.exe with administrator privileges as:
dartcli.exe -nuor
dartcli.exe -newudid -
Print the UDID prior to and after this command to ensure that the UDID has changed with this comand: dartcli.exe -uor
dartcli.exe -udid
Predeploying AnyConnect Modules as Standalone Applications
The Network Access Manager, Web Security, and Umbrella Roaming Security modules can run as standalone applications. The AnyConnect
core client is installed, but the VPN and AnyConnect UI are not used.
Deploying
Stand-Alone Modules with an SMS on Windows
Procedure
| Step 1 |
Disable VPN functionality by configuring your software management
The MSI copies the VPNDisable_ServiceProfile.xml file embedded in |
| Step 2 |
Install the module. For example, the following CLI
|
| Step 3 |
(Optional) Install DART. misexec /package |
| Step 4 |
Save a copy of the obfuscated client profile to the proper Windows folder. |
| Step 5 |
Restart the Cisco AnyConnect service. |
Deploying AnyConnect Modules as Standalone Applications
You can deploy the AnyConnect
Network Access Manager or Umbrella Roaming Security Modules as standalone applications
on a user computer. DART is supported with these applications.
Refer to Standalone NVM for details about its advantages and
method of deployment.
Requirements
The VPNDisable_ServiceProfile.xml file must also be the only
AnyConnect profile in the VPN client profile directory.
User Installation of
Stand-Alone Modules
You can break out the individual installers and distribute them
manually.
If you decide to make the zip image available to your users, and then ask to install it, be sure to instruct them to install
only the stand-alone modules.
Note |
If a previous installation of Network Access Manager did not |
Procedure
| Step 1 |
Instruct users to check the AnyConnect Network Access Manager or Umbrella |
| Step 2 |
Instruct users to uncheck Cisco AnyConnect VPN Doing so disables the VPN functionality of the core |
| Step 3 |
(Optional) Check the Lock Down Component Services check box. The lockdown component service prevents users from switching off or stopping the Windows service. |
| Step 4 |
Instruct users to run the installers for the optional modules,
|
Predeploying to Windows
Distributing AnyConnect Using the zip File
Predeployment zip Modifications
The zip package file contains the Install Utility, a selector menu program to launch the individual component installers,
and the MSIs for the core and optional AnyConnect modules. When you make the zip package file available to users, they run
the setup program (setup.exe). The program displays the Install Utility menu, from which users choose which AnyConnect modules
to install. You probably do not want your users to chose which modules to load. So if you decide to distribute using a zip
file, edit the zip to remove the modules you do not want to use, and edit the HTA file.
One way to distribute an ISO is by using virtual CD mount software, such as SlySoft or PowerIS.
-
Update the zip file with any profiles that you created when you bundled the files, and to remove any installers for modules
that you do not want to distribute. -
Edit the HTA file to personalize the installation menu, and to remove links to any module installers that you do not want
to distribute.
Contents of the AnyConnect zip File
|
File |
Purpose |
|---|---|
| GUI.ico | AnyConnect icon image. |
| Setup.exe | Launches the Install Utility. |
|
anyconnect-win-version-dart-predeploy-k9.msi |
MSI installer file for the DART module. |
|
anyconnect-win-version-gina-predeploy-k9.msi |
MSI installer file for the SBL module. |
|
anyconnect-win-version-iseposture-predeploy-k9.msi |
MSI installer for the ISE Posture module. |
|
anyconnect-win-version-amp-predeploy-k9.exe |
MSI installer file for the AMP Enabler. |
|
anyconnect-win-version-nvm-predeploy-k9.msi |
MSI installer file for the Network Visibility Module. |
|
anyconnect-win-version-umbrella-predeploy-k9.msi |
MSI installer file for the Umbrella Roaming Security Module. |
|
anyconnect-win-version-nam-predeploy-k9.msi |
MSI installer file for the Network Access Manager module. |
|
anyconnect-win-version-posture-predeploy-k9.msi |
MSI installer file for the posture module. |
|
anyconnect-win-version-core-vpn-predeploy-k9.msi |
MSI installer file for the AnyConnect core client. |
| autorun.inf | Information file for setup.exe. |
| eula.html | Acceptable Use Policy. |
| setup.hta | Install Utility HTML Application (HTA), which you can customize for your site. |
Distributing
AnyConnect Using an SMS
After extracting the installers (*.msi) for the modules you want to deploy from the zip image, you can distribute them manually.
Requirements
-
When installing AnyConnect onto Windows, you must disable either
the AlwaysInstallElevated or the Windows User Account Control (UAC) group
policy setting. If you do not, the AnyConnect installers may not be able to
access some directories required for installation. -
Microsoft Internet Explorer (MSIE) users should add the headend
to the list of trusted sites or install Java. Adding to the list of trusted
sites enables the ActiveX control to install with minimal interaction from the
user.
Profile
Deployment Process
- If you are using the MSI installer, the MSI picks any profile that has been placed in the Profiles folder and places it in
the appropriate folder during installation. The proper folder paths are available in the predeployment MSI file available
on CCO. - If you are predeploying the profile manually after the installation, copy the profile manually or use an SMS, such as Altiris,
to deploy the profile to the appropriate folder. - Make sure you put the same client profile on the headend that you predeploy to the client. This profile must also be tied
to the group policy being used on the ASA. If the client profile does not match the one on the headend or if it is not tied
to the group policy, you can get inconsistent behavior, including denied access.
Windows Predeployment MSI Examples
|
Module Installed |
Command and Log File |
|---|---|
|
AnyConnect core client No VPN capability. Use when installing |
msiexec /package anyconnect-win-version-core-vpn-predeploy-k9.msi /norestart /passive PRE_DEPLOY_DISABLE_VPN=1 /lvx* anyconnect-win-version-core-vpn-predeploy-k9-install-datetimestamp.log |
|
AnyConnect core client with VPN capability. |
msiexec /package anyconnect-win-version-core-vpn-predeploy-k9.msi /norestart /passive /lvx* anyconnect-win-version-core-vpn-predeploy-k9-install-datetimestamp.log |
|
Customer Experience Feedback |
msiexec /package anyconnect-win-version-core-vpn-predeploy-k9.msi /norestart /passive DISABLE_CUSTOMER_EXPERIENCE_FEEDBACK=1 /lvx* anyconnect-win-version-core-vpn-predeploy-k9-install-datetimestamp.log |
|
Diagnostic and Reporting Tool (DART) |
msiexec /package anyconnect-win-version-dart-predeploy-k9.msi /norestart /passive /lvx* anyconnect-win-version-dart-predeploy-k9-install-datetimestamp.log |
|
SBL |
msiexec /package anyconnect-win-version-gina-predeploy-k9.msi /norestart /passive /lvx* anyconnect-win-version-gina-predeploy-k9-install-datetimestamp.log |
|
Network Access Manager |
msiexec /package anyconnect-win-version-nam-predeploy-k9.msi /norestart /passive /lvx* anyconnect-win-version-nam-predeploy-k9-install-datetimestamp.log |
|
VPN Posture (HostScan) |
msiexec /package anyconnect-win-version-posture-predeploy-k9.msi /norestart/passive /lvx* anyconnect-win-version-posture-predeploy-k9-install-datetimestamp.log |
|
ISE Posture |
msiexec /package anyconnect-win-version-iseposture-predeploy-k9.msi /norestart/passive /lvx* anyconnect-win-version-iseposture-predeploy-k9-install-datetimestamp.log |
|
AMP Enabler |
msiexec /package anyconnect-win-version-amp-predeploy-k9-install-datetimestamp.log |
|
Network Visibility Module |
msiexec /package anyconnect-win-version-nvm-predeploy-k9.msi / norestart/passive /lvx* anyconnect-win-version-nvm-predeploy-k9-install-datetimestamp.log |
|
Umbrella Roaming Security |
msiexec /package anyconnect-win-version-umbrella-predeploy-k9.msi / norestart/passive /lvx* anyconnect-version-umbrella-predeploy-k9-install-datetimestamp.log |
AnyConnect
Sample Windows Transform
Cisco provides example Windows transforms, along with documents that describe how to use the transforms. A transform that
starts with an underscore character (_) is a general Windows transform which allows you to apply only certain transforms to
certain module installers. Transforms that start with an alphabetic character are VPN transforms. Each transform has a document
that explains how to use it. The transform download is sampleTransforms-x.x.x.zip.
Windows Predeployment Security Options
Cisco recommends that end users are given limited rights on the device that
hosts the Cisco AnyConnect Secure
Mobility Client. If an end user warrants additional rights, installers can provide a lockdown
capability that prevents users and local administrators from switching off or stopping
those Windows services established as locked down on the endpoint. You can also prevent
users from uninstalling AnyConnect.
Windows Lockdown
Property
Each MSI installer supports a common property (LOCKDOWN) which,
when set to a non-zero value, prevents the Windows service(s) associated with
that installer from being controlled by users or local administrators on the
endpoint device. We recommend that you use the sample transform
(anyconnect-vpn-transforms-X.X.xxxxx.zip) provided at the time of install to
set this property and apply the transform to each MSI installer that you want
to have locked down. The lockdown option is also a check box within the ISO
Install Utility.
Hide AnyConnect
from Add/Remove Programs List
You can hide the installed AnyConnect modules from users that
view the Windows Add/Remove Programs list. If you launch any installer using
ARPSYSTEMCOMPONENT=1, that module will not appear in the Windows Add/Remove
Programs list.
We recommend that you use the sample transform
(anyconnect-vpn-transforms-X.X.xxxxx.zip) that we provide to set this property.
Apply the transform to each MSI installer for each module that you want to
hide.
AnyConnect Module
Installation and Removal Order on Windows
The module installers verify that they are the same version as
the core client before starting to install. If the versions do not match, the
module does not install, and the installer notifies the user of the mismatch.
If you use the Install Utility, the modules in the package are built and
packaged together, and the versions always match.
Procedure
| Step 1 |
Install the AnyConnect modules in the following order:
|
| Step 2 |
Uninstall the
|
DART information is
valuable should the uninstall processes fail.
Note |
By design, some XML files remain after uninstalling AnyConnect. |
Predeploying to macOS
Install and Uninstall AnyConnect on macOS
AnyConnect for macOS is distributed in a DMG file, which includes all the AnyConnect modules. When users open the DMG file,
and then run the AnyConnect.pkg file, an installation dialog starts, which guides the user through installation. On the Installation
Type screen, the user is able to select which packages (modules) to install.
To remove any of the AnyConnect modules from your distribution, use the
Apple pkgutil tool, and sign the package after modifying it.staller with
ACTransforms.xml. You can customize the language and appearance a You can also
modify the innd change some other install actions, which is described in the
Customization chapter: Customize Installer Behavior on macOS with ACTransforms.xml.
Installing AnyConnect Modules on macOS as a Standalone Application
You can install just the Network Visibility Module or Umbrella Roaming
Security Module without the VPN. The VPN and AnyConnect UI are not used.
The following procedure explains how to customize the modules by installing the standalone Profile Editor, creating a profile,
and adding that profile to the DMG package. It also sets the AnyConnect user interface to start automatically on boot-up,
which enables AnyConnect to provide the necessary user and group information for the module.
Procedure
| Step 1 |
Download the |
| Step 2 |
Open the file to |
| Step 3 |
Make the
|
| Step 4 |
Install the stand-alone Profile Editor on a computer running a Windows operating system. You must select the AnyConnect modules |
| Step 5 |
Start the |
| Step 6 |
Save the profile appropriately as
|
| Step 7 |
Save the profile appropriately as For these modules, the profile editor creates an additional obfuscated
|
Restrict Applications on macOS
Gatekeeper restricts which applications are allowed to run on
the system. You can choose to permit applications downloaded from:
-
Mac App Store
-
Mac App Store and identified developers
-
Anywhere
The default setting is Mac App Store and identified developers
(signed applications).
The current version of AnyConnect is signed application using an Apple certificate. If Gatekeeper is configured for Mac App
Store (only), then you must either select the Anywhere setting or control-click to bypass the selected setting to install
and run AnyConnect from a predeployed installation. For more information see: http://www.apple.com/macosx/mountain-lion/security.html.
Predeploying to Linux
Installing Modules for Linux
You can break out the individual installers for Linux and distribute them manually. Each installer in the predeploy package
can run individually. Use a compressed file utility to view and extract the files in the tar.gz file.
Procedure
| Step 1 |
Install the AnyConnect core client module, which installs the GUI and VPN capability (both SSL and IPsec). |
| Step 2 |
Install the DART module, which provides useful diagnostic information about the AnyConnect core client installation. |
| Step 3 |
Install the posture module or ISE compliance module. |
| Step 4 |
Install the NVM. |
Uninstalling Modules
for Linux
The order that the user uninstalls
AnyConnect is important.
DART information is valuable if the uninstall processes fails.
Procedure
| Step 1 |
Uninstall the NVM. |
| Step 2 |
Uninstall the posture module or ISE compliance module. |
| Step 3 |
Uninstall the AnyConnect core |
| Step 4 |
Uninstall DART. |
Manually Installing/Uninstalling NVM on a Linux Device
Procedure
| Step 1 |
Extract the AnyConnect predeploy package. |
| Step 2 |
Navigate to the nvm directory. |
| Step 3 |
Invoke the script $sudo ./nvm_install.sh. |
Certificate Store for Server Certificate Verification
If you will be using server
certificates with AnyConnect, you must make a certificate store available for AnyConnect
to access and verify certificates as trusted. By default, AnyConnect uses the Firefox
certificate store.
To Activate a Firefox Certificate Store
After you have AnyConnect installed on a Linux device, and
before you attempt an AnyConnect connection for the first time, open up a Firefox
browser. When you open Firefox, a profile is created, which includes a certficate
store.
If You Do Not Use the Firefox Certificate
Store
If you opt not to use Firefox, you must configure the local
policy to exclude the Firefox certificate store, and must configure the PEM store.
Multiple Module
Requirement
If you deploy the core client plus one or more optional modules,
you must apply the lockdown property to each of the installers. Lockdown is
described in the
Windows Predeployment MSI Examples.
This action is available for the VPN installer, Network Access Manager,
Network Visibility Module, and Umbrella Roaming Security Module.
Note |
If you choose to activate lockdown to the VPN installer, you |
Manually Installing
DART on a Linux Device
-
Store anyconnect-dart-linux-(ver)-k9.tar.gz locally.
-
From a terminal, extract the tar.gz file using the
tar -zxvf <path to tar.gz file including
the file name command. -
From a terminal, navigate to the extracted folder and run
dart_install.sh using the
sudo ./dart_install.sh command. -
Accept the license agreement and wait for the installation to
finish.
Note |
You can only uninstall DART using |
Web Deploying AnyConnect
Web deployment refers to the AnyConnect Downloader on the client system
getting AnyConnect software from a headend, or to using the portal on the headend to
install or update AnyConnect. As an alternative to our traditional web launch which
relied too heavily on browser support (and Java and ActiveX requirements), we improved
the flow of auto web deploy, which is presented at initial download and upon launch from
a clientless page. Automatic provisioning (Weblaunch) works on Windows operating systems
with Internet Explorer browsers only.
Web Deployment with the ASA
The Clientless Portal on the ASA web deploys AnyConnect. The process flow is:
Users open a browser and connect to the ASA’s
clientless portal. On the portal, the users click the Start AnyConnect Client
button. They can then download the AnyConnect package manually. If they are running
a browser that supports NPAPI (Netscape Plugin Application Programming Interface)
plugins, they can also use the tab to launch the automatic web provisioning using
weblaunch (ActiveX or Java).
ASA Web-Deployment
Restrictions
-
Loading multiple AnyConnect packages for the same O/S to the ASA is not
supported. -
The OPSWAT definitions are not included in the VPN posture (HostScan) module
when web deploying. You must either manually deploy the HostScan module or
load it on the ASA in order to deliver the OPSWAT definitions to the client. -
If your ASA has only the default internal flash memory
size, you could have problems storing and loading multiple AnyConnect client
packages on the ASA. Even if you have enough space on flash to hold the
package files, the ASA could run out of cache memory when it unzips and
loads the client images. For more information about the ASA memory
requirements when deploying AnyConnect, and possibly upgrading the ASA
memory, see the latest release notes for your VPN Appliance. -
Users can connect to the ASA using the IP address or
DNS, but the link-local secure gateway address is not supported. -
You must add the URL of the security appliance
supporting web launch to the list of trusted sites in Internet Explorer.
This can be done with a group policy, as described in Add the ASA to the List of Internet Explorer Trusted Sites
on Windows. -
For Windows 7 SP1 users, we recommend that you install Microsoft .NET framework 4.0 before
installation or initial use. At startup, the Umbrella service checks if .NET
framework 4.0 (or newer) is installed. If it is not detected, the Umbrella
Roaming Security module is not activated, and a message is displayed. To go
and then install the .NET Framework, you must reboot to activate the
Umbrella Roaming Security module.
Web Deployment with ISE
Policies on ISE
determine when the AnyConnect client will be deployed. The user opens a browser
and connects to a resource controlled by ISE and is redirected to the
AnyConnect Client Portal. That ISE Portal helps the user download and install
AnyConnect. In Internet Explorer, ActiveX controls guide the installation. For
other browsers, the Portal downloads the Network Setup Assistant, and that
tools helps the user install AnyConnect.
ISE Deployment
Restrictions
-
If both ISE and ASA are web deploying AnyConnect, the configurations must match on both headends.
-
The ISE server
can only be discovered by the AnyConnect ISE Posture agent if that agent is
configured in the ISE Client Provisioning Policy. The ISE administrator
configures either the NAC Agent or the AnyConnect ISE Posture module under
Agent Configuration > Policy > Client Provisioning.
Configuring Web Deployment on the ASA
Browser
Restrictions for WebLaunch
|
Operating System |
Browser |
|---|---|
|
Current Microsoft supported versions of Windows 10 x86 (32-bit) and x64 (64-bit) |
Internet |
|
Windows 8.x |
Internet |
|
Windows 7 SP1 x86 (32-bit) and x64 (64-bit) |
Internet |
|
macOS 10.13, 10.14 (64-bit), and 10.15 (64-bit) |
Safari 11 |
Note |
Because the EDGE browser does not support ActiveX, our provisioning page hides the Automatic Provisioning options. |
Note |
Web launch works on all browsers that support NPAPI (Netscape Plugin Application Programming Interface) plugins. |
Also, with the
addition of the AnyConnect Umbrella Roaming Security Module, Microsoft .NET 4.0
is required.
Download the
AnyConnect Package
Download the latest Cisco AnyConnect Secure
Mobility Client package from the Cisco AnyConnect Software Download
webpage.
|
OS |
AnyConnect |
|---|---|
|
Windows |
anyconnect-win-version-webdeploy-k9.pkg |
|
macOS |
anyconnect-macos-version-webdeploy-k9.pkg |
|
Linux |
anyconnect-linux64-version-webdeploy-k9.pkg |
Note |
You should not |
Load the AnyConnect Package on the ASA
Procedure
| Step 1 |
Navigate to . The AnyConnect Client Images panel displays the AnyConnect |
| Step 2 |
To add an AnyConnect image, click Add.
|
| Step 3 |
Click OK or |
| Step 4 |
Click Apply. |
Enable Additional
AnyConnect Modules
To enable additional features, specify the new module names in
the group-policy or Local Users configuration. Be aware that enabling
additional modules impacts download time. When you enable features, AnyConnect
must download those modules to the VPN endpoints.
Note |
If you choose |
Procedure
| Step 1 |
In ASDM go to |
| Step 2 |
Select a group policy and click |
| Step 3 |
In the |
| Step 4 |
Click |
Create a Client Profile in ASDM
You must add an AnyConnect web-deployment package to the ASA
before you can create a client profile on the ASA.
Procedure
| Step 1 |
Navigate to |
| Step 2 |
Select the client profile you want to associate with a |
| Step 3 |
In the Change Policy for Profile policy name window, |
| Step 4 |
Click OK. |
| Step 5 |
In the AnyConnect Client Profile page, click Apply. |
| Step 6 |
Click Save. |
| Step 7 |
When you have finished with the configuration, click |
Configuring Web Deployment on ISE
ISE can configure and
deploy the AnyConnect core, ISE Posture module and OPSWAT (compliance module)
to support posture for ISE. ISE can also deploy all the AnyConnect modules and
resources that can be used when connecting to an ASA. When a user browses to a
resource controlled by ISE:
-
If ISE is behind
an ASA, the user connects the ASA, downloads AnyConnect, and makes a VPN
connection. If AnyConnect ISE Posture was not installed by the ASA, then the
user is redirected to the AnyConnect Client Portal to install the ISE Posture. -
If ISE is not
behind an ASA, the user connects to the AnyConnect Client Portal, which guides
him to install the AnyConnect resources defined in the AnyConnect configuration
on ISE. A common configuration is to redirect the browser to AnyConnect client
provisioning portal if the ISE Posture status is unknown. -
When the user is
directed to the AnyConnect Client Provisioning Portal in ISE:-
If the browser is Internet Explorer, ISE downloads AnyConnect Downloader, and the Downloader loads AnyConnect.
-
For all other browsers, ISE opens the client provisioning redirection portal, which displays a link to download the Network
Setup Assistant (NSA) tool. The user runs the NSA, which finds the ISE server, and downloads the AnyConnect downloader.When the NSA is done running in Windows, it deletes itself. When it is done running on macOS, it must be manually deleted.
-
The ISE documentation
describes how to:
-
Create AnyConnect
Configuration profiles in ISE -
Add AnyConnect Resources to ISE from a local device
-
Add AnyConnect
Provisioning Resources from a Remote Site -
Deploy the
AnyConnect client and resources
Note |
Because AnyConnect ISE posture module does not support web proxy based redirection in discovery, Cisco recommends that you |
ISE can configure and
deploy the following AnyConnect resources:
-
AnyConnect core
and modules, including the ISE Posture module -
Profiles: Network Visibility Module, AMP Enabler, VPN, Network Access Manager,
Customer Feedback and AnyConnect ISE Posture -
Files for
customization-
UI Resources
-
Binaries,
connection scripts and help files
-
-
Localization
files-
AnyConnect
gettext translations for message localizations -
Windows
Installer Transforms
-
Prepare AnyConnect
Files for ISE Upload
-
Download the
AnyConnect packages for your operating systems, and other AnyConnect resources
that you want to deploy to your local PC.
Note
With ASA, installation happens with the VPN downloader. With the download, the ISE posture profile is pushed via ASA, and
the discovery host needed for later provisioning the profile is available before the ISE posture module contacts ISE. Whereas
with ISE, the ISE posture module will get the profile only after ISE is discovered, which could result in errors. Therefore,
ASA is recommended to push the ISE posture module when connected to a VPN.
-
Create profiles for the modules you plan to deploy. At a minimum, create an AnyConnect ISE
Posture profile (ISEPostureCFG.xml).
Note
An ISE posture profile with a Call Home List is mandatory for predeploying
the ISE posture module, if non-redirection based discovery is used.
-
Combine
customization and localization resources into a ZIP archive, which is called a
bundle in ISE. A bundle can contain:-
AnyConnect UI
resources -
VPN Connection
Scripts -
Help file(s)
-
Installer
Transforms
An AnyConnect
localization bundle can contain:-
AnyConnect
gettext translations, in binary format -
Installer
transforms
-
Creating ISE bundles is described in Prepare AnyConnect Customizations and Localizations for ISE Deployment .
Configure ISE to
Deploy AnyConnect
You must upload the AnyConnect package to ISE before you upload and create additional AnyConnect
resources.
Note |
When configuring the AnyConnect Configuration object in ISE, unchecking the VPN module under AnyConnect Module Selection |
-
In ISE, select Expand Client Provisioning to show Resources, and select Resources.
-
Select
, and upload the AnyConnect package file. Repeat
adding agent resources from local disk for any other AnyConnect resources that
you plan to deploy. -
Select This AnyConnect Configuration configures modules, profiles, customization/language packages, and the OPSWAT package, as described
in the following table.The AnyConnect ISE
Posture profile can be created and edited in ISE, on the ASA, or in the Windows
AnyConnect Profile Editor. The following table describes the name of each
AnyConnect resource, and the name of the resource type in ISE.Table 5. AnyConnect
Resources in ISEPrompt ISE Resource Type and Description AnyConnect
PackageAnyConnectDesktopWindows
AnyConnectDesktopOSX
AnyConnectWebAgentWindows
AnyConnectWebAgentOSX
Compliance
ModuleAnyConnectComplianceModuleWindows
AnyConnectComplianceModuleOSX
AnyConnect
ProfilesAnyConnectProfile
ISE displays
a checkbox for each profile provided by the uploaded AnyConnect package.Customization
BundleAnyConnectCustomizationBundle
Localization
BundleAnyConnectLocalizationBundle
-
Create a Role or
OS-based client provisioning policy. AnyConnect and the ISE legacy NAC/MAC
agent can be selected for Client provisioning posture agents. Each CP policy
can only provision one agent, either the AnyConnect agent or the legacy NAC/MAC
agent. When configuring the AnyConnect agent, select one AnyConnect
Configuration created in step 2.
Configuring Web Deployment on FTD
A Firepower Threat Defense (FTD) device is a Next Generation Firewall (NGFW) that provides secure gateway capabilities similar
to the ASA. FTD devices support Remote Access VPN (RA VPN) using the AnyConnect Secure Mobility Client only, no other clients,
or clientless VPN access is supported. Tunnel establishment and connectivity are done with IPsec IKEv2 or SSL. IKEv1 is not
supported when connecting to an FTD device.
Windows, macOS, and Linux AnyConnect clients are configured on the FTD headend and deployed upon
connectivity; giving remote users the benefits of an SSL or IKEv2 IPsec VPN client
without the need for client software installation and configuration. In the case of a
previously installed client, when the user authenticates, the FTD headend examines the
revision of the client, and upgrades the client as necessary.
Without a previously installed client, remote users enter the IP address of an interface configured to download and install
the AnyConnect client. The FTD headend downloads and installs the client that matches the operating system of the remote computer,
and establishes a secure connection.
The AnyConnect apps for Apple iOS and Android devices are installed from the platform app store. They require a minimum configuration
to establish connectivity to the FTD headend. As with other headend devices and environments, alternative deployment methods,
as described in this chapter, can also be used to distribute the AnyConnect software.
Currently, only the core AnyConnect VPN module and the AnyConnect VPN Profile can be configured on the FTD and distributed
to endpoints. A Remote Access VPN Policy wizard in the Firepower Management Center (FMC) quickly and easily sets up these
basic VPN capabilities.
Guidelines and Limitations for AnyConnect and FTD
-
The only supported VPN client is the Cisco AnyConnect Secure Mobility Client. No other clients or native VPNs are supported.
Clientless VPN is not supported as its own entity; it is only used to deploy the AnyConnect Client. -
Using AnyConnect with FTD requires version 4.0 or later of AnyConnect, and version 6.2.1 or later of the FMC.
-
There is no inherent support for the AnyConnect Profile Editor in the FMC; you must configure the VPN profiles independently.
The VPN Profile and AnyConnect VPN package are added as File Objects in the FMC, which become part of the RA VPN configuration. -
Secure Mobility, Network Access Management, and all the other AnyConnect modules and their profiles beyond the core VPN capabilities
are not currently supported. -
VPN Load balancing is not supported.
-
Browser Proxy is not supported.
-
All posture variants (HostScan, Endpoint Posture Assessment, and ISE) and Dynamic Access Policies based on the client posture
are not supported. -
The Firepower Threat Defense device does not configure or deploy the files necessary to customize or localize AnyConnect.
-
Features requiring Custom Attributes on the AnyConnect Client are not supported on FTD such as: Deferred Upgrade on desktop
clients and Per-App VPN on mobile clients.
-
Authentication cannot be done on the FTD headend locally; therefore, configured users are not available for remote connections,
and the FTD cannot act as a Certificate Authority. Also, the following authentication features are not supported:-
Secondary or double authentication
-
Single Sign-on using SAML 2.0
-
TACACS, Kerberos (KCD Authentication) and RSA SDI
-
LDAP Authorization (LDAP Attribute Map)
-
RADIUS CoA
-
For details on configuring and deploying AnyConnect on an FTD, see the Firepower Threat Defense Remote Access VPN chapter in the appropriate release of the Firepower Management Center Configuration Guide, Release 6.2.1 or later.
Updating AnyConnect
Software and Profiles
AnyConnect can be updated in several ways.
-
AnyConnect Client—When AnyConnect connects to the ASA, the
AnyConnect Downloader checks to see if any new software or profiles have been
loaded on the ASA. It downloads those updates to the client, and the VPN tunnel
is established. -
Cloud Update—The Umbrella Roaming Security Module can provide automatic updates for all installed AnyConnect modules from
the Umbrella Cloud infrastructure. With Cloud Update, the software upgrades are obtained automatically from the Umbrella Cloud
infrastructure, and the update track is dependent upon that and not any action of the administrator. By default, automatic
updates from Cloud Update are disabled. -
ASA or FTD Portal—You instruct your users to connect to the ASA’s Clientless Portal to get updates. FTD downloads the core
VPN module only. -
ISE—When a user connects to ISE, ISE uses its AnyConnect configuration to decide if there are updated components or new posture
requirements. Upon authorization, the Network Access Device (NAD) redirects the users to the ISE portal, and the AnyConnect
downloader is installed on the client to manage the package extraction and installation. We recommend that you upload the
deploy package to the ASA headend and make sure that the versions of AnyConnect client match the ASA and ISE deployment package
versions.Receiving a message that «automatic software updates are required but cannot be performed while the VPN tunnel is established»
indicates that the configured ISE policy requires updates. When the AnyConnect version on the local device is older than what’s
configured on ISE, you have the following options, because client updates are not allowed while the VPN is active:-
Deploy AnyConnect update out of band
-
Configure the same version of AnyConnect on the ASA and ISE
-
You can allow the end user to delay updates, and you can also
prevent clients from updating even if you do load updates to the headend.
Upgrade Example
Flows
Prerequisites
The following
examples assume that:
- You have created a Dynamic
Authorization Control List (DACL) in ISE that uses the posture status of the
client to determine when to redirect the client to the AnyConnect Client
Provisioning portal on ISE, and that DACL has been pushed to the ASA. -
ISE is behind
the ASA.
AnyConnect is Installed on
the Client
-
User starts
AnyConnect, provides credentials, and clicks Connect. -
ASA opens SSL
connection with client, passes authentication credentials to ISE, and ISE
verifies the credentials. - AnyConnect launches the
AnyConnect Downloader, which performs any upgrades, and initiates a VPN tunnel.
If ISE Posture was
not installed by the ASA, then
-
A user browses
to any site and is redirected to AnyConnect client provisioning portal on ISE
by the DACL. -
If the browser
is Internet Explorer, ActiveX control launches AnyConnect Downloader. On other
browsers, the user downloads and executes Network Setup Assistant (NSA), which
downloads and starts the AnyConnect Downloader. -
The AnyConnect
Downloader performs any AnyConnect upgrades configured on ISE, which now
includes the AnyConnect ISE Posture module. -
The ISE Posture
agent on the client starts posture.
AnyConnect is Not
Installed
-
The user browses
to a site, which starts a connection to the ASA Clientless Portal. -
The user
provides authentication credentials, which are passed to ISE, and verified. -
AnyConnect
Downloader is launched by ActiveX control on Internet Explorer and by Java
applet on other browsers. -
AnyConnect
Downloader performs upgrades configured on ASA and then initiates VPN tunnel.
Downloader finishes.
If ISE Posture was
not installed by the ASA, then
-
User browses to
a site again and is redirected to AnyConnect client provisioning portal on ISE. -
On Internet
Explorer, an ActiveX control launches AnyConnect Downloader. On other browsers,
the user downloads and executes Network Setup Assistant, which downloads and
launches the AnyConnect Downloader. -
The AnyConnect
Downloader performs any upgrades configured on ISE through the existing VPN
tunnel, which includes adding the AnyConnect ISE Posture module. -
ISE Posture
agent starts posture assessment.
Disabling AnyConnect
Auto Update
It is possible to disable or limit AnyConnect automatic updates
by configuring and distributing client profiles.
-
In the VPN Client Profile:
-
Auto
Update disables automatic updates. You can include this profile with
the AnyConnect web-deployment installation or add to an existing client
installation. You can also allow the user to toggle this setting.
-
-
In the VPN Local Policy Profile:
-
Bypass Downloader
prevents any updated content on the ASA from being
downloaded to the client. -
Update Policy offers granular control over software
and profiles updates when connecting to different headends.
-
Prompting Users to Download AnyConnect During WebLaunch
You can configure the ASA to prompt remote users to start web
deployment, and configure a time period within which they can choose to download
AnyConnect or go to the clientless portal page.
Prompting users to download AnyConnect is configured on a group
policy or user account. The following steps show how to enable this feature on a
group policy.
Procedure
| Step 1 |
In ASDM go to |
| Step 2 |
Select a group policy and click |
| Step 3 |
In the navigation pane, choose . Uncheck the Inherit If you choose to prompt users, specify a timeout period |
| Step 4 |
Click OK and be sure to apply your |
Allowing Users to
Defer Upgrade
You can force users to accept an AnyConnect update by disabling
AutoUpdate, as described in
Disabling AnyConnect Auto
Update. AutoUpdate is on by default.
You can also allow users to defer client update until later by
setting Deferred Update. If Deferred Update is configured, then when a client
update is available, AnyConnect opens a dialog asking the user if they would
like to update, or to defer. Deferred Upgrade is supported by all Windows,
Linux and OS X.
Configure Deferred
Update on an ASA
On an ASA, Deferred
Update is enabled by adding custom attributes and then referencing and
configuring those attributes in the group policies. You must create and
configure
all
custom attributes to use Deferred Upgrade.
The procedure to add
custom attributes to your ASA configuration is dependent on the ASA/ASDM
release you are running. See the
Cisco ASA
Series VPN ASDM Configuration Guide or the
Cisco ASA
Series VPN CLI Configuration Guide that corresponds to your ASA/ASDM
deployed release for custom attribute configuration procedures.
The following attributes and values configure Deferred Update in
ASDM:
|
Custom Attribute * |
Valid Values |
Default Value |
Notes |
|---|---|---|---|
| DeferredUpdateAllowed |
true false |
false |
True enables deferred update. If deferred update is disabled (false), the settings below are ignored. |
| DeferredUpdateMinimumVersion | x.x.x |
0.0.0 |
Minimum version of AnyConnect that must be installed for updates to be deferrable. The minimum version check applies to all modules enabled on the head end. If any enabled module (including VPN) is not installed If this attribute is not specified, then a deferral prompt is displayed (or auto-dismissed) regardless of the version installed |
| DeferredUpdateDismissTimeout | 0-300 (seconds) |
150 seconds |
Number of seconds that the deferred upgrade prompt is displayed before being dismissed automatically. This attribute only If this attribute is missing, then the auto-dismiss feature is disabled, and a dialog is displayed (if required) until the Setting this attribute to zero allows automatic deferral or upgrade to be forced based on:
|
| DeferredUpdateDismissResponse | defer update |
update |
Action to take when DeferredUpdateDismissTimeout occurs. |
* The custom attribute values are case-sensitive.
Configure Deferred
Update in ISE
Procedure
| Step 1 |
Follow this navigation:
|
| Step 2 |
Upload any other |
| Step 3 |
On |
Deferred Update
GUI
The following figure shows the UI that the user sees when an
update is available, and Deferred Update is configured. The right part of the
figure shows the UI when
DeferredUpdateDismissTimeout is configured.
Set the Update
Policy
Update Policy
Overview
AnyConnect software and profile updates occur when they are
available and allowed by the client upon connecting to a headend. Configuring
the headend for AnyConnect updates makes them available. The Update Policy
settings in the VPN Local Policy file determine if they are allowed.
Update policy is
sometimes referred to as software locks. When multiple headends are configured,
the update policy is also referred to as the multiple domain policy.
By default, the Update Policy settings allow software and
profile updates from any headend. Set the Update Policy parameters to restrict
this as follows:
-
Allow, or authorize, specific headends to update all AnyConnect
software and profiles by specifying them in the
Server Name
list.The headend server name can be an FQDN or an IP Address. They
can also be wild cards, for example: *.example.com.See
Authorized Server Update Policy
Behavior below for a full description of how the update occurs. -
For all other unspecified, or unauthorized headends:
-
Allow or disallow software updates of the VPN core module and
other optional modules using the
Allow
Software Updates From Any Server option. -
Allow or disallow VPN Profile updates using the
Allow
VPN Profile Updates From Any Server
option. -
Allow or disallow other service module profile updates using the
Allow
Service Profile Updates From Any Server option. - Allow or disallow ISE
Posture Profile updates using the
Allow ISE
Posture Profile Updates From Any Server option. - Allow or disallow Compliance
Module updates using the
Allow
Compliance Module Updates From Any Server option.See
Unauthorized Server Update Policy
Behavior below for a full description of how the update occurs.
-
Authorized Server
Update Policy Behavior
When connecting to an authorized headend identified in the
Server Name
list, the other Update Policy parameters do not apply and the following occurs:
-
The version of the AnyConnect package on the headend is compared
to the version on the client to determine if the software should be updated.-
If the version of the AnyConnect package is older than the
version on the client, no software updates occur. -
If the version of the AnyConnect package is the same as the
version on the client, only software modules that are configured for download
on the headend and not present on the client are downloaded and installed. -
If the version of the AnyConnect package is newer than the
version on the client, software modules configured for download on the headend,
as well as software modules already installed on the client, are downloaded and
installed.
-
-
The VPN profile, ISE Posture profile, and each service profile
on the headend is compared to that profile on the client to determine if it
should be updated:-
If the profile on the headend is the same as the profile on the
client, it is not updated. -
If the profile on the headend is different than the profile on
the client, it is downloaded.
-
Unauthorized Server
Update Policy Behavior
When connecting to an unauthorized headend, the
Allow … Updates From Any
Server options are used to determine how AnyConnect is updated as
follows:
-
Allow Software Updates From
Any Server:-
If this option is checked, software updates are allowed for this
unauthorized ASA. Updates are based on version comparisons as described above
for authorized headends. -
If this option is not checked, software updates do not occur. In
addition, VPN connection attempts will terminate if updates, based on version
comparisons, should have occurred.
-
-
Allow VPN Profile Updates
From Any Server:
-
If this option is checked, the VPN profile is updated if the VPN
profile on the headend is different than the one on the client. -
If this option is not checked, the VPN profile is not updated.
In addition, VPN connection attempts will terminate if theVPN profile update,
based on differentiation, should have occurred.
-
-
Allow Service Profile Updates
From Any Server:-
If this option is checked, each service profile is updated if
the profile on the headend is different than the one on the client. -
If this option is not checked, the service profiles are not
updated.
-
-
Allow ISE Posture Profile Updates From Any
Server:-
If this option is checked, the ISE Posture profile is updated
when the ISE Posture profile on the headend is different than the one on the
client. -
If this option is not checked, the ISE Posture profile is not
updated. ISE Posture profile is required for the ISE Posture agent to work.
-
-
Allow Compliance Module Updates From Any
Server:-
If this option is checked, the Compliance Module is updated when
the Compliance Module on the headend is different than the one on the client. -
If this option is not checked, the Compliance Module is not
updated. The Compliance Module is required for the ISE Posture agent to work.
-
Update Policy
Guidelines
-
Enable remote users to connect to a headend using its IP address
by listing that server’s IP address in the authorized
Server Name
list. If the user attempts to connect using the IP address but the headend is
listed as an FQDN, the attempt is treated as connecting to an unauthorized
domain. -
Software updates include downloading customizations, localizations, scripts and transforms. When software updates are disallowed,
these items will not be downloaded. Do not rely on scripts for policy enforcement if some clients will not be allowing script
updates. -
Downloading a VPN profile with
Always-On
enabled deletes all other VPN profiles on the client. Consider this when
deciding whether to allow or disallow VPN profiles updates from unauthorized,
or non-corporate, headends. -
If no VPN profile is downloaded to the client due to your installation
and update policy, the following features are unavailable:Service Disable Untrusted Network Policy Certificate Store Override Trusted DNS Domains Show Pre-connect Message Trusted DNS Servers Local LAN Access Always-On Start Before Logon Captive Portal Remediation Local proxy connections Scripting PPP Exclusion Retain VPN on Logoff Automatic VPN Policy Device Lock Required Trusted Network Policy Automatic Server Selection -
In Windows, the downloader creates a separate text log
(UpdateHistory.log) that records the download history. This log includes the
time of the updates, the ASA that updated the client, the modules updated, and
what version was installed before and after the upgrade. This log file is stored
here:%ALLUSERESPROFILE%\Cisco\Cisco AnyConnect Secure Mobility
Client\Logs directory. -
You must restart the AnyConnect service to pick up any changes in the Local Policy file.
Update Policy
Example
This example shows the client update behavior when the
AnyConnect version on the client differs from various ASA headends.
Given the following
Update Policy in the VPN Local Policy XML file:
<?xml version="1.0" encoding="UTF-8"?>
<AnyConnectLocalPolicy acversion="2.4.140"
xmlns=http://schemas.xmlsoap.org/encoding/
xmlns:xsi=http://www.w3.org/2001/XMLSchema-instance
xsi:schemaLocation="http://schemas.xmlsoap.org/encoding/ AnyConnectLocalPolicy.xsd">
<FipsMode>false</FipsMode>
<BypassDownloader>false</BypassDownloader><RestrictWebLaunch>false</RestrictWebLaunch>
<StrictCertificateTrust>false</StrictCertificateTrust>
<RestrictPreferenceCaching>false</RestrictPreferenceCaching>
<RestrictTunnelProtocols>false</RestrictTunnelProtocols>
<UpdatePolicy>
<AllowSoftwareUpdatesFromAnyServer>false</AllowSoftwareUpdatesFromAnyServer>
<AllowVPNProfileUpdatesFromAnyServer>false</AllowVPNProfileUpdatesFromAnyServer>
<AllowServiceProfileUpdatesFromAnyServer>false</AllowServiceProfileUpdatesFromAnyServer>
<AllowISEProfileUpdatesFromAnyServer>true</AllowISEProfileUpdatesFromAnyServer>
<AllowComplianceModuleUpdatesFromAnyServer>true</AllowComplianceModuleUpdatesFromAnyServer>
<AllowManagementVPNProfileUpdatesFromAnyServer>true</AllowManagementVPNProfileUpdatesFromAnyServer>
<AuthorizedServerList>
   <ServerName>seattle.example.com</ServerName>
   <ServerName>newyork.example.com</ServerName>
</AuthorizedServerList>
</UpdatePolicy>
</AnyConnectLocalPolicy>
With the following ASA headend configuration:
|
ASA Headend |
AnyConnect Package Loaded |
Modules to Download |
|---|---|---|
|
seattle.example.com |
Version 4.7.01076 |
VPN, Network Access Manager |
|
newyork.example.com |
Version 4.7.03052 |
VPN, Network Access Manager |
|
raleigh.example.com |
Version 4.7.04056 |
VPN, Posture |
The following update sequence is possible when the client is
currently running AnyConnect VPN and Network Access Manager modules:
-
The client connects to seattle.example.com, an authorized server
configured with the same version of AnyConnect. If the VPN and Network Access
Manager profiles are available for download and different than the ones on the
client, they will also be downloaded. -
The client then connects to newyork.example.com, an authorized ASA
configured with a newer version of AnyConnect. The VPN and Network Access
Manager modules are upgraded. Profiles that are available for download and
different than the ones on the client are also downloaded. -
The client then connects to raleigh.example.com, an unauthorized ASA.
Even though a software update is necessary and a software update is available,
the update is not allowed due to the policy determining version upgrades are not
allowed. The connection terminates.
AnyConnect Reference Information
Locations of User
Preferences Files on the Local Computer
AnyConnect stores some profile settings on the user computer in
a user preferences file and a global preferences file. AnyConnect uses the
local file to configure user-controllable settings in the Preferences tab of
the client GUI and to display information about the last connection, such as
the user, the group, and the host.
AnyConnect uses the global file for actions that occur before
logon, for example, Start Before Logon and AutoConnect On Start.
The following table shows the filenames and installed paths for
preferences files on the client computer:
|
Operating System |
Type |
File and Path |
|---|---|---|
|
Windows |
User |
C:\Users\username\AppData\Local\Cisco\ Cisco AnyConnect VPN Client\preferences.xml |
|
Global |
C:\ProgramData\Cisco\Cisco AnyConnect VPN Client\ preferences_global.xml |
|
|
macOS |
User |
/Users/username/.anyconnect |
|
Global |
/opt/cisco/anyconnect/.anyconnect_global |
|
|
Linux |
User |
/home/username/.anyconnect |
|
Global |
/opt/cisco/anyconnect/.anyconnect_global |
Port Used by AnyConnect
The following tables list the ports used by the Cisco AnyConnect Secure
Mobility Client for each protocol.
|
Protocol |
Cisco AnyConnect Client Port |
|---|---|
|
TLS (SSL) |
TCP 443 |
|
SSL Redirection |
TCP 80 (optional) |
|
DTLS |
UDP 443 (optional, but highly recommended) |
|
IPsec/IKEv2 |
UDP 500, UDP 4500 |
- Настройка двухфакторной аутентификации
- Установка приложения Cisco Anyconnect VPN Client
- Подключение
- Аутентификация
Прежде, чем подключаться к сети Университета, Вам необходимо настроить Ваш телефон на проверку второго фактора. Настройку проверки второго фактора необходимо сделать только один раз, поэтому если Вы уже выполняли это ранее, можете пропустить этот шаг, и перейти к шагу с установкой приложения Cisco Anyconnect VPN Client.
Внимание! С 12.09.2023 изменился сервис двухфакторной аутентификации. Потребуется повторная настройка в новом сервисе, следуя пункту с настройкой двухфакторной аутентификации ниже. Приложение доступно для систем Android (Google Play) и iOS (App Store).
Также не забывайте, что при необходимости использования квалифицированной электронной подписи при удаленном подключении к рабочему месту носитель с электронной подписью необходимо забрать с собой, чтобы подключить его к домашнему компьютеру/ноутбуку.
Настройка двухфакторной аутентификации
Войдите на портал регистрации по адресу https://mfa.utmn.ru. Введите данные Вашей корпоративной учетной записи и нажмите кнопку «Войти» как показано на рисунке ниже.

После успешного входа Вы перейдете в настройку Мультифактора. Нажмите кнопку «Далее».

Вам на выбор предоставляется 2 способа проверки:
- Мобильное приложение Multifactor
- Оповещения от Телеграм-бота
Двухфакторная аутентификация с приложением Multifactor
Портал предложит установить приложение на мобильное устройство. Данное приложение доступно в магазинах Play Store, App Store и AppGallery. Установите данное приложение. Не закрывайте портал.
Пользователи устройств компании Huawei для корректной работы приложения должны установить приложение ТОЛЬКО из AppGallery.

После установки приложения нажмите кнопку Далее на портале в форме «Установите приложение».

Далее вам предоставят QR-код и ссылку, который будет необходимо отсканировать с помощью приложения. Данный код будет действовать 20 минут с момента создания. Вернитесь к приложению Мультфактор.

В приложении нажмите на кнопку добавления нового аккаунта (кнопка +), разрешите приложению доступ к камере (при запросе) и отсканируйте QR-код.

После успешной регистрации Ваша учетная запись появиться в главном меню приложения. Портал предложит выполнить вход для проверки работы приложения. Нажмите кнопку «Выполнить вход».

На портале появится окно, показывающее какой способ аутентификации используется. В приложении придет оповещение с просьбой «Подтвердить вход» или «Отклонить его». Подтвердите вход.

Вас перенаправит на страничку, где показаны все настроенные методы аутентификации с возможностью их настройки и удаления.

Настройка двухфакторной аутентификации через приложение Multifactor завершена.
Двухфакторная аутентификация через Телеграм-бот
Для настройки двухфакторной аутентификации через Телеграм-бот потребуется активный аккаунт в приложении Телеграм и установленное приложение Телеграм.
На портале mfa.utmn.ru в шаге «Установите приложение» нажмите на меню в виде трех вертикальных точек ⋮ , чтобы открыть контекстное меню. В нем выберете Расширенные настройки.
Появится список доступных способ аутентификации. В поле Telegram нажмите +Добавить контакт.

Далее вам предоставят QR-код и ссылку. Отсканируйте QR-код через любое доступное приложение для сканирования или перейдите по ссылке.

QR-код или ссылка перенаправит на установленное приложение Телеграм и откроет чат с ботом @MultifactorBot.
Нажмите «Начать», чтобы зарегистрировать ваш аккаунт. Бот @MultifactorBot ответит, что ваша регистрация завершена. Далее в этом чате будут появляться запросы на подтверждение.
Если вы просто найдете данный бот через поиске в Telegram и нажмете Начать, то Ваш аккаунт не привяжется в портале MULTIFACTOR. Обязательно пройдите по сгенерированной ссылке или отсканируйте QR-код.

На портале mfa.utmn.ru появится имя аккаунта Телеграм. Нажмите кнопку «ОК» в правом верхнему углу.

Далее портал отправит тестовое подтверждение для проверки работы. В чате бот @MultifactorBot отправит сообщение о подтверждение подключения. Нажмите кнопку «Да, это я».

После успешной аутентификации вас перенаправит на страничку, где показаны все настроенные способы проверки доступа.
Настройка двухфакторной аутентификации через Телеграм-бот завершена.
Установка приложения Cisco Anyconnect VPN Client
Для установления защищенного подключения к корпоративной сети Университета Вам необходимо использовать приложение для обеспечения удаленного доступа Cisco AnyConnect Secure Mobility Client. Его можно скачать по ссылке для ОС Windows и по ссылке для ОС macOS. Данное приложение доступно для систем Android и iOS. Выполните установку, если приложение уже установлено, пропустите данный пункт.
Подключение
Откройте установленное приложение Cisco AnyConnect Secure Mobility Client. В качестве сервера подключения укажите имя «vpn.utmn.ru» и нажмите кнопку «Connect».

Аутентификация
Для прохождения аутентификации Вам необходимо выбрать группу подключения «UTMN_MFA» и ввести данные Вашей корпоративной учетной записи .

Приложение Microsoft Authenticator пришлет уведомление с просьбой подтвердить или отклонить вход.

После чего автоматически будет установлено защищенное подключение и Вы сможете использовать корпоративные ресурсы Университета.

Если у Вас остались вопросы по удаленному подключению к сети Университета, обратитесь в диспетчерскую службы технической поддержки ЦИТ:
- напишите запрос через Портал поддержки ЦИТ;
- с помощью электронной почты 597777@utmn.ru;
- по телефону: +7 (3452) 59-77-77.
-
Home
-
Partition Manager
- How to Download and Install Cisco AnyConnect on PC
By Linda | Follow |
Last Updated
Cisco AnyConnect is a VPN client launched by Cisco for Windows, Android, iOS, OS X, Ubuntu, and WebOS. This post from MiniTool Partition Wizard offers you the Cisco AnyConnect download and installation guide.
AnyConnect is a VPN client launched by Cisco. Its main function is to allow employees to use any device to access the corporate network anytime and anywhere. At present, there are Cisco AnyConnect clients for Windows, Android, iOS, OS X, Ubuntu, and WebOS.
Do you want to use Cisco AnyConnect on your PC? If you want, you can refer to the following guide to download and install it.
Cisco AnyConnect Download
You can follow the guide below to download Cisco AnyConnect for Windows, macOS, and Linux.
Step 1: Go to the Cisco software download page. In the search box, type “anyconnect” and then click AnyConnect Secure Mobility Client v4.x from the result list. It is also the latest AnyConnect software version.
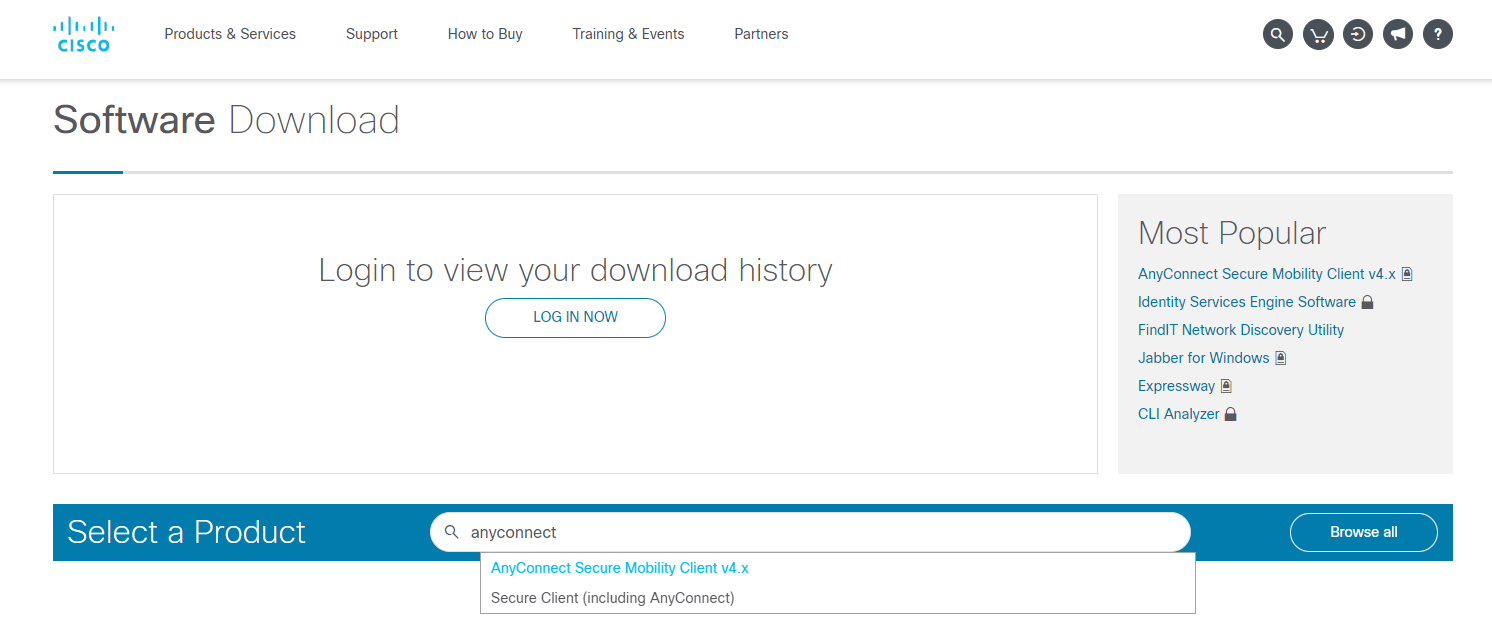
Step 2: After going to the Cisco AnyConnect Secure Mobility Client download page, you need to choose a proper Cisco AnyConnect version.
- To get the Cisco AnyConnect download Mac, you need to choose the AnyConnect Pre-Deployment Package (Mac OS) option.
- To download Cisco AnyConnect Windows 10, you need to choose the AnyConnect Pre-Deployment Package (Windows) – includes individual MSI files option.
- To run Cisco AnyConnect on Linux, you need to choose the AnyConnect Pre-Deployment Package (Linux 64-bit) option.
Tips:
Before you get the Cisco AnyConnect download, you need to purchase it.
2022 11 Best Free VPN Service for Windows 10/11 PC and Laptop
How to Install Cisco AnyConnect on a PC
To install Cisco AnyConnect on Windows, the process is as follows:
- Extract the Cisco AnyConnect installer filer.
- In the extracted folder, double-click Setup.exe to initiate the installation process.
- A pop-up window may ask for permissions, in this case, select Yes. If your pop-up asks if you are sure you want to run this software, select Run.
- Choose the components to be installed and click Install Selected.
- Click OK.
- Review the Supplemental End User License Agreement and then click Accept.
To install Cisco AnyConnect on macOS, the process is as follows:
- Double-click the installer file.
- Click Continue.
- Go over the Supplemental End User License Agreement and then click Continue.
- Click Agree.
- Choose the components to be installed and click Continue.
- Click Install.
- Enter your password in the Password field and then click Install Software.
To install Cisco AnyConnect on Linux, the process is as follows:
- Open the Terminal by pressing Ctrl+Alt+T on your keyboard.
- Execute the command “cd desktop” to navigate to Desktop where the downloaded file is saved.
- Execute the command “tar xvf anyconnect-linux64-4.10.05111-predeploy-k9.tar.gz” to extract the downloaded file.
- Execute the command “cd anyconnect-linux64-4.10.05111” to navigate into the folder.
- Execute the command “cd vpn” to navigate into the vpn sub-folder.
- Execute the command “sudo ./vpn_install.sh” to begin the installation process.
- Type “y” to accept the license agreement to complete the installation.
If you want to know how to connect and disconnect to a VPN, you can read the content on this page.
Bottom Line
This post shows you how to download and install Cisco AnyConnect on your PC. If you are interested in MiniTool Partition Wizard software, you can download it from the official website. This software can manage your disk better.
About The Author

Position: Columnist
Linda has been working as an editor at MiniTool for 5 years. She is always curious about computer knowledge and learns it crazily. Her articles are simple and easy to understand. Even people who do not understand computer can gain something. By the way, her special focuses are disk management, data recovery and PDF editing.
На чтение 13 мин Просмотров 20.9к.
Максим aka WisH
Высшее образование по специальности «Информационные системы». Опыт работы системным администратором — 5 лет.
Задать вопрос
Cisco AnyConnect – это VPN клиент от известной компании Cisco, которая занимается поставками сетевого оборудования. Их устройства дороги и сложны в настройке, но достаточно надежны и приспосабливаются под любую сеть. Настройкой оборудования занимаются или сторонние специалисты, или свои сотрудники, имеющие нужные сертификаты.
Обычный работник имеет возможность столкнуться с настройкой и использование программ от этой фирмы только в случае небольших бесплатных программ, которые они предоставляют. Cisco AnyConnect – это одна из таких программ, которые могут быть установлены на компьютере обычного работника.
Содержание
- Зачем использовать Cisco AnyConnect
- Установка и настройка Cisco AnyConnect Client на ПК
- Где скачать Cisco AnyConnect Secure?
- На Windows 10
- На MacOS
- На Linux Ubuntu
- Запуск и первые шаги Cisco AnyConnect Mobility для смартфонов
- На Android
- На iOS
- Возможные проблемы
- Нет соединения
- Ошибка инициализации
- Как удалить клиент
- Аналоги Cisco VPN Client
Стоит сразу сказать, несмотря на то, что Cisco AnyConnect является бесплатным приложением для использования VPN, он не предоставляет доступа ни к каким платным или бесплатным серверам. Cisco Anyconnect используется для подключения к существующим виртуальным частным сетям или VPN.
Программа является клиентом, так что в ней осуществляется только настройка подключения к самой сети. Все настройки VPN задаются на сервере или на том оборудовании Cisco, что служит шлюзом между интернетом и корпоративной сетью.
Разберем несколько особенностей, которые позволяют предоставлять удаленный доступ через это приложение:
- Возможность получения настроек со шлюза или сервера. Если человек работает через свое оборудование и нет возможности отдать его на установку и настройку техническим специалистам, то AnyConnect может получить настройки с сервера при первом подключении.
- Безопасность конечного устройства. Присутствует возможность настройки проверки компьютера или телефона, на котором установлено. Если устройство не соответствует заданным параметрам безопасности, то подключение не произойдет.
- «Тихая» работа. Можно сделать так, чтобы приложение не отображалось в активных, а значка в трее не было.
- Настройка приложения таким образом, чтобы при работе внутри корпоративной сети, не работал интернет. Это повышает безопасность корпоративной сети от взлома или занесения вредоносных программ.
К сожалению, все это задается в конфиге оборудования Cisco или на серверах компании. В самом клиенте настраивается подключение, производится ввод логина и пароля, а также задаются некоторые параметры установки соединения.
Всем остальным занимается администратор сети внутри компании. Так что вам столкнуться с этим не придется, ведь для работы с цисками требуется довольно долгое обучение и наличие некоторых сертификатов его подтверждающих.
Установка и настройка Cisco AnyConnect Client на ПК
Про места для скачивания поговорим чуть ниже, так что стоит остановиться на самой установке и настройке. Опять же, для каждой системы конкретные действия будут разными, но общий алгоритм такой: распаковать скачанный архив, запустить оттуда установочный файл. Дождаться окончания установки и запустить саму программу.
В некоторых случаях потребуется добавить программу в исключения своего антивируса и брандмауэра, но сначала попробуйте запустить её без этого. Теперь можно переходить к настройке.
Где скачать Cisco AnyConnect Secure?
Скачать программу можно всего с нескольких ресурсов. Основным является официальный сайт производителя.
Текущая версия находится по адресу: https://software.cisco.com/download/home/286281283/type/282364313/release/4.10.05095 , если соединится не получается, что удалите все до последнего слэша, должно перекинуть на последнюю версию. Здесь представлен полный список программ для Линукса, MacOS и Windows. Скачивайте и устанавливайте, для винды рекомендуется брать AnyConnect Pre-Deployment Package.
Проблема в том, что как только вы нажмете на скачивание, выскочит окно с предупреждением. Посторонние люди не могут загружать программы, так что войдите в свой аккаунт, в котором активен сервисный договор с компанией. Если такого нет, то обратитесь к своему дилеру, чтобы он предоставил вам копию программы.
У Microsoft есть свой официальный магазин, работающий с последними операционными системами. Зайдите туда и найдите нужное приложение, можете перейти по ссылке https://apps.microsoft.com/store/detail/anyconnect/9WZDNCRDJ8LH?hl=ru-ru&gl=RU. Нажмите на «Установить» и дождитесь окончания процесса. Это работает только для десятки, для Windows 7 и других ранних версий потребуется воспользоваться первым способом.
На Windows 10
После загрузки из официального магазина, программа станет доступна в списке установленных. Найдите её по ярлыку или через меню пуск и запустите. Нажмите на «Manage VPN», вас перебросит в стандартное окно с ВПН на десятке.
Здесь нужно установить, когда можно использовать ВПН, использовать ли его при роуминге и т.д. После выбора этих опций нажмите на «Add a VPN Connection», на русском будет «Добавить ВПН-соединение».
В открывшемся окне производятся все настройки. Главное, в верхней строке выберите создание соединения через AnyConnect. Дальше введите имя соединения, адрес сервера, а также логин и пароль, если они требуются для входа. Сохраните настройки. Теперь, для запуска соединения, вам нужно снова открыть окно с настройками ВПН и кликнуть там по нужному соединению.
В некоторых случаях может потребоваться настройка самой программы. Тогда из пуска снова запустите её и перейдите в раздел «Settings», здесь найдите настройку «Block Untrusted Servers», часто её требуется отключить для установки соединения. В разделе Diagnostic есть параметр Сertificate, здесь будут храниться сертификаты серверов, сюда же может потребоваться установить выданный вам сертификат, если подключение происходит по нему.
На MacOS
Загрузите программу из указанного источника, а потом дважды кликните на файл для начала установки. В первом окне нажмите «Continue», это просто приветствие, во втором окне выберите место, в которое хотите установить программу. Дальше все понятно, просто введите пароль и дождитесь окончания установки.
Теперь перейдите в раздел с приложениями и найдите там Cisco > Cisco AnyConnect Secure Mobility Client.app. Запустите его, в первом окне укажите точный адрес, выданный вам для подключения к VPN и нажмите на Connect. Появится еще одно окно, в верхней строке выберите группу, а ниже введите логин и пароль.
Теперь вы подключены. Для отключения снова нажмите на приложение, откроется окно с адресом сервера. Нажмите здесь на Disconnect, это позволит отключить соединение.
На Linux Ubuntu
Алгоритм будет одинаковым на всех линуксах, в том числе и на Debian, и Fedora. Скачайте архив из указанных источников. Распакуйте его и перейдите в новый каталог. Откройте и запустите установочный файл. В некоторых случаях все это можно проделать и через графический интерфейс, но можно работать и через консоль.
Запустите программу. На картинке вы видите интерфейс подключения, он выскочит после первого запуска программы. Введите адрес, а через двоеточие порт, если он нужен. Вводите его с точностью до каждого знака такой же, как вам выдали на работе. Потом нажмите на «Connect».
Откроется окно с предупреждениями. Нажмите здесь на «Change Settings», если вы нажмете по второй кнопке, то точно никуда не подключитесь.
Откроется окно с настройками. Вам нужно снять галочку с последнего пункта «Block connections to untrusted servers». Остальные галки расставьте так, как рекомендовали вам в инструкции на работе.
В следующем окне кликните по кнопке «Connect Anyway», а потом введите логин и пароль. Теперь можно пользоваться программой.
Запуск и первые шаги Cisco AnyConnect Mobility для смартфонов
Сильных отличий в работе приложений друг от друга нет. Меню выглядят похоже и алгоритм действий почти не меняется. Вот и получается, что если один раз настроить полностью работу впн, то и в другой раз проблем не будет. Особенно это характерно для телефонов. Здесь расскажем способы настройки приложений на разных аппаратах.
На Android
На андроиде загрузите приложение из официального магазина. После загрузке запустите его и попадете в первое меню. Здесь кликните по «Подключения», в новом окне на «Добавить новое подключение».
Появится стандартное окно для ввода данных. Введите туда информацию, которая предоставили вам для подключения. Теперь нажмите на три точки вверху и выберите «Settings» и снимите галку с «Блокировать недоверенные серверы».
Нажмите на три точки сверху и перейдите на вкладку «Diagnostics», откройте «Управление сертификатом». Снова нажав на три точки вверху выберите «Импортировать», здесь укажите путь до сертификата. Это потребуется, если подключение осуществляется по нему.
На iOS
На iPhone алгоритм ничем не отличается от Андроида. Скачайте и установите приложение из официального магазина. Откройте его. Щелкните по строке Connections, потом кликните по Add VPN Connection. В появившемся окне введите логин и пароль, а также остальные данные для подключения.
Для включения и отключения используйте рычажок, находящийся в верхней строке. Настройки находятся в разделе «Settings», а управление сертификатами в «Diagnostics».
Возможные проблемы
Сама программа проста, потому что представляет собой клиентскую часть программного решения. То есть, все основные действия и настройки происходят где-то далеко, на серверах и оборудовании Cisco, а Cisco AnyConnect представляет собой небольшую программу для подключения ко всей этой конструкции. Тем не менее разработчики сюда заложили и проверку клиентских устройств и ограничение на работу в интернете, так что проблемы возникают с завидным постоянством.
Нет соединения
Если не устанавливается соединение, то причин несколько:
- Включилось ограничение на связь, вшитое в установку программы, так что во время работы не получится соединиться с интернетом.
- Неправильно введены данные сервера, так что приложение не может к нему подключится.
- Несовпадение версий. Эту проблему отметила компания Майрософт, что при включении ВПН от циско, на некотором оборудовании перестает подключаться беспроводной интернет. Тут только ждать обновлений от обеих компаний.
Проблема глобальная, так что стоит сначала уточнить у тех, кто делал настройки на сервере, какие параметры выставлены. Тогда вы не будете удивляться ограничениям.
При отпадании интернета вообще при включении программы, рекомендуется почистить кэш интернет-соединения.
Ошибка инициализации
При запуске программы выскакивает ошибка «failed to initialize connection subsystem». Ошибка возникала на старых версиях программы, но нет гарантий, что она решена.
Есть два способа решения проблемы:
- Найдите исполняемый файл программы. Щелкните по ярлыку правой кнопкой мыши, а потом нажмите на «Расположение файла». Обычно это C:Program Files (x86)CiscoCisco AnyConnect Secure Mobility Client.
По найденному файлу кликните правой кнопкой мыши и выберите «Исправление неполадок». Дождитесь окончания работы.
Нажмите на компьютер правой кнопкой, перейдите в управление, потом в службы, найдите Cisco AnyConnect Secure Mobility Agent остановите его и потом снова запустите.
- Нажмите Win+R и введите в открывшемся окне regedit. Пройдите по пути HKEY_CURRENT_USERSoftwareMicrosoftWindowsCurrentVersionInternet Settings и создайте переменную DWORD с именем GlobalUserOffline и значением 0. Перезагрузите компьютер.
Проблема возникает из-за установки некоторых обновлений, так что можете удалить последние обновления и проблема решится. Или установите обновление MS15-018, оно решает эту проблему.
Как удалить клиент
С удалением возникают проблемы. Иногда удаляется не полностью, из-за чего возникают сбои при повторной установке. Так что тут совет один: заходите в папку с установленной программой и запускайте деинсталлятор оттуда. Если этого не сделали, то придется работать с командной строкой.
Для мака введите в терминал следующие команды:
- sudo /opt/cisco/anyconnect/bin/websecurity_uninstall.sh
- sudo /opt/cisco/anyconnect/bin/dart_uninstall.sh
- sudo /opt/cisco/anyconnect/bin/nvm_uninstall.sh
- sudo /opt/cisco/anyconnect/bin/umbrella_uninstall.sh
- sudo /opt/cisco/anyconnect/bin/amp_uninstall.sh
Если вы запороли удаление на виндовс, то попробуйте воспользоваться одной из программ, что чистят реестр. Если она не поможет, то остается только откат на точку восстановления или переустановка системы. Так что лучше сразу зайдите в папку с установленным приложением и используйте деинсталлятор оттуда.
Аналоги Cisco VPN Client
Есть и бесплатные аналоги этой программы, которые не предъявляют требований к договорам и остальному. Так что можете использовать их для создания туннелей, виртуальных сетей и организации удаленного доступа.
Однако, я не рекомендую использовать бесплатные решения для чего-то серьезного. Они редко хорошо защищены, да и следят за их безопасностью не очень пристально. Лучше приобрести какое-то корпоративное решение.
Аналоги:
- OpenConnect GUI — это графический клиент OpenConnect для систем Microsoft Windows, бесплатный и с открытым исходным кодом.
- OpenVPN — это полнофункциональное решение SSL VPN с открытым исходным кодом. Это рабочая лошадка большинства предприятия на данный момент. Обеспечивает неплохой уровень безопасности и позволяет задавать много параметров.
- ShrewSoft VPN Client работает через IPsec на Windows 2000, XP, Vista. Можете применять в тех местах, где не подойдут современные программы.
Cisco Anyconnect – это программа для тех организаций, что используют у себя их оборудование. Поэтому проблем с настройкой возникать не должно. Параметры сервера задает специалист, он же выдаст точную инструкцию по подключению.
Программу можно использовать и с другими видами серверов, как простой ВПН-клиент, но полные возможности раскроются только при использовании вместе с сервером от того же производителя. В других случаях стоит поискать аналогичные программы для организации безопасного удаленного доступа в свою корпоративную сеть или для подключения к какому-то оборудованию – применений для VPN много.
Configure VPN
Access
Connect and Disconnect to a VPN
AnyConnect VPN
Connectivity Options
The AnyConnect client provides many options for automatically
connecting, reconnecting, or disconnecting VPN sessions. These options provide
a convenient way for your users to connect to your VPN, and they also support
your network security requirements.
Starting and
Restarting AnyConnect Connections
Configure VPN Connection
Servers to provide the names and addresses of the secure gateways your
users will manually connect to.
Choose from the following AnyConnect capabilities to provide convenient, automatic VPN connectivity:
-
Automatically Start Windows VPN Connections Before Logon
-
Automatically Start VPN Connections when AnyConnect Starts
-
Automatically Restart VPN Connections
Also, consider using the following Automatic VPN Policy options to enforce greater network security or restrict network access
to the VPN only:
-
Use Trusted Network Detection to Connect and Disconnect
-
Require VPN Connections Using Always On
-
Use Captive Portal Hotspot Detection and Remediation
Renegotiating
and Maintaining the AnyConnect Connection
You can limit how long the ASA keeps an AnyConnect VPN
connection available to the user even with no activity. If a VPN session goes
idle, you can terminate the connection or re-negotiate the connection.
-
Keepalive—The ASA sends keepalive messages at regular intervals.
These messages are ignored by the ASA, but are useful in maintaining
connections with devices between the client and the ASA.For instructions to configure Keepalive with the ASDM or CLI, see the
Enable Keepalive section in the Cisco ASA Series VPN Configuration Guide. -
Dead Peer Detection—The ASA and AnyConnect client send «R-U-There» messages. These messages are sent less frequently than
IPsec’s keepalive messages. You can enable both the ASA (gateway) and the AnyConnect client to send DPD messages, and configure
a timeout interval.-
If the client does not respond to the ASA’s DPD messages, the ASA tries once more before putting the session into «Waiting
to Resume» mode. This mode allows the user to roam networks, or enter sleep mode and later recover the connection. If the
user does not reconnect before the idle timeout occurs, the ASA will terminate the tunnel. The recommended gateway DPD interval
is 300 seconds. -
If the ASA does not respond to the client’s DPD messages, the client tries again before terminating the tunnel. The recommended
client DPD interval is 30 seconds.For instructions to configure DPD within the ASDM, refer to Configure Dead Peer
Detection in the appropriate release of the Cisco ASA Series VPN Configuration
Guide.
-
-
Best Practices:
-
Set Client DPD to 30 seconds (Group Policy > Advanced >
AnyConnect Client > Dead Peer Detection). -
Set Server DPD to 300 seconds (Group Policy > Advanced >
AnyConnect Client > Dead Peer Detection). -
Set Rekey, for both SSL and IPsec to 1 hour (Group Policy >
Advanced > AnyConnect Client > Key Regeneration).
-
Terminating an
AnyConnect Connection
Terminating an AnyConnect connection requires the user to
re-authenticate their endpoint to the secure gateway and create a new VPN
connection.
The following connection parameters terminate the VPN session based on timeouts:
-
Maximum Connect Time—Sets the maximum user connection time in minutes. At the end of this time, the system terminates the
connection. You can also allow unlimited connection time(default). -
VPN Idle Timeout—Terminates any user’s session when the session is inactive for the specified time. If the VPN idle timeout
is not configured, then the default idle timeout is used. -
Default Idle Timeout—Terminates any user’s session when the session is inactive for the specified time. The default value
is 30 minutes. The default is 1800 second.
See the Specify a VPN Session Idle Timeout for a Group Policy section in the
appropriate release of the Cisco ASA Series VPN Configuration Guide to set these
parameters.
Configure VPN Connection Servers
The AnyConnect VPN server list consists of host name and host
address pairs identifying the secure gateways that your VPN users will connect to.
The host name can be an alias, an FQDN, or an IP address.
The hosts added to the server list display in the Connect to
drop-down list in the AnyConnect GUI. The user can then select from the drop-down
list to initiate a VPN connection. The host at the top of the list is the default
server, and appears first in the GUI drop-down list. If the user selects an
alternate server from the list, the selected server becomes the new default server.
Once you add a server to the server list, you can view its
details and edit or delete the server entry. To add a server to the server list,
follow this procedure.
Procedure
| Step 1 |
Open the VPN |
||
| Step 2 |
Click Add. |
||
| Step 3 |
Configure the server’s host name and address:
|
||
| Step 4 |
Enter the server to fall back to as the backup server in
|
||
| Step 5 |
(Optional) Add load balancing servers to the Load Balancing Server List. Do not use «&» or «<» If the host for this server list entry specifies a load |
||
| Step 6 |
Specify the Primary
|
||
| Step 7 |
(Optional) Configure SCEP for this server:
|
||
| Step 8 |
Click OK. |
Automatically Start Windows VPN Connections Before Logon
About Start Before
Logon
This feature called Start Before Logon (SBL) allows users to
establish their VPN connection to the enterprise infrastructure before logging
onto Windows.
Note |
When using Start Before Logon (SBL) and HostScan, you must install the |
When SBL is installed and enabled, AnyConnect
starts before the Windows logon dialog box appears, ensuring users are
connected to their corporate infrastructure before logging on. After VPN
authentication, the Windows logon dialog appears, and the user logs in as
usual.
SBL also includes the Network Access Manager tile and allows connections using user configured home network profiles. Network
profiles allowed in SBL mode include all media types employing non-802.1X authentication modes, such as open WEP, WPA/WPA2
Personal, and static key (WEP) networks.
using different mechanisms depending on the version of Windows:
-
On Windows, the Pre-Login Access Provider (PLAP) is used to
implement AnyConnect SBL.With PLAP, the Ctrl+Alt+Del key combination opens a window where
the user can choose either to log in to the system or activate Network
Connections (PLAP components) using the Network Connect button in the
lower-right corner of the window.PLAP supports 32-bit and 64-bit versions of the Windows.
-
The user’s computer is joined to an Active Directory
infrastructure. -
A user has network-mapped drives that require authentication
with the Microsoft Active Directory infrastructure. -
The user cannot have cached credentials on the computer (the
group policy disallows cached credentials). In this scenario, users must be
able to communicate with a domain controller on the corporate network for their
credentials to be validated before gaining access to the computer. -
The user must run logon scripts that execute from a network
resource or need access to a network resource. With SBL enabled, the user has
access to the local infrastructure and logon scripts that would normally run
when a user is in the office. This includes domain logon scripts, group policy
objects and other Active Directory functionality that normally occurs when
users log on to their system. -
Networking components (such as MS NAP/CS NAC) exist that might
require connection to the infrastructure.
Limitations on Start
Before Logon
-
AnyConnect is not compatible with fast user switching.
-
AnyConnect cannot be started by third-party Start Before Logon
applications. -
Because SBL is pre-login and will not have access to the user store, you
cannot do multiple certificate authentication (MCA) with it. MCA requires a
machine certificate and a user certificate, or two user certificates.
Configure Start Before Logon
Procedure
Install the AnyConnect Start Before Logon Module
The AnyConnect installer detects the underlying operating
system and places the appropriate AnyConnect DLL from the AnyConnect SBL module in
the system directory. On Windows 7, or the Windows 2008 server, the installer
determines whether the 32-bit or 64-bit version of the operating system is in use
and installs the appropriate PLAP component, vpnplap.dll or vpnplap64.dll.
Note |
If you uninstall AnyConnect while leaving the VPNGINA or |
You can predeploy the SBL module or configure the ASA to
download it. When predeploying AnyConnect, the Start Before Logon module requires
that the core client software is installed first. If you are predeploying AnyConnect
Core and the Start Before Logon components using MSI files, you must get the order
right.
Procedure
| Step 1 |
In ASDM go to |
| Step 2 |
Select a group policy and click |
| Step 3 |
Select in the left navigation pane. |
| Step 4 |
Uncheck Inherit for the Optional Client Module for Download setting. |
| Step 5 |
Select the AnyConnect |
Enable SBL in the AnyConnect Profile
Before you begin
-
SBL requires a network connection to be present at the
time it is invoked. In some cases, this might not be possible, because a
wireless connection might depend on credentials of the user to connect to
the wireless infrastructure. Since SBL mode precedes the credential phase of
a logon, a connection would not be available in this scenario. In this case,
the wireless connection needs to be configured to cache the credentials
across logon, or another wireless authentication needs to be configured, for
SBL to work. -
If the Network Access Manager is installed, you must
deploy device connection to ensure that an appropriate connection is
available.
Procedure
| Step 1 |
Open the VPN |
||
| Step 2 |
Select Use Start Before |
||
| Step 3 |
(Optional) To give the remote user control over SBL,
|
Troubleshoot Start Before Logon
Procedure
| Step 1 |
Ensure that the AnyConnect profile is loaded on the ASA, |
| Step 2 |
Delete prior profiles (search for them on the hard drive |
| Step 3 |
Using Windows Add/Remove Programs, uninstall the SBL |
| Step 4 |
Clear the user’s AnyConnect log in the Event Viewer and |
| Step 5 |
Browse back to the security appliance to install |
| Step 6 |
Reboot once. On the next reboot, you should be prompted |
| Step 7 |
Collect a DART bundle and send it to your AnyConnect |
| Step 8 |
If you see the following error, delete the user’s |
| Step 9 |
Go back to the .tmpl file, save a copy as an.xml file, |
Automatically Start VPN Connections When AnyConnect Starts
This feature called Auto Connect On Start, automatically
establishes a VPN connection with the secure gateway specified by the VPN client
profile when AnyConnect starts.
Auto Connect On Start is disabled by default, requiring the
user to specify or select a secure gateway.
Procedure
| Step 1 |
Open the VPN |
| Step 2 |
Select Auto Connect On |
| Step 3 |
(Optional) To give the user control over Auto Connect on |
Configure Start
Before Logon (PLAP) on Windows Systems
The Start Before Logon (SBL) feature
starts a VPN connection before the user logs in to Windows. This ensures that
users connect to their corporate infrastructure before logging on to their
computers.
The SBL AnyConnect feature is known as the Pre-Login Access Provider
(PLAP), which is a connectable credential provider. This feature lets
programmatic network administrators perform specific tasks, such as collecting
credentials or connecting to network resources before logon. PLAP provides SBL
functions on all of the supported Windows operating systems. PLAP supports
32-bit and 64-bit versions of the operating system with vpnplap.dll and
vpnplap64.dll, respectively. The PLAP functions supports x86 and x64.
Automatically Restart VPN Connections
When Auto Reconnect is enabled (default), AnyConnect recovers
from VPN session disruptions and reestablishes a session, regardless of the media
used for the initial connection. For example, it can reestablish a session on wired,
wireless, or 3G. When Auto Reconnect is enabled, you also specify the reconnect
behavior upon system suspend or system resume. A system suspend is a low-power
standby, such as Windows “hibernation” or macOS or Linux “sleep.” A system resume is
a recovery following a system suspend.
If you disable Auto Reconnect, the client does not attempt to
reconnect regardless of the cause of the disconnection. Cisco highly recommends
using the default setting (enabled) for this feature. Disabling this setting can
cause interruptions in VPN connectivity over unstable connections.
Procedure
| Step 1 |
Open the VPN |
| Step 2 |
Select Auto |
| Step 3 |
Choose the Auto Reconnect Behavior:
|
Use Trusted Network Detection to Connect and Disconnect
About Trusted
Network Detection
Trusted Network Detection (TND) gives you the ability to have
AnyConnect automatically disconnect a VPN connection when the user is inside
the corporate network (the trusted network) and start the VPN connection when
the user is outside the corporate network (the untrusted network).
TND does not interfere with the ability of the user to manually
establish a VPN connection. It does not disconnect a VPN connection that the
user starts manually in the trusted network. TND only disconnects the VPN
session if the user first connects in an untrusted network and moves into a
trusted network. For example, TND disconnects the VPN session if the user makes
a VPN connection at home and then moves into the corporate office.
You configure TND in the AnyConnect VPN Client profile. No
changes are required to the ASA configuration. You need to specify the action
or policy AnyConnect takes when recognizing it is transitioning between trusted
and untrusted networks, and identify your trusted networks and servers.
Guidelines for
Trusted Network Detection
-
Because the TND feature controls the AnyConnect GUI and
automatically starts connections, the GUI should run at all times. If the user
exits the GUI, TND does not automatically start the VPN connection. -
If AnyConnect is also running Start Before Logon (SBL), and the
user moves into the trusted network, the SBL window displayed on the computer
automatically closes. -
Trusted Network Detection with or without
Always-On
configured is supported on IPv6 and IPv4 VPN connections to the ASA over IPv4
and IPv6 networks. -
Multiple profiles on a user computer may present problems if the
TND configuration is different.If the user has received a TND-enabled profile in the past, upon
system restart, AnyConnect attempts to connect to the security appliance it was
last connected to, which may not be the behavior you desire. To connect to a
different security appliance, they must manually disconnect and re-connect to
that headend. The following workarounds will help you prevent this problem:-
Enable TND in the client profiles loaded on all the ASAs on your
corporate network. -
Create one profile listing all the ASAs in the host entry
section, and load that profile on all your ASAs. -
If users do not need to have multiple, different profiles, use
the same profile name for the profiles on all the ASAs. Each ASA overrides the
existing profile.
-
Configure Trusted Network Detection
Procedure
| Step 1 |
Open the VPN profile editor and choose Preferences (Part |
||||||||
| Step 2 |
Select Automatic VPN Policy. |
||||||||
| Step 3 |
Choose a Trusted Network This is the action the client takes when the user is inside the corporate
|
||||||||
| Step 4 |
Choose an Untrusted Network This is the action the client takes when the user is outside the corporate
|
||||||||
| Step 5 |
Specify Trusted DNS Domains. Specify the DNS suffixes (a string separated by commas) that a network The AnyConnect client builds the DNS suffix list in the following order:
|
||||||||
| Step 6 |
Specify Trusted DNS Servers. All DNS server addresses (a string separated by commas) that a network You must have a DNS entry for the headend server that is resolvable via DNS.
An active interface will be considered as an In-Trusted-Network if it matches |
||||||||
| Step 7 |
Specify a host URL that you want to add as trusted. You must have a secure web
|
Require VPN
Connections Using
Always-On
About
Always-On VPN
Always-On operation prevents access to Internet
resources when the computer is not on a trusted network, unless a VPN session
is active. Enforcing the VPN to always be on in this situation protects the
computer from security threats.
When
Always-On is enabled, it establishes a VPN
session automatically after the user logs in and upon detection of an untrusted
network. The VPN session remains open until the user logs out of the computer,
or the session timer or idle session timer (specified in the ASA group policy)
expires. AnyConnect continually attempts to reestablish the connection to
reactivate the session if it is still open; otherwise, it continually attempts
to establish a new VPN session.
When
Always-On is enabled in the VPN Profile,
AnyConnect protects the endpoint by deleting all the other downloaded
AnyConnect profiles and ignores any public proxies configured to connect to the
ASA.
The following AnyConnect options also need to be considered when
enabling
Always-On:
-
Allowing the user to disconnect the Always-On VPN session: AnyConnect provides the ability for the user to disconnect Always-On VPN sessions. If you enable Allow VPN
Disconnect , AnyConnect displays a Disconnect button upon
the establishment of a VPN session. By default, the profile editor enables the
Disconnect button when you enableAlways-On VPN.Pressing the disconnect button locks all interfaces to prevent data
from leaking out and to protect the computer from internet access except for
establishing a VPN session. Users of Always-On VPN sessions may want to click Disconnect so they can choose an alternative
secure gateway due to performance issues with the current VPN session, or
reconnection issues following the interruption of a VPN session. -
Setting a connect failure policy: The connect failure policy determines
whether the computer can access the internet if Always-On VPN is enabled and AnyConnect cannot establish a VPN session. See Set a Connect Failure Policy. -
Handling captive portal hotspots: See Use Captive Portal Hotpost Detection and Remediation.
Limitations of
Always-On VPN
-
Always On is available only on Windows and macOS
-
If
Always-On
is enabled, but the user does not log on, AnyConnect does not establish the VPN
connection. AnyConnect starts the VPN connection only post-login. -
Always-On VPN does not support connecting though
a proxy.
Guidelines for
Always-On VPN
To enhance protection against threats, we recommend the
following additional protective measures if you configure
Always-On VPN:
-
We strongly recommend purchasing a digital certificate from a
certificate authority (CA) and enrolling it on the secure gateways. The ASDM
provides an
Enroll ASA SSL VPN with Entrust button on the
Configuration > Remote Access VPN > Certificate Management
> Identity Certificates panel to facilitate enrollment of a
public certificate. -
If you are using always-on VPN, external SAML IdP is not supported (however,
with internal SAML IdP, the ASA proxies all traffic to IdP and is supported) -
Predeploy a profile configured with Always-On to the endpoints to limit connectivity to the pre-defined ASAs. Predeployment prevents contact with a rogue server.
-
Restrict administrator rights so that users cannot terminate
processes. A PC user with admin rights can bypass an
Always-On policy by stopping the agent. If you
want to ensure fully-secure
Always-On, you must deny local admin rights to
users. -
Restrict access to the Cisco sub-folders on Windows computers,
typically
C:ProgramData. -
Users with limited or standard privileges may sometimes have
write access to their program data folders. They could use this access to
delete the AnyConnect profile file and thereby circumvent the
Always-On feature. -
Predeploy a group policy object (GPO) for Windows users to prevent users with limited rights from terminating the GUI. Predeploy
equivalent measures for macOS users.
Configure Always-On VPN
Procedure
Configure Always-On in the AnyConnect VPN Client Profile
Before you begin
Always-On VPN requires that a valid, trusted server certificate be configured on the ASA;
otherwise, it fails and logs an event indicating the certificate is invalid. In
addition, ensuring that the server certificate can pass Strict Certificate Trust
mode prevents the download of an Always-On VPN profile that locks a VPN connection to a rogue server.
Procedure
| Step 1 |
Open the VPN |
| Step 2 |
Select Automatic VPN |
| Step 3 |
Configure Trusted Network Detection |
| Step 4 |
Select Always |
| Step 5 |
(Optional) Select or un-select Allow VPN Disconnect. |
| Step 6 |
(Optional) Configure a Connect Failure Policy. |
| Step 7 |
(Optional) Configure Captive Portal Remediation. |
Add Load-Balancing Backup Cluster Members to the Server List
Always-On VPN affects the load balancing of AnyConnect VPN sessions. With Always-On VPN disabled, when the client connects to a primary device within a load
balancing cluster, the client complies with a redirection from the primary device to
any of the backup cluster members. With Always-On enabled, the client does not comply with a redirection from the primary device
unless the address of the backup cluster member is specified in the server list of
the client profile. Therefore, be sure to add any backup cluster members to the
server list.
To specify the addresses of backup cluster members in the
client profile, use ASDM to add a load-balancing backup server list by following
these steps:
Procedure
| Step 1 |
Open the VPN |
| Step 2 |
Choose a server that is a primary device of a |
| Step 3 |
Enter an FQDN or IP address of any load-balancing cluster |
Exempt Users from Always-On VPN
You can configure exemptions to override an Always-On policy. For example, you might want to let certain individuals establish VPN
sessions with other companies or exempt the Always-On policy for noncorporate assets.
Exemptions set in group policies and dynamic access policies on
the ASA override the Always-On policy. You specify exceptions according to the matching criteria used to assign
the policy. If an AnyConnect policy enables Always-On and a dynamic access policy or group policy disables it, the client retains the
disable setting for the current and future VPN sessions as long as its criteria
match the dynamic access policy or group policy on the establishment of each new
session.
This procedure configures a dynamic access policy that uses AAA
endpoint criteria to match sessions to noncorporate assets.
Procedure
| Step 1 |
Choose Configuration > Remote |
| Step 2 |
Configure criteria to exempt users from Always-On VPN. For example, use the Selection Criteria area to specify AAA attributes |
| Step 3 |
Click the AnyConnect tab on the bottom half of the Add or Edit Dynamic |
| Step 4 |
Click Disable next to “Always-On VPN for AnyConnect client.» |
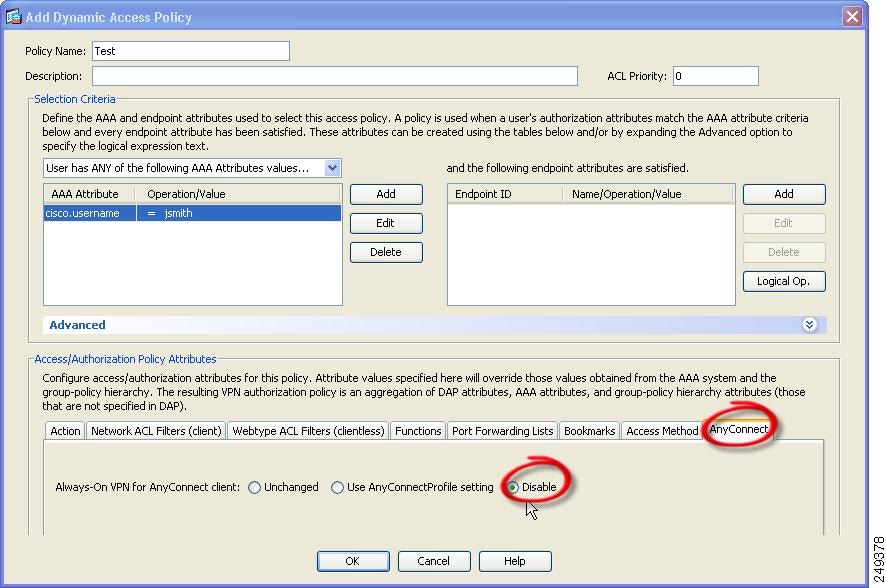
Set a Connect
Failure Policy for Always-On
About the Connect
Failure Policy
The connect failure policy determines whether the computer can
access the internet if
Always-On
VPN is enabled and AnyConnect cannot establish a VPN session. This can occur
when a secure gateway is unreachable, or when AnyConnect fails to detect the
presence of a captive portal hotspot.
An open policy permits full network access, letting users
continue to perform tasks where access to the Internet or other local network
resources is needed.
A closed policy disables all network connectivity until the VPN
session is established. AnyConnect does this by enabling packet filters that
block all traffic from the endpoint that is not bound for a secure gateway to
which the computer is allowed to connect.
Regardless of the connect failure policy, AnyConnect continues
to try to establish the VPN connection.
Guidelines for
Setting the Connect Failure Policy
Consider the following when using an open policy which permits
full network access:
-
Security and protection are not available until the VPN session
is established; therefore, the endpoint device may get infected with web-based
malware or sensitive data may leak. -
An open connect failure policy does not apply if you enable the
Disconnect button and the user clicks
Disconnect.
Consider the following when using a closed policy which disables
all network connectivity until the VPN session is established:
-
A closed policy can halt productivity if users require Internet
access outside the VPN. -
The purpose of closed is to help protect corporate assets from
network threats when resources in the private network that protect the endpoint
are not available.The endpoint is protected from web-based malware and
sensitive data leakage at all times because all network access is prevented
except for local resources such as printers and tethered devices permitted by
split tunneling. -
This option is primarily for organizations where security
persistence is a greater concern than always-available network access. -
A closed policy prevents captive portal remediation unless you
specifically enable it. -
You can allow the application of the local resource rules
imposed by the most recent VPN session if
Apply Last VPN Local Resources is enabled in the
client profile. For example, these rules could determine access to active sync
and local printing. -
The network is unblocked and open during an AnyConnect software
upgrade when
Always-On
is enabled regardless of a closed policy. -
If you deploy a closed connection policy, we highly recommend
that you follow a phased approach. For example, first deploy
Always-On
with a connect failure open policy and survey users for the frequency with
which AnyConnect does not connect seamlessly. Then deploy a small pilot
deployment of a connect failure closed policy among early-adopter users and
solicit their feedback. Expand the pilot program gradually while continuing to
solicit feedback before considering a full deployment. As you deploy a connect
failure closed policy, be sure to educate the VPN users about the network
access limitation as well as the advantages of a connect failure closed policy.
Caution
A connect failure closed policy prevents network access if
AnyConnect fails to establish a VPN session. Use extreme caution when
implementing a connect failure closed policy.

Configure a Connect Failure Policy
You configure a Connect Failure Policy only when the Always-On feature is enabled. By default, the connect failure policy is closed, preventing
Internet access if the VPN is unreachable. To allow Internet access in this
situation the connect failure policy must be set to open.
Procedure
| Step 1 |
Open the VPN |
| Step 2 |
Set the Connect Failure
|
| Step 3 |
If you specified a closed policy:
|
Use Captive Portal
Hotspot Detection and Remediation
About Captive
Portals
Many facilities that offer Wi-Fi and wired access, such as
airports, coffee shops, and hotels, require the user to pay before obtaining
access, to agree to abide by an acceptable use policy, or both. These
facilities use a technique called captive portal to prevent applications from
connecting until the user opens a browser and accepts the conditions for
access. Captive portal detection is the recognition of this restriction, and
captive portal remediation is the process of satisfying the requirements of a
captive portal hotspot in order to obtain network access.
Captive portals are detected automatically by AnyConnect when
initiating a VPN connection requiring no additional configuration. Also,
AnyConnect does not modify any browser configuration settings during captive
portal detection and does not automatically remediate the captive portal. It
relies on the end user to perform the remediation. AnyConnect reacts to the
detection of a captive portal depending on the current configuration:
-
If
Always-On
is disabled, or if
Always-On
is enabled and the Connect Failure Policy is open, the following message is
displayed on each connection attempt:The service provider in your current location is restricting access to the Internet. You need to log on with the service provider before you can establish a VPN session. You can try this by visiting any website with your browser.The end user must perform captive portal remediation by meeting
the requirements of the provider of the hotspot. These requirements could be
paying a fee to access the network, signing an acceptable use policy, both, or
some other requirement defined by the provider. -
If
Always-On
is enabled and the connect failure policy is closed, captive portal remediation
needs to be explicitly enabled. If enabled, the end user can perform
remediation as described above. If disabled, the following message is displayed
upon each connection attempt, and the VPN cannot be connected.The service provider in your current location is restricting access to the Internet. The AnyConnect protection settings must be lowered for you to log on with the service provider. Your current enterprise security policy does not allow this.
Configure Captive Portal Remediation
You configure captive portal remediation only when the Always-On feature is enabled and the Connect Failure Policy is set to closed. In this
situation, configuring captive portal remediation allows AnyConnect to connect to
the VPN when a captive portal is preventing it from doing so.
If the Connect Failure Policy is set to open or Always-On is not enabled, your users are not restricted from network access and are capable
of remediating a captive portal without any specific configuration in the AnyConnect
VPN client profile.
By default, captive portal remediation is disabled on platforms
supporting Always on (Windows and macOS) to provide the greatest security.
AnyConnect does not provide data leakage protection capabilities during the captive
portal remediation phase. If data loss protection is desired, you should employ a
relevant endpoint security product.
Procedure
| Step 1 |
Open the VPN |
| Step 2 |
Select Allow Captive This setting lifts the network access restrictions |
| Step 3 |
Specify the Remediation Timeout. Enter the number of minutes for which AnyConnect lifts |
Troubleshoot Captive
Portal Detection and Remediation
AnyConnect can falsely assume that it is in a captive portal in
the following situations.
-
If AnyConnect attempts to contact an ASA with a certificate
containing an incorrect server name (CN), then the AnyConnect client will think
it is in a “captive portal” environment.To prevent this, make sure the ASA certificate is properly
configured. The CN value in the certificate must match the name of the ASA
server in the VPN client profile. -
If there is another device on the network before the ASA, and
that device responds to the client’s attempt to contact an ASA by blocking
HTTPS access to the ASA, then the AnyConnect client will think it is in a
“captive portal” environment. This situation can occur when a user is on an
internal network, and connects through a firewall to connect to the ASA.If you need to restrict access to the ASA from inside the corporation,
configure your firewall such that HTTP and HTTPS traffic to the ASA’s
address does not return an HTTP status. HTTP/HTTPS access to the ASA should
either be allowed or completely blocked to ensure that HTTP/HTTPS requests
sent to the ASA will not return an unexpected response.
If users cannot access a captive portal remediation page, ask
them to try the following:
-
Terminate any applications that use HTTP, such as instant
messaging programs, e-mail clients, IP phone clients, and all but one browser
to perform the remediation.The captive portal may be actively inhibiting DoS attacks by
ignoring repetitive attempts to connect, causing them to time out on the client
end. The attempt by many applications to make HTTP connections exacerbates this
problem. -
Disable and re-enable the network interface. This action
triggers a captive portal detection retry. -
Restart the computer.
Configure AnyConnect over L2TP or PPTP
ISPs in some countries require support of the Layer 2 Tunneling
Protocol (L2TP) and Point-to-Point Tunneling Protocol (PPTP).
To send traffic destined for the secure gateway over a
Point-to-Point Protocol (PPP) connection, AnyConnect uses the point-to-point adapter
generated by the external tunnel. When establishing a VPN tunnel over a PPP
connection, the client must exclude traffic destined for the ASA from the tunneled
traffic intended for destinations beyond the ASA. To specify whether and how to
determine the exclusion route, use the PPP Exclusion setting in the AnyConnect
profile. The exclusion route appears as a non-secured route in the Route Details
display of the AnyConnect GUI.
Procedure
| Step 1 |
Open the VPN |
| Step 2 |
Choose a PPP
|
Instruct Users to Override PPP Exclusion
If automatic detection does not work and you configured the PPP
Exclusion fields as user controllable, the user can override the setting by editing
the AnyConnect preferences file on the local computer.
Procedure
| Step 1 |
Use an editor such as Notepad to open the preferences XML This file is at one of the following paths on the
|
| Step 2 |
Insert the PPPExclusion details under |
| Step 3 |
Save the file. |
| Step 4 |
Exit and restart AnyConnect. |
Configure AnyConnect Proxy Connections
About AnyConnect
Proxy Connections
AnyConnect supports VPN sessions through Local, Public, and
Private proxies:
-
Local Proxy Connections:
A local proxy runs on the same PC as AnyConnect, and is
sometimes used as a transparent proxy. Some examples of a transparent proxy
service include acceleration software provided by some wireless data cards, or
a network component on some antivirus software, such as Kaspersky.The use of a local proxy is enabled or disabled in the
AnyConnect VPN client profile, see
Allow
a Local Proxy Connection. -
Public Proxy Connections:
Public proxies are usually used to anonymize web traffic. When Windows is configured to use a public proxy, AnyConnect uses
that connection. Public proxy is supported on macOS and Linux for both native and override. -
Private Proxy Connections:
Private proxy servers are used on a corporate network to prevent
corporate users from accessing certain Web sites based on corporate usage
policies, for example, pornography, gambling, or gaming sites.You configure a group policy to download private proxy settings to the browser after the tunnel is established. The settings
return to their original state after the VPN session ends. See Configure a Private Proxy Connection.
Note
AnyConnect SBL
connections through a proxy server are dependent on the Windows operating
system version and system (machine) configuration or other third-party proxy
software capabilities; therefore, refer to system wide proxy settings as
provided by Microsoft or whatever third-party proxy application you use.
Control Client
Proxy with VPN Client Profile
The VPN Client
profile can block or redirect the client system’s proxy connection. For Windows
and Linux, you can configure, or you can allow the user to configure, the
address of a public proxy server.
For more information about configuring the proxy settings in the VPN client profile, see AnyConnect Profile Editor, Preferences (Part 2).
Proxy
Auto-Configuration File Generation for Clientless Support
Some versions of the
ASA require AnyConnect configuration to support clientless portal access
through a proxy server after establishing an AnyConnect session. AnyConnect
uses a proxy auto-configuration (PAC) file to modify the client-side proxy
settings to let this occur. AnyConnect generates this file only if the ASA does
not specify private-side proxy settings.
Requirements for
AnyConnect Proxy Connections
OS support of proxy connections varies as shown:
|
Proxy Connection Type |
Windows |
macOS |
Linux |
|---|---|---|---|
|
Local Proxy |
Yes |
Yes (Override) |
Yes |
|
Private Proxy |
Yes (on Internet Explorer) |
Yes (set as system proxy settings) |
No |
|
Public Proxy |
Yes (IE and Override) |
Yes (Override) |
Limitations on Proxy
Connections
-
IPv6 proxies are not supported for any type of proxy
connection. -
Connecting through a proxy is not supported with the
Always-On feature enabled. -
A VPN client profile is required to allow access to a local proxy.
Allow a Local Proxy Connection
Procedure
| Step 1 |
Open the VPN |
| Step 2 |
Select (default) or unselect Allow Local Proxy Connections. Local proxy |
Configure a Private Proxy Connection
Procedure
| Step 1 |
Configure the private proxy information in the ASA group
|
||
| Step 2 |
(Optional) Configure the Client to Ignore Browser Proxy |
||
| Step 3 |
(Optional) Lockdown the Internet Explorer Connections Tab. |
Configure the Client to Ignore Browser Proxy Settings
You can specify a policy in the AnyConnect profile to bypass
the Microsoft Internet Explorer or Safari proxy configuration settings on the user’s
PC. This prevents the user from establishing a tunnel from outside the corporate
network, and prevents AnyConnect from connecting through an undesirable or
illegitimate proxy server.
Procedure
| Step 1 |
Open the VPN |
| Step 2 |
In the Proxy Settings drop-down list, choose IgnoreProxy. Ignore Proxy causes the |
Lock Down the Internet Explorer Connections Tab
Under certain conditions, AnyConnect hides the Internet
Explorer Tools > Internet Options > Connections tab. When exposed, this tab
lets the user set proxy information. Hiding this tab prevents the user from
intentionally or unintentionally circumventing the tunnel. The tab lockdown is
reversed on disconnect, and it is superseded by any administrator-defined policies
applied to that tab. The conditions under which this lock down occurs are the
following:
-
The ASA configuration specifies Connections tab
lockdown. -
The ASA configuration specifies a private-side proxy.
-
A Windows group policy previously locked down the
Connections tab (overriding the no lockdown ASA group policy setting).
You can configure the ASA to allow or not allow proxy lockdown,
in the group policy. To do this using ASDM, follow this procedure:
Procedure
| Step 1 |
In ASDM go to |
| Step 2 |
Select a group policy and click |
| Step 3 |
In the navigation pane, go to . The Proxy Server Policy pane displays. |
| Step 4 |
Click Proxy |
| Step 5 |
Uncheck Inherit and select Yes to enable proxy lockdown and hide the Internet Explorer |
| Step 6 |
Click OK to |
| Step 7 |
Click Apply |
Verify the Proxy
Settings
-
For Windows: Find the proxy settings in the registry under:
HKEY_CURRENT_USERSoftwareMicrosoftWindowsCurrentVersionInternet Settings -
For macOS: Open a terminal window, and type:
scutil --proxy
Select and Exclude VPN Traffic
Configure IPv4 or IPv6 Traffic to Bypass the VPN
You can configure how the AnyConnect client manages IPv4
traffic when the ASA is expecting only IPv6 traffic or how AnyConnect manages IPv6
traffic when the ASA is only expecting IPv4 traffic using the Client Bypass Protocol
setting.
When the AnyConnect client makes a VPN connection to the ASA,
the ASA can assign the client an IPv4, IPv6, or both an IPv4 and IPv6 address.
If Client Bypass Protocol is enabled for an IP protocol and an
address pool is not configured for that protocol (in other words, no IP address for
that protocol was assigned to client by the ASA), any IP traffic using that protocol
will not be sent through the VPN tunnel. It will be sent outside the tunnel.
If Client Bypass Protocol is disabled, and an address pool is
not configured for that protocol, the client drops all traffic for that IP protocol
once the VPN tunnel is established.
For example, assume that the ASA assigns only an IPv4 address
to an AnyConnect connection and the endpoint is dual stacked. When the endpoint
attempts to reach an IPv6 address, if Client Bypass Protocol is disabled, the IPv6
traffic is dropped. If Client Bypass Protocol is enabled, the IPv6 traffic is sent
from the client in the clear.
If establishing an IPsec tunnel (as opposed to an SSL connection), the ASA is not
notified whether or not IPv6 is enabled on the client, so ASA always pushes down the
client bypass protocol setting.
You configure the Client Bypass Protocol on the ASA in the
group policies.
Procedure
| Step 1 |
In ASDM go to |
| Step 2 |
Select a group policy and click |
| Step 3 |
Select . |
| Step 4 |
Next to Client Bypass |
| Step 5 |
Choose one of these options:
|
| Step 6 |
Click OK. |
| Step 7 |
Click Apply. |
Configure a Client
Firewall with Local Printer and Tethered Device Support
See the Client Firewall with Local Printer and Tethered Device Support section in the Cisco ASA Series Configuration Guide.
Split DNS
When split DNS is configured in the
Network (Client) Access group policy, AnyConnect tunnels specific DNS queries to the
private DNS server (also configured in the group policy). All other DNS queries go to
the DNS resolver on the client operating system, in the clear, for DNS resolution. If
split DNS is not configured, AnyConnect tunnels all DNS queries.
If split DNS is not configured, AnyConnect tunnels all DNS queries.
Requirements for
Split DNS
Split DNS supports
standard and update queries (including A, AAAA, NS, TXT, MX, SOA, ANY, SRV, PTR, and
CNAME). PTR queries matching any of the tunneled networks are allowed through the
tunnel.
-
Limited support is available on Linux, namely only tunneled DNS requests
are subject to the split DNS policy. Consequently, some DNS requests
sent outside the tunnel may not comply with the split DNS policy.
For macOS, AnyConnect can use true split-DNS for a certain IP
protocol only if one of the following conditions is met:
-
Split-DNS is configured for one IP protocol (such as
IPv4), and Client Bypass Protocol is configured for the other IP protocol
(such as IPv6) in the group policy (with no address pool configured for the
latter IP protocol). -
Split-DNS is configured for both IP protocols.
Configure Split DNS for Split Include Tunneling
To configure split DNS for split include tunneling in the group policy,
do the following:
Procedure
| Step 1 |
Configure at least one DNS server. See the Configure Server Attributes for an Internal Ensure the private DNS servers specified do not overlap with the DNS |
| Step 2 |
Configure split-include tunneling: On the Configuration Split-DNS does not support the |
| Step 3 |
On the Configuration > Remote Access VPN |
What to do next
After making changes to the group policy in ASDM, be sure the
group policy is associated with a Connection Profile in Configuration > Remote Access VPN > Network (Client)
Access > AnyConnect Connection Profiles > Add/Edit > Group
Policy.
Verify Split DNS Using AnyConnect Logs
Check Which Domains Use Split DNS
You can use any tool or application that relies on the
operating system’s DNS resolver for domain name resolution. For example, you can use
a ping or web browser to test the split DNS solution. Other tools such as nslookup
or dig circumvent the OS DNS resolver.
To use the client to check which domains are used for split
DNS, follow these steps:
Procedure
| Step 1 |
Run |
||
| Step 2 |
Establish a VPN connection and again check the domains Those extra domains added after establishing the tunnel
|
Manage VPN Authentication
Important Security
Considerations
gateway
-
because of the possibility that a user could inadvertently configure a
browser to trust a certificate on a rogue server, and -
because of the inconvenience to users of having to respond to a security
warning when connecting to your secure gateway.
We strongly recommend that you enable Strict Certificate Trust for the AnyConnect client. To
configure Strict Certificate Trust, see the Local Policy
Parameters and Values section: Local Policy Preferences.
Configure Server Certificate Handling
Server Certificate
Verification
-
The AnyConnect
client does not support certificate verification using certificate revocation
lists (CRL).Many sites
position the Certificate Authority they use to validate server certificates
inside the corporate network. That means that a client cannot verify CRL when
it is trying to connect to a headend, since the CRL is not accessible on the
public network. The client operating system can be configured to verify CRL in
Windows and Mac OS X, but we ignore that setting. -
(Windows only) For both SSL and IPsec VPN connections, you have the
option to perform Certificate Revocation List (CRL) checking. When enabled in
the profile editor, AnyConnect retrieves the updated CRL for all certificates
in the chain. It then verifies whether the certificate in question is among
those revoked certificates which should no longer be trusted; and if found to
be a certificate revoked by the Certificate Authority, it does not connect.
Refer to
Local Policy Preferences
for further information. -
When a user connects to an ASA that is configured with a server
certificate, the checkbox to trust and import that certificate will still
display, even if there is a problem with the trust chain (Root, Intermediate,
etc.) If there are any other certificate problems, that checkbox will not
display. -
SSL connections being performed via FQDN do not make a secondary
server certificate verification with the FQDN’s resolved IP address for name
verification if the initial verification using the FQDN fails. -
IPsec and SSL connections require that if a server
certificate contains Key Usage, the attributes must contain DigitalSignature AND
(KeyAgreement OR KeyEncipherment). If the server certificate contains an EKU,
the attributes must contain serverAuth (for SSL and IPsec) or ikeIntermediate
(for IPsec only). Note that server certificates are not required to have a KU or
an EKU to be accepted. -
IPsec and SSL connections perform name verification on server certificates. The following rules are applied for the purposes
of IPsec and SSL name verification:-
If a Subject Alternative Name extension is present with relevant
attributes, name verification is performed solely against the Subject
Alternative Name. Relevant attributes include DNS Name attributes for all
certificates, and additionally include IP address attributes if the connection
is being performed to an IP address. -
If a Subject Alternative Name extension is not present, or is
present but contains no relevant attributes, name verification is performed
against any Common Name attributes found in the Subject of the certificate. -
If a certificate uses a wildcard for the purposes of name
verification, the wildcard must be in the first (left-most) subdomain only, and
additionally must be the last (right-most) character in the subdomain. Any
wildcard entry not in compliance is ignored for the purposes of name
verification.
-
-
For OSX, expired certificates are displayed only when Keychain
Access is configured to “Show Expired Certificates.” Expired certificates are
hidden by default, which may confuse users.
Invalid Server
Certificate Handling
In response to the increase of targeted attacks against mobile
users on untrusted networks, we have improved the security protections in the
client to help prevent serious security breaches. The default client behavior
has been changed to provide an extra layer of defense against Man-in-the-middle
attacks.
User
Interaction
When the user tries to connect to a secure gateway, and there is
a certificate error (due to expired, invalid date, wrong key usage, or CN
mismatch), the user sees a red-colored dialog with Change Settings and Keep Me
Safe buttons.
Note |
The dialogs for Linux may look different from the ones shown in |
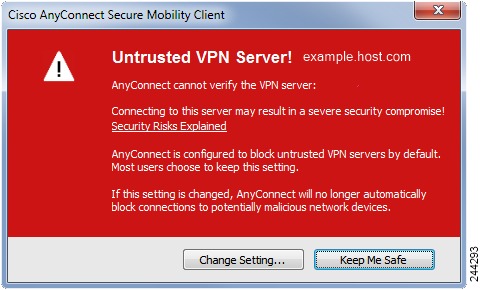
-
Clicking
Keep Me Safe cancels the connection. -
Clicking
Change Settings opens AnyConnect’s Advanced > VPN
>Preferences dialog, where the user can enable connections to untrusted
servers. The current connection attempt is canceled.
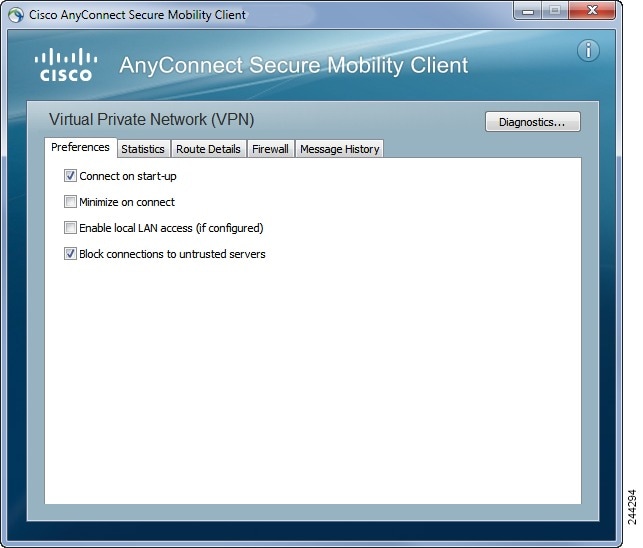
If the user un-checks
Block
connections to untrusted servers, and the only issue with the
certificate is that the CA is untrusted, then the next time the user attempts
to connect to this secure gateway, the user will not see the Certificate
Blocked Error Dialog dialog; they only see the following dialog:

If the user checks
Always trust this VPN server and import the certificate,
then future connections to this secure gateway will not prompt the user to
continue.
Note |
If the user checks Block connections to |
Improved
Security Behavior
When the client accepts an invalid server certificate, that
certificate is saved in the client’s certificate store. Previously, only the
thumbprint of the certificate was saved. Note that invalid certificates are
saved only when the user has elected to always trust and import invalid server
certificates.
There is no administrative override to make the end user less
secure automatically. To completely remove the preceding security decisions
from your end users, enable
Strict Certificate Trust in the user’s local policy file.
When Strict Certificate Trust is enabled, the user sees an error message, and
the connection fails; there is no user prompt.
For information about enabling Strict Certificate Trust in the
local policy file, see the
AnyConnect
Local Policy Parameters and Values section:
Local Policy Preferences.
Guidelines and
Limitations
Invalid server certificates are rejected when:
-
Always On is enabled in the AnyConnect VPN client profile and is
not turned off by an applied group policy or DAP. -
The client has a Local Policy with Strict Certificate Trust
enabled. -
AnyConnect is configured to start before logon.
-
A client certificate from the machine certificate store is used
for authentication.
Configure Certificate-Only Authentication
You can specify whether you want users to authenticate using
AAA with a username and password or using a digital certificate (or both). When you
configure certificate-only authentication, users can connect with a digital
certificate and are not required to provide a user ID and password.
To support certificate-only authentication in an environment
where multiple groups are used, you may provision more than one group-url. Each
group-url would contain a different client profile with some piece of customized
data that would allow for a group-specific certificate map to be created. For
example, the Department_OU value of Engineering could be provisioned on the ASA to
place the user in this group when the certificate from this process is presented to
the ASA.
Note |
The certificate used to authenticate the client to the |
Procedure
| Step 1 |
Go to . Select a connection profile and click Edit. The Edit AnyConnect |
| Step 2 |
If it is not already, click the Basic node of the navigation tree on the |
| Step 3 |
Click OK and |
Configure
Certificate Enrollment
The
Cisco AnyConnect Secure
Mobility Client
uses the Simple Certificate Enrollment Protocol (SCEP) to provision and renew a
certificate as part of client authentication. Certificate enrollment using SCEP
is supported by AnyConnect IPsec and SSL VPN connections to the ASA in the
following ways:
-
SCEP Proxy: The ASA acts as a proxy for SCEP requests and
responses between the client and the Certificate Authority (CA).-
The CA must be accessible to the ASA, not the AnyConnect client,
since the client does not access the CA directly. -
Enrollment is always initiated automatically by the client. No
user involvement is necessary.
-
-
Legacy SCEP: The AnyConnect client communicates with the CA directly to enroll and obtain a certificate.
-
The CA must be accessible to the AnyConnect client, not the ASA, through an established VPN tunnel or directly on the same
network the client is on. -
Enrollment is initiated automatically by the client and may be initiated manually by the user if configured.
-
SCEP Proxy
Enrollment and Operation
The following steps describe how a certificate is obtained and a
certificate-based connection is made when AnyConnect and the ASA are configured
for SCEP Proxy.
-
The user connects to the ASA headend using a connection profile
configured for both certificate and AAA authentication. The ASA requests a
certificate and AAA credentials for authentication from the client. -
The user enters his/her AAA credentials, but a valid certificate
is not available. This situation triggers the client to send an automatic SCEP
enrollment request after the tunnel has been established using the entered AAA
credentials. -
The ASA forwards the enrollment request to the CA and returns
the CA’s response to the client. -
If SCEP enrollment is successful, the client presents a
(configurable) message to the user and disconnects the current session. The
user can now connect using certificate authentication to an ASA tunnel group.If SCEP enrollment fails, the client displays a (configurable)
message to the user and disconnects the current session. The user should
contact his/her administrator.
Other SCEP Proxy operational considerations:
-
If configured to do so, the client automatically renews the
certificate before it expires, without user intervention. -
SCEP Proxy enollment uses SSL for both SSL and IPsec tunnel
certificate authentication.
Legacy SCEP
Enrollment and Operation
The following steps describe how a certificate is obtained and a
certificate-based connection is made when AnyConnect is configured for Legacy
SCEP.
-
When the user initiates a connection to the ASA headend using a
tunnel group configured for certificate authentication, the ASA requests a
certificate for authentication from the client. -
A valid certificate is not available on the client. The
connection cannot be established. This certificate failure indicates that SCEP
enrollment needs to occur. -
The user must then initiate a connection to the ASA headend
using a tunnel group configured for AAA authentication only whose address
matches the Automatic SCEP Host configured in the client profile. The ASA
requests the AAA credentials from the client. -
The client presents a dialog box for the user to enter AAA
credentials.If the client is configured for manual enrollment and the client
knows it needs to initiate SCEP enrollment (see Step 2), a
Get Certificate button displays on the credentials
dialog box. If the client has direct access to the CA on his/her network, the
user will be able to manually obtain a certificate by clicking this button at
this time.
Note
If access to the CA relies on the VPN tunnel being established,
manual enrollment cannot be done at this time because there is currently no VPN
tunnel established (AAA credentials have not been entered).
-
The user enters AAA credentials and establishes a VPN
connection. -
The client knows it needs to initiate SCEP enrollment (see Step
2). It initiates an enrollment request to the CA through the established VPN
tunnel, and a response is received from the CA. -
If SCEP enrollment is successful, the client presents a
(configurable) message to the user and disconnects the current session. The
user can now connect using certificate authentication to an ASA tunnel group.If SCEP enrollment fails, the client displays a (configurable)
message to the user and disconnects the current session. The user should
contact his/her administrator.
Other Legacy SCEP operational considerations:
-
If the client is configured for manual enrollment and the
Certificate Expiration Threshold value is met, a
Get Certificate button displays on a presented
tunnel group selection dialog box. Users can manually renew their certificate
by clicking this button. -
If the certificate expires and the client no longer has a valid
certificate, the client repeats the Legacy SCEP enrollment process.
Certificate
Authority Requirements
-
All SCEP-compliant CAs, including IOS CS, Windows Server 2003
CA, and Windows Server 2008 CA, are supported. -
The CA must be in auto-grant mode; polling for certificates is
not supported. -
You can configure some CAs to email users an enrollment password for an additional layer of security. The CA password is the
challenge password or token that is sent to the certificate authority to identify the user. The password can then be configured
in the AnyConnect client profile, which becomes part of SCEP request that the CA verifies before granting the certificate.
Guidelines for Certificate Enrollment
-
Clientless (browser-based) VPN access to the ASA does not support SCEP proxy, but WebLaunch (clientless-initiated AnyConnect)
does. -
ASA Load balancing is supported with SCEP enrollment.
-
The ASA does not indicate why an enrollment failed, although it does log the requests received from the client. Connection
problems must be debugged on the CA or the client. -
Certificate-Only Authentication and Certificate Mapping on the ASA:
To support certificate-only authentication in an environment where multiple groups are used, you may provision more than one
group-url. Each group-url would contain a different client profile with some piece of customized data that would allow for
a group-specific certificate map to be created. For example, the Department_OU value of Engineering could be provisioned on
the ASA to place the user in this tunnel group when the certificate from this process is presented to the ASA. -
Identifying Enrollment Connections to Apply Policies:
On the ASA, the aaa.cisco.sceprequired attribute can be used to catch the enrollment connections and apply the appropriate
policies in the selected DAP record. -
Windows Certificate Warning:
When Windows clients first attempt to retrieve a certificate from a certificate authority they may see a warning. When prompted,
users must click Yes. This allows them to import the root certificate. It does not affect their ability to connect with the
client certificate.
Configure SCEP Proxy Certificate Enrollment
Configure a VPN Client Profile for SCEP Proxy Enrollment
Procedure
| Step 1 |
Open the VPN |
||
| Step 2 |
Select Certificate |
||
| Step 3 |
Configure the Certificate Contents to be requested in the enrollment
|
Configure the ASA to Support SCEP Proxy Enrollment
For SCEP Proxy, a single ASA connection profile supports
certificate enrollment and the certificate authorized VPN connection.
Procedure
| Step 1 |
Create a group policy, for example, cert_group. Set the
|
| Step 2 |
Create a connection profile for certificate enrollment
|
Configure Legacy SCEP Certificate Enrollment
Configure a VPN Client Profile for Legacy SCEP Enrollment
Procedure
| Step 1 |
Open the VPN |
||
| Step 2 |
Select Certificate |
||
| Step 3 |
Specify an Automatic Enter the FQDN or IP address, and the alias of the When the user initiates the connection, the address |
||
| Step 4 |
Configure the Certificate Authority attributes:
|
||
| Step 5 |
Configure which Certificate Contents to request in the enrollment certificate.
|
||
| Step 6 |
(Optional) Check Display |
||
| Step 7 |
(Optional) Enable SCEP for a specific host in the server
|
Configure the ASA to Support Legacy SCEP Enrollment
For Legacy SCEP on the ASA, you must create a connection
profile and group policy for certificate enrollment and a second connection profile
and group policy for the certificate authorized VPN connection.
Procedure
| Step 1 |
Create a group policy for enrollment, for example, On the Advanced > AnyConnect Client pane, uncheck |
| Step 2 |
Create a second group policy for authorization, for |
| Step 3 |
Create a connection profile for enrollment, for example,
|
| Step 4 |
Create a connection profile for authorization, for
|
| Step 5 |
(Optional) On the General pane of each group policy, set |
Set Up a Windows
2008 Server Certificate Authority for SCEP
If your Certificate Authority software is running on a Windows
2008 server, you may need to make one of the following configuration changes to
the server to support SCEP with AnyConnect.
Disable the SCEP Password on the Certificate Authority
The following steps describe how to disable the SCEP challenge
password, so that clients will not need to provide an out-of-band password before
SCEP enrollment.
Procedure
| Step 1 |
On the Certificate Authority server, launch the Registry |
| Step 2 |
Navigate to If the EnforcePassword key does not exist, create it as |
| Step 3 |
Edit EnforcePassword, and set it to ‘0’. If it does not |
| Step 4 |
Exit regedit, and reboot the certificate authority |
Setting the SCEP Template on the Certificate Authority
The following steps describe how to create a certificate
template, and assign it as the default SCEP template.
Procedure
| Step 1 |
Launch the Server Manager. You can do this by selecting |
| Step 2 |
Expand Roles > Certificate Services (or AD Certificate |
| Step 3 |
Navigate to CA Name > Certificate Templates. |
| Step 4 |
Right-click Certificate Templates > |
| Step 5 |
From the Cert Templates Console, right-click User |
| Step 6 |
Choose Windows Server |
| Step 7 |
Change the template display name to something |
| Step 8 |
Adjust the Validity Period for your site. Most sites |
| Step 9 |
On the Cryptography tab, set the minimum key size for |
| Step 10 |
On the Subject Name tab, select Supply in Request. |
| Step 11 |
On the Extensions tab, set the Application Policies to
These values are valid for SSL or IPsec. |
| Step 12 |
Click Apply, |
| Step 13 |
From Server manager > Certificate Services-CA Name, |
| Step 14 |
Edit the registry. You can do this by selecting Start |
| Step 15 |
Navigate to |
| Step 16 |
Set the value of the following three keys to NDES-IPSec-SSL.
|
| Step 17 |
Click Save, |
Configure a Certificate Expiration Notice
Configure AnyConnect to warn users that their authentication
certificate is about to expire. The Certificate
Expiration Threshold setting specifies the number of days before the
certificate’s expiration date that AnyConnect warns users that their certificate is
expiring. AnyConnect warns the user upon each connect until the certificate has
actually expired or a new certificate has been acquired.
Note |
The Certificate Expiration Threshold feature cannot be used |
Procedure
| Step 1 |
Open the VPN |
| Step 2 |
Select Certificate |
| Step 3 |
Specify a Certificate This is the number of days before the certificate The default is 0 (no warning displayed). The range is 0 |
| Step 4 |
Click OK. |
Configure Certificate Selection
The following steps show all the places in the AnyConnect
profiles where you configure how certificates are searched for and how they are
selected on the client system. None of the steps are required, and if you do not
specify any criteria, AnyConnect uses default key matching.
AnyConnect reads the browser
certificate stores on Windows. For macOS and Unix, you must create a Privacy
Enhanced Mail (PEM) formatted file store.
Procedure
| Step 1 |
Windows and macOS:Configure Which Certificate Stores to Use Specify which certificate stores are used by AnyConnect in the VPN client |
| Step 2 |
Windows Only: Prompt Windows Users to Select Authentication Certificate Configure AnyConnect to present a list of valid certificates to users and let |
| Step 3 |
For macOS and Linux environments: Create a PEM Certificate Store for macOS and Linux |
| Step 4 |
For macOS and Linux environments: Select which certificate stores to exclude in |
| Step 5 |
Configure Certificate Matching Configure keys that AnyConnect tries to match, when searching for a |
Configure Which Certificate Stores to Use
Windows provides separate
certificate stores for the local machine and for the current user. Specify which
certificate stores are used by AnyConnect in the VPN client profile. By default, it
searches both, but you can configure AnyConnect to use only one.
Users with administrative
privileges on the computer have access to both certificate stores. Users without
administrative privileges only have access to the user certificate store. Usually,
Windows users do not have administrative privileges. Selecting
Certificate Store Override allows AnyConnect to access
the machine store, even when the user does not have administrative privileges.
Note |
Access-control for the machine store can vary depending on the Windows version and |
The following table describes how
AnyConnect searches for certificates on a client based on what
Certificate Store is searched, and whether
Certificate Store Override is checked.
|
Certificate Store Setting |
Certificate Store Override Setting |
AnyConnect Search Strategy | ||
|---|---|---|---|---|
|
All (for Windows) |
cleared |
AnyConnect searches all certificate stores. This setting is the default. This setting |
||
|
All (for Windows) |
checked |
AnyConnect searches all certificate stores. |
||
|
Machine (not a multi-cert option) |
checked |
AnyConnect searches the machine certificate |
||
|
Machine (not a multi-cert option) |
cleared |
AnyConnect searches the machine certificate store. AnyConnect is
|
||
|
User (for Windows) |
does not apply |
AnyConnect searches in the user certificate |
||
|
All (for Linux) |
does not apply |
AnyConnect uses client certificates from both system and user PEM |
||
|
Machine (for Linux) |
does not apply |
AnyConnect uses client certificate stores only from the system |
||
|
User (for Linux) |
does not apply |
AnyConnect uses client certificates only from the user PEM file |
With Basic Certificate Authentication
Procedure
| Step 1 |
Set Certificate Store.
|
| Step 2 |
Choose Certificate |
Prompt Windows Users to Select Authentication Certificate
You can configure the AnyConnect to present a list of valid
certificates to users and let them choose the certificate to authenticate the
session. An expired certificate is not necessarily considered invalid. For example,
if you are using SCEP, the server might issue a new certificate to the client.
Eliminating expired certificates might keep a client from connecting at all; thus
requiring manual intervention and out-of-band certificate distribution. AnyConnect
only restricts the client certificate based on security-related properties, such as
key usage, key type and strength, and so on, based on configured certificate
matching rules. This configuration is available only for Windows. By default, user
certificate selection is disabled.
Procedure
| Step 1 |
Open the VPN |
| Step 2 |
To enable certificate selection, uncheck Disable Certificate Selection. |
| Step 3 |
Uncheck User |
Create a PEM Certificate Store for macOS and Linux
AnyConnect supports certificate retrieval from a Privacy
Enhanced Mail (PEM) formatted file store. AnyConnect reads PEM-formatted
certificate files from the file system on the remote computer, verifies, and
signs them.
Before you begin
In order for the client to acquire the appropriate certificates
under all circumstances, ensure that your files meet the following
requirements:
-
All certificate files must end with the extension .pem.
-
All private key files must end with the extension .key.
-
A client certificate and its corresponding private key must have
the same filename. For example: client.pem and client.key.
Tip
Instead of keeping copies of the PEM files, you can use soft links to PEM files.

To create the PEM file certificate store, create the paths and
folders listed below. Place the appropriate certificates in these folders:
|
PEM File Certificate Store Folders |
Type of Certificates Stored |
||
|---|---|---|---|
|
~/.cisco/certificates/ca
|
Trusted CA and root certificates |
||
|
~/.cisco/certificates/client |
Client certificates |
||
|
~/.cisco/certificates/client/private |
Private keys |
Machine certificates are the same as
PEM file certificates, except for the root directory. For machine certificates,
substitute /opt/.cisco for ~/.cisco. Otherwise, the paths, folders, and types of
certificates listed apply.
Configure
Certificate Matching
AnyConnect can limit its search of certificates to those
certificates that match a specific set of keys. Certificate matchings are
global criteria that are set in an AnyConnect VPN client profile, in the
Certificate Matching
pane. The criteria are:
-
Key Usage
-
Extended Key Usage
-
Distinguished Name
Configure Key
Usage
Selecting the
Key Usage keys limits the certificates that
AnyConnect can use to those certificates that have at least one of the selected
keys. The supported set is listed in the
Key Usage list on the VPN client profile, and it
includes:
-
DECIPHER_ONLY
-
ENCIPHER_ONLY
-
CRL_SIGN
-
KEY_CERT_SIGN
-
KEY_AGREEMENT
-
DATA_ENCIPHERMENT
-
KEY_ENCIPHERMENT
-
NON_REPUDIATION
-
DIGITAL_SIGNATURE
If one or more criteria are specified, a certificate must match
at least one to be considered a matching certificate.
Configure Extended
Key Usage
Selecting the
Extended Key Usage keys limits the certificates that
AnyConnect can use to the certificates that have these keys. The following
table lists the well-known set of constraints with their corresponding object
identifiers (OIDs).
|
Constraint |
OID |
|---|---|
|
ServerAuth |
1.3.6.1.5.5.7.3.1 |
|
ClientAuth |
1.3.6.1.5.5.7.3.2 |
|
CodeSign |
1.3.6.1.5.5.7.3.3 |
|
EmailProtect |
1.3.6.1.5.5.7.3.4 |
|
IPSecEndSystem |
1.3.6.1.5.5.7.3.5 |
|
IPSecTunnel |
1.3.6.1.5.5.7.3.6 |
|
IPSecUser |
1.3.6.1.5.5.7.3.7 |
|
TimeStamp |
1.3.6.1.5.5.7.3.8 |
|
OCSPSign |
1.3.6.1.5.5.7.3.9 |
|
DVCS |
1.3.6.1.5.5.7.3.10 |
|
IKE Intermediate |
1.3.6.1.5.5.8.2.2 |
Configure Custom
Extended Match Key
All other OIDs (such as 1.3.6.1.5.5.7.3.11, used in some
examples in this document) are considered “custom.” As an administrator, you
can add your own OIDs if the OID that you want is not in the well-known set.
Configure
Certificate Distinguished Name
The
Distinguished Name table contains certificate
identifiers that limit the certificates that the client can use to the
certificates that match the specified criteria and criteria match conditions.
Click the
Add button to add criteria to the list and to set a
value or wildcard to match the contents of the added criteria.
|
Identifier |
Description |
|---|---|
|
CN |
SubjectCommonName |
|
SN |
SubjectSurName |
|
GN |
SubjectGivenName |
|
N |
SubjectUnstructName |
|
I |
SubjectInitials |
|
GENQ |
SubjectGenQualifier |
|
DNQ |
SubjectDnQualifier |
|
C |
SubjectCountry |
|
L |
SubjectCity |
|
SP |
SubjectState |
|
ST |
SubjectState |
|
O |
SubjectCompany |
|
OU |
SubjectDept |
|
T |
SubjectTitle |
|
EA |
SubjectEmailAddr |
|
DC |
DomainComponent |
|
ISSUER-CN |
IssuerCommonName |
|
ISSUER-SN |
IssuerSurName |
|
ISSUER-GN |
IssuerGivenName |
|
ISSUER-N |
IssuerUnstructName |
|
ISSUER-I |
IssuerInitials |
|
ISSUER-GENQ |
IssuerGenQualifier |
|
ISSUER-DNQ |
IssuerDnQualifier |
|
ISSUER-C |
IssuerCountry |
|
ISSUER-L |
IssuerCity |
|
ISSUER-SP |
IssuerState |
|
ISSUER-ST |
IssuerState |
|
ISSUER-O |
IssuerCompany |
|
ISSUER-OU |
IssuerDept |
|
ISSUER-T |
IssuerTitle |
|
ISSUER-EA |
IssuerEmailAddr |
|
ISSUER-DC |
IssuerDomainComponent |
Distinguished
Name can contain zero or more matching criteria. A certificate must
match all specified criteria to be considered a matching certificate.
Distinguished Name matching specifies that a
certificate must or must not have the specified string, and whether wild
carding for the string is allowed.
VPN Authentication
Using SDI Token (SoftID) Integration
AnyConnect integrates support for RSA SecurID client software
versions 1.1 and later running on Windows 7 x86 (32-bit) and x64 (64-bit).
RSA SecurID software authenticators reduce the number of items a
user has to manage for safe and secure access to corporate assets. RSA SecurID
Software Tokens residing on a remote device generate a random one-time-use
passcode that changes every 60 seconds. The term SDI stands for Security
Dynamics, Inc. technology, which refers to this one-time password generation
technology that uses hardware and software tokens.
Typically, users make an AnyConnect connection by clicking the
AnyConnect icon in the tools tray, selecting the connection profile with which
they wish to connect, and then entering the appropriate credentials in the
authentication dialog box. The login (challenge) dialog box matches the type of
authentication configured for the tunnel group to which the user belongs. The
input fields of the login dialog box clearly indicate what kind of input is
required for authentication.
For SDI authentication, the remote user enters a PIN (Personal
Identification Number) into the AnyConnect software interface and receives an
RSA SecurID passcode. After the user enters the passcode into the secured
application, the RSA Authentication Manager validates the passcode and allows
the user to gain access.
Users who use RSA SecurID hardware or software tokens see input
fields indicating whether the user should enter a passcode or a PIN, a PIN, or
a passcode and the status line at the bottom of the dialog box provides further
information about the requirements. The user enters a software token PIN or
passcode directly into the AnyConnect user interface.
The appearance of the initial login dialog box depends on the
secure gateway settings: the user can access the secure gateway either through
the main login page, the main index URL, a tunnel-group login page, or a tunnel
group URL (URL/tunnel-group). To access the secure gateway via the main login
page, the “Allow user to select connection” check box must be set in the
Network (Client) Access AnyConnect Connection Profiles page. In either case,
the secure gateway sends the client a login page. The main login page contains
a drop-down list in which the user selects a tunnel group; the tunnel-group
login page does not, since the tunnel-group is specified in the URL.
In the case of a main login page (with a drop-down list of
connection profiles or tunnel groups), the authentication type of the default
tunnel group determines the initial setting for the password input field label.
For example, if the default tunnel group uses SDI authentication, the field
label is “Passcode;” but if the default tunnel group uses NTLM authentication,
the field label is “Password.” In Release 2.1 and later, the field label is not
dynamically updated with the user selection of a different tunnel group. For a
tunnel-group login page, the field label matches the tunnel-group requirements.
The client supports input of RSA SecurID Software Token PINs in
the password input field. If the RSA SecurID Software Token software is
installed and the tunnel-group authentication type is SDI, the field label is
“Passcode” and the status bar states “Enter a username and passcode or software
token PIN.” If a PIN is used, subsequent consecutive logins for the same tunnel
group and username have the field label “PIN.” The client retrieves the
passcode from the RSA SecurID Software Token DLL using the entered PIN. With
each successful authentication, the client saves the tunnel group, the
username, and authentication type, and the saved tunnel group becomes the new
default tunnel group.
AnyConnect accepts passcodes for any SDI authentication. Even
when the password input label is “PIN,” the user may still enter a passcode as
instructed by the status bar. The client sends the passcode to the secure
gateway as is. If a passcode is used, subsequent consecutive logins for the
same tunnel group and username have the field label “Passcode.”
The RSASecureIDIntegration profile setting has three possible
values:
-
Automatic—The client first attempts one method, and if it fails,
the other method is tried. The default is to treat the user input as a token
passcode (HardwareToken), and if that fails, treat it as a software token pin
(SoftwareToken). When authentication is successful, the successful method is
set as the new SDI Token Type and cached in the user preferences file. For the
next authentication attempt, the SDI Token Type defines which method is
attempted first. Generally, the token used for the current authentication
attempt is the same token used in the last successful authentication attempt.
However, when the username or group selection is changed, it reverts to
attempting the default method first, as shown in the input field label.
Note
The SDI Token Type only has meaning for the automatic setting.
You can ignore logs of the SKI Token Type when the authentication mode is not
automatic. HardwareToken as the default avoids triggering next token mode.
-
SoftwareToken—The client always interprets the user input as a
software token PIN, and the input field label is “PIN:”. -
HardwareToken—The client always interprets the user input as a
token passcode, and the input field label is “Passcode:”.
Note |
AnyConnect does not support token selection from multiple tokens |
Categories of SDI
Authentication Exchanges
All SDI authentication exchanges fall into one of the following
categories:
-
Normal SDI Authentication Login
-
New User mode
-
New PIN mode
-
Clear PIN mode
-
Next Token Code mode
Normal SDI
Authentication Login
A normal login challenge is always the first challenge. The SDI
authentication user must provide a user name and token passcode (or PIN, in the
case of a software token) in the username and passcode or PIN fields,
respectively. The client returns the information to the secure gateway
(central-site device), and the secure gateway verifies the authentication with
the authentication server (SDI or SDI via RADIUS proxy).
If the authentication server accepts the authentication request,
the secure gateway sends a success page back to the client, and the
authentication exchange is complete.
If the passcode is not accepted, the authentication fails, and
the secure gateway sends a new login challenge page, along with an error
message. If the passcode failure threshold on the SDI server has been reached,
then the SDI server places the token into next token code mode.
New User, Clear
PIN, and New PIN Modes
The PIN can be cleared only on the SDI server and only by the
network administrator.
In the New User, Clear PIN, and New PIN modes, AnyConnect caches
the user-created PIN or system-assigned PIN for later use in the “next
passcode” login challenge.
Clear PIN mode and New User mode are identical from the point of
view of the remote user and are both treated the same by the secure gateway. In
both cases, the remote user either must enter a new PIN or be assigned a new
PIN by the SDI server. The only difference is in the user response to the
initial challenge.
For New PIN mode, the existing PIN is used to generate the
passcode, as it would be in any normal challenge. For Clear PIN mode, no PIN is
used at all for hardware tokens, with the user entering just a token code. A
PIN of eight consecutive zeros (00000000) is used to generate a passcode for
RSA software tokens. In either case, the SDI server administrator must inform
the user of what, if any, PIN value to use.
Adding a new user to an SDI server has the same result as
clearing the PIN of an existing user. In both cases, the user must either
provide a new PIN or be assigned a new PIN by the SDI server. In these modes,
for hardware tokens, the user enters just a token code from the RSA device. In
either case, the SDI server administrator must inform the user of what, if any,
PIN value to use.
Creating a New
PIN
If there is no current PIN, the SDI server requires that one of
the following conditions be met, depending on how the system is configured:
-
The system must assign a new PIN to the user (Default)
-
The user must create a new PIN
-
The user can choose whether to create a PIN or have the system
assign it
If the SDI server is configured to allow the remote user to
choose whether to create a PIN or have the system assign a PIN, the login
screen presents a drop-down list showing the options. The status line provides
a prompt message.
For a system-assigned PIN, if the SDI server accepts the
passcode that the user enters on the login page, then the secure gateway sends
the client the system-assigned PIN. The client sends a response back to the
secure gateway, indicating that the user has seen the new PIN, and the system
continues with a “next passcode’ challenge.
If the user chooses to create a new PIN, AnyConnect presents a
dialog box on which to enter that PIN. The PIN must be a number from 4 to 8
digits long. Because the PIN is a type of password, anything the user enters
into these input fields is displayed as asterisks.
With RADIUS proxy, the PIN confirmation is a separate challenge,
subsequent to the original dialog box. The client sends the new PIN to the
secure gateway, and the secure gateway continues with a “next passcode”
challenge.
“Next Passcode”
and “Next Token Code” Challenges
For a “next passcode” challenge, the client uses the PIN value
cached during the creation or assignment of a new PIN to retrieve the next
passcode from the RSA SecurID Software Token DLL and return it to the secure
gateway without prompting the user. Similarly, in the case of a “next Token
Code” challenge for a software token, the client retrieves the next Token Code
from the RSA SecurID Software Token DLL.
Compare Native SDI with RADIUS SDI
The network administrator can configure the secure
gateway to allow SDI authentication in either of the following modes:
-
Native SDI refers to the native ability in the
secure gateway to communicate directly with the SDI server for handling SDI
authentication. -
RADIUS SDI refers to the process of the secure
gateway performing SDI authentication using a RADIUS SDI proxy, which
communicates with the SDI server.
Native SDI and RADIUS SDI appear identical to the
remote user. Because the SDI messages are configurable on the SDI server, the
message text on the ASA must match the message text on the SDI server.
Otherwise, the prompts displayed to the remote client user might not be
appropriate for the action required during authentication. AnyConnect might
fail to respond and authentication might fail.
RADIUS SDI challenges, with minor exceptions,
essentially mirror native SDI exchanges. Since both ultimately communicate with
the SDI server, the information needed from the client and the order in which
that information is requested is the same.
During authentication, the RADIUS server presents
access challenge messages to the ASA. Within these challenge messages are reply
messages containing text from the SDI server. The message text is different
when the ASA is communicating directly with an SDI server from when
communicating through the RADIUS proxy. Therefore, in order to appear as a
native SDI server to AnyConnect, the ASA must interpret the messages from the
RADIUS server.
Also, because the SDI messages are configurable on
the SDI server, the message text on the ASA must match (in whole or in part)
the message text on the SDI server. Otherwise, the prompts displayed to the
remote client user may not be appropriate for the action required during
authentication. AnyConnect might fail to respond and authentication might fail.
Configure the ASA to Support RADIUS/SDI Messages
To configure the ASA to interpret SDI-specific RADIUS reply
messages and prompt the AnyConnect user for the appropriate action, you must
configure a connection profile (tunnel group) to forward RADIUS reply messages in a
manner that simulates direct communication with an SDI server. Users authenticating
to the SDI server must connect over this connection profile.
Procedure
| Step 1 |
Go to . |
|||||||||||||||||||||||||||||
| Step 2 |
Select the connection profile you want to configure to |
|||||||||||||||||||||||||||||
| Step 3 |
In the Edit AnyConnect |
|||||||||||||||||||||||||||||
| Step 4 |
Check Enable the display |
|||||||||||||||||||||||||||||
| Step 5 |
Click OK. |
|||||||||||||||||||||||||||||
| Step 6 |
Choose. |
|||||||||||||||||||||||||||||
| Step 7 |
Click Add to |
|||||||||||||||||||||||||||||
| Step 8 |
Configure the AAA server group in the Edit AAA Server |
|||||||||||||||||||||||||||||
| Step 9 |
In the AAA Server |
|||||||||||||||||||||||||||||
| Step 10 |
In the SDI Messages area, expand the Message Table area. Double-click a message The following table shows the message code, the default
|
|||||||||||||||||||||||||||||
| Step 11 |
Click OK, |
На чтение 4 мин. Просмотров 389 Опубликовано 15.05.2021
Мы здесь, чтобы предоставить вам простые пошаговые инструкции по установке Cisco Anyconnect VPN Client в Windows 10. Хотя последняя версия хорошо совместима с Windows 10, браузер Microsoft Edge не имеет необходимого подключаемого модуля для его автоматическая установка через Интернет. Следовательно, это руководство поможет вам установить его правильно.
Cisco Anyconnect VPN Client – это популярный простой и безопасный доступ к конечным точкам в нескольких местах по всему миру. Организация обеспечивает постоянное взаимодействие с пользователем на всех устройствах, как локальных, так и внешних, и упрощает управление с помощью одного агента.
Содержание
- Процедура установки Cisco Anyconnect VPN Client на Windows 10
- Следуйте приведенным ниже инструкциям, чтобы использовать Cisco Anyconnect VPN Client в Windows 10:
- Внимание
Процедура установки Cisco Anyconnect VPN Client на Windows 10
Вот способ установки VPN-клиента Cisco Anyconnect в Windows 10 –
Шаг 1. Щелкните меню «Пуск» и выберите «Microsoft Edge». ”Браузер из плиток меню, чтобы запустить его.

Шаг 2: Когда браузер откроется, скопируйте перейдите по следующей ссылке и вставьте ее в адресную строку:
https://anyc.vpn.gatech.edu. Нажмите Enter .
Примечание. – Вы также можете щелкнуть ссылку, чтобы открыть ее в другом браузере.
Шаг 3: Один раз страница входа закрывает вид, щелкните раскрывающееся меню рядом с Group и выберите из списка gatech-2fa-Duo .
Шаг 4: Далее введите свое имя пользователя и пароль в соответствующие поля.

Еще раз введите свой пароль.

Шаг 5. После успешной аутентификации учетных данных вы увидит баннер входа в систему. Нажмите «Продолжить», чтобы двигаться дальше.

Примечание. Для автоматической установки установщик быстро выполнит установку. попытаться обнаружить ActiveX и более поздние версии на Java. Поскольку в Microsoft Edge нет этого подключаемого модуля, вы увидите всплывающее окно с уведомлением о сбое. Поэтому щелкните ссылку, предоставленную опцией «Рабочий стол Windows» во всплывающем окне, чтобы загрузить приложения.

Шаг 6. После завершения загрузки нажмите Run на панели Downloads и следуйте инструкциям установщика на экране, чтобы продолжить установки.

Шаг 7: Выберите «Да», когда диалоговое окно с предупреждением UAC запрашивает ваше разрешение.
Шаг 8: Когда в мастере установки появится следующая страница, выберите вариант Далее для завершения установки.

Когда установка завершит свою работу, выберите Готово .

Следовательно, клиент Cisco Anyconnect VPN установлен в вашей Windows, и он будет доступен в меню” Пуск “..
Следуйте приведенным ниже инструкциям, чтобы использовать Cisco Anyconnect VPN Client в Windows 10:
Откройте меню «Пуск» и выберите Cisco AnyConnect Secure Mobility Client из списка для запуска.

Когда появится следующее всплывающее окно, выберите vpn.gatech.edu в разделе VPN и нажмите кнопку Connect , чтобы продолжить.

После появления всплывающего окна Credential щелкните раскрывающееся окно рядом с Group: и выберите gatech-2fa-Duo из меню.
После выбора «gatech-2fa-Duo» во всплывающем окне вы увидите несколько блоков, таких как имя пользователя, пароль и двухфакторный (второй пароль).
Введите имя пользователя GT и пароль GT в соответствующие поля.
В поле второго пароля введите любой из следующих кодов и нажмите кнопку «ОК», чтобы продолжить.
push, phone, phone2, phone3, phoneN

Мобильное приложение Duo сгенерирует код, поэтому вам нужно только нажать на опцию Key в правом верхнем углу.
Нажмите phone, phone2, phone3 ……. В серии phoneN отсутствует phone1, поскольку и phone, и phone1 являются справочными, и приложение сохраняет их в системе в соответствии с порядком. В случае phone1 система позвонит на ваш телефон (может быть мобильный телефон), а для Phone2 вы получите в своем офисе номер.
После проверки всех учетных данных вы увидите приветственный баннер. Нажмите кнопку «Принять», чтобы продолжить.

Таким образом, AnyConnect значок будет свернут в системном трее. Как только вы сделаете щелчок, он будет развернут. Щелкните значок «Шестеренка» в нижнем левом углу, чтобы просмотреть подробную информацию.

Если хотите чтобы разорвать соединение, просто нажмите кнопку «Отключить».

Это все о способе установки Cisco Клиент Anyconnect VPN в Windows 10.
Внимание
Полная инструкция посвящена установке клиента Cisco Anyconnect VPN Client в ПО Windows 10. Это действительно не влияет на компонент Start Before Logon . Фактически, это необходимо не для общей платформы, а для конкретных подразделений кампуса. Если вам нужен компонент, посетите эту ссылку, чтобы получить уникальные установочные пакеты. Кроме того, поскольку вы уже установили VPN-клиент, пакет «Начать перед входом в систему» также будет добавлен в следующее онлайн-обновление.
Отказ от ответственности: некоторые страницы этого сайта могут содержать партнерскую ссылку. На нашу редакцию это никак не влияет.
Хотите знать, как настроить Cisco VPN? Cisco — одно из самых узнаваемых имен в области сетевых технологий. Это имя стоит за большинством корпоративных маршрутизаторов, значительной частью магистральных интернет-маршрутизаторов, брандмауэров, коммутаторов и сетевого оборудования. Он также предоставляет приложения для конечных пользователей, такие как Cisco AnyConnect, которые используются во многих колледжах и университетах, а также на предприятиях по всему миру. Это руководство поможет вам настроить Cisco AnyConnect VPN.
VPN — важный инструмент для защиты сетевого трафика от слежки. Независимо от того, спонсируется ли это государством, интернет-провайдером или взломом, шифрование вашего трафика защищает его от посторонних глаз. Даже если вам нечего скрывать, защита вашего интернет-трафика является фундаментальной частью компьютерной безопасности. Некоторые образовательные учреждения настаивают на этом, как и большинство компаний, которые разрешают удаленный доступ к данным или приложениям.
Cisco AnyConnect включает в себя клиент, который вы устанавливаете на свои устройства, а также веб-приложение или Adaptive Security Appliance (ASA). Cisco ASA — это единое устройство, которое включает в себя брандмауэр, антивирус, спам-фильтр, VPN-сервер, устройство с сертификатом SSL и другие дополнительные функции. Там, где раньше мы использовали отдельный аппаратный брандмауэр, VPN-сервер и антивирусное решение, все это можно инкапсулировать в одном устройстве. Это отличный способ обезопасить свой бизнес. Это одно устройство защищает все решения — одна из причин популярности ASA.
Ограниченное предложение: 3 месяца БЕСПЛАТНО!
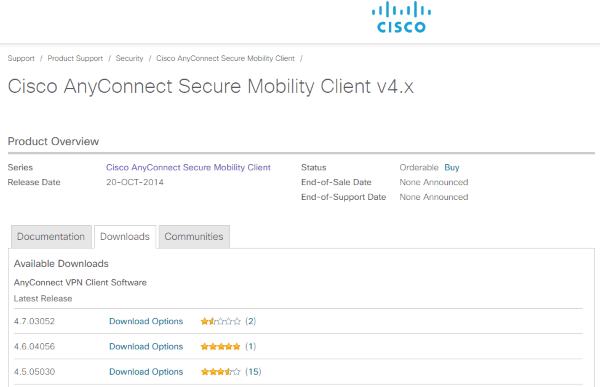
Настройка Cisco AnyConnect VPN
Настройка Cisco AnyConnect VPN аналогична настройке любого VPN-клиента. Подход зависит от устройства, на которое вы его устанавливаете, но после установки установка очень проста. Вы можете скачать Cisco AnyConnect VPN напрямую с сайта Cisco, но если вы используете его для подключения к своему колледжу или работодателю, они должны предоставить ссылку. Вы должны использовать эту ссылку, так как она может содержать файл конфигурации, необходимый для быстрого подключения.
Чтобы вы могли подключиться к VPN с помощью Cisco AnyConnect, вам потребуется логин. Если вы подключаетесь к сети колледжа или компании, ваш отдел кадров или служба ИТ-поддержки должны были в какой-то момент прислать вам их. Без них вы не сможете подключиться.
Ограниченное предложение: 3 месяца БЕСПЛАТНО!
В противном случае:
Программа установки может не включать какие-либо конкретные шаги установки в зависимости от того, откуда вы получили доступ к файлу загрузчика. В приведенном выше примере используется исполняемый файл Windows. Android, Mac OS и другие операционные системы будут использовать что-то другое.
Настройка Cisco AnyConnect VPN на устройстве Chromebook или Android
Другим примером может быть установка Cisco AnyConnect VPN на Chromebook. Я упоминаю об этом специально, так как он не использует стандартную установку приложения. Хотя у Cisco есть совместимое приложение для Android, оно работает не так, как должно, поэтому компания рекомендует вместо этого использовать расширение Chrome. Просто имейте в виду, что в этом случае будет зашифрован только трафик Chrome. Весь остальной трафик не будет использовать VPN.
Ограниченное предложение: 3 месяца БЕСПЛАТНО!
После аутентификации расширения вы можете установить новое соединение, сохранить его и использовать, когда вам нужно подключиться.

Подключение Cisco AnyConnect VPN
После установки вы можете подключиться к Cisco AnyConnect VPN в любое время, если у вас есть данные для входа, предоставленные вашим колледжем или работодателем. Откройте приложение, войдите в сеть, к которой вы хотите подключиться, введите свои данные для входа, нажмите «Подключиться», и через несколько секунд вы увидите окно с подключением.
В некоторых сетях требуется двухфакторная аутентификация. Если у вас один из них, получите код и введите его в новом окне 2FA. Нажмите «Продолжить», и VPN подключится. На вашем устройстве должен появиться статус, говорящий о том, что вы подключились к службе Cisco AnyConnect.
Чтобы отключиться, либо выберите уведомление Windows, либо откройте приложение Cisco AnyConnect на своем устройстве и выберите Отключить. Дайте ему несколько секунд, чтобы отключиться от защищенной сети, и еще несколько секунд, чтобы ваши устройства применили сетевые настройки по умолчанию. Теперь вы сможете нормально пользоваться Интернетом за пределами VPN.
VPN-клиент Cisco AnyConnect быстро справляется с защитой интернет-трафика между организацией и удаленными клиентами. Это быстро, безопасно и отлично справляется с задачей упрощения для пользователей. Неудивительно, что он так популярен!
- Настройка двухфакторной аутентификации
- Установка приложения Cisco Anyconnect VPN Client
- Подключение
- Аутентификация
Прежде, чем подключаться к сети Университета, Вам необходимо настроить Ваш телефон на проверку второго фактора. Настройку проверки второго фактора необходимо сделать только один раз, поэтому если Вы уже выполняли это ранее, можете пропустить этот шаг, и перейти к шагу с установкой приложения Cisco Anyconnect VPN Client.
Внимание! С 15.09.2021 изменился способ двухфакторной аутентификации по умолчанию. Теперь вместо звонка второй фактор подтверждается через мобильное приложение Microsoft Authenticator. Приложение доступно для систем Android (Google Play) и iOS (App Store).
Для пользователей, использовавших аутентификацию по вызову (звонку), действует прежний способ проверки. Если Вы хотите изменить Ваш контактный номер телефона, воспользуйтесь инструкцией.
Чтобы сменить метод аутентификации, воспользуйтесь руководством по ссылке.
Также не забывайте, что при необходимости использования квалифицированной электронной подписи при удаленном подключении к рабочему месту носитель с электронной подписью необходимо забрать с собой, чтобы подключить его к домашнему компьютеру/ноутбуку.
Настройка двухфакторной аутентификации
Проверка второго фактора выполняется через мобильное приложение Microsoft Authenticator, которое доступно для систем Android (Google Play) и iOS (App Store). Установите данное приложение (рис. 1).

Рис. 1
При первом входе нажмите «Принимаю» для принятия соглашения о конфиденциальности. Затем нажмите «Сканировать QR-код и выдайте необходимые системные разрешения для доступа к камере. Откроется интерфейс сканирования (рис. 2). Не закрывайте приложение!

Рис. 2
Далее Вам необходимо с компьютера или другого устройства войти на портал двухфакторной проверки аутентификации, доступного по адресу: https://mfa.utmn.ru . Введите данные Вашей корпоративной учетной записи в поля и нажмите кнопку «Вход» (рис. 3).

Рис. 3
После успешного входа Вы перейдете в настройку пользователя и Вам предложат выбрать метод аутентификации. Выберете «Мобильное приложение» и нажмите «Создать код активации» (рис. 4).

Рис. 4
Вам предоставят URL-адрес и QR-код (рис. 5). Данный код будет действовать 10 минут с момента создания. Вернитесь к приложению Mircrosoft Authenticator.

Рис. 5
Если отсканировать не удалось, введите код вручную (рис. 6).

Рис. 6
После успешной регистрации Ваша учетная запись появиться в главном меню (рис. 7).

Рис. 7
Вернитесь в окно портала и нажмите «Завершить активацию» (рис. 8). Портал вернет Вас на предыдущую страничку с сообщением «Активация выполнена» (рис. 9).

Рис. 8

Рис. 9
Настройка двухфакторной аутентификации через приложение завершена. Теперь Вы можете подключаться к своему рабочему компьютеру.
Установка приложения Cisco Anyconnect VPN Client
Для установления защищенного подключения к корпоративной сети Университета Вам необходимо использовать приложение для обеспечения удаленного доступа Cisco AnyConnect Secure Mobility Client. Его можно скачать по ссылке для ОС Windows и по ссылке для ОС macOS. Данное приложение доступно для систем Android и iOS. Выполните установку, если приложение уже установлено, пропустите данный пункт.
Подключение
Откройте установленное приложение Cisco AnyConnect Secure Mobility Client. В качестве сервера подключения укажите имя «vpn.utmn.ru» в поле, указанном на рис. 10, и нажмите кнопку «Connect».
Рис. 10
Аутентификация
Для прохождения аутентификации Вам необходимо выбрать группу подключения «UTMN_MFA» и ввести данные Вашей корпоративной учетной записи в поля, представленные на рис. 11.
Рис. 11
Приложение Microsoft Authenticator пришлет уведомление с просьбой подтвердить или отклонить вход (рис. 12).

Рис. 12
После чего автоматически будет установлено защищенное подключение (рис. 13) и Вы сможете использовать корпоративные ресурсы Университета.
Рис. 13
Если у Вас остались вопросы по удаленному подключению к сети Университета, обратитесь в диспетчерскую службы технической поддержки ЦИТ:
- напишите запрос через Портал поддержки ЦИТ;
- с помощью электронной почты 597777@utmn.ru;
- по телефону: +7 (3452) 59-77-77.