-
Contents
-
Table of Contents
-
Troubleshooting
-
Bookmarks
Quick Links
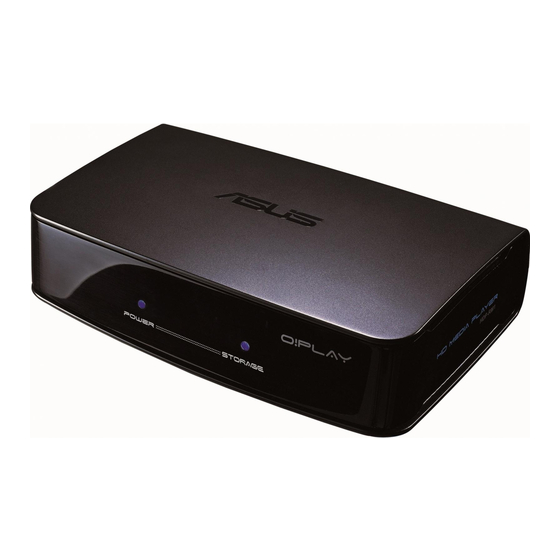
HD Media Player
O!Play HDP-R1
User Manual
Related Manuals for Asus O!Play HDP-R1
Summary of Contents for Asus O!Play HDP-R1
-
Page 1: User Manual
HD Media Player O!Play HDP-R1 User Manual…
-
Page 2
Product warranty or service will not be extended if: (1) the product is repaired, modified or altered, unless such repair, modification of alteration is authorized in writing by ASUS; or (2) the serial number of the product is defaced or missing. -
Page 3: Table Of Contents
Contents Safety information ………………v License notice and trademark acknowledgement for Dolby Digital ..vi License notice and trademark acknowledgement for DTS ….. vi About this user guide …………….vii Chapter 1: Getting started Welcome ………………..1-1 Package contents ………………1-1 Specifications summary …………….
-
Page 4
Chapter 4: Troubleshooting Troubleshooting ………………4-1 Display ………………4-1 Audio ………………4-3 USB storage device …………… 4-3 Remote Control …………….4-3 Firmware Update …………….4-4 Operation/function failure …………… 4-4 Appendices Notices …………………..A-1 GNU General Public License …………..A-2 ASUS contact information ……………A-8… -
Page 5: Safety Information
Safety information Use only a dry cloth to clean the device. DO NOT place on uneven DO NOT expose to or use near liquids, rain, or or unstable work surfaces. Seek servicing if the casing moisture. has been damaged. Refer all servicing to qualified service personnel.
-
Page 6: License Notice And Trademark Acknowledgement For Dolby Digital
License notice and trademark acknowledgement for Dolby Digital Manufactured under license from Dolby Laboratories. Dolby and the double-D symbol are trademarks of Dolby Laboratories. License notice and trademark acknowledgement for DTS Manufactured under license under US Patent #s: 5,451,942; 5,956,674; 5,974, 380;…
-
Page 7: About This User Guide
Provides the basic information about your ASUS O!Play HD Media Player. • Chapter 2: Getting connected Provides information on connecting your ASUS O!Play HD Media Player to a home or an office network. • Chapter 3: Using the ASUS O!Play HD Media Player Provides information on using your ASUS O!Play HD Media Player.
-
Page 8: Chapter 1: Getting Started
Welcome Thank you for buying the ASUS O!Play HD Media Player! ASUS O!Play HD Media Player allows you to enjoy digital media files from your computer via portable USB/eSATA storage devices, or over the network to your TV or entertainment system.
-
Page 9: Specifications Summary
Specifications summary Network TCP/IP (DHCP or Static IP Address) 10/100Mbps Wired LAN Supported video formats MPEG1/2/4, H.264, VC-1, RM/RMVB Supported video file .mp4, .mov, .xvid, .avi, .asf, .wmv, .mkv, .rm, .rmvb, .flv, extension .ts, m2ts, .dat, .mpg, .vob Supported audio formats MP3, WAV, AAC, OGG, WAV, FLAC, AIFF, Dolby Digital, DTS Digital Surround Supported image formats…
-
Page 10: System Requirements
Using a pin or a paper clip, press this button to reset the device to its factory default settings. USB 2.0 port Connect a USB 2.0 device into this port. IR (Infra-red) Receiver Allows you to control the HD media player using the IR remote control. ASUS O!Play HD media player…
-
Page 11: Rear Panel
LED indicators Displays the status of the HD media player. Status Description Power The device is turned off. The device is in sleep mode. Blue The device is turned on. Storage No storage device is found. Blinking Receiving data from a storage device. A storage device is found.
-
Page 12: Remote Control
Volume down Mode switch Subtitle Zoom Language Repeat Music shuffle Power Turn the HD media player on or off. Rewind Press to rewind the playback. Stop Stops the playback. Previous Returns to the previous media file. ASUS O!Play HD media player…
-
Page 13
Home Displays the home menu. Navigation/OK keys Press the up/down keys to move through the main menus in the Home screen. Press the up/down keys to move through the items in a submenu. Press the left/right keys to move through the menu bar in a submenu. -
Page 14: Getting Your O!Play Hd Media Player Ready
Do any of the following to connect a display to your HD media player: • Use an HDMI cable to connect your HD media player to an HDTV or an HDMI monitor. The HDMI cable is purchased separately. ASUS O!Play HD media player…
-
Page 15
• Use the bundled composite AV cable to connect your HD media player to a standard TV. Insert a USB/eSATA storage device such as a portable hard disk drive or a USB flash disk to the USB port or USB/eSATA combo port at the left side of your HD media player. -
Page 16: Starting For The First Time
If you are using an HDMI monitor, ensure that the monitor’s display resolution is set to HDMI. The Setup Wizard appears. Follow the onscreen instructions to complete the setup process. Use the remote control the navigate the screen. ASUS O!Play HD media player…
-
Page 17: Chapter 2: Getting Connected
Chapter 2 Getting connected Connecting to a network Wired connection Use an RJ-45 cable to connect your HD media player to a home or an office network. DC IN EZSETUP RESET ADSL LAN4 LAN3 LAN2 LAN1 Audio Out Video Out To connect to your network: Connect one end of the RJ-45 cable to the LAN port at the back of your HD media player and the other end to the LAN port of the router.
-
Page 18
From the Home screen, press the up/down keys to navigate to Setup, then press You may also press to launch the Setup menu. Select Network > Wired LAN Setup and press Select either Select either DHCP IP (AUTO) or FIX IP (MANUAL) as your setup type: •… -
Page 19: Configuring The Network Clients
Configuring the network clients Setting an IP address for wired client To access the ASUS HD media player, you must have the correct TCP/IP settings on your computer. Follow the instructions below that correspond to the operating system installed on your computer.
-
Page 20
Select Internet Protocol (TCP/ IP), then click Properties. Select Obtain an IP address automatically if you want the IP settings to be assigned automatically. Otherwise, select Use the following IP address: and key in the IP address and Subnet mask. Click OK when done. -
Page 21: Sharing Files Over The Network
Sharing files under Windows XP OS ® To share files under Windows XP OS: ® On your computer, select the folder containing the files that you want to share. Right-click the selected folder, and select Sharing and Security. ASUS O!Play HD media player…
-
Page 22: Sharing Files Under Windows ® Vista Os
Tick Share this folder. If you want to set permissions for the network users, click Permissions. Click Apply when done. A hand icon appears on the folder indicating that the folder’s contents are shared over the network. Sharing files under Windows Vista OS ®…
-
Page 23
Turn on sharing so anyone with network access can open files • Turn on sharing so anyone with network access can open, change, and create files • Turn off sharing (people logged on to this computer can still access this folder) When done, click Apply. ASUS O!Play HD media player… -
Page 24: Chapter 3: Using Your O!Play Hd Media Player
Chapter 3 Using your O!Play HD media player The Home screen The Home screen includes these main options: Movies, Music, Photos, Setup, and File Copy. Configuring the system settings The System menu allows you to configure the menu language, text encoding, system update, and system time, turns on/off the screen saver function, and restore the HD media player to the default settings.
-
Page 25: Playing A Video File
Press the right key to navigate to the System tab, then press Press the up/down keys navigate and select the function that you want to configure. Use the up/down keys to increase/decrease a numerical value. Press to save or press to cancel the settings made.
-
Page 26: Playing A Video File
Before you can access a media file over the network, ensure that the folder containing the file is shared. For more details, refer to the section Sharing files over the network in Chapter 2. Press twice to play the video. ASUS O!Play HD media player…
-
Page 27: Configuring The Subtitle Settings
Configuring the subtitle settings The Subtitle key allows you to configure the subtitle settings such as font size and color. To configure the video settings: From the Home screen, press the up/down keys to navigate to Movies, then press Locate and play your selected video file, then press Use the navigation keys to move through and make your changes to the subtitle settings.
-
Page 28: Playing Music
Press to group all your music files in your storage device and then play the music files randomly. Playing a music file To play a music file: From the Home screen, press the up/down keys to navigate to Music, then press ASUS O!Play HD media player…
-
Page 29: Configuring The Audio Settings
Using the up/down keys , select the source of your music file, then press . Locate the music file that you want to play. Before you can access a media file over the network, ensure that the folder containing the file is shared. For more details, refer to the section Sharing files over the network in Chapter 2.
-
Page 30: Viewing Photos
Using the up/down keys , select the source of your photo, then press . Locate the photo that you want to view. Press to browse the photos. Press to view the photos in slideshow mode. ASUS O!Play HD media player…
-
Page 31: Viewing Photos In Slideshow Mode
Viewing photos in slideshow mode To view photos in slideshow mode: When the selected photo is displayed in full screen, press on the remote control to start the slideshow. Photos in the same source folder will be displayed in order. Press to pause the slideshow.
-
Page 32
Left to Right, Top to Bottom, Waterfall, Snake, Dissolve, Strip Left Down, and All Effect Shuffle. Slide Show Interval • Set the time interval between the photos in the slideshow from two seconds (default) to two minutes. ASUS O!Play HD media player… -
Page 33: Copying Files
Copying files To copy files: From the Home screen, press the up/down keys to navigate to File Copy, then press . You may also press to launch the Setup menu. Select your Source, then press Select your Destination, then press In your source’s directory, locate the file that you want to copy to another location, then press .
-
Page 34: Chapter 4: Troubleshooting
Troubleshooting This section provides answers to some common problems that you may encounter while installing or using the ASUS O!Play HD media player. These problems require simple troubleshooting that you can perform by yourself. Contact ASUS Technical Support if you encounter problems not mentioned in this section.
-
Page 35
The TV screen is blinking and fuzzy. • Ensure that the AV/HDMI cable is properly connected to the correct terminals on both the TV and the media player. • Ensure that the media player power LED is on. • Ensure that the TV system setting matches the system used in your country. •… -
Page 36: Audio
Ensure that the batteries are properly inserted. • The batteries may already be drained out. Replace the batteries with new ones. • Ensure that the path between the remote control and the media player is not blocked. ASUS O!Play HD media player…
-
Page 37: Firmware Update
Operation/function failure An operation/function failed on my HD media player. Disconnect the AC adapter from the power source, then plug it in again. If you still encounter the same problem, contact the ASUS Technical Support. Chapter 4: Troubleshooting…
-
Page 38: Appendices
REACH Complying with the REACH (Registration, Evaluation, Authorisation, and Restriction of Chemicals) regulatory framework, we published the chemical substances in our products at ASUS REACH website at http://green.asus.com/ english/REACH.htm. Federal Communications Commission Statement This device complies with Part 15 of the FCC Rules. Operation is subject to the following two conditions: •…
-
Page 39: Gnu General Public License
Canadian Department of Communications Statement This digital device does not exceed the Class B limits for radio noise emissions from digital device set out in the Radio Interference Regulations of the Canadian Department of Communications. This class B digital device complies with Canadian ICES-003. GNU General Public License Licensing information This product includes copyrighted third-party software licensed under the terms of…
-
Page 40
Program or any derivative work under copyright law: that is to say, a work containing the Program or a portion of it, either verbatim or with modifications and/or translated into another language. (Hereinafter, translation is included without limitation in the term “modification”.) Each licensee is addressed as “you”. ASUS O!Play HD media player… -
Page 41
Activities other than copying, distribution and modification are not covered by this License; they are outside its scope. The act of running the Program is not restricted, and the output from the Program is covered only if its contents constitute a work based on the Program (independent of having been made by running the Program). -
Page 42
Program is void, and will automatically terminate your rights under this License. However, parties who have received copies, or rights, from you under this License will not have their licenses terminated so long as such parties remain in full compliance. ASUS O!Play HD media player… -
Page 43
You are not required to accept this License, since you have not signed it. However, nothing else grants you permission to modify or distribute the Program or its derivative works. These actions are prohibited by law if you do not accept this License. Therefore, by modifying or distributing the Program (or any work based on the Program), you indicate your acceptance of this License to do so, and all its terms and conditions for copying, distributing or modifying the Program or works based on it. -
Page 44
RENDERED INACCURATE OR LOSSES SUSTAINED BY YOU OR THIRD PARTIES OR A FAILURE OF THE PROGRAM TO OPERATE WITH ANY OTHER PROGRAMS), EVEN IF SUCH HOLDER OR OTHER PARTY HAS BEEN ADVISED OF THE POSSIBILITY OF SUCH DAMAGES. END OF TERMS AND CONDITIONS ASUS O!Play HD media player… -
Page 45: Asus Contact Information
+1-510-739-3777 +1-510-608-4555 Web site usa.asus.com Technical Support Telephone +1-812-282-2787 Support fax +1-812-284-0883 Online support support.asus.com ASUS COMPUTER GmbH (Germany and Austria) Address Harkort Str. 21-23, D-40880 Ratingen, Germany +49-2102-959911 Web site www.asus.de Online contact www.asus.de/sales Technical Support Component Telephone +49-1805-010923…
![]()
HD медиаплеер
O!Play HDP-R1
Руководство
пользователя

R5182
Вторая редакция Ноябрь 2009
Copyright © 2009 ASUSTeK COMPUTER INC. Все права защищены.
Никакая часть этого руководства, включая изделия и программное обеспечение, описанные в нем, не может быть дублирована, передана, преобразована, сохранена в системе поиска или переведена на другой язык в любой форме или любыми средствами, кроме документации, хранящейся покупателем с целью резервирования, без специального письменного разрешения ASUSTeK COMPUTER INC. (“ASUS”).
Гарантиянебудетиметьсилы,если:(1)изделиеотремонтировано,модифицированоилиизмененобезписьменного разрешения ASUS; (2)серийный номер изделия поврежден, неразборчив либо отсутствует.
ASUS предоставляет данное руководство «как есть» без гарантии любого типа, явно выраженной или подразумеваемой, включая неявные гарантии или условия получения коммерческой выгоды или пригодности для конкретной цели, но не ограничиваясь этими гарантиями и условиями. Ни при каких обстоятельствах компания ASUS, ее директора, должностные лица, служащие или агенты не несут ответственности за любые косвенные, специальные, случайныеили являющиесяследствиемчего-либоубытки(включаяубытки из-запотери прибыли, потери бизнеса, потери данных, приостановки бизнеса и т.п.), даже если ASUS сообщила о возможности таких убытков, возникающих из-за любой недоработки или ошибки в данном руководстве или продукте.
Технические характеристики и сведения, содержащиеся в данном руководстве, представлены только для информативного использования, и могут быть изменены в любое время без уведомления, и не должны быть истолкованы как обязательства ASUS. ASUS не берет на себя никакой ответственности или обязательств за любыеошибкиилинеточностивданномруководстве,включаяизделияилипрограммноеобеспечение,описанные в нем.
Продукты и названия корпораций, имеющиеся в этом руководстве могут быть зарегистрированными торговыми марками или авторскими правами соответствующих компаний и используются только в целях идентификации.
ii

Содержание
|
Содержание……………………………………………………………………………………………….. |
iii |
|
Информация о правилах безопасности……………………………………………………….. |
v |
|
Предупреждающие знаки………………………………………………………………….. |
v |
|
Надпись и торговая марка Dolby Digital…………………………………………………… |
vi |
|
Надпись и торговая марка DTS………………………………………………………………… |
vi |
|
Об этом руководстве пользователя…………………………………………………………… |
vii |
|
Как организовано руководство……………………………………………………….. |
vii |
|
Предупреждения, используемые в этом руководстве……………………….. |
vii |
|
Где найти дополнительную информацию………………………………………… |
vii |
|
Глава 1 |
1-1 |
|
Начало работы |
1-1 |
|
Приветствие…………………………………………………………………………………………….. |
1-1 |
|
Комплект поставки…………………………………………………………………………………. |
1-1 |
|
Спецификация………………………………………………………………………………………… |
1-2 |
|
Системные требования……………………………………………………………………………. |
1-3 |
|
Знакомство с HD медиплеером……………………………………………………………….. |
1-3 |
|
Передняя / левая панели………………………………………………………………… |
1-3 |
|
Правая панель………………………………………………………………………………. |
1-4 |
|
Задняя панель……………………………………………………………………………….. |
1-5 |
|
Пульт ДУ……………………………………………………………………………………… |
1-6 |
|
Подготовка O!Play HD медиаплеера……………………………………………………….. |
1-8 |
|
Подключение блока питания.………………………………………………………… |
1-8 |
|
Подключение устройств к HD медиплееру.……………………………………. |
1-8 |
|
Первое включение.……………………………………………………………………… |
1-10 |
|
Глава 2 |
2-1 |
|
Подключение |
2-1 |
|
Подключение к сети………………………………………………………………………………… |
2-1 |
|
Проводное подключение.………………………………………………………………. |
2-1 |
|
Бесроводное подключение…………………………………………………………….. |
2-4 |
|
Подключение к беспроводной локальной сети (WLAN).………………… |
2-5 |
|
Подключение сетевых клиентов…………………………………………………….. |
2-6 |
|
Совместное использование файлов в сети……………………………………………….. |
2-8 |
|
Совместное использование файлов в ОС Windows XP……………………. |
2-8 |
|
Совместное использование файлов в ОС Windows Vista………………… |
2-9 |
iii

|
Глава 3 |
3-1 |
|
Использование ASUS O!Play HD медиаплеера |
3-1 |
|
Главный экран………………………………………………………………………………………… |
3-1 |
|
Настройка системных параметров………………………………………………………….. |
3-1 |
|
Воспроизведение видеофайла………………………………………………………………….. |
3-2 |
|
Кнопки для управления видео на пульте………………………………………… |
3-2 |
|
Воспроизведение видеофайла………………………………………………………… |
3-3 |
|
Настройка субтитров…………………………………………………………………….. |
3-4 |
|
Настройка видео-параметров…………………………………………………………. |
3-4 |
|
Воспроизведение музыки………………………………………………………………………… |
3-5 |
|
Кнопки для управления музыкой на пульте……………………………………. |
3-5 |
|
Воспроизведение аудиофайла………………………………………………………… |
3-5 |
|
Настройка аудио-параметров.……………………………………………………….. |
3-6 |
|
Просмотр фотографий…………………………………………………………………………….. |
3-7 |
|
Просмотр фотографий………………………………………………………………….. |
3-7 |
|
Просмотр фотографий в режиме слайдшоу……………………………………. |
3-8 |
|
Установка фоновой музыки для слайдшоу.……………………………………. |
3-8 |
|
Настройка параметров слайдшоу…………………………………………………… |
3-8 |
|
Копирование файлов…………………………………………………………………………….. |
3-10 |
|
Совместное использование файлов через Ваш медиаплеер…………………… |
3-10 |
|
Глава 4 |
4-1 |
|
Устранение неисправностей |
4-1 |
|
Устранение неисправностей……………………………………………………………………. |
4-1 |
|
Дисплей .…………………………………………………………………………………….. |
4-1 |
|
Звук .…………………………………………………………………………………….. |
4-2 |
|
USB устройство……………………………………………………………………………. |
4-3 |
|
Пульт ДУ……………………………………………………………………………………… |
4-3 |
|
Обновление прошивки…………………………………………………………………… |
4-3 |
|
Беспроводное и Интернет-подключения.……………………………………….. |
4-4 |
|
Отказ в работе………………………………………………………………………………. |
4-4 |
|
Appendices |
A-1 |
|
Notices ……………………………………………………………………………………………………. |
A-1 |
|
GNU General Public License…………………………………………………………………….. |
A-2 |
|
ASUS контактная информация……………………………………………………………………… |
A-8 |
iv

Информация о правилах безопасности
Для очистки устройства используйте сухую ткань.
НЕ ставьте устройство на неровную или неустойчивую поверхность. В случае повреждени я корпус а обращайтесь в сервис-центр. Обращайтесь за помощью только к квалифицированным специалистам.
НЕ подвергайте воздействию влаги и не используйте вблизи от жидкостей, под дождем и в условиям повышенной влажности.
Допустимыйтемпературный


 диапазон: Это устройство
может использоваться при температуре воздуха в диапазоне от 5oC (41oF) до
35oC (95oF).
НЕ устанавливайтеустройство 

 поблизостиотисточникатепла,
 например радиатора.
|
Убедитесь, |
что выходное |
НЕ выбрасывайте устройство |
||
|
напряжение Вашего блока |
вместе с бытовым мусором. |
|||
|
питания |
соответствует |
Этот продукт предназначен |
||
|
входному для устройства |
для повторного использования |
|||
|
(12Vdc, 2A). |
и переработки. Ознакомьтесь |
|||
|
с правилами утилизации таких |
||||
|
продуктов. |
||||
|
Предупреждающие знаки |
||||
|
З н а ч о к м о л н и и |
в |
Во избежание |
риска |
Восклицательный знак в |
|
треугольникепредупреждает |
поражения электрическим |
треугольнике предназначен |
||
|
пользователя о наличии |
током не снимайте крышку. |
для привлечения внимания |
||
|
в изделии высокого |
Внутри нет обслуживаемых |
пользователякважнымоперациям |
||
|
напряжения и опасности |
пользователемкомпонентов. |
и инструкциям. |
||
|
поражения электрическим |
Обращайтесь в |
сервис- |
||
|
током. |
центр. |
• При замене аккумулятоа на аккумулятор другого типа возможен взрыв. Заменяйте аккумулятор на такой же или эквивалентный, рекомендованный производителем.
•Утилизируйте использованные аккумуляторы в соответствии с инструкциями производителя.

 Надпись и торговая марка Dolby Digital
Изготовлено по лицензии Dolby Laboratories. Dolby и двойной символ D являются торговым марками Dolby Laboratories.
Надпись и торговая марка DTS
Изготовлено по лицензии и в соответствии со следующими патентами США: 5,451,942; 5,956,674; 5,974, 380; 5,978,762; 6,487,535 и другими США и всемирными патентами. DTS и DTS 2.0 + Digital Out и логотип DTS являются зарегистрированными торговыми марками DTS, Inc. © 1996-2008 DTS, Inc. Все права защищены.
vi

Об этом руководстве пользователя
Как организовано руководство
•Глава 1: Начало работы
Содержит информацию об ASUS O!Play HD медиаплеере.
•Глава 2: Подключение
Содержит рекомендации по подключению ASUS O!Play HD Media Player к сети.
•Глава 3: Использование ASUS O!Play HD медиаплеер
Содержит рекомендации по использованию ASUS O!Play HD Media Player.
•Глава 4: Устранение неисправностей
Содержит часто задаваемые вопросы о ASUS O!Play HD Media Player, которые могут помочь Вам при решении Ваших проблем.
Предупреждения, используемые в этом руководстве
Чтобы убедиться в правильном выполнении задач, обратите внимание на следующие символы, используемые в этом руководстве.
ОСТОРОЖНО: Информация о действиях, которые могут привести к повреждению оборудования, потере данных и бытовым травмам.
ВНИМАНИЕ: Предупреждающаяинформацияовозможностиповреждения компонентов при выполнении задач.
ВАЖНО: Инструкции, которым Вы должны следовать при выполнении задач.
ПРИМЕЧАНИЕ: Советы и полезная информация, которая поможет при выполнении задач.
Где найти дополнительную информацию
За дополнительной информацией о продукте обратитесь к следующим источникам.
1.Сайт поддержки ASUS
ЗагрузитьпоследнююверсиюBIOS,драйвераиутилитыВыможетессайтаASUS http://support.asus.com.
2.Дополнительная документация
В комплект поставки может быть включена дополнительная документация, например гарантийный талон, который может быть добавлен Вашим дилером. Эти документы не являются частью стандартного комплекта.
vii

Глава 1
Начало работы
Приветствие
Благодарим за приобретение ASUS O!Play HD медиаплеера!
ASUS O!Play HD медиаплеер позволяет воспроизводить медиафайлы используя UPnP, портативные USB/eSATA устройства, карты памяти или сеть.
Комплект поставки
|
O!Play Air HDP-R3 HD медиаплеер |
Пульт с двумя элементами питания |
||
|
типа ААА |
|||
|
Шнур питания |
Блок питания |
Support CD (Руководство |
|
пользователя) |
||
|
O!Play |
||
|
HD Media Player |
||
|
Quick Start Guide |
||
|
Композитный AV (аудио-видео) кабель |
Краткое руководство |
Если что-то повреждено или отсутствует, обратитесь к продавцу.
1-1

Спецификация
Cеть
Поддерживаемые
видеоформаты
Поддерживаемые типы файлов
Поддерживаемые
аудиоформаты
Поддерживаемые графические форматы
Поддерживаемые форматы субтитров
Порты ввода/вывода
Размеры
Входное напряжение
Потребляемая мощность
TCP/IP (DHCP или статический IP адрес) Проводная сеть 10/100Mbps
MPEG1/2/4, H.264, VC-1, RM/RMVB
.mp4, .mov, .xvid, .avi, .asf, .wmv, .mkv, .rm, .rmvb, .flv, .ts, m2ts, .dat, .mpg, .vob
MP3, WAV, AAC, OGG, WAV, FLAC, AIFF, Dolby Digital, DTS Digital Surround
JPEG, BMP, PNG, GIF, TIFF
SRT, SUB, SMI, SSA
1 Разъем питания (пост. ток)
1 x USB 2.0 порт
1 x USB/eSATA комбинированный порт
1 x сетевой порт (10/100Mbps)
1 x HDMI порт
1 x композитный аудио-видео (AV) порт
1 x оптический цифровой аудиовыход (S/PDIF)
1 x CF кардридер
1 x SD/MMC кардридер
1 x MS/MS-Duo кардридер
W x D x H: 181.0мм x 125.32мм x 47.73мм
Вес: 480г
12Vdc, 2A
10Вт
Спецификация может быть изменена без уведомления.
|
1-2 |
Глава 1: Начало работы |

Системные требования
•ТВ высокого разрешения (HDTV), стандартный ТВ или HDMI монитор
•Устройствохранения(USBфлеш-накопитель/USBHDD/eSATAфлеш-накопитель
/ eSATA HDD)
•RJ-45 кабель для подключения к домашней или офисной сети (опция)
• Используйте HDMI кабель для подключения устройства к HDTV или HDMI монитору.
•ИспользуйтепоставляемыйкомпозитныйAVкабельдляподключенияустройства к стандартному ТВ.
Знакомство с HD медиплеером
Передняя / левая панели
|
1 |
|||
|
2 |
3 |
4 |
5 |
1Комбинированный порт eSATA/USB 2.0
Подключение USB 2.0/eSATA устройств, например внешнего жесткого диска.
2Кнопка сброса
Для нажатия на кнопку сброса используйте выпрямленную скрепку .
3Порт USB 2.0
Подключение устройств USB 2.0 .
4ИК-приемник
Позволяет управлять устройством с помощью пульта дистанционного управления.
|
ASUS O!Play HD медиаплеер |
1-3 |
![]()
|
Индикаторы |
||||||
|
Показывает состояние HD медиплеера. |
||||||
|
Индикатор |
Состояние |
Описание |
||||
|
Питание |
Не горит |
Устройство выключено. |
||||
|
5 |
Красный |
Устройство в спящем режиме. |
||||
|
Синий |
Устройство включено. |
|||||
|
Устройства |
||||||
|
Не горит |
Устройство хранения не найдено. |
|||||
|
хранения |
||||||
|
Мигает |
Получение данных с устройства хранения. |
|||||
|
Горит |
Устройство хранения найдено. |
|||||
Убедитесь,чтоИКприемникнаходитсявзонепрямойвидимости.Впротивномслучае Media Player может не реагировать на команды с пульта ДУ.
Задняя панель
1 2 3 4 5 6
1Аналоговый аудиовыход (красный и белый)
Вывод звука на телевизор или другое аудиоустройство.
2Аналоговый аудиовыход (желтый)
Подключение телевизора или другого видеоустройства.
3Цифровой аудиовыход (S/PDIF)
Подключение внешней Hi-Fi аудиосистемы.
4Разъем HDMI
Подключение HDMI устройства.
5Разъем LAN (RJ-45)
Подключение к локальной сети.
6Разъем питания (DC-In)
Подключение блока питания.
|
1-4 |
Глава 1: Начало работы |

Пульт ДУ
Используйте пульт для включения/отключения HD медиаплеера, навигации в меню и выбора файла для просмотра или прослушивания.
|
Питание |
1 |
|
Перемотка назад |
2 |
|
Стоп |
3 |
|
Назад |
4 |
|
Главное меню |
5 |
|
Кнопки навигации/ |
6 |
|
Кнопка OK |
|
|
Прибавить |
7 |
|
громкость |
|
|
Убавить |
8 |
|
громкость |
|
|
Субтитры |
9 |
|
Язык |
10 |
|
DISPLAY |
11 |
Дисплей |
|
12 |
Воспроизведение/ |
|
|
13 |
Пауза |
|
|
Перемотка вперед |
||
|
14 |
Вперед |
|
|
15 |
Назад |
16 Настройка
17 Режим
18 Масштаб
19 Повтор
20 Случайная композиция
1
Питание
Включает или отключает HD медиплеер.
2
Перемотка назад
Нажмите для перемотки.
3
Стоп
Останавливает воспроизведение.
4
Назад
Переход к предыдущему файлу.
|
ASUS O!Play HD медиаплеер |
1-5 |

|
5 |
Главное меню |
|
|
Показывает главное меню. |
||
|
Кнопки навигации и OK |
||
|
Используйте клавиши вверх/вниз для навигации по главному |
||
|
меню. |
||
|
Используйте клавиши вверх/вниз для навигации по пунктам |
||
|
6 |
подменю. |
|
|
Используйте клавиши влево/вправо для навигации в подменю. |
||
|
Используйте клавиши влево/вправо для увеличения/уменьшения |
||
|
значения. |
||
|
Нажмите OK для подтверждения выбора. |
||
|
7 |
Прибавить громкость |
|
|
Увеличение громкости. |
||
|
8 |
Убавить громкость |
|
|
Уменьшение громкости. |
||
|
9 |
Субтитры |
|
|
Нажмите для настройки субтитров, например цвет и размер. |
||
|
10 |
Язык |
|
|
Нажмите для выбора звуковой дорожки к фильму. |
||
|
11 |
Дисплей |
|
|
DISPLAY |
||
|
Нажмите для показа имени файла, типа файла и времени. |
||
|
12 |
Воспроизведение/Пауза |
|
|
Переключение между режимами воспроизведения и паузы. |
||
|
13 |
Перемотка вперед |
|
|
Нажмите для перемотки. |
||
|
14 |
Вперед |
|
|
Переход к следующему файлу. |
||
|
15 |
Назад |
|
|
Возврат к предыдущему экрану. |
||
|
16 |
Настройка |
|
|
Запуск меню настроек. |
||
|
17 |
Режим |
|
|
Переключение между режимами музыки, фото и фильмов. |
||
|
18 |
Масштаб |
|
|
Увеличение масштаба. |
||
|
Повтор |
||
|
19 |
Нажмите для повторения текущей музыкальной композиции, фильма, |
|
|
изображения. |
||
|
20 |
Случайная композиция |
|
|
Нажмите для воспроизведения файлов в случайном порядке. |
||
|
1-6 |
Глава 1: Начало работы |

Подготовка O!Play HD медиаплеера
Подключение блока питания
Для подключение блока питания выполните следующее:
1.Подключите шнур питания к блоку питания.
2.Подключите блок питания к разъему DC-in, расположенному на задней панели HD медиплеера.
3.Подключите шнур питания к розетке.
Подключение устройств к HD медиплееру
Для подключения устройств к HD медиплееру выполните следующее:
1.Для подключения монитора к выполните любое из следующих действий:
•Используйте HDMI кабель для подключения устройства к HDTV или HDMI монитору.
HDMI кабель приобретается отдельно.
|
ASUS O!Play HD медиаплеер |
1-7 |
 Loading…
- Инструкции и руководства
- Бренды
- ASUS
- O!Play HDP-R1
- Справочник Пользователя
![]()
HD медиаплеер
Руководство
пользователя
O!Play HDP-R1
Предложите, как улучшить StudyLib
(Для жалоб на нарушения авторских прав, используйте
другую форму
)
Ваш е-мэйл
Заполните, если хотите получить ответ
Оцените наш проект
1
2
3
4
5
-
Asus O!Play HDP-R1 — page 1
HDP-R1 O!Play HD Media Player User Manual …
-
Asus O!Play HDP-R1 — page 2
ii E4727 First Edition May 2009 Copyright © 2009 ASUST eK COMPUTER INC. All Rights Reserved. No part of this manual, including the products and software described in it, may be reproduced, transmitted, transcribed, stored in a retrieval system, or translated into any language in any form or by any means, except documentation kept by the purchaser …
-
Asus O!Play HDP-R1 — page 3
iii Contents ………………………………………………………………………………………… iii Notices ……………………………………………………………………………………………. v Federal Communications Commission Statement ……………………….. v Canadian Department of Communications …
-
Asus O!Play HDP-R1 — page 4
iv 3.4.2 Viewing photos in slideshow mode …………………………… 3-8 3.4.3 Photo setup …………………………………………………………… 3-9 Appendix T roubleshooting guide ………………………………………………………………….. A-2 Display ……………………………………………….. …
-
Asus O!Play HDP-R1 — page 5
v Notices Federal Communications Commission Statement This device complies with Part 15 of the FCC Rules. Operation is subject to the following two conditions: • This device may not cause harmful interference, and • This device must accept any interference received including interference that may cause undesired operation. This equipment has be …
-
Asus O!Play HDP-R1 — page 6
vi REACH Notice Complying with the REACH (Registration, Evaluation, Authorisation, and Restriction of Chemicals) regulatory framework, we published the chemical substances in our products at ASUS REACH website at http://green.asus.com/ english/REACH.htm. …
-
Asus O!Play HDP-R1 — page 7
vii • Read these instructions. • Keep these instructions. • Heed all warnings. • Follow all instructions. • Do not use this apparatus near water . • Clean only with dry cloth. • Do not block any ventilation openings. Install in accordance with the manufacturer ’s instructions. • Do not install near any heat sources such as radiato …
-
Asus O!Play HDP-R1 — page 8
viii Conventions used in this guide T o make sure that you perform certain tasks properly , take note of the following symbols used throughout this manual. DANGER/W ARNING: Information to prevent injury to yourself when trying to complete a task. NOTE : T ips and additional information to help you complete a task. IMPORT ANT : Instructions that you …
-
Asus O!Play HDP-R1 — page 9
1- This chapter describes the general features of the ASUS O�Play HD media ASUS O�Play HD media player including specifications, front including specifications, front / side / rear panel features, and LED definitions. This chapter also includes the key table for the remote control. Chapter 1 Product introduction …
-
Asus O!Play HDP-R1 — page 10
Chapter 1: Product introduction 1-2 1.1 Introduction Thank you for choosing the ASUS O�Play HD media player , a device that allows you to enjoy digital media files from your PC or portable USB/eSA T A storage devices to your TV or entertainment system. Enjoy new levels of entertainment by accessing, viewing, and playing media files with the ASUS …
-
Asus O!Play HDP-R1 — page 11
ASUS O�Play HD media player 1-3 LED Status Description Power OFF No power is supplied Red Power is supplied but system is off Blue Power is supplied and system is on Storage OFF No storage device was found ON A storage device is plugged 1.4 Product features 1.4.1 Front panel The front panel features LEDs that signify whether the device is powered …
-
Asus O!Play HDP-R1 — page 12
Chapter 1: Product introduction 1-4 1.4.2 Side panel The side panel features one USB port and one eSA T A / USB combo port for your USB and eSA T A storage devices. Refer to the rear panel connector descriptions below . • eSA T A / USB 2.0 combo port. This port is available for connecting both an external USB 2.0 media device and an eSA T A stora …
-
Asus O!Play HDP-R1 — page 13
ASUS O�Play HD media player 1-5 1.4.3 Rear panel The rear panel features the output ports for video and audio cables, the power socket, and a LAN port. Refer to the rear panel connector descriptions below . • Analog audio output (red and white). These ports connect the left and right audio cable jacks to the television or video player/recorder …
-
Asus O!Play HDP-R1 — page 14
Chapter 1: Product introduction 1-6 1.4.4 Remote control Use the remote control to power on/off the O�Play HD media player , browse through menus, and select media to play , view , or listen to. Refer to the table on the next page for the description of the remote control buttons. 2 3 1 1 12 13 14 4 8 10 15 16 17 18 DISPLA Y Power on/off Display …
-
Asus O!Play HDP-R1 — page 15
ASUS O�Play HD media player 1-7 No. Button Function 1 Power T urn the HD media player on or off 2 Fast rewind Press to rewind playback 3 Stop Stops playback 4 Previous Switches to the previous video clip 5 Home Display the home menu 6 Navigation buttons / OK button Move up, down, right, and left through selections on the display . Press OK press …
-
Asus O!Play HDP-R1 — page 16
Chapter 1: Product introduction 1-8 1.5 Technicalspecications Network TCP/IP (DHCP or Static IP Address) 10/100Mbps Wired LAN Supported video formats MPEG1/2/4, H.264, VC-1, RM/RMVB Supported video le extension .mp4, .mov , .xvid, .avi, .divx, .asf, .wmv , .mkv , .rm, .rmvb, .flv , .ts, m2ts, .dat, .mpg, .vob Supported audio formats MP3 …
-
Asus O!Play HDP-R1 — page 17
1- This chapter provides information on how to set up the HD media player . Chapter 2 Setup information …
-
Asus O!Play HDP-R1 — page 18
Chapter 2: Setup information 2-2 LAN (RJ45) HDD AI-FLASH Router Desktop PC or Notebook TV/Home Theater SPLENDID MENU USB / eSA T A 2.1 Connecting the O!Play HD media player Below is an illustration of how devices may be connected to the ASUS O�Play HD media player . T o connect the HD media player: 1. Connect the HD media player to your televisio …
-
Asus O!Play HDP-R1 — page 19
ASUS O�Play HD media player 2-3 2.2 Setting up the HD media player 2.2.1 Network setup 1. After connecting all required devices to the HD media player , turn it on using the remote control. The Home screen menu is displayed. Select Setup and press <OK>. 2. Select Network > W ired LAN Setup and press <OK>. Select your wired LAN setu …
-
Asus O!Play HDP-R1 — page 20
Chapter 2: Setup information 2-4 2.2.2 Network neighborhood setup The network neighborhood function allows you to easily access the shared folder (s) on a connected computer via the HD media player . T o set up the network neighborhood function under Windows ® XP OS: 1. Create a folder named HD , for example, on the Windows desktop of the computer …
-
Asus O!Play HDP-R1 — page 21
ASUS O�Play HD media player 2-5 2.2.3 System setup From the System menu, you can configure the menu language, text encoding, system update, and system time, turns on/off the screen saver function, and restore the HD media player to the default settings. On the Home screen menu, browse to Setup , then press <OK>. Select the System category , …
-
Asus O!Play HDP-R1 — page 22
Chapter 2: Setup information 2-6 …
-
Asus O!Play HDP-R1 — page 23
1- This chapter provides information on how chapter provides information on how provides information on how how to enjoy media contents using the HD media player . Chapter 3 Enjoying media content s …
-
Asus O!Play HDP-R1 — page 24
Chapter 3: Enjoying media content 3-2 3.1 Home screen menu Below is the Home screen menu of the HD media player . Use the remote control to navigate through the menus. Refer to Chapter 1 for remote control key functions. Home screen options There are five main Home options for you to choose from: Movies, Music, Photo, Setup, and File Copy . The hig …
-
Asus O!Play HDP-R1 — page 25
ASUS O�Play HD media player 3-3 3.2 Playing video 3.2.1 Selecting and playing video 1. On the Home screen, select Movies , then press <OK>. 3. Y ou can preview the video file you want to play before playback by locating the video file. T o play the file, press <OK> or the <Play/Pause> button. 2. Select the file source from Stora …
-
Asus O!Play HDP-R1 — page 26
Chapter 3: Enjoying media content 3-4 Button Function DISPLAY Press to display the video file source, file name, format, and elapsed time DISPLAY Go back to the previous screen DISPLAY Play/pause DISPLAY Rewind Pr ess the button r epeatedly to change the r ewinding speed to x1.5, x2, x4, x8, x16, x32, or normal speed (x1) DISPLAY Forward Pr ess the …
-
Asus O!Play HDP-R1 — page 27
ASUS O�Play HD media player 3-5 3.3 Listening to music 3.3.1 Selecting and playing music T o select and play music: 1. On the Home screen, select Music , then press <OK>. 2. Select the file source from Storage or Network, then press <OK>. Then, locate the music file you want to play . 3. Y ou can preview the information about the musi …
-
Asus O!Play HDP-R1 — page 28
Chapter 3: Enjoying media content 3-6 Music control buttons on the remote control Button Function DISPLAY Press to display the video file source, file name, format, and elapsed time DISPLAY Go back to the previous screen DISPLAY Play/pause DISPLAY Rewind Pr ess the button r epeatedly to change the r ewinding speed to x1.5, x2, x4, x8, x16, x32, or …
-
Asus O!Play HDP-R1 — page 29
ASUS O�Play HD media player 3-7 3.4 Viewing photos 3.4.1 Selecting and view photos T o select and view photos: 1. On the Home screen, select Photos , then press <OK>. 2. Select the file source from Storage or Network, then press <OK>. Then, locate the image file you want to view . 3. Y ou can preview the information about the image fi …
-
Asus O!Play HDP-R1 — page 30
Chapter 3: Enjoying media content 3-8 Photo control buttons on the remote control Button Function DISPLAY Press to display the image file source, file name, format, and elapsed time DISPLAY Go back to the previous screen DISPLAY Play/pause the slideshow DISPLAY Stop the playback DISPLAY Skip to the previous image file DISPLAY Skip to the next image …
-
Asus O!Play HDP-R1 — page 31
ASUS O�Play HD media player 3-9 3.4.3 Photo setup Configure the photo slideshow settings including Slide Show Interval and T ransition Effect. On the Home screen menu, browse to Setup , then press <OK>. Select the Photo category , then browse up and down to the function you want to configure . Slide Show Interval Set the time interval betwe …
-
Asus O!Play HDP-R1 — page 32
Chapter 3: Enjoying media content 3-10 …
-
Asus O!Play HDP-R1 — page 33
1- This chapter presents solutions to common problems that you may encounter when installing, setting up, or using the HD media player and offers the ASUS contact information.. Appendix Appendix …
-
Asus O!Play HDP-R1 — page 34
Appendix A-2 Display The media player does not work. Y ou suspect problem with media player’s power adapter • The media player’s power adapter may perform the overload protection function — automatic shutdown during overload conditions, such as Over Current, Over V oltage and Over T emperature. • Disconnect the media player’s power adap …
-
Asus O!Play HDP-R1 — page 35
ASUS O�Play HD media player A-3 I can’t nd any of my audio, video, or image les. • Ensure that the Media Center , Media Server or your computer is switched on and that the device is not in standby mode. • If using a wired network, check that the Ethernet cable is properly a ttached to the Media Player and to a network switch, hub o …
-
Asus O!Play HDP-R1 — page 36
Appendix A-4 I can’t hear any sound when I’m playing music les. • Ensure that the audio cables are properly connected. • If the audio cables are connected to your TV , the TV must be turned on to play any music files. • If the audio cables are connected to your stereo, ensure that the ste reo is on and you have the correct stereo …
-
Asus O!Play HDP-R1 — page 37
ASUS O�Play HD media player A-5 Firmware Update What version of rmware do I have? How to upgrade it? • On the Home screen, press the Stop and then Play/Pause button t o display the firmware version. • Go to Setup > System > System Update to perform the firmware upgrade process. • If you are still unable to update the firmware, rese …
-
Asus O!Play HDP-R1 — page 38
Appendix A-6 ASUS contact information ASUST eK COMPUTER INC. Address 15 Li-T e Road, Peitou, T aipei, T aiwan 1 1259 T elephone +886-2-2894-3447 Fax +886-2-2890-7798 E-mail info@asus.com.tw Web site www .asus.com.tw T echnical Support T elephone +86-21-3842991 1 Online support support.asus.com ASUS COMPUTER INTERNA TIONAL (America) Address 800 Corp …