Инструкция к Amazon Kindle 3
1.Не допускайте разряда Киндла в ноль, он может наглухо зависнуть. ( если зависнет, поставьте на зарядку на несколько часов, потом перезагрузите удерживая выкл 30 сек )
*Так же он может зависнуть при битых файлах. И при скачке книги с самого ридера на Флибусте.
*Стеклобой. Так как ридер имеет стекляный экран, с ним надо обращаться как с тонким хрупким стеклом. Нежелательно класть на диван, прижимать в транспорте, кидать на диван и т.д.
Отключить Wifi чтобы дольше работала книга:
Кнопка Menu —> Turn Wireless Off
Удаление книги или ссылок:
Встать на книгу или закладку, джойстиком влево ———> Delete
Зайти в браузер:
Home — Menu — Experimental — launch browser — Menu
Enter Url — ввести адрес
Bookmarks — Ваши закладки
Bookmarks This Page — Добавить закладку для просматриваемой страницы
Back — возврат на шаг назад
*Регистрация
Регистрируетесь на Amazon.com
Для продолжения регистрации уже на книге, первое — нажмите “Home” для того чтобы попасть в главное/основное меню устройства (“Home screen”) и затем нажмите кнопку “Menu”. Выбирете пункт “Settings” (“Настройки”) и затем выбирете пункт “register” (“Регистрация”) и в появившемся меню введите имя Вашей учетной записи Amazon и пароль к ней. Если имя Вашей учетной записи или пароль содержат символы не представленные на клавиатуре устройства — нажмите кнопку чтобы увидеть меню символов и цифр и затем использую 5-позиционный джойстик выберете требуемый символ.
В качестве альтернативы, Вы можете перерегистрировать Ваш Kindle посетив страницу Вашей учетной записи на сайте Amazon по адресу:
http://www.amazon.com/manageyourkindle (США и другие страны)
Как снять регистацию Киндла ?
Отвязать Киндл можно на странице Manage Your Kindle http://www.amazon.com/gp/digital/fiona/manage либо из самого устройства, нажав в настройках deregister
Подключение Wifi с паролем
MENU > Settings >Wi-Fi Settings view / rescan / connect
Отключить Wifi чтобы дольше работала книга:
Кнопка Menu —> Turn Wireless Off
Включить WiFi:
Кнопка Menu —> Turn Wireless On
Регистрируя свой Kindle на себя на Amazon’e вы получаете 2 email’a вида *@kindle.com и *@free.kindle.com. При отправлении своих документов в форматах (Microsoft Word (DOC, DOCX), PDF, HTML, TXT, RTF, JPEG, GIF, PNG, BMP, PRC and MOBI) на *@kindle.com вы получаете их в готовом для чтения виде на свое устройство через 3G сеть, оплачивая за каждый мегабайт документа. При отправке тех же документов на *@free.kindle.com, Вы получите документы бесплатно, но только при наличии активного WiFi подключения
4.
Увеличение шрифта: Aa —> 150% 200% 300 % так же Menu — > Article Mode
Добавить закладку в браузере: Клавиша Menu —> Bookmarks This Page
Перейти на закладки браузера: Клавиша Menu —> Bookmarks
Скролинг: Клавиши листания
Отключение WiFi В браузере нажать кнопку Menu: Turn Wireless Off (отключение Wifi — экономит батарею ) On — подключение.
Числа без нажатия SYM: ATL+[верхний ряд клавиатуры, с Q(1) до P(0)]. Аналогично заглавным буквам ALT можно не держать
Удаление книги — встать на книгу, джойстик: нажать влево, далее Delete, ОК
Перейти на нужную страницу книги: Нажать кнопку Menu, далее перейти на Go to… Нажать кнопку Sym ввести номер страницы, нажать кнопку Sym, перейти на location. cover — переход на обложку, table of Contents — переход на оглавление, beginning на начало.
5.
Киндл: полезные советы
Основные
— Для написания заглавных букв не надо обязательно держать Shift: можно сначала нажать Shift, а потом букву.
— Числа без нажатия SYM: ATL+[верхний ряд клавиатуры, с Q(1) до P(0)]. Аналогично заглавным буквам ALT можно не держать
— Обновить/перерисовать экран: ALT+G
— Сделать скриншот в формате .GIF (будет находиться в папке document): ALT+SHIFT+G или ALT+SHIFT+H
— Показать время: нажать MENU. Время появится в верхней статусной строке.
— Показать количество свободного места: нажать MENU на экране Home, Settings, Experimental
— Быстрый переход в Kindle store: ALT+HOME
— Повторно просканировать внутренние папки Киндла на предмет новых книг, музыки, фотографий: ALT+Z
— Показать серийный номер и штрихкод: ALT+SHIFT+. (точка)
— Специальные команды из экрана Settings:
o Изменить 3G провайдера:набрать 311 (ALT+EQQ)
o Серийный номер Киндла и т.п.:набрать 411 (ALT+RQQ)
o Информация по 3G модему: набрать 611 (ALT+YQQ)
o Информация по Wi-Fi модему: набрать 711 (ALT+UQQ)
Экран Home
— Длина линии из точек под книгой пропорциональна ее размеру. Жирные точки на этой линии – прочитанная часть книги
— Быстро перейти на определенную страницу экрана Home: [номер] затем Enter
— Быстрый поиск по автору или названию: [первая буква] затем Enter
Коллекции ( доступны после регистрации )
— Сортировка книг по коллекциям: 5-позиционной клавишей выбрать строку, расположенную выше самой первой книги (называется Showing All x Items…), нажать Вправо и выбрать Collections
— Добавление/удаление сразу нескольких книг в/из коллекции: 5-позиционной клавишей выбрать коллекцию, нажать Вправо и далее Add/Remove Items. В списке всех книг нажатием на середину 5-позиционной клавиши можно добавлять или удалять книги из коллекции
— Для удобства сортировок коллекций в начале их названий можно использовать символы. Так однотипные коллекции будут находиться рядом, а не сортироваться по алфавиту. Пример: #Fiction, @Feynman, (Current_reading), (Someday_reading). Аналогичного эффекта можно добиться путем названия коллекций, начиная с цифр: 111Fiction, 112Non_fiction
Чтение
Закладки ставятся автоматически при выходе из книги.
— Поставить/убрать закладку: ALT+B (попадете на нее открыв книгу)
— Для перемещения между главами, закладками, записями и выделенными кусками (указаны точками на прогресс-баре внизу) нажать Вправо-Влево на 5-позиционной клавише.
— Выделить кусок в книге, состоящий из нескольких страниц: перейти в начало куска 5-позиционной клавишей, нажать на ее центр, нажать Next Page, нажать на центр 5-позиционной клавиши.
— Все записи и выделенные куски хранятся в корне киндла в файле My Clippings.txt
— Увеличить иллюстрацию: поставить курсор на иллюстрацию, используя 5-позиционную клавишу (курсор изменится на лупу со знаком +), нажать на центр 5-позиционной клавиши. Киндл покажет иллюстрацию в ландшафтном режиме (landscape). Для возврата нажать Back.
— Сдвинуть рамку во время просмотра PDF файла: SHIFT+[Направление на 5-позиционной клавише]
— Удалить несколько закладок, записей, выделенных кусков:
o Нажать MENU и выбрать View My Notes & Marks
o Выбрать 5-позиционной клавишей, что должно быть удалено
o Нажать DEL
o Повторить для следующей закладки, записи, выделенного куска
Поиск
— Скопировать текст в строку поиска (для поиска в интернете, например):
o Нажать на середину 5-позиционной клавиши в начале слова (текста), который вы хотите скопировать
o Нажав вправо, выделить слово (текст) 5-позиционной клавишей
o Вместо нажатия на середину 5-позиционной клавиши для выделения слова, нажать ПРОБЕЛ
o Выделенное слово (текст) теперь находятся в строке поиска, которую можно отредактировать
o Нажать вниз и вправо, выбрав область для поиска
— Удалить весь текст из строки поиска: ALT+DEL
— Если поиск требуется начать с символа (клавиша SYM активна только в то время, когда открыта строка поиска), то для того, чтобы открыть строку поиска:
o На экране Home: нажать DEL или ENTER
o На других экранах: нажать ПРОБЕЛ и стереть его
— Если на экране Home напечатать в строке поиска DATE или TIME, то первой строкой в результатах поиска выведется текущая дата. Нажав на середину 5-позиционной клавиши, можно увидеть полную информацию о времени
— Специальные команды, которые можно набирать в строке поиска:
o @dict [слово] – поиск слова в словаре по умолчанию
o @store [слово] – поиск в amazon.com
o @author [автор] – поиск в amazon.com книг определенного автора
o @url – открыть броузер
o @url [адрес] – переход по адресу в броузере
o @web [слово] – поиск в интернете по ключевому слову
o @wiki [слово] или @wikipedia [слово] – поиск в википедии по ключевому слову
o @help – выводит список доступных команд
Перезагрузка
— Индикация перезагрузки:когда Киндл перезагружается, он выдает картинку читающего мальчика под деревом.
— Обычная перезагрузка: если Киндл на зарядке, то просто отключить от зарядки/компьютера
— Мягкая перезагрузка (когда работают клавиши и экран): HOME – MENU – SETTINGS – MENU – RESTART
— Жесткая перезагрузка (когда Киндл не откликается ни на что): сдвинуть и удерживать кнопку включения 30 секунд и потом подождите минуту-две
*Не допускайте разряда Киндла в ноль, он может наглухо зависнуть.
Так же он может зависнуть при битых файлах. И при скачке книги с самого ридера на Флибусте.
Музыка
— Файлы должны быть в формате MP3 и копируются в папку “music” в корне Киндла
— Воспроизвести/остановить: ALT+SPACEBAR
— Следующий файл: ALT+F
— Файлы проигрываются в том порядке, в котором они были скопированы на Киндл
— Для того, чтобы аудиофайлы появились в главном меню (их потом для удобства можно засунуть в коллекцию — типа альбом), нужно скопировать их в папку audible.
Очень удобно слушать кроме музыки Аудиокниги.
Text-to-Speech
- shift + Sym — Включить или выключить воспроизведение текста вслух
- back — Отключает Text-to-Speech
- spacebar — Ставит Text-to-Speech на паузу.
- Управляя курсором можно управлять порядком воспроизведения текста вслух.
Фотоальбомы
Алгоритм добавления и просмотра:
— Подключите Киндл к компьютеру
— Создайте в корне Киндла папку pictures
— Внутри папки Pictures создайте папку с названием Фотоальбома (например, Family). Можно создать несколько папок.
— Скопируйте в него фотографии (форматы: .JPG, .GIF, .PNG). Рекомендуемый размер 800×600
— Отключите Киндл от компьютера
— Обновите список книг на экране Home, нажав ALT+Z
— Фотоальбом должен выглядеть как новая книга в списке.
— При просмотре фотографий кнопка MENU выводит опции по просмотру фотографий
— Можно добавлять фотографии не только в подпапки внутри папки Pictures, а ещё и копированием zip архива с картинками в папку documents. Альбом также появится в списке книг. (Спасибо TSV)
— Горячие клавиши при просмотре картинок: (Спасибо TSV)
o Реальный размер изображения – C
o Изображение на полный экран – F
o Увеличить – Q
o Уменьшить – W
o Повернуть – R
o Сбросить текущее значение увеличения – E
Игры
— Миноискатель: ALT+SHIFT+M из экрана Home. Для опций сложности нажать MENU
— Крестики-нолики: G из Миноискателя
Преобразование текста в речь (Text-to-Speech)
— Начать/остановить: SHIFT+SYM. Для начала с определенного места необходимо сначала выбрать 5-позиционной клавишей это место и затем нажать SHIFT +SYM.
— Пауза/продолжить: ПРОБЕЛ
**********************************************************************************************************************************
1.7 Использование Wi-Fi
Kindle автоматически обнаруживает сети Wi-F поблизости и точки доступа, которые транслируют свое имя сети. Когда вы посещаете места, которые предлагают Wi-Fi доступ, такие как школы, дома, или Wi-Fi точки доступа в вашем любимом кафе, вы можете настроить Wi-Fi подключение. После того как вы создали Wi-Fi подключение и подключились к нему, Kindle автоматически подключается к нему в следующий раз когда вы возвращаетесь в тоже место, если сигнал Wi-Fi является достаточно сильным.
Подключение к сети Wi-Fi
Ваш Kindle может подключаться к Wi-Fi сетями или точкам доступа, которые используют стандарт 802.11b или 802.11g. Kindle не подключается к корпоративным или специальным Wi-Fi сетям (сети, которые позволяют подключение устройства к устройству без использования точки доступа(ad-hoc подключение)). Имейте в виду, что вы должны находиться в пределах одной или нескольких Wi-Fi сетей для подключения к хотя бы одной из них.
Для подключения к сети Wi-Fi, выполните следующие действия
Нажмите на кнопку Home, затем нажмите кнопку Меню.
Перейдите в раздел “Settings”, перемещая 5-позиционный джойстик вниз, а затем нажмите 5-позиционный джойстик для выбора.
Выберите “View”(Настройки) в разделе “Wi-Fi Settings”(Настройка беспроводных сетей) для отображения списка обнаруженных Wi-Fi сетей. Возможно, вам придется подождать пару мгновений, пока ваш Kindle обнаружит доступные сети. Kindle автоматически сканирует доступные сети Wi-Fi через определенные промежутки времени. Чтобы сканировать повторно доступные сети в любое время, выберите пункт “rescan” (повторное сканирование).
Выберите “Connect”(“Подключить”) для подключения к сети. Если вы видите символ замка рядом с “Connect”, сеть требует пароль для подключения.
Введите пароль (если требуется). Нажмите кнопку “Symbols”(Символы) для ввода цифр или символов, которые отсутствуют на клавиатуре Kindle. Вы можете продолжать использовать клавиатуру в то время как меню “Symbols” продолжает находится на экране.
Выберите “submit”(“Отправить”). Kindle подключается к сети Wi-Fi.
Подключившись к сети Wi-Fi хотя бы один раз, Kindle будет автоматически подключатся к ней снова, при нахождении сети в зоне доступа. Если несколько ранее использованных сетей находятся в районе доступа, ваш Kindle автоматически подключится к сети, которая используется наиболее часто.
Как только Ваш Kindle подключится к сети Wi-Fi, рядом с данной сетью в списке доступных сетей станет видна кнопка “Forget” (“забыть”). Выбор кнопки “Forget” отключает ваш Kindle от данной сети Wi-Fi, а также предотвращает Kindle от автоматического подключения к ней в будущем. Для получения дополнительной информации смотрите “Забудьте Wi-Fi сеть”.
Добавить новую Wi-Fi сеть
Если вы не видите сеть в списке обнаруженных сетей к которой вы подключиться, вы можете добавить ее, выбрав ““Enter other Wi-Fi network”(“Ввести сеть Wi-Fi вручную”) в нижней части списка обнаруженных сетей.
Чтобы добавить новую сеть Wi-Fi, выполните следующие действия:
Убедитесь, что вы находитесь в зоне действия сети которую вы хотите добавить, и что вы знаете имя сети и пароль (если требуется).
Нажмите на кнопку Home, затем нажмите кнопку Menu .
Перейдите в раздел “Settings” (“Настройки”), перемещая 5-позиционный джойстик вниз, а затем нажмите 5-позиционный джойстик для выбора.
Выберите “view”(“Просмотр”) в разделе “Wi-Fi настройки” для отображения списка обнаруженных Wi-Fi сетей.
Use the 5-way controller to navigate down to Используйте 5-позиционный джойстик для навигации до “Enter other Wi-Fi network”(“Введите другой сети Wi-Fi”) и нажмите кнопку, чтобы выбрать. and press to select.
Введите название Wi-Fi сети, которую вы хотите добавить.
Введите пароль (если требуется). Нажмите кнопку Symbol для ввода цифр или символов, которые отсутствуют на клавиатуре Kindle. Вы можете продолжать использовать клавиатуру в то время как меню “Symbols” продолжает находится на экране.
Выберите “Отправить”. Kindle подключается к новой сети Wi-Fi.
Если ваш Kindle не может подключиться к новой сети Wi-Fi, он будет отображать “unable to connect” (“не удалось связаться”) сообщения. Вы можете попробовать вручную ввести все информацию о сети для сети Wi-Fi, выбрав “set up network” (“Настройка сети”), когда вы видите сообщение “unable to connect”(“не удалось связаться”), или выполнить следующие шаги, описанные в “Ввод информации о сети” в главе 7. Если у вас нет информации о сети, попробуйте подключиться к другой сети, или обратитесь к администратору сети.
Forget(“Забудьте”) сеть Wi-Fi
Вы можете выполнить определенные действия чтобы Kindle “забыл” конкретную Wi-Fi сеть к которой вы подключены, что бы ваш Kindle не подключался к ней автоматически в будущем.
Чтобы “Забыть” Wi-Fi сеть, к которой вы подключены, выполните следующие действия:
Будучи подключеннными к сети, которую вы хотите забыть, нажмите на кнопку Home, затем нажмите кнопку Menu .
Перейдите в раздел “Settings”(“Настройки”), перемещая 5-позиционный джойстик вниз, а затем нажмите 5-позиционный джойстик для выбора.
Выберите “view”(“Вид”) в разделе “Wi-Fi Settings”(“Wi-Fi настройки”) для отображения списка обнаруженных Wi-Fi сетей. Возможно, вам придется ждать момента, как ваш Kindle обнаруживает доступные сети. Wi-Fi сеть к которой вы в настоящее время подключены отображает слово “forget”(“забыть”) рядом с ней в списке доступных сетей.
Выберите “forget” (“забыть”) для отключения от сети.
************************************************************************************************************
*Сделать выравнивание по левому краю:
Для этого нужно открыть файл настроек на ридере \system\com.amazon.ebook.booklet.reader\reader.pref
и заменить JUSTIFICATION=full на JUSTIFICATION=left. Можно также уменьшить горизонтальные поля, например, HORIZONTAL_MARGIN=10. Чтобы настройки были применены, необходимо перезагрузить устройство через HOME > MENU > «Settings» > MENU > «Restart»
Скрытые файлы видны при использовании Total Commander ( показать скрытые файлы )
*На 20% черных ридеров со временем стираются буквы. Выход: гравировка клавиш, стоит около 400 рублей. Найти можно в Яндексе.
*Если у вас книга быстро разряжается, не держите много книг на ридере, заряд уходит на индексацию книг. Оптимально держать до 300 штук. Выключайте по возможности интернет.
Так же после 5 зарядок аккумулятор раскачается. Из скачанной книги добавляйте на книгу только файл в MOBI, так меньше будет уходить заряда на индексирование книг. Так же перезагрузите книгу удерживая выключение 30 секунд.
Отключить интдексацию книг: Попробуйте отключить индексацию, она может сажать батарею (индексация позволяет ускорить поиск нужных книг по ключевым словам прямо с экрана «Home»).
Для этого нужно войти в режим отладки (находясь в Menu нажать любую букву, потом в появившейся строке поиска DEL, потом ввести ;debugOn, нажать «энтер»). После этого находясь в Menu нажать любую букву, потом в появившейся строке поиска DEL, потом ввести ~disableIndexing». В самой книге после этого поиск по словам работает, не работает только на экране «Home». Перезагрузить книгу удерживая кнопку вкл 30 секунд.
Установка времени на устройстве устанавливается только после регистрации на Амазоне
Вы можете установить время на свой Kindle для соответствия Вашему местному времени .
Совет: Модели Kindle 3G могут автоматически устанавливать время в правильное местное время, выбирая «установить автоматически».
Чтобы установить время устройства, следуйте этим шагам:
Если вы не находитесь на экране Home, нажмите кнопку Home.
Нажмите кнопку Menu.
Перемещая 5-позиционный джойстик, перейдите на пункт «Settings» (Настройки). Он выделится подчеркиванием. Нажмите на центральную кнопку джойстика, чтобы войти в этот пункт.
Нажмите боковую кнопку «Следующая страница», чтобы перейти на 2-ю страницу Настроек (Settings).
Перемещая 5-позиционный джойстик, перейдите на пункт «set» (установить) (для моделей Kindle Wi-Fi) или «установить вручную» (set manually) (для моделей Kindle 3G+Wi-Fi). Он выделится подчеркиванием. Нажмите на центральную кнопку джойстика, чтобы войти в этот пункт. Затем выберите » Время устройства» (Device Time) и нажмите джойстик.
Использую 5-позиционный джойстик, отрегулируйте часы, минуты и настройки am/pm (до/после полудня).
Переместитесь на «Сохранить» (save), и нажмите джойстик, чтобы выбрать его.
На моделях Kindle 3G, после того как Вы установили время вручную, Вы можете выбрать «Редактировать» (edit) для изменения времени устройства.
Совет: Нажав кнопку Menu, находясь на любой странице Kindle , можно вывести время в верхней части экрана.
Преобразование Word в MOBI
1. В Word сохранил документ в RTF ( Сохранить Как — другие форматы — RTF ) Далее загрузил в Калибри: http://calibre-ebook.com/ 1. Добавить книги (левая кнопка вверху) — добавить книги из одной директории — добавляем Документ 2.Преобразовать книги (кнопка вверху по центру ) Метаданные, формат вывода (EPUB, MOBI) и т.д. ( справа сверху )3.Сохранить на диск (кнопка вверху) в одну директорию
Русификация для желающих ( не будут вставать обновления, на рекламный ставятся обычные русификаторы, на WiFi — для WiFi, для 3G выбрать 3G русификатор ) http://www.siralex.info/2011/03/07/kindle-3-localization-russian/
** Инструкция по вводу русских символов **
1. Кнопка [SYM] — вызывает стандартное окно с символами.
2. Кнопка [ALT] + [SYM] — вызывает окно с русскими буквами.

1. Поставить jailbreak
2. Поставить русификацию
Инструкция по гарантийной замене Amazon Kindle http://habrahabr.ru/blogs/ebooks/123571/
Форма возврата/замены на Амазоне https://www.amazon.com/gp/orc/returns/homepage.html
Теперь можно общаться и по чату: https://www.amazon.com/gp/help/chat/popup.html?c2cId=b2dc013a-5957-4d3a-b2f3-610920f2c388&token=6062598477&callMeC2CId=5cc95135-30fd-474b-97a7-197f28c24edc&reftagSuffix=EPC# Переводчик: http://translate.google.com/
Закладки ставить не надо,они ставятся автоматически. Во всех книгах вы начнете читать с того места где читали.
Заряжать можно когда хотите, при зарядке горит желтый огонек, когда зарядится зеленый. От сети заряжается быстрей в несколько раз чем от компьютера, и при зарядке от сети книга не блокируется.
Увидеть заряд батареи нажать кнопку Menu
Если не заряжается перезагрузите книгу удерживая выкл 30 сек
Полоски при чтении книг внизу отображают не все книги
-
Contents
-
Table of Contents
-
Bookmarks
Quick Links
Related Manuals for Amazon kindle
Summary of Contents for Amazon kindle
-
Page 2: Table Of Contents
Removing Kindle Items ……..
-
Page 3
3.2 Content Formatting on Kindle …….. -
Page 4
Connecting to the Kindle Store …….. -
Page 5
Registering or Deregistering Kindle …….. -
Page 6
9.2 Managing Your Kindle on Amazon.com …….. -
Page 7
Maintaining Your Kindle …….. -
Page 8: Welcome
You can leave this guide at any time by pressing the Home button on your Kindle. To turn to the next page, press one of the Next Page buttons.
-
Page 9
If you haven’t done so already, please follow the Getting Started instructions that came with your Kindle and plug in your Kindle to charge the battery. The charge indicator light on the bottom edge of your Kindle turns yellow and a lightning bolt appears on the battery icon at the top of the display. -
Page 10
Kindle Store. You can also use the keyboard to create notes while reading. All of these are covered in more detail later in this guide. -
Page 11
5-way to select. The text changes to the new size. Repeat the same steps to change the text size back or to change it to a size comfortable for you to read. KINDLE USER’S GUIDE 3 EDITION · 11 ·… -
Page 12
Amazon.com. Underline the item you want to move back to your Kindle and move the 5-way to the right to start the transfer. In under a minute, the item re-downloads into your Kindle and appears in the list of content in Home. -
Page 13
You can see details about an item, read customer reviews, and even download free samples of books you are interested in. If you want to buy an item, Kindle uses secure Amazon 1-Click and then Whispernet delivers the item to your Kindle generally in under a minute with no wireless delivery charges to you. -
Page 14
If you own multiple Kindles, Whispersync makes it easy to synchronize the furthest page read in your book and your bookmarks among your devices. With Whispersync turned on, you can start a book on your Kindle, and pick up where you left off on your Kindle. -
Page 15
Manage Your Kindle page on Amazon.com). We will convert the document into Kindle format and wirelessly deliver it directly to your Kindle for a small fee or back to your computer for free. Currently, the conversion of PDF documents is an experimental feature on Kindle, and some complex PDF files might not format correctly on your Kindle. -
Page 16
Amazon.com at: http://www.amazon.com/manageyourkindle You can leave the Kindle User’s Guide, or any item you are reading, at any time by pressing the Home button. If you are done reading, you can put your Kindle to sleep by sliding and releasing the power button located at the top of your Kindle (you wake up Kindle the same way). -
Page 17: Getting Started With Your Kindle
CHAPTER 1: Getting Started with Your Kindle In the Welcome chapter of the Kindle User’s Guide, you read about many of the things you can do with your Kindle. This chapter reviews all of the physical features of Kindle and covers the basics of using the Kindle buttons, menus, and keyboard.
-
Page 18
Keyboard — use to enter search terms, notes in your content, URLs for Web sites, etc. Back button — retraces your steps on Kindle just like the back button on a web browser. For example, you can follow a link in a book and then press the Back button to return to your place. -
Page 19
Text key — changes the size of the text while you are reading and presents available controls for Text-to-Speech. Move the 5-way controller to select the optimal text size or a Text-to-Speech action. KINDLE USER’S GUIDE 3 EDITION · 19 ·… -
Page 20: Back View
BACK VIEW The back of your Kindle contains stereo speakers for audio content. KINDLE USER’S GUIDE 3 EDITION · 20 ·…
-
Page 21: Top View
Your Kindle will also go to sleep by itself after ten minutes if you are not using it. If your Kindle had wireless on prior to going to sleep, it will continue to receive your regularly scheduled subscriptions while in sleep.
-
Page 22: Bottom View
Check to make sure the power adapter is not covered by anything that could cause it to overheat. If the charge indicator light does not light up, make sure that the USB cable is fully inserted into your Kindle and the power adapter. If Kindle still is not charging, try another electrical outlet.
-
Page 23: Getting Around
1.2 Getting Around To get around on your Kindle, you use the buttons, menus, and the keyboard—all of which are explained here. USING THE BUTTONS In the Welcome section you learned about the navigation buttons (Previous Page, Next Page, and Back). For an explanation of what each button does, see Front View of Kindle.
-
Page 24
The illustration below shows the Home menu; the bold line under “Shop in Kindle Store” indicates that it is ready to be selected. KINDLE USER’S GUIDE 3 EDITION · 24 ·… -
Page 25
THE APPLICATION MENU You can display a menu from any screen on your Kindle. When you press the Menu button, it displays choices related to the screen you are viewing. The sample screen below shows you the screen you would typically see when you press the Menu button from within a book. -
Page 26: Entering Text
1.3 Entering Text To use the Kindle keyboard, most people find it easiest to hold the device in both hands, and use the tips of their thumbs to press the keys. LOWERCASE AND UPPERCASE LETTERS To enter lowercase letters, press the appropriate letter key. To enter uppercase letters,…
-
Page 27
Use the 5-way controller to choose the character you want and it will appear in your text entry box. KINDLE USER’S GUIDE 3 EDITION · 27 ·… -
Page 28: Status Indicators
None of the bars are filled in. This means the wireless signal strength is too low to connect. You will not be able to connect to the Kindle Store, Basic Web, register your device, retrieve content from Archived Items, or receive your subscriptions.
-
Page 29: Battery Status Indicators
Kindle also lights up. Note that if your Kindle is plugged into a low powered USB port such as those found on some keyboards or older computers, you will only derive enough charge to avoid depleting the battery but not enough to recharge it.
-
Page 30: Getting To Know Kindle Content
Kindle. It shows you what has arrived recently, what you are reading, and where you are in your reading. It also allows you to remove content from your Kindle and to move content from Amazon.com to your Kindle. Read below for more details.
-
Page 31
Audiobooks look similar to books, but they will be labeled in the Home screen as audio content. Like regular books, they have a progress indicator that shows where you are in the audiobook. KINDLE USER’S GUIDE 3 EDITION · 31 ·… -
Page 32: Home Screen Features
The screen sample and list below explain the features that you may find on your Home screen. Device name — the name of your Kindle. You can edit this name on the Settings screen.
-
Page 33
24 hours old. Once you open a new document or more than 24 hours has passed since the item arrived on your Kindle, the “new” label is removed. Archived Items — items stored at Amazon.com that you can re-download to your device. -
Page 34: Show Options
Moving the 5-way controller to the left lets you select what items to show in Home. Personal Docs — shows only the Personal Documents you have stored on your Kindle. Subscriptions — shows only the periodicals and blogs you have stored on your Kindle.
-
Page 35
Books — shows only the books and audiobooks you have stored on your Kindle. All My Items — shows all of the content you have stored on your Kindle. CHANGING WHAT YOUR HOME SCREEN SHOWS By default, the Home screen shows all of your content. To change the type of content displayed, follow these steps: 1. -
Page 36: Sort Options
Title — sorts your content alphabetically by title of the item. Author — sorts your content alphabetically by the author’s last name or publisher’s name. If you choose this option, periodicals will be sorted by their dates. KINDLE USER’S GUIDE 3 EDITION · 36 ·…
-
Page 37
3. Move the 5-way to the right to see the Sort options. 4. Move the 5-way to underline how you want the items sorted. 5. Press the 5-way to select it. The sort order on the Home screen changes immediately. KINDLE USER’S GUIDE 3 EDITION · 37 ·… -
Page 38: The Home Screen Menu
THE HOME SCREEN MENU The Home screen menu allows you to navigate to other places in Kindle or to perform specialized tasks. To display the Home screen menu, press the Menu button when your Home screen is displayed. The list below explains the menu.
-
Page 39: Managing Your Content
4. When you see “delete,” press the 5-way to confirm the deletion. To change your mind, move the 5-way up or down to cancel. Note that Kindle books are backed up for you at Amazon.com even if removed from the device.
-
Page 40
Amazon, any annotations you created on Kindle for those items do not get saved. Your “My Clippings” file will still remain as a separate file containing all the clippings you added regardless of whether the content is a book, subscription, or blog or was purchased from Amazon or not. -
Page 41: Chapter 3: Reading On Kindle
Kindle books for free. If you like it, simply buy it from within the sample and continue reading. You can learn more about this feature in Chapter 5.
-
Page 42: Blogs
Chapter 8. BACKGROUND MUSIC If you like to listen to music while you use your Kindle, use your computer to transfer MP3 files to the “music” folder on your Kindle. When you select “Play MP3” from the Experimental page, each of the songs will play in the order they were added to your Kindle.
-
Page 43: Content Formatting On Kindle
When you read a book on Kindle, you will find that the formatting generally follows the printed version of the book. If the book has a table of contents, it will appear in Kindle. If the book has chapters, a preface, an illustrated cover, and so forth, these will be displayed.
-
Page 44: Progress Indicator
Locations are the digital answer to page numbers. Changing the text size on Kindle also changes the page numbering, but with locations, you return to the same place every time regardless of the text size.
-
Page 45: Changing The Text Size
You can adjust the size of the text to suit your preference. You have a choice of six sizes for reading content on Kindle. (You cannot change the text size on menus or on Kindle screens, such as the Home screen or the Kindle Store.) KINDLE USER’S GUIDE 3…
-
Page 46: Increasing The Size Of A Picture
To go to the menu, press the Menu button when reading a book or periodical. You will have slightly different options depending on the content you are reading. Examples of the menu options are described below. KINDLE USER’S GUIDE 3 EDITION · 46 ·…
-
Page 47
Shop in Kindle Store — takes you to the Kindle Storefront. Buy This Book Now — connects to the Kindle Store, purchases, and downloads the full book to your Kindle. Only appears if you are reading a sample from the Kindle Store. -
Page 48
Sync to Furthest Page Read — connects to Amazon.com and compares your current reading location with the one saved at Amazon. If you are further along in your book using another device, Kindle gives you the choice to go to the furthest page read. -
Page 49
Clip This Article — makes a copy of the entire article and adds it to your “My Clippings” file. Keep This Issue — designates the newspaper or magazine issue as one to be stored in your Kindle until you remove it. KINDLE USER’S GUIDE 3 EDITION… -
Page 50: Navigating Within A Periodical
5-way, a list of the sections will appear. If you are viewing a blog, “View Articles List” is highlighted and pressing the 5-way shows a list of the blog’s articles. KINDLE USER’S GUIDE 3 EDITION · 50 ·…
-
Page 51
To dismiss this view and return to where you were last reading in the magazine or newspaper, select “Close Sections List” located at the bottom of the screen. KINDLE USER’S GUIDE 3 EDITION · 51 ·… -
Page 52: Selecting Internal Links
Your reading material may also contain links to other places in the document. For example, in many books, the table of contents is set up to link to the content pages. Links are easy to spot because they are underlined. KINDLE USER’S GUIDE 3 EDITION · 52 ·…
-
Page 53: Viewing A Table
READING ACROSS MULTIPLE KINDLES If you read the same Kindle Store book across multiple Kindles, you’ll find Whispersync makes it easy for you to switch back and forth. Whispersync synchronizes the bookmarks and furthest page read among devices registered to the same account.
-
Page 54: Looking Up Definitions
When you view the annotations, you see only those for the content you are currently reading. Kindle also gathers the annotations you’ve made across all your various books, magazines, newspapers, blogs, and personal documents and places them in the “My Clippings”…
-
Page 55: Using Bookmarks
Tip: All of your annotations on a Kindle book are backed up on Amazon servers in case you transfer your Kindle to another person or lose or break the device. When you download a previously annotated book from Amazon.com, your annotations and last location read will come down with it.
-
Page 56
5. Repeat steps 3 and 4 until you have removed all unwanted bookmarks. 6. Move the 5-way down until the “Close Notes & Marks” button is highlighted and press the 5-way to exit. You can also exit this view by pressing the Back button. KINDLE USER’S GUIDE 3 EDITION · 56 ·… -
Page 57: Using Highlights
USING HIGHLIGHTS You can highlight text in Kindle like you would use a highlighter pen on paper. Kindle stores all your highlights for the current content in your annotations. You can view them at any time by pressing the Menu button and selecting “My Notes & Marks.”…
-
Page 58: Using Notes
To delete a note, follow these steps: 1. Use the 5-way to move the cursor over the note’s number. 2. The note appears at the bottom of the screen. 3. Press the Delete key to delete the note. KINDLE USER’S GUIDE 3 EDITION · 58 ·…
-
Page 59
VIEWING YOUR ANNOTATIONS To view your bookmarks, highlights, and notes, press the Menu button and select “My Notes & Marks.” KINDLE USER’S GUIDE 3 EDITION · 59 ·… -
Page 60
3. Move the 5-way controller down until “Clip this Article” is underlined. Press the 5-way to select. Kindle adds your clipping to the “My Clippings” file. You can review your clippings later, search for words or terms you clipped, and transfer the “My Clippings” file to your computer. -
Page 61: Using Clippings
MORE ABOUT MY CLIPPINGS You cannot edit the “My Clippings” file from within Kindle, but you can edit the file on your computer. To edit the “My Clippings” file: 1. Connect your Kindle to your computer using the USB cable.
-
Page 62: Listening To Audio Materials
3.6 Listening to Audio Materials There are three types of audio materials that you can listen to on your Kindle. You can purchase, transfer, and listen to audiobooks from Audible.com, transfer MP3 files from your computer to play as background music while you read, or turn on Text-to-Speech in any of your reading material.
-
Page 63
Pause/Play — pauses or plays the audiobook (there is no Stop control). Forward 30 Seconds — moves ahead thirty seconds from the current location. Beginning — takes you back to the beginning of the audiobook. KINDLE USER’S GUIDE 3 EDITION · 63 ·… -
Page 64: Background Audio
4. Move the 5-way down until “Play MP3” is underlined and press down to select it. The songs are played in order, by the date you added them to your Kindle. You can adjust the volume of the music using the volume controls on the right side of your Kindle.
-
Page 65: Text-To-Speech
2. Move the 5-way down so that the “Text-to-Speech” option is underlined. Press the 5-way to select “turn on.” In a few moments, you will hear your content spoken aloud. You can either listen to it through the Kindle’s external speakers or plug in earphones into the headphone jack.
-
Page 66
Menu button and selecting “Stop Text-to-Speech.” Tip: You can also play or stop Text-to-Speech by holding down the Shift key and pressing the Symbol key . You can pause and resume Text-to-Speech by pressing the Spacebar. KINDLE USER’S GUIDE 3 EDITION · 66 ·… -
Page 67: Chapter 4: Searching On Kindle
You enter your search term or phrase and Kindle searches in the body of the text, in the metadata (for example, the title or author), and in your “My Clippings” file. Additionally, Kindle also keeps and searches the metadata for the content you have stored on Amazon.
-
Page 68: Performing A Search
SEARCHING FOR DEFINITIONS You can limit a search to the dictionary. Kindle searches your default dictionary for definitions of the word you have entered. PERFORMING A SEARCH To perform a search, follow these steps: 1. Type in your search term, the Search line will automatically appear. You can use whole words or partial words, and no distinction is made between lower and upper case.
-
Page 69: Search Results Page
4.2 Search Results Page When searching all your content, Kindle looks in the reading materials you have on your Kindle and the metadata (like title and author) of the materials you have in Archived Items. This includes purchased items, personal documents, local reference materials, and annotations that you have created.
-
Page 70: Search Results For A Specific Item
3. A page appears showing all instances of the search term in that particular title. Each occurrence lists its location number and is shown in context so you can see how the search term is used. KINDLE USER’S GUIDE 3 EDITION · 70 ·…
-
Page 71
To go to a specific location in the content where the search term occurs, use the 5-way to underline the location and press the 5-way to select. KINDLE USER’S GUIDE 3 EDITION · 71 ·… -
Page 72: Search Results For A Definition
SEARCH RESULTS FOR A DEFINITION When you want to look up the meaning of a word, you can limit a search to the dictionary. Kindle searches your default dictionary for definitions of the word you enter. To find a definition, follow these steps: 1.
-
Page 73: Performing Remote Searches
Basic Web and submits your search term to Google. SEARCHING THE KINDLE STORE To search the Kindle Store, enter your term and move the 5-way to select “store.” Your Kindle connects to the Kindle Store and displays the search results page for the store sorted by relevance, as shown in the example below.
-
Page 74
Tip: You can also narrow a search in the Kindle Store to an author’s name by typing “@author” followed by the author’s name. For example, to search the Kindle Store for books by Agatha Christie, enter “@author Agatha Christie” in the Search line. -
Page 75: Chapter 5: The Kindle Store
Amazon automatically backs up all of your purchases in case you lose your Kindle or want to download a title again. To help other Amazon users decide what to buy, you can also add your own ratings and reviews.
-
Page 76: The Kindle Storefront
THE KINDLE STOREFRONT When you select “Shop in Kindle Store” from any menu, you will be taken to the Kindle Storefront. An example is shown below, the storefront you see may be different as we update it often. The features are explained in the list that follows.
-
Page 77: The Store Menu
Kindle Store for matches and return the search results. Once you are in the Kindle Store, you can move around using links on the pages of the store such as Reviews or Top Sellers, by using the Store menu, or by searching the Kindle Store for specific titles.
-
Page 78
Kindle Store. Kindle Storefront — takes you to the Kindle Storefront. Books — displays the books currently available in the Kindle Store. Newspapers — displays the newspapers currently available in the Kindle Store. -
Page 79: Browsing The Store
BROWSING THE STORE Another way to find reading material in the Kindle Store is to browse through the different content categories such as books or newspapers. Once inside a category, you can further refine your browse by topic. For example, within “Books,” you can refine listings to “Fiction,”…
-
Page 80
Number of titles in the category — shows the number of items available in the particular category. Categories — groups the content by topics of interest to make browsing easier. Select the category you are interested in to show only items in that particular subject. KINDLE USER’S GUIDE 3 EDITION · 80 ·… -
Page 81: Getting The Details
5-way controller to select it. PRODUCT DETAIL PAGE EXAMPLE The example below shows you a product detail page for a book available at the Kindle Store. The features on this page are explained in the list below. KINDLE USER’S GUIDE 3 EDITION ·…
-
Page 82
Author — searches the Kindle Store for other books by the author when selected. If more than one author wrote the book, selecting this item will show a menu of the authors from which to choose. Description — describes the item. Select “more” to see the full text. -
Page 83: Saving Items For Later
SAVING ITEMS FOR LATER The Kindle Store provides a “Save for Later Items” page for you to save items that you want to look at or purchase later. This page lists the item’s title, author, and average customer rating. To add an item to your list, select “Save for Later” from the product detail page for the item.
-
Page 84: Writing Your Own Ratings And Reviews
To get to this page, select “Customer Reviews” from the product detail page for the item you want to critique, and then select “Write a Review.” The sample screen below shows you the type of information you can enter. KINDLE USER’S GUIDE 3 EDITION · 84 ·…
-
Page 85: Entering And Rating A Review
3. Select “Review” and type your review on the lines provided. Select “ok” to submit your review. 4. To submit your rating and review, select “Submit.” If you want to close this page without submitting your rating or review, select “Cancel.” KINDLE USER’S GUIDE 3 EDITION · 85 ·…
-
Page 86: Making Purchases
This section explains various aspects of purchasing items from the Kindle Store. TRYING A SAMPLE BOOK Most Kindle books allow you to download a sample before you decide to buy the item. The end of the sample book has a link to revisit the product detail page for the item or a link to purchase the item directly.
-
Page 87: Chapter 6: Accessing The Web
“Basic Web” from the Experimental screen or to follow a link from within your reading material. Many of the blogs that you subscribe to from the Kindle Store have links to Web sites. Selecting these links will open Basic Web and take you to the URL associated with the link.
-
Page 88: Using Bookmarks And Adding Your Own
Menu button. Move the cursor to “Bookmark this page” and press the 5-way controller. Any new bookmarks that you select will be added to the existing list on your Kindle. You can remove a bookmark by going to your Bookmarks lists and moving the 5-way controller until the item you want to delete is underlined.
-
Page 89: Using Next Page And Previous Page
You can navigate the links on a Web page by using the 5-way controller to move the cursor around the page. Links in Basic Web are shown as underlined words, just like in the Reader. Below is a Web page with multiple selectable links. KINDLE USER’S GUIDE 3 EDITION · 89 ·…
-
Page 90
If there are radio buttons embedded within a Web page, you can change the input by maneuvering the cursor to the button you want to change and press the 5-way to “push” this button. KINDLE USER’S GUIDE 3 EDITION · 90 ·… -
Page 91: Using History
The Basic Web menu contains other items you can select, many of which also appear in the Browser’s navigation bar. To view the menu, press the Menu button when the Basic Web browser is on the screen. KINDLE USER’S GUIDE 3 EDITION · 91 ·…
-
Page 92: Other Features
Use Advanced Mode — for complex Web sites. This mode squeezes pages down to fit the width of the Kindle screen. In this mode, JavaScript can also be enabled. When this mode is selected, the menu selection then changes to “Use Basic Mode” which optimizes the Kindle’s browser for viewing most pages.
-
Page 93: Basic Web Settings
The types of files you can download include Kindle content (.AZW, .AZW1), unprotected Mobipocket books (.MOBI, .PRC) and text files (.TXT). BASIC WEB SETTINGS You can modify the default browser behaviors and perform simple maintenance procedures using Basic Web Settings. To display the Settings screen, press the Menu button while in the browser and then use the 5-way to select “Settings.”…
-
Page 94
Switch to Advanced Mode — switches between Basic and Advanced modes, when you view Basic Web. Clear Cache — removes temporary Internet files from your Kindle. Move the on- screen highlight to “Clear Cache” and press the 5-way controller to clear the cache. -
Page 95: Settings And Experimental
CHAPTER 7: Settings and Experimental Use the Kindle Settings page to personalize items on Kindle such as the name of your Kindle, automatic backup, personal information, etc. The Settings page also gives you information about your Kindle, such as the software version number. The Experimental page contains a number of prototype concepts we are working on.
-
Page 96
Device Name — you can change the name of your device to anything you want. This name shows at the top of the Home screen. Device E-mail — this is the e-mail address of your Kindle. You and your friends can send documents to this address and they will be converted by Amazon and sent to your Kindle. -
Page 97: Registering Or Deregistering Kindle
3. Move the 5-way down until “Settings” is underlined and press to select. 4. Press the 5-way to select “Register.” 5. You will see a text entry box at the bottom of the screen to enter your Amazon.com user name and password (the e-mail address and password associated with your Amazon account).
-
Page 98: Personalizing Your Kindle
DEREGISTERING YOUR KINDLE If you want to transfer ownership of your Kindle or return it for service or recycling, you should deregister it to prevent unauthorized purchases. The process is similar to the registration process described above. Just select “deregister” from the Registration section and select “ok”…
-
Page 99: Choosing Your Primary Dictionary
Amazon.com on any of your purchased content. If you delete an item from your Kindle or your Kindle is lost, stolen, or damaged, you can automatically restore your annotations, bookmarks, and the last location you read by downloading the item from the Manage Your Kindle page on Amazon.com…
-
Page 100
Turn Wireless Off — turns off Whispernet. When Whispernet is off, this option will change to Turn Wireless On. Shop in Kindle Store — takes you to the storefront of the Kindle Store. Disable Annotations Backup — by default the last location read on your content and any annotations you’ve made to Kindle Store content is backed-up at Amazon. -
Page 101: Experimental
Lookup function. This menu option is only present if you have at least one additional dictionary loaded on your Kindle. Update Your Kindle — installs the latest software for your Kindle. When an update is loaded on your device, this menu option becomes available; otherwise it is grayed out.
-
Page 102: Kindle And Your Computer
8.1 Getting Started This section lists the requirements for connecting Kindle to your computer. The USB cable you use with your power adapter can also be used to connect your Kindle to a computer, so there is nothing additional to buy.
-
Page 103: Handling Files Through Usb
Also, your Kindle is not usable as a reading device while you are in USB drive mode, but will return right to where you were when you unmount the device from your computer.
-
Page 104: Transferring Your Clippings
In addition to reading commercially available materials, you can have Amazon convert your personal documents into a Kindle-compatible format for reading on your Kindle. You can have the converted files sent wirelessly to your Kindle for a small fee or to the e-mail address associated with your Amazon account for free.
-
Page 105: Sending Your Documents For Conversion
2. Sign-in to your Amazon.com account. 3. In the Your Kindle(s) section, select “Edit Info.” 4. In the Kindle E-mail Address text field, change the first part of the e-mail address to what you would like it to be. The @kindle.com will automatically be appended.
-
Page 106: Audiobooks And Mp3S
Windows or Mac-based computer and then transfer these books over USB to your Kindle’s “Audible” folder, and listen to them on your Kindle. Once on your Kindle, an Audible file will be displayed on your Home screen with your other documents. The file will have the word “audio”…
-
Page 107: Transferring Mp3S
TRANSFERRING MP3s You can transfer your MP3 files to Kindle by copying them to the “music” folder on your Kindle over USB. For more information on connecting your computer over USB, see Making the Connection earlier in this chapter.
-
Page 108: Your Kindle And Amazon.com
Store using a Web browser on your computer. You can also go to the Manage Your Kindle page on Amazon.com to manage your Kindle account, change or cancel a subscription, or look up a past Kindle order. If you need help, Kindle Support on Amazon.com gives you information, e-mail, and phone access to dedicated customer service representatives.
-
Page 109: Ordering Content
Send sample now — click this button to receive a free sample of a book on your Kindle. You can read the beginning of the book for free. If you enjoy it, you can make a purchase directly from your Kindle or return to the Kindle Store on Amazon.com if you prefer to purchase from your computer.
-
Page 110: Managing Your Device
Edit Info: manages the same options available on Kindle’s Settings menu such as the name that appears on the top of your Kindle Home screen; allows you to change your Kindle e-mail address to which you or others can send e-mail attachments to be read on your Kindle (see Chapter 8 for more information on converting personal documents);…
-
Page 111: Downloading Content From Your Computer
Home. 9.3 Contacting Kindle Support If you have problems with your Kindle, try using the Kindle Support Web site or one of our Customer Service members will be happy to help. KINDLE SUPPORT WEB ADDRESS: http://www.amazon.com/kindlesupport…
-
Page 112: Migrating Content To Your New Kindle
4. Move the 5-way to the right and “add to home” will appear under the title. Press the 5-way to download the item to your new Kindle. You can also transfer books to your device by visiting the Manage Your Kindle page on Amazon.com with your computer. From your computer’s Web browser, open: http://www.amazon.com/manageyourkindle…
-
Page 113: Transferring Periodical Subscriptions
2. Connect the USB cable (provided with your Kindle) to the Kindle and your computer. 3. Your Kindle should appear on your computer in the same location you would normally find an external USB drive. 4. Open your Kindle. You should see a folder entitled “documents.”…
-
Page 114: Transferring Personal Documents
10.3 Transferring Personal Documents To transfer personal documents you have stored on a Kindle to another Kindle, follow these steps: 1. Connect the Kindle you want to transfer information from to your computer using the USB cable provided for that particular Kindle.
-
Page 115: Transferring Audiobooks
4. Using your computer, un-mount your Kindle from your computer. 5. Connect the Kindle you want to receive the audiobooks to your computer using the USB cable provided for that particular Kindle. 6. Open your Kindle. Transfer the “Audible” folder from your computer desktop to your Kindle.
-
Page 116: Transferring Mp3S
10.5 Transferring MP3s To transfer MP3s you have stored on a Kindle to another Kindle, follow these steps: 1. Connect the Kindle you want to transfer an MP3 from, to your computer using the USB cable provided for that particular Kindle.
-
Page 117: Appendix
Administration regulations require you to have permission from a crew member to use your device’s wireless service. If you have your wireless service turned off, you can use your Kindle for reading once a crew member has said it is okay to use electronic devices.
-
Page 118
If your Kindle does cause harmful interference to radio or television reception (which you can determine by turning your Kindle off and on), you can try to correct the interference by one or more of the following measures: reorient or relocate the receiving antenna for the radio or television;… -
Page 119: Maintaining Your Kindle
Troubleshooting section. Faulty service may void the warranty. Clean the screen with a soft cloth; be careful not to wipe it with anything abrasive. When carrying your Kindle in a bag or briefcase, keep a book cover on to avoid scratches.
-
Page 120
EXCLUSION OR LIMITATION OF INCIDENTAL OR CONSEQUENTIAL DAMAGES, SO THE ABOVE EXCLUSION OR LIMITATION MAY NOT APPLY TO YOU. This limited warranty gives you specific legal rights, and you may have other rights which vary from state to state. KINDLE USER’S GUIDE 3 EDITION · 120 ·… -
Page 121: Notices And Certification
RADIO FREQUENCY EXPOSURE INFORMATION (SAR) Your Kindle device meets the U.S. government’s requirements for exposure to radio waves. Kindle is designed and manufactured not to exceed the emission limits for exposure to RF energy set by the U.S. FCC. The exposure standard for wireless devices employs a unit of measurement known as the specific absorption rate, or SAR.
-
Page 122
In general, the closer you are to a wireless base-station antenna, the lower the power output. The highest measured SAR value for this model Kindle as reported to the FCC when held at least 0.39 of an inch (1.0 cm) from the body is 1.32W/kg. -
Page 123
PATENT NOTICES The Kindle device and/or methods used in association with the Kindle device may be covered by one or more patents or pending patent applications. MPEG Layer-3 audio decoding technology licensed from Fraunhofer IIS and Thomson. TRADEMARK NOTICES 1-CLICK, AMAZON, the AMAZON.COM LOGO, the AMAZONKINDLE LOGO, AUDIBLE, KINDLE, MOBIPOCKET, WHISPERNET AND WHISPERSYNC are trademarks of Amazon Technologies, Inc. -
Page 124: Product Specifications
Power — AC power adapter and rechargeable lithium polymer battery. Connectivity — USB 2.0 (micro-B connector) EVDO/CDMA wireless modem. Operating temperature — 32°F to 95°F (0°C to 35°C). Storage temperature — 14°F to 113°F (-10°C to 45°C). KINDLE USER’S GUIDE 3 EDITION · 124 ·…
| Регистрация | Полная инструкция на русском языке, а также секреты Amazon Kindle 3 нашим покупателям, клиентам и коллегам по программе
которые прошли Регистрацию Mir2day.com. |
Краткая Инструкция
1. Включаем Amazon Kindle 3 с помощью слайдера, расположенного на нижнем торце. Кнопка включения — слайдер — передвигается легко слева направо (удобнее большим пальцем правой руки). Также происходит и отключение устройства. Кнопки управления:слева направо — регулировка громкости «-» и «+», слайдер включение и выключения электронной книги. Нижний торец устройства:

2. Гнёздаслева направо — выход под наушники и для кабеля microUSB, микрофон (пока никак не задействован).
3. С помощью кабеля microUSB подсоединяем Amazon Kindle 3 к USB гнезду в компьютере. Скачиваем любой файл в формате TXT или MOBI с интернета или Вашего компьютера в папку Вашего Kindle Documents. Компьютер видит Ваш Kindle, как обычную флешку или ещё один дополнительный диск. Соответственно после подключения кабеля microUSB через кнопки Пуск и Компьютер Вы увидите Ваш Kindle и внутри папку Documents для книг и любых файлов с последующим их прочтением.
4. Полная инструкция на русском языке, а также секреты Amazon Kindle 3 нашим покупателям, которые прошли Регистрацию .
5. Кнопки Back (Назад), Menu, а между ними джойстик, состоящий из 5-ти кнопок: Влево, Вправо, Вверх, Вниз и центральная Вправо, позволяющая раскрыть выбранную книгу (на рисунке внизу выделенный файл с именем Welcome Vladimir).  Кнопка Вправо, если её нажать, в данной конкретной ситуации приведёт Вас к навигации по кокретному файлу или книге. Вы сможете перейти к содержанию книги, быстро открывать нужную главу, продолжать чтение там, где Вы закрыли книгу в прошлый раз и т.д.
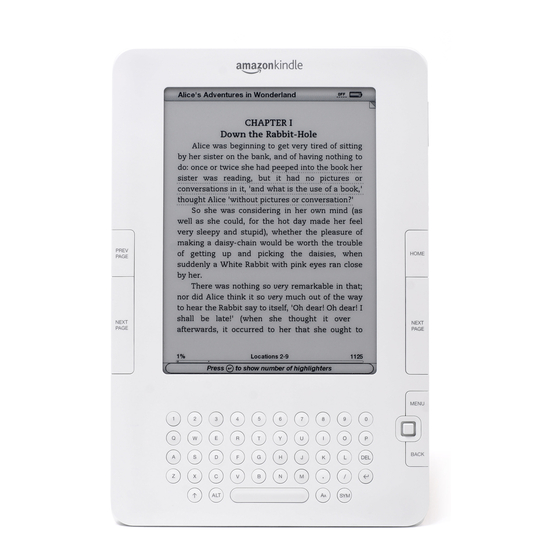
1.1 Внешний вид Kindle
Вид спереди
На передней части Киндла находится экран, клавиатура и элементы управления. Эти особенности иллюстрируются и прокомментированы в списке ниже.
Кнопка «Предыдущая страница» (Previous Page button) — переход на предыдущую страницу текста. Кнопка Предыдущая Страница находится по правую и левую сторону устройства, чуть выше кнопки Следующая Страница.
Кнопка «Следующая страница» (Next Page button) — переход на следующую страницу текста. Кнопка Следующая Страница находится по правую и левую сторону устройства, чуть ниже кнопки Предыдущая Страница.
Кнопка «Домой» (Home) — показывает содержимое хранящееся на Киндле и в архиве на Амазоне. Home кнопка расположена на нижнем ряду клавиатуры, чуть слева от кнопки Back («Назад»).
Кнопка «Меню» (Menu) — отображает приложения и навигационные решения, которые связаны с тем что отображается на экране в данный момент. Кнопка меню находится в верхней строке клавиатуры, чуть выше 5-позиционного джойстика.
5-позиционная клавиша/джойстик (5-way controller) — выбирает элемент или действие когда вы нажимаете центр клавиши. Перемещает курсор влево, вправо , вверх и вниз при нажатии соответствующих клавиш со стрелками. Для ускорения перемещения курсора нажмите и удерживайте соответствующую клавишу со стрелкой. 5-позиционный джойстик расположен на правой стороне клавиатуры, чуть ниже кнопки Menu , и чуть выше кнопки «Back».
Клавиатура — используется для ввода слов, для поиска, заметок, адресов вебсайтов и т.д.
Клавиша «Назад» (Back) — возврат к предыдущему шагу. Например можно перейти по ссылке в книге, а затем нажать «Back» и вернуться назад. Кнопка «Назад» находится в правом нижнем углу клавиатуры, чуть ниже 5-позиционного контроллера и чуть правее кнопки Home.
Кнопка «Символ» (Symbol key) — предоставляет меню знаков пунктуации, символов и чисел. Для выбора нужного символа используйте 5-позиционную клавишу (стрелки для перемещения, центр – для выбора). Когда отображается меню символов можно продолжать использовать клавиатуру. Чтобы убрать меню символов – повторно нажмите кнопку «Sym». Кнопка Symbol расположена во втором ряду (снизу) на клавиатуре, чуть левее kнопки Back.
Кнопка “Текст” (Text key) — Вызывает диалог настройки размера шрифта, гарнитуры, междустрочного интервала. Также в этом диалоге можно включить (выключить) функцию преобразования текста в речь, установить поворот экрана. Для документов формате PDF можно настроить параметры контраста и масштабирования. Кнопка “Текст” находится в нижнем ряду клавиатуры, чуть правее клавиши Пробел(«Space»).
Кнопка «Шифт» (Shift key) — после ее нажатия следующая введенная буква будет большой. Кнопка «Шифт» (Shift key) находится в левом нижнем углу клавиатуры.
Кнопка «Alt» (Alt key) — обычно используется в сочетании с другими клавишами для ввода сочетаний клавиш. Смотрите “Kindle Shortcuts”(«Горячие клавиши») в главе 7 чтобы увидеть список полезных ссылок. Эта клавиша находится в нижнем ряду клавиатуры, чуть правее кнопки «Shift».
Вид снизу
В нижней части Киндла находиться кнопка управления громкостью, разъем для подключения наушников, микро — USB порт, выключатель питания, микрофон и индикатор заряда.
Кнопка управления громкостью (Volume controls ) — управляет громкостью наушников или динамиков для аудиокниг, фоновой музыки, функции Text-to-Speech(текст-в-речь), а также Voice Guide( голосового озвучивания пунктов меню на экране). Регуляторы громкости расположены на нижнем торце с левого края.
Разъем для подключения наушников (Headphone jack) — подключите наушники для прослушивания аудиокниг, фоновой музыки, или чтения вслух содержимого через преобразование текста в речь. Присоединение наушников отключает встроенные динамики. Разъем для наушников расположен чуть правее управления уровнем громкости.
Микрофон (Microphone) — на данный момент не используется. Возможно будет использоваться в будущем.
Микро — USB порт (Micro-USB/Power port) — вставьте USB кабель, идущий в комплекте с вашим Киндлом, в микро — USB порт и в адаптер питания Киндла. (Не все конфигурации поставляются с адаптером питания). Вставьте адаптер в розетку чтобы заряд ить батарею Киндла. Также зарядить Киндл можно присоединив USB кабель не к адаптеру питания, а к USB разъему компьютера. Во время зарядки индикатор статуса зарядки горит желтым. Зеленый свет индикатора показывает полный заряд батареи. Во время заряда батареи можно продолжать пользоваться Киндлом (при заряде от компьютера Киндл нужно предварительно безопасно отключить (в операционной системе).
Во время заряда батареи ничем не накрывайте адаптер во избежание перегрева. Если индикатор заряда не загорается – проверьте соединения. Если опять не заряжается- подключитесь к другой резетке или к другому разъему USB.
Для передачи контента между Киндлом и компьютером, соедините Киндл и компьютер прилагаемым USB кабелем.
Переключатель питания (Power Switch) — переводит Киндл в спящий режим и выводит из него, включает и выключает Киндл. Чтобы превести Киндл в спящий режим – сдвиньте и отпустите переключатель питания, на экране появится полноэкранная картинка. Когда Киндл находится в спящем режиме, его кнопки блокируются во избежание случайных нажатий. Чтобы полностью выключить Киндл – сдвиньте и удерживайте переключатель питания около семи секунд, пока экран не станет пустым, и затем отпустите его. Чтобы вывести Киндл из спящего режима или включить его – сдвиньте и отпустите переключатель питания. Если у вас установлен пароль, то при включении Киндла вам будет необходимо его ввести.
Если ваш Киндл не включается или не реагирует на нажатия, попробуйте его перезагрузить сдвинув и удерживая переключатель питания 15 секунд перед тем как отпустить.
Совет: Ваш Киндл самостоятельно перейдет в спящий режим если вы не пользуетесь ним 10 минут. Если до перехода в спящий режим ваш Киндл был подключен к беспроводной сети, то он продолжит получать регулярно запланированные подписки и в спящем режиме.
Индикатор заряда (Charge indicator light) — показывает зтатус батареии во время процесса зарядки. Если цвет индикатора сменился с желтого на зеленый – батарея полностью заряжена. Индикатор заряда находится за переключателем питания.
Вид сзади
На задней панели Kindle имеет стереодинамики для прослушивания аудио-контента. Динамики расположены в верхнем правом и левом краях на задней стороне Kindle.
Общие горячие клавиши
- alt + Sym — Для вызова виртуальной Русской клавиатуры нажмите кнопки Alt + Sym.
- alt + G — Обновить экран (при ярком солнце полезно для очищения экрана от чернил предыдущей страницы)
- alt + кнопки из верхнего ряда на клавиатуре — Набрать цифры от 1 до 9 и 0
- Клавиша Menu — Посмотреть время можно, вызвав меню. На стартовом экране так же выводится информация о доступном свободном месте.
- Ползунок снизу(slide) — Удерживая его 7 секунд в отодвинутом положении можно выключить Киндл. Удерживая 15 секунд, можно перезагрузить читалку. Перезагрузка так же доступна из меню (Home -> Menu -> Settings -> Menu).
- alt + shift + G — Снять скриншот
Горячие клавиши в режиме чтения
- alt + B — Установка/удаление закладок (Страница-закладка обозначается загнутым уголком, закладки доступны из меню по пункту View my notes & marks для .mobi, для всех текстовых форматов (кроме .pdf).
- Джойстик. Нажатие вверх. — Отобразит курсор ВНИЗУ экрана.
- Джойстик. Нажатие вниз. — Отобразит курсор ВВЕРХУ экрана.
- Джойстик. Нажатие вправо. — Следующая глава.
- Джойстик. Нажатие влево. — Предыдущая глава.
7.3 Кнопки быстрого доступа Kindl
Общие
Для быстрого ввода цифр, Вы можете использовать кнопки верхнего ряда клавиатуры. Цифрам от 1 до 0 соответствуют кнопки от «Q» до «P» слева направо. Чтобы ввести число: Нажмите и удерживайте Alt и соотвествующую букву верхнего ряда клавиатуры. Пример: Alt + Q соответствует цифре 1, Alt + U — цифре 7.
Для быстрого удаления напечатанного текста нажмите: Alt + Del .
Экран «Home»
Если Ваши файлы, отображаемые на экране «Home», отсортированны в алфавитном порядке по автору или имени, то нажав любую букву и 5-позиционный джойстик Вы перейдете к первому файлу начинающемуся с этой буквы.
Для поиска слова во всех Ваших книгах и периодике из экрана «Home»: напечатайте слово и нажмите «Ввод».
При чтении
Чтобы отправить выделенный текст в твиттер (www.twitter.com): Alt + Return .
Добавить или удалить закладку: Alt + B.
Добавить коментарий: Нажмите 5-позиционный джойстик вверх или вниз до появления на странице мерцающего курсора. Переместите курсор в нужное место на странице и начните ввод текста, чтобы создать коментарий, или нажмите джойстик для начала выделения.
В большинстве книг для перехода в начало, к следующей или предшествующей главе, разделу, статье, можно использовать 5-позиционный джойстик нажимая его влево или вправо.
Text-to-Speech
- shift + Sym — Включить или выключить воспроизведение текста вслух
- back — Отключает Text-to-Speech
- spacebar — Ставит Text-to-Speech на паузу.
- Управляя курсором можно управлять порядком воспроизведения текста вслух.
Music Controls
- alt + space — Включить/выключить музыку.
- alt + f — Следующий трек (в алфавитном порядке).
alt + home — Открыть Kindle Store (нужно соединение с Интернетом)
shift + alt + m (На стартовом экране) — Запуск игрушки Минер. После нажатия G на экране минера доступна еще одна игра: GoMoku.
Для зарядки параметры следующие — microUSB 4,9 В, 0,85 А. Если у Вас есть зарядка miniUSB или такая же поставляется с телефоном, то переходник miniUSB — microUSB подойдёт, как альтернатива стандартному способу зарядки устройства.
Сохраняйте Ваши любимые места
Читая книгу, газету, или другой документ хотелось ли Вам отметить и сохранить несколько слов для просмотра позже? С Kindle, просто выберите пункт «Add a Note or Highlight» («Добавить заметку или Выделить») в меню и используйте 5-позиционный джойстик, чтобы выделить содержимое, которое требуется для запоминания, а затем нажмите 5-ую среднюю кнопку для сохранения Вашего выбора. Отмеченные места добавляется в файл на главную и называется «My Clippings» («Мой Вырезки»). Вы можете просмотреть вырезки позже, искать слова или термины, обрезать, и передать файл «My Clippings» на свой компьютер. Это отличный способ для сохранения ваших любимых цитат, чтобы поделиться с другими.
Закладки
Kindle автоматически сохраняет текущее место в любой книге, которую Вы читаете, но Вы также можете добавить закладку на любую страницу в книге или документе PDF, нажав на Menu button (кнопку Меню) и выбрав пункт «Add a Bookmark» («Добавить закладку»). Вы можете видеть закладку — в правом верхнем углу страница имеет загнутый уголок. Kindle хранит все ваши закладки для текущего содержания в аннотации. Вы можете просматривать их в любое время, нажав на Menu button (кнопку Меню) прямо из читаемой книги и выбрав «View My Notes & Marks» («Открыть Мои заметки»).
Добавление записей и примечаний
Нравится ли вам делать заметки и высказать свои замечания при чтении? Вы можете добавлять примечания к любому документу на своём Kindle. Amazon автоматически сохраняет все ваши аннотации в файл «My Clippings» и копирует их на Amazon. Таким образом они не будут потеряны.
Например, это предложение будет выделено, записано и помеченно номером справа от этого текста. Используйте 5-позиционный джойстик для перемещения курсор на обозначение номер, чтобы увидеть запись. Для добавления своей записки, переместите курсор на слово, где вы хотите добавить свои мысли, и начинайте печатать. Затем с помощью 5-позиционная джойстик, чтобы выделить «сохранить запись» («save note») кнопку на экране и нажмите выбор 5-позиционного джойстика. Позже Вы сможете просматривать, редактировать или удалить записки, или просмотреть их все, нажав на кнопку меню («Menu») и выбрав «Открыть Мои заметки» («View My Notes Marks»).
1.3 Ввод текста
Ввод текста осуществляется с помощью клавиатуры. Большинство людей предпочитают вводить текст держа устройство двумя руками, и используя для набора кончики больших пальцев.
Буквы нижнего и верхнего регистров
Для ввода букв нижнего регистра нажимайте соответствующие клавиши. Для ввода букв верхнего регистра удерживайте нажатой клавишу «Шифт»(Shift key) , и затем нажимайте соответствующие клавиши. Также можно нажать и отпустить клавишу «Шифт» ( Shift key) и затем нажать нужную букву. В этом случае только одна следующая буква станет заглавной.
Цифры, знаки препинания и символы
Для ввода знака препинания, символа или цифры нажмите кнопку «Символ» (Symbol key) находящуюся во втором ряду снизу на клавиатуре.
Для выбора нужного символа используйте используйте 5-поз. клавишу, при выборе символ появиться в поле ввода. Во время нахождения на экране меню символов можно продолжать набор на клавиатуре. Повторное нажатие кнопки «Символ» (Symbol) уберет с экрана меню символов.
Использование меню
В дополнение к физическим кнопкам, навигация по Киндлу осуществляется с помощью меню. Меню зависят от контекста, но все они работают одинаково.
Для навигации по меню используется 5-позиционная клавиша. Для выбора пункта меню используется центральная кнопка 5-позиционной клавиши.
Рисунок ниже показывает меню домашнего (Home) экрана; жирная линия под надписью «Shop in Kindle Store» указывает на текущий пункт меню.
Меню приложения
Меню можно вызвать в любом месте. Когда вы нажмете кнопку «Меню» (Menu), покажется меню с элементами, относящимися к тому , что вы сейчас просматриваете. Пример экрана, изображенный ниже, показывает меню, которое появляется во время чтения книги.
Меню главного экрана (Home)
Меню главного экрана (Home) позволяет перемещаться в другие места Kindle или выполнять специальные задачи. Для отображения меню главного экрана, нажмите кнопку меню, когда отображается главный экран (Home). Ниже приведено описание меню.
Отключение / включение беспроводной связи (Turn Wireless Off/On) — выключает или включает услуги беспроводной связи Whispernet. Вы можете выключить беспроводную связь, чтобы продлить срок службы батарей. Любые операции, которые требуют беспроводного соединения будет происходить с момента включения беспроводной связи. Выключение беспроводной связи относится как к 3G так и к Wi-Fi соединениям.
Покупка в Kindle Store (Shop in Kindle Store) — приведет вас в Kindle Storefront.
Просмотр архивированных элементов (View Archived Items) — приведет вас к архивированным элементам (Archived Items), где можно просмотреть и по беспроводной связи повторно загрузить контент, который Вы храните на Amazon.
Поиск (Search) — выполняет поиск текста на странице ввода для представления искомого слова или фразы.
Создание новой коллекции (Create New Collection) — позволяет ввести имя для новой коллекции элементов.
Синхронизировать и проверить элементы (Sync & Check for Items) — подключается к Amazon для загрузки любых новых доступных элементов и синхронизации чтения и аннотации удаленных страниц для всех книг на Вашем устройстве.
Просмотреть загруженные элементы (View Downloading Items) — если один или несколько элементов находятся в процессе загрузки с Kindle Store для Вашего Kindle, Вы можете выбрать «Просмотреть загруженные элементы (View Downloading Items)», чтобы увидеть состояние загрузки. Эта опция недоступна, если элементы загружены.
Настройки (Settings) — приведет Вас к экрану настройки (Settings).
Экспериментальные (Experimental) — приведет Вас к экспериментальной странице (Experimental) где можно увидеть и использовать некоторые из экспериментальных прототипов, над которыми мы работаем.
Как только вы начнете читать книгу на Kindle, вы заметите, что ее формат обычно полностью повторяет формат печатной версии книги. Если в печатной версии присутствует оглавление, оно будет и в Kindle. Если есть главы, предисловие, иллюстрированная обложка и т.п., всё это будет отображаться и в Kindle.
При первом открытии книги в верхней части страницы появляется заголовок (верхний колонтитул), показывающий название книги и/или дату выпуска издания. В заголовке также отображаются тип соединения и индикаторы силы сигнала и состояния батареи.
При переходе на следующую или предыдущую страницы, заголовок автоматически исчезает, позволяя содержимому страницы отобразиться на весь экран. Чтобы временно отобразить заголовок (например, вы хотите проверить состояние батареи), нажмите кнопку «Меню» (Menu). Повторное нажатие кнопки «Меню» уберет заголовок с экрана.
Индикатор хода процесса чтения
В нижней части каждой страницы читаемого вами материала, взглянув на полосу хода процесса чтения, можно увидеть, в каком месте вы сейчас находитесь. Начальное положение указывает с какого места вы начали читать в текущий подход. По мере продвижение в чтении вы заметите, что длина сплошной линии будет увеличиваться, показывая, сколько в целом от всей книги вы прочитали. На полосе хода процесса чтения отображаются структурные метки содержимого книги, такие как параграфы, закладки, заметки или выделения. Здесь также можно увидеть, сколько вы прочитали за текущий подход.
Индикатор хода процесса чтения также показывает общий процент прочитанного и текущую позицию в цифрах так, что вы легко сможете найти определенный отрывок или дать на него ссылку своим друзьям. Позиции — это цифровой ответ номерам страниц. При изменении размера шрифта количество страниц также меняется, но используя цифровые позиции вы всегда с легкостью вернетесь к нужному вам месту независимо от размера шрифта.
Изменение размера и гарнитуры шрифта, междустрочных интервалов
Вы можете по своему усмотрению настроить отображение текста на экране Kindle. Для этого в вашем распоряжении есть выбор из 8-ми различных размеров шрифта, отображаемых в книгах, периодических изданиях и личных документах. (Вы не можете изменить размер шрифта в меню и экранах Kindle, таких как Домашний экран или Магазин Kindle.) Также изменению поддаются гарнитура шрифта и междустройный интервал. При чтении PDF документов, для более комфортного чтения, можно лишь приближать какую-то часть документа или изменять контраст.
Чтобы выбрать желаемые размер шрифта, его гарнитуру, или междустрочный интервал, выполните следующие действия:
Нажмите клавишу «аА» , расположенную в нижнем ряду клавиатуры.
Используя джойстик, выберите нужные размер шрифта, его гарнитуру, и междустрочный интервал (вы сразу же увидите изменения).
Нажмите в середину джойстика или клавишу «аА» чтобы подтвердить свой выбор.
Настройка количества слов в строке
Вы можете изменить количество слов, отображаемых в строке при чтении книг, периодических изданий или конвертированных личных документов. Изменение количества слов увеличивает или уменьшает величину отступов. Вам можете вдруг обнаружить, что читаете гораздо быстрее, если в строке меньшее количество слов. Поэкспериментируйте, чтобы найти для себя оптимальный вариант.
Чтобы выбрать желаемое количество слов в строке, выполните следующие действия:
Нажмите клавишу «аА» , расположенную в нижнем ряду клавиатуры.
Используя джойстик, перейдите к опции выбора количества слов в строке (Words per Line).
Выберите желаемое количество слов (вы сразу же увидите изменения).
Нажмите в середину джойстика или клавишу «аА» чтобы подтвердить свой выбор.
3.3 Передвижение по тексту
Есть несколько способов перехода с одного места в тексте, который Вы читаете, на другое. Чаще всего это перелистывание страниц кнопками Next Page (Следующая страница) и Previous Page (Предыдущая страница) (описано в Раздел 1 (Chapter 1) ). Вы можете перейти на другую страницу книги или периодического издания, выбирая номер локации (местоположения (location) в меню (Menu), можете выбрать ссылку и перейти по ней, можно боковыми клавишами джойстика переходить от одной главы или статьи к другой.
Передвижение по тексту с помощью меню (Menu)
Go to…(Перейти …) — переход от одного местоположения (локации (location)) в тексте, который Вы читаете, к другому местоположению (локации (location)). Можно выбрать одну из этих опций :
cover (обложка) — переход на страницу с обложкой книги, которую Вы читаете. Обычно это обложка книги.
beginning (начало) — переход к началу книги. Обычно это первый раздел, но это может оказаться и предисловием, содержанием, или локацией с номером 1. ((Location/Локация — это некий, функционально более гибкий, аналог номера страницы, принятый для книг в формате Kindle; указан внизу страницы — примеч.переводч.)
location(локация, местоположение) — введите номер локации, чтобы перейти на соответствующую страницу текста, выберите эту опцию и нажмите центральную кнопку джойстика, чтобы подтвердить Ваш выбор. Чтобы ввести номер, нажмите кнопку Symbol (после введения цифр, нажмите ее еще раз).
table of contents (содержание) — переход к содержанию читаемой книги (если оно есть). Если эта опция затенена (серый шрифт), содержание книги отсутствует.
Sync to Furthest Page Read (Синхронизация последней прочитанной страницы) — подключение к сайту Amazon через сеть Whispernet и сравнение текущего местоположения в книге, которую Вы читаете, с последней записью на Amazon. Если Вы продолжаете читать текст на другом устройстве, Kindle синхронизирует тексты и нумерацию, и Вы сможете читать с того самого места, где закончили читать ранее.
Book Description (описание книги) — подсоединение к хранилищу Kindle Store и вывод экран страницы с детальной информацией о книге.
Search This Book (Поиск по книге) — выводит в нижней части экрана окошко, куда вводится искомый текст. Для детальной информации, как выполняется поиск по книге, см. Раздел 4 (Chapter 4).
Add a Bookmark (вставить закладку) — вставляет закладку страницы, которую Вы читаете. После выбора этой опции в верхнем правом углу листа книги появляется загнутый уголок, а сама опция меню меняется на «Delete Bookmark» (Удалить закладку)
Add a Note or Highlight (Добавить заметку или выделение отрывка) — выводит на экран курсор, чтобы Вы могли выделить отрывок текста или создать заметку. См. “Using Highlights” (использование выделения отрывков) и “Using Notes” (Использование заметок) для детального ознакомления с процессом создания заметки или выделения отрывка.
View My Notes & Marks (Просмотр заметок и отметок) — выводит на экран страницу со всеми Вашими закладками, заметками и выделенными отрывками, сделанными в книге, которую Вы читаете.
View Popular Highlights (Просмотр коллекции популярных отрывков ) — выводит на экран страницу со всеми Вашими выделенными отрывками, которые вошли в коллекцию популярных отрывков Popular Highlights. Эта опция тусклая (серый шрифт), если в книге нет ни одного популярного выделенного отрывка, или если Вы через меню отключилиcь от коллекции популярных выделенных отрывков — т.е. установлена опция turned off Popular Highlights в меню Kindle Settings (Установки).
Выбор внутренней ссылки
Ваш материал для чтения может содержать и другие ссылки — на другие части текста. Например, во многих книгах, оглавление книги связано с соответствующими номерами страниц. Есть ли такие линки (установлена ли такая связь) определить легко — если есть, соответствующие записи в оглавлении выделены подчеркиванием.
Чтобы выбрать ссылку:
Джойстиком перейдите на ссылку (она выделится подчеркиванием).
Курсор изменит свой вид и будет выглядеть следующим образом:
Нажмите центральную кнопку джойстика, чтобы перейти по ссылке.
Kindle перейдет к соответствующему местоположению (локации) в тексте.
Нажмите кнопку Back, чтобы вернуться назад.
3.5 Аннотации и вырезки
Вы можете добавлять аннотации ко всем книгам, периодическим изданиям и личным документам. Аннотации могут содержать заметки, которые написали Вы, выделенные Вами части текстов и закладки, которые Вы сделали. Закладки могут быть созданы только в книгах или PDF-документах. Аннотации создаются для конкретного текста, т.о. каждая книга, периодическое издание или личный документ будут иметь свои собственные аннотации. Когда Вы просматриваете аннотации, Вы видите только те, которые были созданы именно для того документа, который Вы сейчас читаете. Обратите внимание, что, когда Вы создали аннотацию к газете или журналу, Вы увидите слово «keep» («хранить») слева от названия издания в перечне экрана Home. Это означает, что этот выпуск будет храниться в памяти Kindle, пока Вы его не удалите.
Кроме того, Kindle накапливает все аннотации и закладки, которые Вы делали для разных книг, журналов, газет и личных документов, в файле «My Clippings» («Мои вырезки»), войти в который Вы можете с экрана Home. Подробнее о файле «My Clippings» («Мои вырезки») в разделе “Using Clippings” («Использование вырезок»).
Аннотации бывают следующих видов:
Закладки (Bookmarks) — ставит отметку всей страницы для последующего обращения к ней. Вы можете создавать закладки в книгах, PDF-документах и личных документах.
Выделение в тексте (Highlights) — отмечает отрывок текста на странице для последующего обращения к нему.
Заметки (Notes) — Ваши заметки к тексту.
В нижеприведенных разделах объясняется, как добавлять аннотации.
Совет: В случае передачи Вашего Kindle другому лицу или потери устройства помните, что все Ваши аннотации и закладки к книгам, загруженным на Kindle, сохраняются на сервере Amazon. Когда Вы загружаете с сайта Amazon книгу, к которой Вы уже создавали аннотацию, Ваши аннотации и местоположение в тексте,где Вы закончили чтение, передадутся вместе с книгой. Когда Вы откроете книгу для чтения, Вы окажетесь на той самой странице, которую читали последней, при этом восстановятся и все аннотации к книге. Отметим, что вместе с книгами автоматически загружается с сайта и файл «My Clippings» («Мои вырезки»). Кроме того, Вы можете просматривать Ваши заметки, выделенные отрывки текстов, а также Вы можете просматривать раздел Popular Highlights (Популярные отрывки) на сайте http://kindle.amazon.com (для пользователей из США и других стран) или http://kindle.amazon.co.uk/ (для пользователей из Англии).
Использование закладок
Хотя Kindle автоматически запоминает то место, где Вы закончили чтение, Вы можете захотеть добавить в книгу, PDF-файл или личный документ дополнительную закладку. Вы можете сделать закладку в любом месте, Вы можете сделать столько закладок, сколько захотите, в любой книге, которую Вы читали. Когда Вы делаете закладку, она жестко привязывается к началу текста на странице. Если Вы измените размер текста, закладка сохранит свое местоположение («текстоположение»,если можно так сказать). Вы можете перейти к закладке в любой момент
Kindle накаппливает все Ваши закладки для открытого документа вместе с Вашими аннотациями. Вы можете просмотреть их в любое время, нажав кнопку Menu и выбрав пункт «View My Notes & Marks» («Просмотр моих заметок и отметок»). Подробности приведены в разделе “Viewing Your Annotations” («Просмотр Ваших аннотаций»)
Вставка закладки
Чтобы вставить закладку в книгу, PDF-документ или личный документ:
Перейдите на страницу, для которой Вы хотите вставить закладку.
Нажмите кнопку Menu.
Джойстиком перейдите вниз по списку на пункт «Add a Bookmark» («Добавить закладку»). Нажмите центральную кнопку джойстика.
Иконка в виде загнутого уголка страницы появится в верхнем правом углу страницы как подтверждение вставки закладки.
Совет: Быстро вставить закладку можно двумя способами: 1) нажать клавишу Alt и, удерживая ее, нажать клавишу «B» ; 2) или нажав верхнюю или нижнюю… Продолжение »
Время на прочтение
7 мин
Количество просмотров 21K

Про технологию электронной бумаги я узнал, если не ошибаюсь, в году этак в 96-м. Готовился сдавать “тысячи” по английскому и в каком-то штатовском журнале нашел статью с описанием технологии и радужными перспективами коммерческой реализации. До рынка технология добиралась почти десять лет.
Когда же устройства наконец пошли в продажу, стоимость их, на мой совершенно субъективный взгляд, была завышена раза в два от нормальной. Ну не позволяло мне национальное зеленое земноводное выложить три сотни долларов за вещь, которая должна стоить сотню-полторы. Слишком узок функционал ридеров (особенно первых поколений) и слишком много других устройств меньшей стоимости можно использовать для чтения — от КПК и коммуникаторов, до телефонов с джавой и GPS’ов.
Начавшееся в этом году снижение цен на ридеры наконец сместило их стоимость в область, которую я лично готов назвать «оправданная покупка». Так что когда Амазон объявил о предпродажной регистрации на Kindle 3-й версии за $139 (с доставкой в Украину — почти $160), решиться было не сложно.
Первым же делом Амазон обманул со сроками. Во первых — начал продажи раньше, чем обещал. Во вторых, доставить пообещал «8-9 сентября», а посылку принесли домой уже 1-го. Вот как можно сотрудничать со столь не пунктуальной компанией, скажите пожалуйста?
Важно: На момент правки обзора (12.09.10) Амазон не поставлял ридеры в Россию, Казахстан, Азербайджан. Но поставляет в Украину, Беларусь, Грузию, Армению. Проверить возможность заказа и доступность бесплатного 3G можно на самом Амазоне в разделе «Experimental Features».
Комплектация
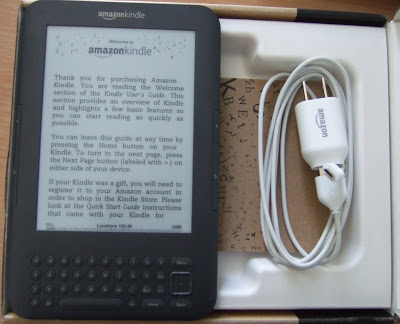
Спартанская до абсолютизма (платить $35 за оригинальный чехол я всё таки не стал) — сам девайс, блок питания с плоской вилкой, собственно в виде вилки и реализованный, да USB кабель. К сожалению, разъём в девайте не mini, а micro-USB.

Блок питания — верх минимализма.
Первые впечатления от девайса.
Посмотрим снаружи: выглядит изящно, сделан качественно. Легкий, тонкий. Матовый корпус без шансов для отпечатков пальцев. О люфтах и скрипах даже вспоминать неловко — подогнано всё идеально.
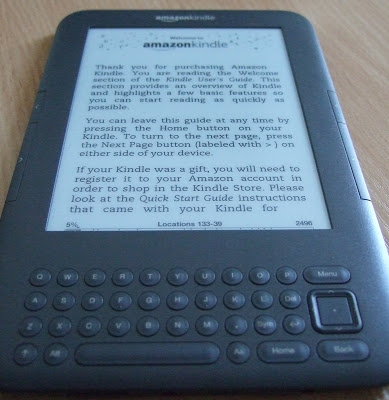
Вид спереди. Ряд с цифрами убрали, теперь их можно набирать или с Alt и верхним символьным рядом, или через Sym
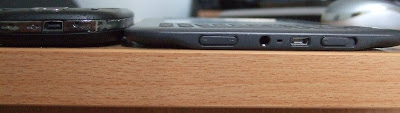
Вид сбоку в сравнении с «боевым» HTC Touch и обычным офисным столом. Качельки регулировки громкости, гнездо наушников, отверстие микрофона (обещают использование в следующих прошивках), micro-USB разъём и слайдер выключателя.

И вид сверху на стандартной клавиатуре — так, полагаю, многим будет проще оценить размеры устройств.
Кстати, при подключении к ПК ридер распознается как внешний USB накопитель и, соответственно, в это время сам доступ к внутренней памяти не имеет.
Включаем
Первая — «холодная» загрузка длится минуты полторы. В принципе с подобной загрузкой практически сталкиваться не придется — из обычного режима ожидания устройство выходит за пару секунд.
Картинка.
Новое поколение e-ink, используемое в 3-й модели, по заявлению производителя даёт «на 50% больше контрастности». Не знаю, как они это измеряли, но изображение действительно очень хорошее.
При включении попадаем в окно «Home», которое будет отправной точкой для всех функций ридера. Изначально тут будет только инструкция пользователя — естественно на английском. Рекомендую ознакомиться — не все функции и настройки я готов отнести к «интуитивно очевидным».
Открываем текст и получаем реально яркое впечатление — страница обновляется «в мгновение ока». На глаз — около трети секунды. Как раз столько, сколько нужно взгляду, чтобы перейти с нижней части экрана на верхнюю. По сравнению с теми ридерами предыдущего поколения, что я видел — разница разительная.
В принципе, скорость отрисовки экрана позволяет ридеру отображать динамические элементы типа колесика активности в браузере, линии загрузки там же или даже мигание курсора в строке ввода Гугла. Но о браузере отдельно ниже.
Структура библиотеки
Первое что замечается — структура каталогов файловой системы в ридере не используется. Использована же система «Коллекций», в которые можно закидывать книги (газеты, блоги). Так как одна книга может входить в разные коллекции, то это, по сути, что-то типа тэгов, облегчающих группировку и поиск. С точки зрения файловой системы все книги складываются в один каталог.
Это далеко не уникальное решение, но не всем оно понравится. Тем более что удобного поиска для русских названий/авторов мы лишены.
Из окна «Home» вызывается меню настроек и дополнительных функций.
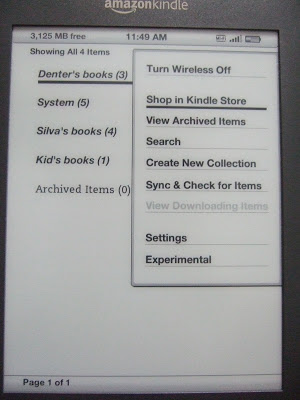
Всё сведено к минимуму, что и логично — устройство рассчитано на широкий круг пользователей. Американских, к тому же.
Кстати, возможность создания коллекций появляется только после регистрации устройства на Амазоне. Понимайте как знаете…
Пополнение библиотеки
Очевидно, что стоимость ридера амазоном уменьшена за счет ожидаемых покупок электронных книг в его магазине.
Столь же очевидно, что тут наши с ним интересы расходятся. Хотя бы потому, что англоязычная литература не пользуется у русскоязычных читателей коммерчески значимым спросом. Имхо, конечно, но весьма уверенное.
Какие же ещё есть у нас варианты?
- Подключить ридер к ПК и залить напрямую книги в форматах TXT, PCR, MOBI или PDF в каталог с книгами на устройстве
- Если у нас уже есть большая и любимая библиотека в FB2, то можно поставить на ПК программу Calibre (кроссплатформенная), которая обнаружит ридер и позволит заливать книги на него «в один клик» с автоматической конвертацией. Да, даже Ваши любимые комиксы в архиве картинок она перепакует и зальёт в читабельном виде
- Зайти браузером ридера на сетевую библиотеку типа Флибусты, выбрать формат mobi и скачать книгу напрямую. Кстати, поддержку браузера ридера они прикрутили в течении дня после небольшой переписки. Есть ли такая поддержка в других библиотеках — не проверял
Чтение текстовых книг
С основной функцией он справляется так, как от него и ожидается — отлично.
Возможности по настройке отображения обычных книг — все на фото:
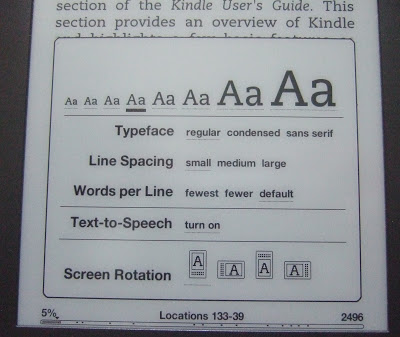
Внизу видна полоска статуса.
Опять же — отсутствует возможность поиска в не английских текстах.
Словари
Полезной возможностью ридера является возможность использования словарей прямо при чтении. Джойстиком подводим курсор в тексте к нужному слову и хоп — в течении секунды сверху (или снизу, в зависимости от положения слова) появляются пару строк со значением из текущего подключенного словаря.
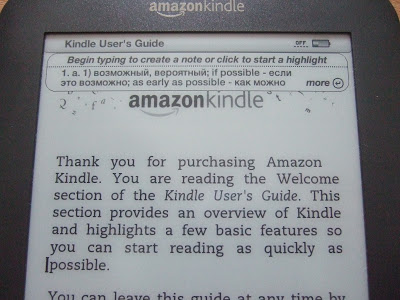
Курсор — в левом нижнем углу.
По умолчанию в ридере есть пара оксфордских словарей (американский и британский), но никто не мешает найти, залить и подключить любой другой. В данном — примере перевод из словаря Мюллера, найденного за 5 минут гугления.
Чтение PDF
Никаких специальных режимов просмотра PDF документа, типа разделения колонок или выделения текста, в ридере нет. Он отображает его именно в том виде, в котором тот свёрстан. Но, естественно, делает он это хорошо — двухколоночный документ в ландшафтном режиме читаем вполне спокойно.
Картинки кликабельны, кстати.
Возможности по регулировке отображения — только необходимое.
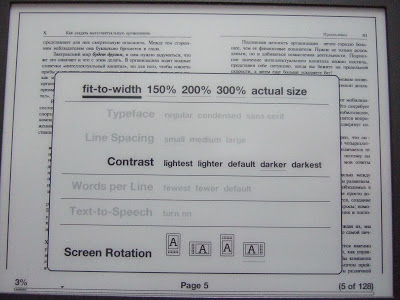
Увеличенная контрастность значительно улучшает читаемость на мелком шрифте.
Так как при просмотре PDF документов джойстик управляет положением видимой части страницы, то курсор в текст (для получения информации из словаря) вызывается через меню.
Подготовка к отображению следующей страницы PDF документа занимает до 2-х секунд.
Отрисовка сканированных PDF, в том числе отконвертированных из djvu, в принципе тоже нормальна. Хотя мне прислали парочку файлов (PDF, сделанный из djvu), в которых одна страница готовилась секунд 40 (да, именно сорок). Но это была проблема использованного конвертера, отконвертированные мной с помощью DjView4 (линуксовая программа) файлы открывались и листались нормально.
Звук
Кроме разъёма для наушников на нижнем торце на задней стенке ридера есть пара стереоколонок. Какой же диапазон аудио возможностей предлагает устройство:
- Проигрывание фоновой музыки. Проигрываются MP3 файлы в порядке заливки на устройство. Т.е. для проигрывания аудиокниг не применимо
- Прослушивание аудиокниг из амазоновского магазина audible.com. Поверхностное гугление способа преобразования аудиокниг из MP3 в поддерживаемый ридером формат однозначного результата не дало
- «Text-to-Speech». На английском, естественно. Вполне внятно и даже с претензией на выражение
WiFi и браузер
Подключение к беспроводной сети вполне тривиально — отображаем список, выбираем нужную, вводим пароль. Сети AdHoc и корпоративные сети с авторизацией на сертификатах не поддерживаются.
С включенным WiFi адаптером, если верить производителю, устройство проживет в 3 раза меньше — 10 дней вместо 30-ти. Что, на мой взгляд, всё равно очень много для устройства с активированным WiFi — разработчики Амазона достигли серьёзных успехов в оптимизации энергопотребления.
Кроме возможности подключаться через Интернет к магазину Амазона нас интересует другая, более привычная и нужная для нас возможность — браузер.
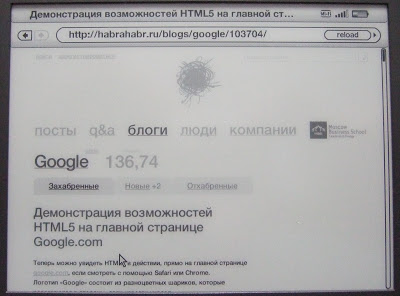
Построенный на Webkit движке браузер справляется со своими задачами в доступном ему объеме — поддерживаются Javascrips и Cookies, есть закладки и режим «Article mode», механизм которого знаком нам по новому Сафари и схожим расширениям для десктопных браузеров…
Но в принципе отсутствуют вкладки, невозможность ввода русского языка радикально ограничивают диапазон решаемых задач, а управление курсором с помощью джойстика удобным ну никак не назовёшь.
Зато теперь для пополнения библиотеки не обязателен компьютер — книги можно брать прямо из Сети в любом месте с доступным WiFi. Причем бесплатно, а не за $9.99 за книгу.
И вот это, как по мне, качественный скачек вперед в использовании ридеров.
Что осталось за кадром
В принципе можно напомнить, что Kindle 3 — это изначально устройство для работы с магазином Amazon. И в нём есть множество функций для
вытягивания денег
получения свежих материалов и социального взаимодействия. Кроме книг, можно покупать подписку на периодику и блоги. Можно интегрировать свою учетную запись в твиттере или фейсбуке и оставлять там сообщения с понравившимися фрагментами текста. Можно отправлять тексты на почту и получать на устройстве в уже сконвертированном виде (за деньги). В любом случае — мне это не интересно ни разу. Потому простите, но этот функционал Вам придется изучать самостоятельно.
Отдельно нужно упомянуть про модель с 3G.
Теоретически это устройство даёт владельцу бесплатный мобильный интернет. Да, в том числе и через браузер. По крайней мере, сам Амазон к этому стремится и заключает с мобильными операторами договора на обслуживание.
Подобная шара доступна пока только в Украине.
Но сам Амазон не просто так отнёс браузер в раздел «Experimental» — никаких гарантий того, что бесплатный 3G и далее будет доступен для браузера, а не только для покупок в их магазине, он не даёт. Т.е. переплачивать или нет за данную «фичу» — решайте сами.
Обновления
Буквально через пару недель после начала продаж вышло первое обновление прошивки (спасибо Artemzr), которое должно убрать проблемы с перезагрузкой и зависаниями, иногда возникавшие при открытии PDF (было такое, столкнулся). К моему удивлению, автоматически по беспроводной сети его ставить нельзя — нужно скачать на ПК (причем выбрав самостоятельно версию), залить на ридер и уже после этого запустить обновление из меню. Надеюсь, что так коряво это было реализовано исключительно из-за срочности выпуска обновления.
Выводы
Плюсы устройства:
- Качественный экран с великолепной контрастностью и скоростью обновления
- Толщина, вес и общее качество исполнения
- Удобное использование словарей
- WiFi и браузер, обеспечивающие независимость от ПК
- Значительное время работы от батарей
- Минимальная цена на рынке на данный момент
Ну и минусы
- Отсутствие ввода для языков, отличных от английского
- Отсутствие сенсорного экрана (минус условный, чувствуется только в браузере)
-
Page 2: Table Of Contents
Wireless Access with Amazon Whispernet ……….12…
-
Page 3
Chapter 1 Getting Started with Your Kindle 1.1 Views of Kindle …………….18 Front View … -
Page 4
Viewing Collection Details …………..35 Renaming a Collection . -
Page 5
3.7 Reading PDF Files ……………. 56 Zooming In to PDF Files or Adjusting Contrast . -
Page 6
Chapter 6 Accessing the Web …………… 6.1 Using Web Browser .. -
Page 7
Chapter 9 Your Kindle and Amazon 9.1 Shopping for Kindle Content on Amazon ……….. 96 Browsing the Kindle Store . -
Page 8
Product Specifications …………… 110 AMAZON.COM KINDLE LICENSE AGREEMENT AND TERMS OF USE … 111 Digital Content . -
Page 9
Kindle. Your Kindle must be registered to an Amazon account in order to shop in the Kindle Store. If you bought your Kindle using your Amazon account, it is already registered. Otherwise, please look at the Quick Start Guide… -
Page 10: Congratulations
PDF file on your computer or print it out. You can download the .AZW version of the Kindle User’s Guide and read it on any supported device (for example, Kindle for iPhone or Kindle for PC). For a complete list of supported devices, visit the Kindle Store on the Amazon website. Download this guide from: http://www.amazon.com/kindledocuments…
-
Page 11: Getting Registered
When you go to the Home screen, check the top left corner of the screen to see if your Amazon name (the same one you see when you are shopping on Amazon) is shown. If it says “My Kindle” instead of your Amazon account name, you need to register your Kindle.
-
Page 12: Wireless Access With Amazon Whispernet
Welcome Wireless Access with Amazon Whispernet The Amazon Whispernet service wirelessly delivers content to your Kindle whenever and wherever you want it. All latest generation Kindle devices have Wi-Fi connectivity built in, and some models also include free 3G connectivity.
-
Page 13: Adjust Screen Rotation
PDF files over USB to your Kindle or e-mail them to your dedicated Kindle e-mail address (found on the Settings page on Kindle or the Manage Your Kindle page on Amazon). If you e-mail a PDF document to your Kindle’s e-mail address, we will wirelessly deliver the PDF file directly to your Kindle via Whispernet.
-
Page 14: Shop Anytime, Anywhere
If you want to buy an item, Kindle uses secure Amazon 1-Click and then Whispernet delivers the item to your Kindle generally in under a minute.
-
Page 15: Collections
Do you like to take notes and make comments while reading? You can add notes to any of the content on Kindle. Amazon automatically stores all of your book annotations in the “My Clippings” file and backs them up at Amazon so they will not be lost.
-
Page 16: Loan Books
Convert Your Own Documents In addition to all of the great reading material you can get from the Kindle Store, Amazon can also convert your own documents so you can read them on Kindle. You can e-mail Microsoft Word, TXT, HTML, RTF , or image files like JPEGs and GIFs to your dedicated Kindle e-mail address (found on the Settings page on Kindle or the Manage Your Kindle page on Amazon).
-
Page 17: Learning More
Kindle User’s Guide Welcome Learning More This ends your brief introduction to just some of the capabilities on Kindle. The chapters that follow give a more complete overview of these and other features. Remember, you can always search on a particular feature or learn more about how to do a particular task by opening this guide on your Kindle and typing on the keyboard to activate Search.
-
Page 18: Chapter 1 Getting Started With Your Kindle
Previous Page button. Home button — shows content stored on your Kindle as well as content archived at Amazon. The Home button is located on the bottom row of the keyboard, just to the left of the Back button.
-
Page 19
Kindle User’s Guide Chapter 1 Getting Started with Your Kindle Menu button — displays application and navigation choices that are related to the screen you are viewing. The Menu button is located in the top row of the keyboard, just above the 5-way controller. -
Page 20: Bottom View
Bottom View The bottom of your Kindle contains the volume controls, headphone jack, micro-USB/power port, power switch, microphone, and charge indicator light. Volume controls — controls the headphone or speaker volume for audiobooks, background music, Text-to-Speech, and Voice Guide. The volume controls are located on the bottom left edge.
-
Page 21: Back View
Kindle User’s Guide Chapter 1 Getting Started with Your Kindle Back View The back of your Kindle contains stereo speakers for audio content. The speakers are located near the top right and left edges on the back of Kindle. 1.2 Getting Around To get around on your Kindle, you use the buttons, menus, and the keyboard—all of which are explained here.
-
Page 22: The Application Menu
Kindle User’s Guide Chapter 1 Getting Started with Your Kindle The Application Menu You can display a menu from any screen on your Kindle. When you press the Menu button, it displays choices related to the screen you are viewing. The sample screen below shows you the screen you would typically see when you press the Menu button from within a book.
-
Page 23: Screen Rotation
Use the 5-way controller to choose the character you want and it will appear in your text entry box. You can continue typing on the keyboard while the Symbol menu is displayed. Press the Symbol key again to dismiss the Symbol menu. 1.4 Screen Rotation The Kindle screen image can be rotated so you can see the entire width of a page.
-
Page 24: Battery Status Indicators
(only for Kindle models with free 3G connectivity) Kindle is connected to Whispernet using the 3G cellular network or one of the slower networks (EDGE or GPRS). Your Kindle will automatically switch to the faster 3G network when available. Kindle is connected to Whispernet using Wi-Fi. When you press the Menu button, icons indicating the type (Wi-Fi or 3G) of your Whispernet service appear to the left side of the signal bars.
-
Page 25: Wi-Fi And 3G Connectivity
International Subscription Service. This service offers the convenience of 3G delivery for a weekly fee. When you travel outside the U.S., Amazon automatically sends a notice to your Kindle Home screen with instructions on how to sign up for the International Subscription Service.
-
Page 26: Connect To A Wi-Fi Network
Connect to a Wi-Fi Network Your Kindle can connect to Wi-Fi networks or hotspots that use the 802.11b or 802.11g standard. Kindle does not connect to enterprise or ad-hoc Wi-Fi networks (networks that allow peer-to-peer connections without a wireless access point). Keep in mind that you must be within range of one or more Wi-Fi networks in order to connect to one.
-
Page 27: Add A New Wi-Fi Network
Add a New Wi-Fi Network If you don’t see the network you want to connect to in the list of detected networks, you can add it by choosing “enter other Wi-Fi network” at the bottom of the list of detected networks. To add a new Wi-Fi network, follow these steps: 1.
-
Page 28: Forget A Wi-Fi Network
Forget a Wi-Fi Network You can tell Kindle to forget the Wi-Fi network you’re connected to so that your Kindle doesn’t connect to it automatically in the future. To forget the Wi-Fi network that you’re connected to, follow these steps: 1.
-
Page 29: Chapter 2 Getting To Know Kindle Content
The Kindle Home screen gives you an overall picture of what you currently have on your Kindle. It shows you what you are reading, and where you are in your reading. It also allows you to remove content from your Kindle and to move content from Amazon to your Kindle. Read below for more details.
-
Page 30: Audible Audiobooks
Microsoft Word, HTML, or image files) on Kindle. You can attach the files to an e-mail message and send the files to your Kindle e-mail address. Amazon will convert the files if necessary and send them back to your computer or to your Kindle, whichever you prefer.
-
Page 31: Sort Options
Periodicals: Back Issues — stores older issues of newspapers and magazines. Archived Items — items stored at Amazon that you can re-download to your device. Pages — indicates the total number of pages in Home. Use the Next Page or Previous Page button to navigate the pages.
-
Page 32: The Home Screen Menu
Create New Collection — allows you to enter a name for a new collection of items. Sync & Check for Items — connects to Amazon to download any newly available items and sync the furthest page read and annotations for all the books on your device.
-
Page 33: Special Offers And Sponsored Screensavers
Kindle User’s Guide Chapter 2 Getting to Know Kindle Content 2.2 Special Offers and Sponsored Screensavers For Kindle with Special Offers, you will receive special offers and sponsored screensavers that only display on Kindle’s home screen or screensaver—not within a book. As always when reading, you can lose yourself in the author’s words.
-
Page 34: Organizing With Collections
To view all available special offers: • Press the Home button, then press the Menu button. • Navigate to “View Special Offers” by moving the 5-way controller down, then press the 5-way controller to select. • Navigate to the item you want to view by moving the 5-way controller down, then press the 5-way controller to view details.
-
Page 35: Adding Multiple Items To A Collection
3. Move the 5-way to the right to view the item’s detail page. 4. On the item’s detail page, use the 5-way to select “Add to Collection…” 5. A screen showing all of your collections and the number of items in each is displayed. Use the 5-way to select each collection you want to add the item to.
-
Page 36: Renaming A Collection
6. Use the 5-way to select either “ok” or “cancel. ” Adding Collections from Another Kindle If you have more than one Kindle registered to your Amazon account, you can add the collections from another Kindle and merge them with collections on your current Kindle. This is useful if you’ve set up an organization system on another Kindle and you want use it on…
-
Page 37: Managing Your Content
6. In the Add Other Device Collections view you will see a list of all Kindles that are associated with your Amazon account. Use the 5-way to select the other Kindle that has the collections you want to add. You can repeat this step for as many devices as you wish to add collections from.
-
Page 38
Amazon, any annotations you created on Kindle for those items do not get saved. Your “My Clippings” file will still remain as a separate file containing all the clippings you added regardless of whether the content is a book, subscription, or blog, or was purchased from Amazon or not. -
Page 39: Chapter 3 Reading On Kindle
PDF files over USB to your device or e-mail them to your dedicated Kindle e-mail address (found on the Settings page on Kindle or the Manage Your Kindle page on Amazon). You can rotate your device sideways for widescreen viewing. For more information on the…
-
Page 40: Audible Content
Kindle User’s Guide Chapter 3 Reading on Kindle For details on fees, see the “Your individual charges” section of the Manage Your Kindle page on Amazon. Audible Content The Kindle Store offers thousands of Audible audio editions, including New York Times Best Sellers.
-
Page 41: Progress Indicator
Kindle User’s Guide Chapter 3 Reading on Kindle Progress Indicator Pressing Menu also temporarily displays a progress bar. Its start location indicates the start- ing point for your current reading session. As you progress further into the content, a solid bar growing longer indicates your overall reading progress.
-
Page 42: Adjusting The Number Of Words Per Line
To pick the text size, typeface, or line spacing that you want to use while reading, follow these steps: 1. Press the Text key located on the bottom row of the keyboard. 2. Use the 5-way to select the new text size, typeface, or line spacing that you want to use (you see the changes immediately).
-
Page 43
If you are reading a Kindle book, the menu shows the following options: Turn Wireless Off — turns off Whispernet. When Whispernet is off, this option will change to “Turn Wireless On. ” Shop in Kindle Store — takes you to the Kindle Storefront. Buy This Book Now —… -
Page 44
Sync to Furthest Page Read — connects to Amazon Whispernet and compares your current reading location with the one saved at Amazon. If you are further along in your book using another device, Kindle gives you the choice to go to the furthest page read. -
Page 45: Navigating Within A Periodical
Kindle User’s Guide Chapter 3 Reading on Kindle If you are reading a blog, you will see the following options: Navigating Within a Periodical At the bottom of a newspaper or magazine you will see options for quickly navigating within an issue.
-
Page 46: Selecting Internal Links
Whispersync synchronizes the bookmarks, notes, highlights, and furthest page read among devices registered to the same account. For a complete list of supported devices, visit the Kindle Store on the Amazon website. Kindle User’s Guide…
-
Page 47: Looking Up Definitions
Whispersync is on by default to ensure a seamless reading experience for a book across multiple Kindles. If you would like to turn Whispersync off, follow these steps: 1. Go to http://www.amazon.com/manageyourkindle: (U.S. and other countries) http://www.amazon.co.uk/manageyourkindle 2. At the bottom of the page, click on the link “Manage synchronization between devices. ”…
-
Page 48: Using Bookmarks
Tip: All of your annotations and bookmarks on a Kindle book are backed up at Amazon in case you transfer your Kindle to another person or lose your device. When you download a previously annotated book from Amazon, your annotations and last location read will come down with it.
-
Page 49: Removing A Bookmark
Removing a Bookmark To remove a bookmark: 1. Go to the bookmarked page. 2. Press the Menu button. 3. Move the 5-way controller down until “Delete Bookmark” is underlined. Press the 5-way to select. The bookmark is removed. You can also delete a bookmark on the page by holding down the Alt key the “B”…
-
Page 50: Displaying Popular Highlights In Your Books
The list of people you follow can be managed at http://kindle.amazon.com. If someone that you follow has highlighted a passage in a book, we will highlight that passage and display the name(s) of the people that highlighted that passage.
-
Page 51: Updating Popular Highlights In A Book
Backup, your notes, highlights, and bookmarks will not be backed up by Amazon, and they will not be displayed on other devices registered to your Amazon account. Also, if you lose or damage your device, there will be no way to retrieve your notes, highlights, and bookmarks.
-
Page 52
2. Move the 5-way down to select the note you want to delete. 3. Press the Delete key to delete the note. Tip: You can view your own notes and highlights and see Popular Highlights at http://kindle.amazon.com. Kindle User’s Guide Chapter 3 Reading on Kindle… -
Page 53: Viewing Your Annotations
Viewing Your Annotations To view your bookmarks, highlights, and notes, press the Menu button and select “View Notes & Marks. ” Each entry has a location number followed by the bookmark, highlighted passage, or note. Your annotations are listed in the order that they occur in the content. There is no limit to the number of annotations you can have.
-
Page 54: More About My Clippings
More About My Clippings You can edit the “My Clippings” file on your computer. To edit the “My Clippings” file: 1. Connect your Kindle to your computer using the USB cable. 2. Your Kindle should appear on your computer in the same location you would normally find an external USB drive.
-
Page 55
To share a new note, follow these steps: 1. While reading a book, periodical, or personal document, press Menu and choose “Add a Note or Highlight. ” If you are zoomed in to a PDF page, press Menu and choose “Place Cursor in Page. -
Page 56: Reading Pdf Files
Kindle User’s Guide Chapter 3 Reading on Kindle 3.7 Reading PDF Files Your Kindle is able to display most PDF documents, including password protected PDFs. When your Kindle is set to portrait orientation, PDF documents are displayed in their original layout and fit the entire screen of the device. White margins of PDF documents are automatically cropped to maximize the amount of content shown on the screen.
-
Page 57: Zooming In To Pdf Files Or Adjusting Contrast
Kindle User’s Guide Chapter 3 Reading on Kindle Zooming In to PDF Files or Adjusting Contrast Pressing the Text key will let you choose zoom and contrast options for a PDF page. fit-to-screen — displays the PDF by matching the width of the page to the width of your Kindle’s screen;…
-
Page 58: Using The Pdf Menu
Using the PDF Menu The options available while reading a PDF file are slightly different than when reading a book or a periodical on Kindle. Options that are not available in PDF files are dimmed in the menu. Go to … — allows you to move to another location in the PDF document. Choose one of these options: cover —…
-
Page 59: Listening To Audio Materials
Kindle User’s Guide Chapter 3 Reading on Kindle 3.8 Listening to Audio Materials There are three types of audio materials that you can listen to on your Kindle. You can listen to audiobooks from Audible.com, transfer MP3 files from your computer to play as background music while you read, or turn on Text-to-Speech in your reading material (where allowed by the rights holder).
-
Page 60: Background Audio
Background Audio To play background audio (MP3 files) that you have transferred to your Kindle, follow the steps below: 1. If you are not already on the Home screen, press the Home button. 2. Press the Menu button. 3. Use the 5-way to navigate down until “Experimental” is underlined and press the 5-way to select it.
-
Page 61
3. By default, content is spoken with a male voice, but using the 5-way, you can select a female speaking voice. You can also slow down or increase the rate of speech as well as pause or turn off Text-to-Speech. 4. -
Page 62: Chapter 4 Searching On Kindle
“My Clippings” file. For PDFs, Kindle searches for the term in the metadata only (author’s name and file name). Additionally, Kindle also keeps and searches the metadata for the content you have stored on Amazon. Searching Remotely Kindle can perform remote searches in several different locations using Whispernet.
-
Page 63: Search Results Page
3. Press the 5-way to submit your search. If you select “Search” from the Home page menu, the screen will display a full Search page. 4.2 Search Results Page When searching all your content, Kindle looks in the reading materials you have on your Kindle and the metadata (like title and author) of the materials you have in Archived Items.
-
Page 64: Search Results For A Definition
Use the Next Page and Previous Page buttons if there are more results than fit on the Search Results page. To go to a specific location in the content where the search term occurs, use the 5-way to underline the location and press the 5-way to select. If the search results encompass multiple pages, then use the Next Page and Previous Page buttons to navigate between pages.
-
Page 65: Performing Remote Searches
4.3 Performing Remote Searches To search remotely, you must have Whispernet switched on. You can select any of the remote searches described in this section. If Whispernet is not already on, press the Menu button. Use the 5-way controller to underline “Turn Wireless On”…
-
Page 66: Chapter 5 The Kindle Store
Kindle or want to download a title again. To help other Amazon users decide what to buy, you can also add your own ratings and reviews. 5.1 Getting Started at the Store This section tells you how to connect to the Kindle Store on your Kindle, and provides some ideas about the best ways to look for content once you are connected.
-
Page 67: The Store Menu
Kindle User’s Guide Chapter 5 The Kindle Store Search Store — begin typing your search criteria here. Select “search store” to search the entire Kindle Store for matches and display the search results. Once you are in the Kindle Store, you can move around using links on the pages of the store such as New &…
-
Page 68: Browsing The Store
Kindle Top Sellers — displays a list of Amazon best sellers. New & Noteworthy — displays a list of new or noteworthy content on the Kindle Store. Recommended for You — displays items recommended for you by Amazon based on your previous digital and physical purchases.
-
Page 69: Product Detail Page Example
Audible account to your Amazon account. This lets you use the credit card on file with Amazon to make Audible purchases directly on your Kindle. Other benefits of linking your Audible account are: you can use your existing Audible credits…
-
Page 70: Additional Details For Periodicals
(digital and printed) you have purchased in the past either on Kindle or on Amazon. To get to this page, select the “See All” link in the “Recommended for You” section of the Kindle Storefront or select “Recommended for You”…
-
Page 71: Writing Your Own Ratings And Reviews
Writing Your Own Ratings and Reviews You can share your opinions with other readers by rating and reviewing the materials that you have read. To get to this page, select “Customer Reviews” from the product detail page for the item you want to critique, and then select “Write a Review. ” The sample screen below shows you the type of information you can enter.
-
Page 72: Making Purchases
Your item will be auto-delivered wirelessly to your Kindle and also added to the Manage Your Kindle page on Amazon. You will see an “items downloaded” message at the top of the screen when your item has arrived on your Kindle.
-
Page 73: Chapter 6 Accessing The Web
Chapter 6 Accessing the Web Your Kindle comes with an Experimental application called Web Browser, which is a standard web browser that’s similar to other web browsers you may have used on a computer or another device. It supports JavaScript, SSL, and cookies, but does not support media plug-ins (Flash, Shockwave, etc.) or Java applets.
-
Page 74: Using Bookmarks And Adding Your Own
Kindle User’s Guide Chapter 6 Accessing the Web Using Bookmarks and Adding Your Own Bookmarks let you easily access a web page without needing to type the address every time. When you open Web Browser from the Experimental page for the first time, you will see a list of default bookmarks with links to news, sports, and other information.
-
Page 75: Zooming In To Web Pages
Zooming In to Web Pages You can zoom in to any web page to magnify the page. Additionally, if you see a magnifying glass displayed on a web page, you can use it to magnify a specific area of a web page. To zoom in to any web page, follow these steps: 1.
-
Page 76: Optimizing Web Browser For Reading Articles
Optimizing Web Browser for Reading Articles While viewing articles on a web page, you can switch to Article Mode to make the text on the page easier to read. Article Mode makes reading articles more enjoyable by allowing you to focus on the main text on the page. To switch to Article Mode, follow these steps: 1.
-
Page 77: Other Features
Kindle User’s Guide Chapter 6 Accessing the Web Zoom Out — zooms out the web page view. Choose this menu item again (up to three times) to return the view to normal size. Pressing the Back button while zoomed in returns the view to normal size.
-
Page 78
Kindle User’s Guide Chapter 6 Accessing the Web Clear History — removes cached Internet address entries from your Kindle. Move the on-screen highlight to “Clear History” and press the 5-way to clear this list. Clear Cookies — removes cookies from your Kindle. Move the on-screen highlight to “Clear Cookies”… -
Page 79: Chapter 7 Settings And Experimental
Settings page, press the Menu button while on your Home screen. Use the 5-way controller to underline “Settings” and press to select. Registration — this is the Amazon account name to which your Kindle is registered. All Kindle Store and other charges will be applied to the credit card associated with your 1-Click account.
-
Page 80
Device E-mail — this is the e-mail address of your Kindle. You and your friends can send documents to this address and they will be converted by Amazon and sent to your Kindle. To edit this e-mail address, go to: http://www.amazon.com/manageyourkindle… -
Page 81: Registering Or Deregistering Kindle
4. Press the 5-way to select “register. ” 5. You will see a text entry box at the bottom of the screen to enter your Amazon user name and password (the e-mail address and password associated with your Amazon account).
-
Page 82: Deregistering Your Kindle
5. Move the 5-way down until “create account” is highlighted. Press the 5-way to select. 6. Follow the instructions on the screen. When you have finished, you will have a new Amazon account and your Kindle will be registered to it.
-
Page 83: Entering Network Information
Entering Network Information If you manage a Wi-Fi network and know the network information, you can manually enter the network information so that Kindle can try to connect to the new Wi-Fi network. You must be within range of the network that you want to add. When entering network information, press the Symbol key to enter numbers or symbols not present on the Kindle keyboard.
-
Page 84: Personalizing Your Kindle
Your Kindle acquires a default name when it is first registered. This name is based on your Amazon account name, and is displayed at the top of your Home screen. Before you edit this name on your Kindle, make sure that wireless is turned on.
-
Page 85
4. Press Next Page to go to Page 2 of Settings. 5. Use the 5-way to underline “turn on” next to the “Device Password” setting and press to select. 6. Type in the password you want. The maximum password length is twelve characters. 7. -
Page 86: Setting The Device Time
Annotations Backup will back up your last location read, all of your notes, collections, and bookmarks you make to Amazon on any of your purchased content. If you delete an item from your Kindle or if you buy a new Kindle, you can automatically restore an item’s annotations, bookmarks, and the last location you read by downloading the item again from the Manage Your Kindle page on Amazon.
-
Page 87: Linking Your Kindle To Your Social Network Accounts
10. Use the 5-way to navigate to “Sign in” and press to select it. 11. If this is the first time you are linking your Amazon account to your Twitter account, select “Allow” to confirm that you want to allow your Kindle to access your Twitter account.
-
Page 88: The Settings Menu
Legal — provides trademark, copyright, and other notices about the software installed on your Kindle. Sync & Check for Items — connects to Amazon to download any newly available items and sync the furthest page read and annotations for all the books on your device.
-
Page 89: Experimental
“Text-to-Speech. ” To give us feedback on items on the Experimental page, send an e-mail to amazon.com (U.S. and other countries) or are really interested in hearing what you have to say, so type as much as you want. Based on your feedback, we may add or remove content from the Experimental page, so let your thoughts be known.
-
Page 90: Browser Shortcuts
Kindle User’s Guide Chapter 7 Settings and Experimental Browser Shortcuts To reload a web page, press the Return key. To return the zoomed in view to normal size, press the Back button. If the view is not zoomed in, pressing the Back button displays the previous page in your browsing history. Audio Shortcuts Text-to-Speech: Press Shift + Sym…
-
Page 91: Chapter 8 Kindle And Your Computer
Chapter 8 Kindle and Your Computer Kindle uses Amazon Whispernet to deliver books, periodicals, personal documents, and audiobooks (via Wi-Fi delivery only) to your Kindle without the need for a computer. Some Kindle content, such as MP3 files, must first be downloaded to your computer and then transferred to your Kindle using USB.
-
Page 92: Transferring Files From Your Computer
To eject Kindle from your computer, follow these steps: • Windows Vista and Windows 7: Click on the Start button, select “Computer” from the options, right-click on the Kindle drive icon and select “Eject” from the pop-up menu. • Windows XP: Click on the “Safely remove hardware” icon in the lower right-hand corner of the task bar and follow the on-screen instructions to eject Kindle.
-
Page 93: Converting And Transferring Your Documents
Your Kindle will only receive converted files from e-mail addresses you have authorized on the Manage Your Kindle page to help prevent spam. The default setting dictates that only items sent from your Amazon account e-mail address will be forwarded. You can add e-mail addresses to the list by visiting http://www.amazon.com/manageyourkindle…
-
Page 94: Audiobooks And Mp3S
Kindle e-mail address is @free.kindle.com. The document will be delivered to your Kindle when your Kindle is connected via Wi-Fi and it will also be e-mailed to your Amazon e-mail address. If Wi-Fi is not available, you can transfer the personal document to your Kindle’s documents folder by connecting your Kindle to your computer.
-
Page 95: Transferring Audiobooks
Transferring Audiobooks To transfer audiobooks to your Kindle, follow these steps: 1. Connect your Kindle to your computer, using the USB cable that came with the device. 2. Your Kindle should appear on your computer in the same location you would normally find an external USB drive.
-
Page 96: Chapter 9 Your Kindle And Amazon
Kindle Store using a web browser on your computer. You can also go to the Manage Your Kindle page on Amazon to manage your Kindle account, change or cancel a subscription, or look up a past Kindle order. If you need help, Kindle Support on Amazon gives you information, e-mail, and phone access to dedicated customer service representatives.
-
Page 97: Managing Your Kindle On Amazon
Send sample now — click this button to receive a free sample of a book on your Kindle. You can read the beginning of the book for free. If you enjoy it, you can make a purchase directly from your Kindle or return to the Kindle Store on Amazon if you prefer to purchase from your computer.
-
Page 98: Contacting Kindle Support
Kindle User’s Guide Chapter 9 Your Kindle and Amazon 9.3 Contacting Kindle Support If you have problems with your Kindle, try using the Kindle Support website, or one of our Customer Service members will be happy to help you. Kindle Support Web Address http://www.amazon.com/kindlesupport…
-
Page 99: Chapter 10 Transferring Content To Your New Kindle
Copies of all your books and recent issues of newspapers and magazines purchased from the Kindle Store are kept in your Amazon account. Tip: You can download and share Kindle books with all the Kindles registered to your Amazon account.
-
Page 100: Transferring Periodical Subscriptions
1. From your computer’s web browser, open (U.S. and other countries) or http://www.amazon.co.uk/manageyourkindle 2. Scroll down to the section entitled “Your Active Kindle subscriptions. ” 3. Under “Deliver future editions to” select the Kindle to which you’d like the subscription to be transferred and select “Save.
-
Page 101: Transferring Mp3S
6. Open your Kindle drive. Transfer the “audible” folder from your computer desktop to your Kindle. You may receive a message asking if you want to replace the folder already on the Kindle. Select “Yes” to replace the content. 7. Using your computer, eject your Kindle from your computer. The content you transferred should now appear in Home.
-
Page 102: Appendix A Troubleshooting
Appendix A Troubleshooting You can resolve many problems with your Kindle, quickly and easily. If you encounter any of the following problems with your Kindle, click on the issue for help. • “My Kindle won’t turn on/My Kindle is unresponsive or appears frozen. ” •…
-
Page 103: I’m Unable To Download A Book Even Though I See Strong Wireless Signal Strength
I’m unable to download a book even though I see strong wireless signal strength. Try restarting your Kindle by doing the following: 1. Press the Home button. 2. Press the Menu button. 3. Select “Settings. ” 4. Press the Menu button. 5.
-
Page 104: I Can’t Open Any Of My Books And Receive An Error Message Instead
I can’t open any of my books and receive an error message instead. Try restarting your Kindle by doing the following: 1. Press the Home button. 2. Press the Menu button. 3. Select “Settings. ” 4. Press the Menu button. 5.
-
Page 105
Kindle User’s Guide Appendix A Troubleshooting If your Kindle is unresponsive, then try resetting it by doing the following: 1. Disconnect your Kindle from any power source. 2. Slide and hold the power switch for 15 seconds before releasing. Note that the screen will be blank for approximately 30 seconds while your Kindle restarts. -
Page 106: Appendix B Product Information
Don’t expose your Kindle to extreme heat or cold. For example, don’t leave it in the trunk of your car in sub-zero or high-heat conditions. Servicing Your Device If your device needs service, consult only Amazon.com authorized personnel by contacting us through Customer Support. U.S. Customer Support e-mail: kindle-feedback@amazon.com…
-
Page 107: Headphone Safety
Wear headphones that isolate the wanted audio from background noise. Wireless Safety and Compliance Turn Amazon Whispernet off in areas where wireless use is forbidden or when it may cause interference or danger. Some specific situations are described below. In general, you should not use your Kindle with Whispernet turned on any place you are not allowed to use a cellular device.
-
Page 108: Information Regarding Exposure To Radio Frequency Energy For Model Number D00901, Fcc Id: Xsx-1013 And Model Number D00901, Fcc Id: X7N-0610
EU Declaration of Conformity Amazon Fulfillment Services, Inc. 410 Terry Avenue North, Seattle, WA 98109-5210 United States Declaration of Conformity We, Amazon Fulfillment Services, Inc. declare under our own responsibility that the product: Product Name: Electronic Display Device Product Spec: WLAN 802.11 b/g…
-
Page 109
The technical documentation relevant to the above equipment will be held at: Amazon EU Sàrl, of 5 Rue Plaetis, L- 2338 Luxembourg, Grand-Duchy of Luxembourg Authorized Person: Name: Russell Grandinetti Title: Vice President Amazon Fulfillment Services, Inc. 410 Terry Avenue North, Seattle, WA 98109-5210 United States Declaration of Conformity We, Amazon Fulfillment Services, Inc. -
Page 110: Additional Information For Kindle Users Outside The U.s. And Uk
Kindle User’s Guide Appendix B Product Information The technical documentation relevant to the above equipment will be held at: Amazon EU Sàrl, of 5 Rue Plaetis, L-2338 Luxembourg, Grand-Duchy of Luxembourg Authorized Person: Name: Russell Grandinetti Title: Vice President Additional Information for Kindle Users Outside the U.S. and UK You can see additional information for Kindle users outside the U.S.
-
Page 111: Amazon.com Kindle License Agreement And Terms Of Use
Appendix B Product Information AMAZON.COM KINDLE LICENSE AGREEMENT AND TERMS OF USE* This is an agreement between you and Amazon Digital Services, Inc. (with its affiliates, “Amazon” or “we”). Please read this Amazon.com Kindle License Agreement and Terms of Use, the Amazon.com privacy notice located at www.amazon.com/privacy, and the other applicable rules, policies, and terms posted on the Amazon.com website or the Kindle Store…
-
Page 112: Wireless Connectivity
Agreement. For more information, see the Legal section in the Kindle Settings menu. Automatic Updates. In order to keep your Software up-to-date, Amazon may automatically provide your Kindle or Other Device with updates/upgrades to the Software.
-
Page 113: General
Kindle to you, nor the license of the Software or Digital Content to you, transfers to you title to or ownership of any intellectual property rights of Amazon or its suppliers or the other Content Providers. All licenses are non-exclusive and all rights not expressly granted in this Agreement are reserved to Amazon or the other Content Providers.
-
Page 114
Amendment. We may amend any of the terms of this Agreement in our sole discretion by posting the revised terms on the Kindle Store or the Amazon.com website. Your continued use of the Kindle, Digital Content, Service, or Software after the effective date of any such amendment constitutes your agreement to be bound by such amendment. -
Page 115: Amazon.co.uk Kindle License Agreement And Terms Of Use
UK Customers AMAZON.CO.UK KINDLE LICENSE AGREEMENT AND TERMS OF USE** This is an agreement between you and Amazon EU S.a.r.l. (with its affiliates, “Amazon” or “we”). Please read this Amazon.co.uk Kindle License Agreement and Terms of Use, the Amazon.co.uk privacy notice located at www.amazon.co.uk/privacy, and the other applicable rules, policies, and terms posted on the Amazon.co.uk website or the Kindle Store…
-
Page 116: Wireless Connectivity
(ii) decompile the Software in whole or in part (except to the extent such right cannot be excluded or limited by law and then only when the express permission of Amazon has been sought and refused), or (iii) create any derivative works from or of the Software, or bypass,…
-
Page 117: General
Kindle to you, nor the license of the Software or Digital Content to you, transfers to you title to or ownership of any intellectual property rights of Amazon or its suppliers or the other Content Providers. All licenses are non-exclusive and all rights not expressly granted in this Agreement are reserved to Amazon or the other Content Providers.
-
Page 118: One-Year Limited Warranty
Kindle Store or the Amazon.co.uk website. Contact Information. For communications concerning this Agreement, please contact Amazon at Amazon EU Sarl, 5 Rue Plaetis, L- 2338, Luxembourg (Lux. reg. no. B 101818, Share capital ¤37500, Trading authorization no. 104408), or by e-mail: ukkindleterms@amazon.co.uk.
-
Page 119: Additional Information
Copyright and Trademark Notices Amazon Kindle device software, the Amazon Kindle Quick Start Guide, and the Amazon Kindle User’s Guide © 2004 — 2011 Amazon.com, Inc. or its affiliates. All rights reserved. 1-CLICK, AMAZON, the AMAZON.COM LOGO, the AMAZONKINDLE LOGO, AMAZON KINDLE, AUDIBLE, KINDLE, MOBIPOCKET, WHISPERNET, AND WHISPERSYNC are trademarks of Amazon.com, Inc.
-
Page 120
Kindle User’s Guide Appendix B Product Information Contains iType™ from Monotype Imaging Inc. “Monotype” is a trademark of Monotype Imaging Inc. registered in the U.S. Patent & Trademark Office and may be registered in certain jurisdictions. Monotype® The Monotype Corporation. All other brands, product names, company names, trademarks, and service marks are the properties of their respective owners.